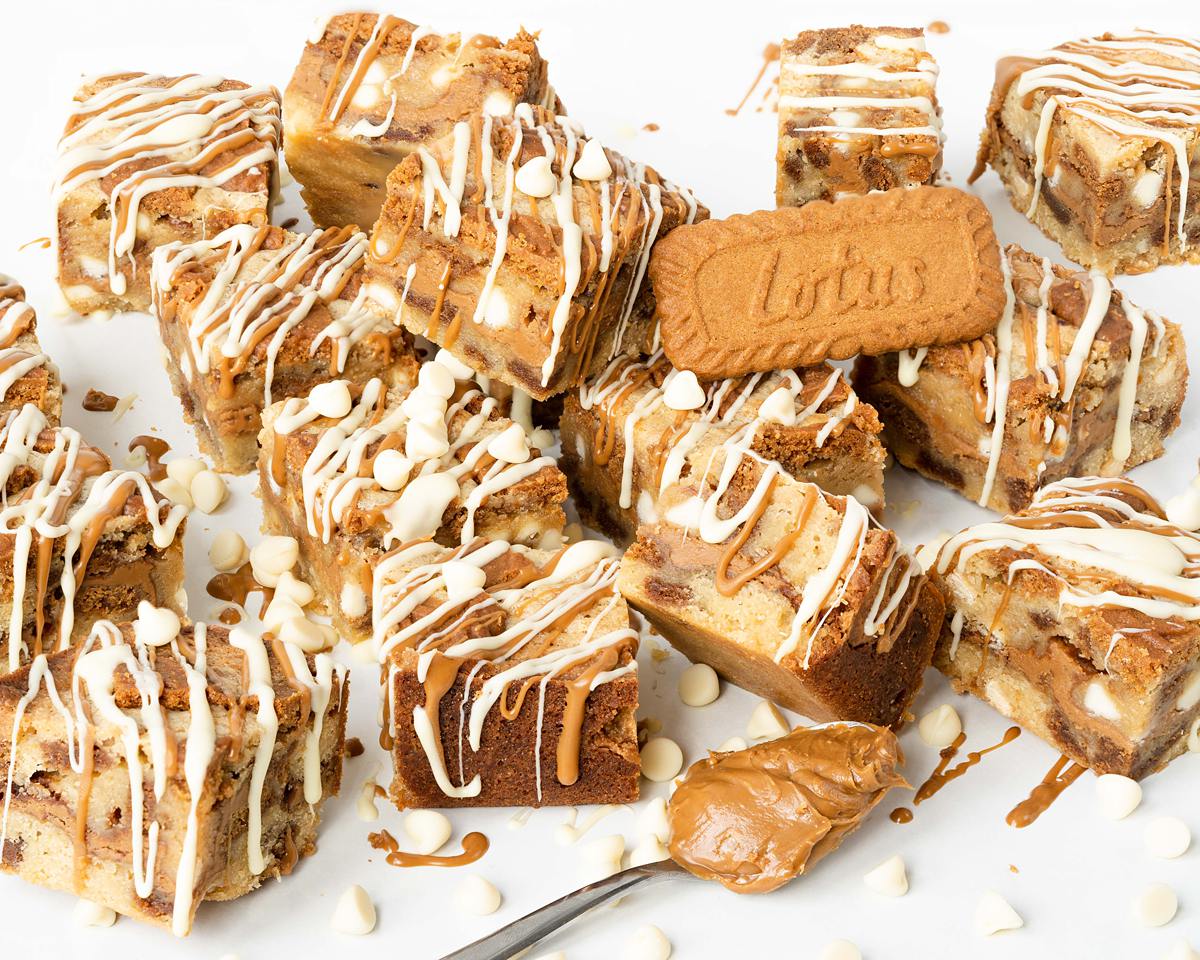
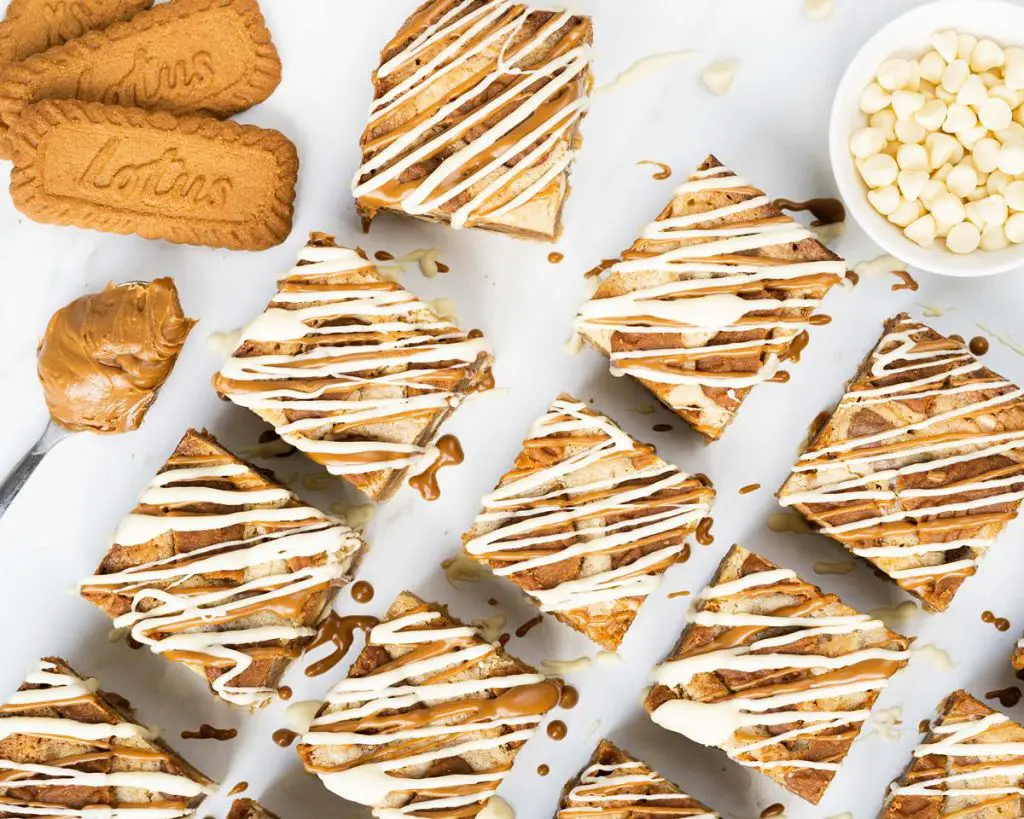
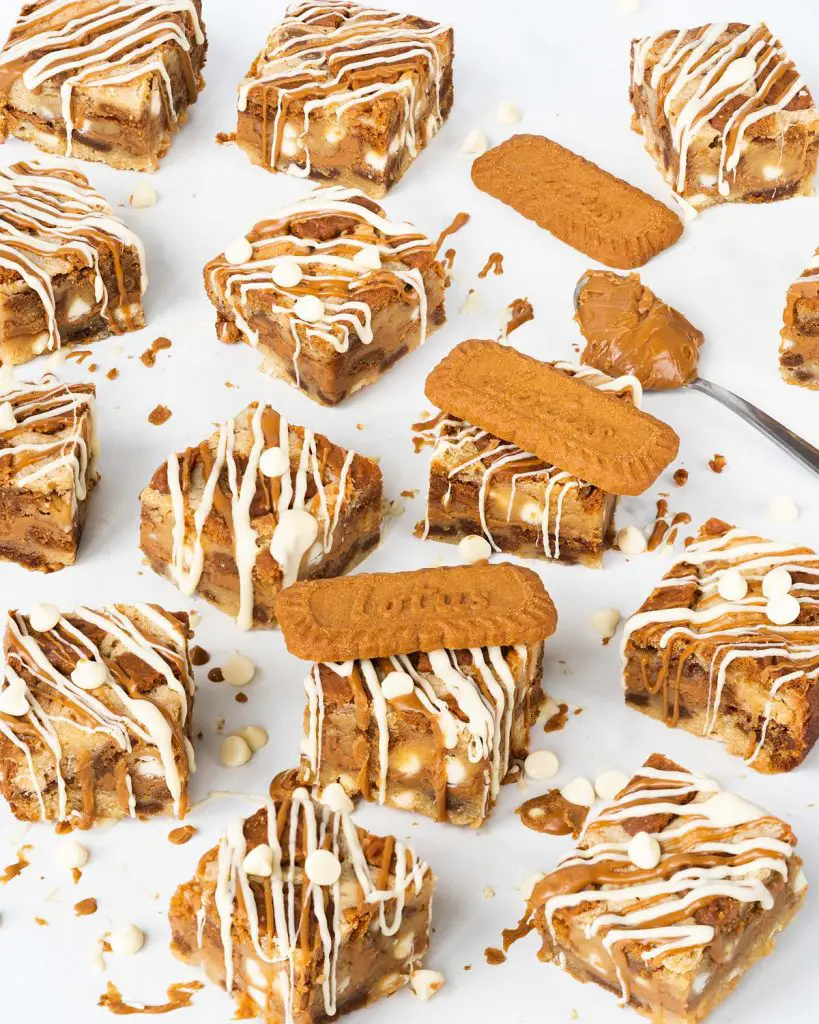
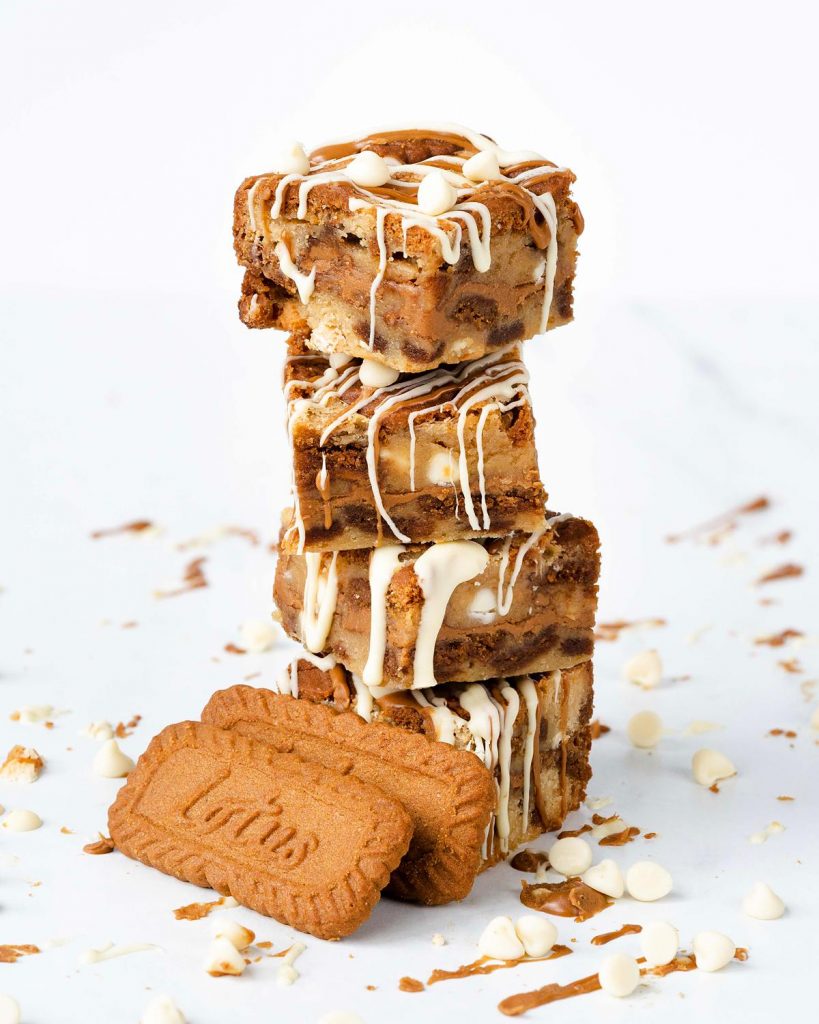
These Biscoff blondies are wonderfully chunky and chewy, cram packed with delicious cookie butter biscuits and spread as well as sweet white chocolate, then drizzled with both for a purely indulgent and utterly heavenly bake!
Addicted to cookie butter
I absolutely adore Biscoff! Whether you call it Biscoff, cookie butter, speculoos or by another name, I can’t get enough of this sweet, caramelly delicious stuff! And since blondies are quickly replacing my favourite bake (sorry cookies, I still love you!), it was just a matter of time before the two met and created a match made in baking heaven!
If you’re a fan of brownies and blondies, I can guarantee you will love these beauties. I am obsessed with how wonderfully chunky they are, packed with biscuits for texture, and a little chewiness to keep you happy. Oh, not to mention the surprise layer of Biscoff spread in the middle too! And if all that wasn’t enough, they have a double drizzle of melted white chocolate and Biscoff to finish them off.
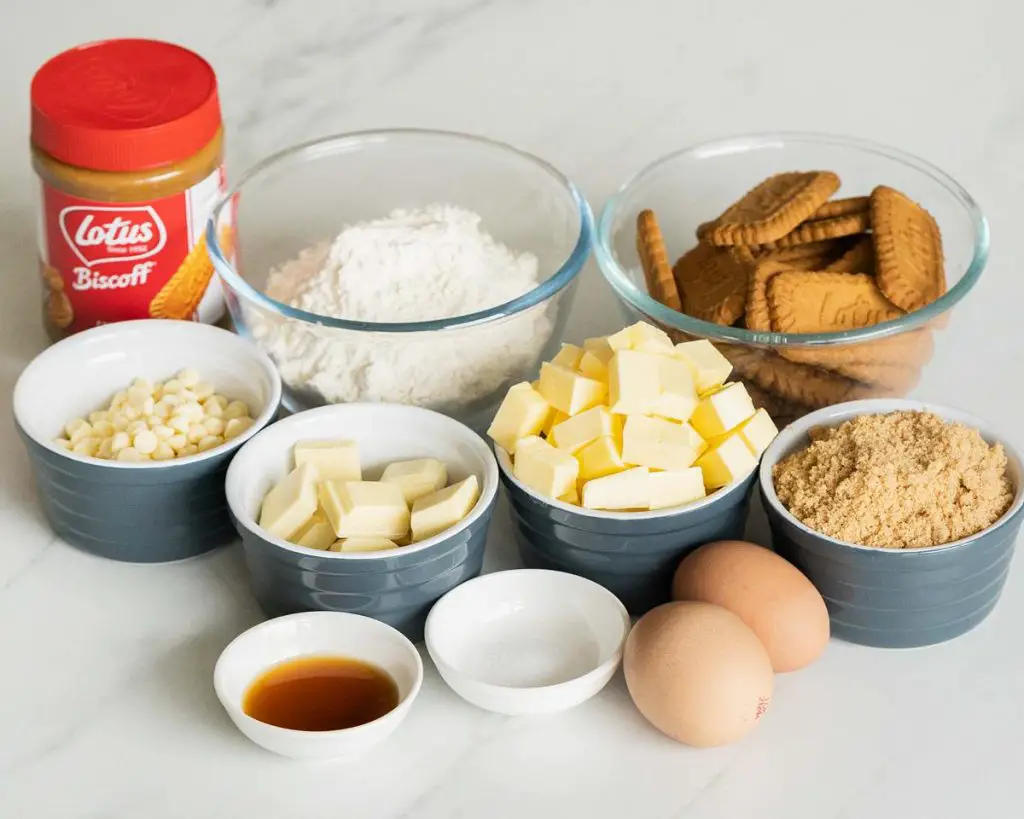
What ingredients do I need to make these Biscoff blondies?
- Unsalted butter: as with all my recipes, I like to use unsalted butter so I can control how much salt is in the bake.
- Brown sugar: I like to use brown sugar in my blondies over caster sugar. I find it gives my blondies a yummy flavour, keeps them moist and makes them wonderfully chewy.
- White chocolate: this adds to the flavour and sweetness of the blondies, making them so addictively delicious!
- Eggs: helps with the structure of the blondies.
- Vanilla: purely for beautiful flavour.
- Flour: this recipe uses plain flour. We don’t want any raising agent in this bake, so self raising is a definite no-no.
- Salt: enhances the flavour of your bake. You won’t taste it, don’t worry!
- White chocolate chips: for extra pops of chocolate with each bite. Goes perfectly with Biscoff!
- Biscoff spread: for flavour ribboned through the blondies and drizzle over the top.
- Biscoff biscuits: gives extra flavour and texture to the blondies.
What equipment do I need to make blondies?
- Baking tin*: you will need an 8”x 8” pan, one with a loose bottom makes it much easier to lift your bake out.
- Cling film/plastic wrap: for lining your tin before you prepare your Biscoff spread.
- Parchment paper: used to line your baking tin, this stops your blondie sticking to your pan and makes it a tonne easier to remove from the tin too.
- Digital kitchen scales*: whilst I do provide cup measurements for all my recipes, I always recommend using digital kitchen scales to weigh your ingredients out instead. Weighing out your ingredients is much more accurate than measuring by volume, as you do with cups, and will ensure better results. Digital scales are now relatively inexpensive and widely available.
- Measuring spoons*: for measuring smaller quantites such as tablespoons (tbsp) and teaspoons (tsp), I would recommend getting a set of spoons as they would be far more accurate than using your everyday eating spoons, which can vary greatly in size.
- Sieve*: to remove lumps from your dry ingredients, ensuring it all gets mixed together evenly.
- Mixing bowl*/Small bowls*: any bowl large enough will do: plastic, glass, the choice is yours!
- Spatula*: to use to mix ingredients together.
How to make Biscoff blondies
This blondie recipe uses simple ingredients you probably already have at home, especially if you’re a cookie butter fan! The blondie mixture doesn’t take long to come together, so you can be enjoying some delicious Biscoff blondies in no time!
For the Biscoff layer
Step 1: Line your baking tin with cling film/plastic wrap, making sure it’s as flat as you can get it. Melt your Biscoff spread in the microwave in short blasts until a little runny, then pour it into your prepared tin, tipping the pan to spread it out evenly across the tin. Place your tin, as flat as possible, into your freezer to set your Biscoff spread for at least 30 minutes, but an hour would be better.
Step 2: When your spread has set, remove the cling film square from your tin and leave it in the freezer while you make your blondie batter. Line your baking tin once more, with some parchment/baking paper this time and set it aside. Preheat your oven to 180C/350F while you make your blondies mixture.
For the blondies
Step 1: In a large mixing bowl, place your butter, sugar and white chocolate. Melt together in the microwave in 10-20 second blasts, stirring in between, until completely melted and combined. Leave to cool slightly.
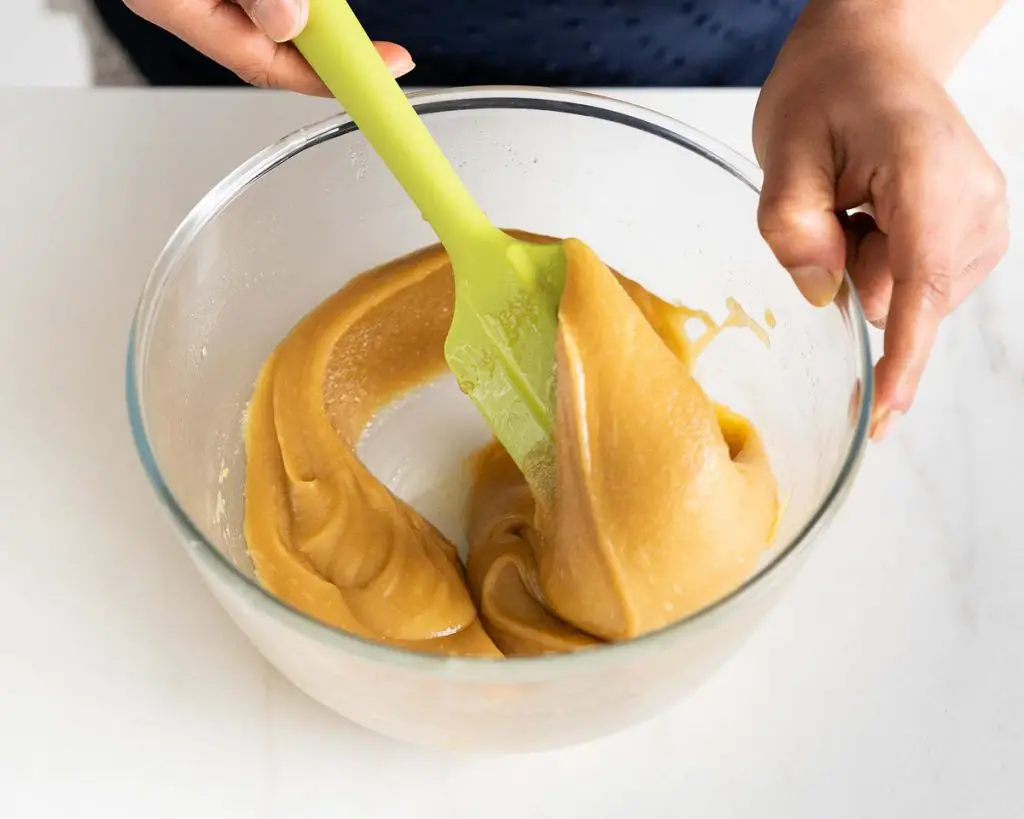
Step 2: Add your eggs and vanilla into the bowl one at a time and mix it all together well.
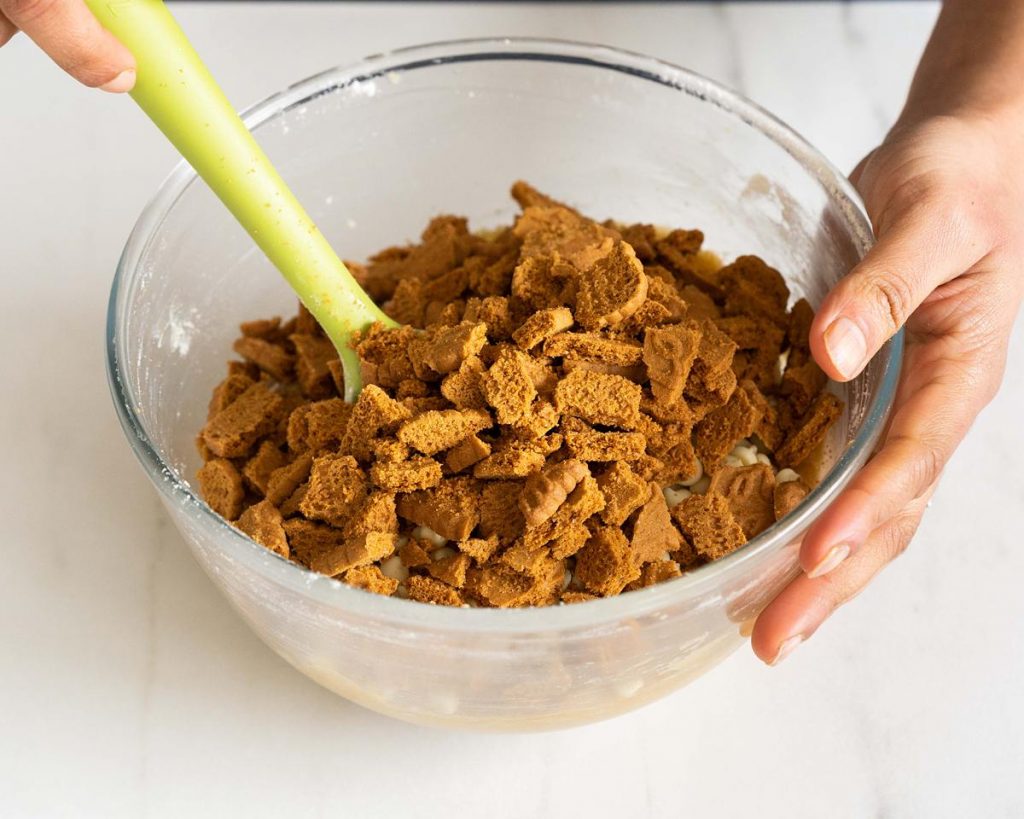
Step 3: Sift in the flour and salt. Fold into your wet mix until just a few streaks remain. Tip in the chocolate chips and break in sixteen Biscoff biscuits, then fold it all in until evenly combined.
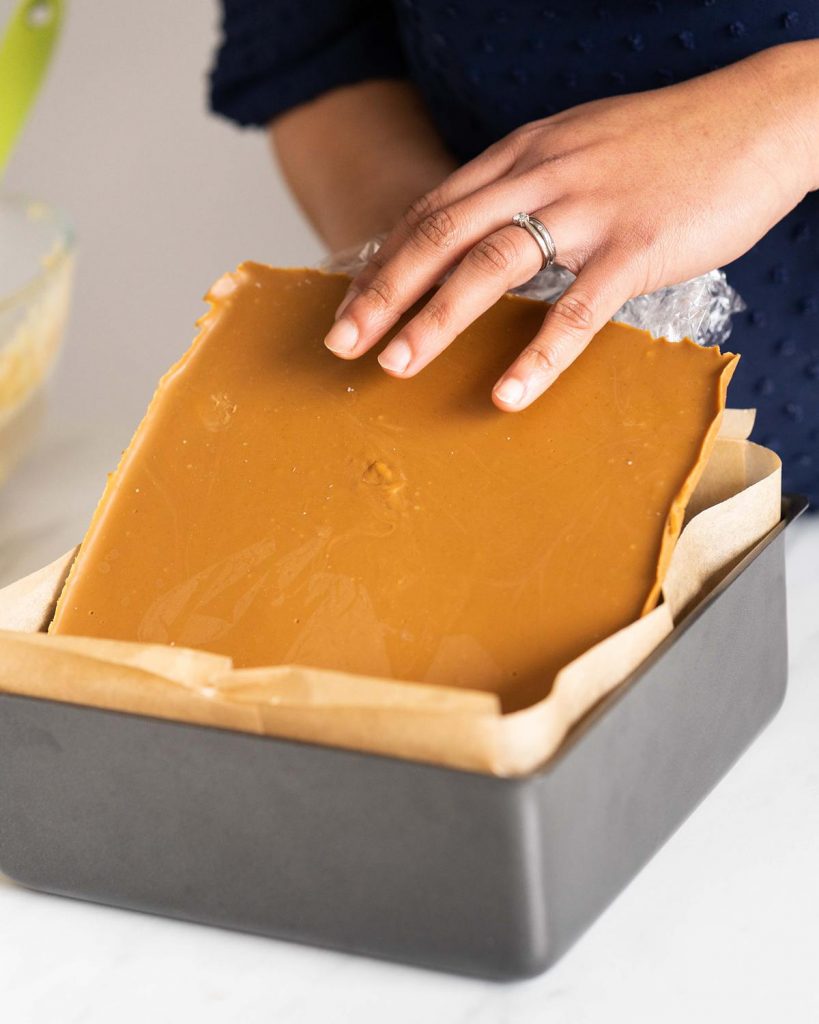
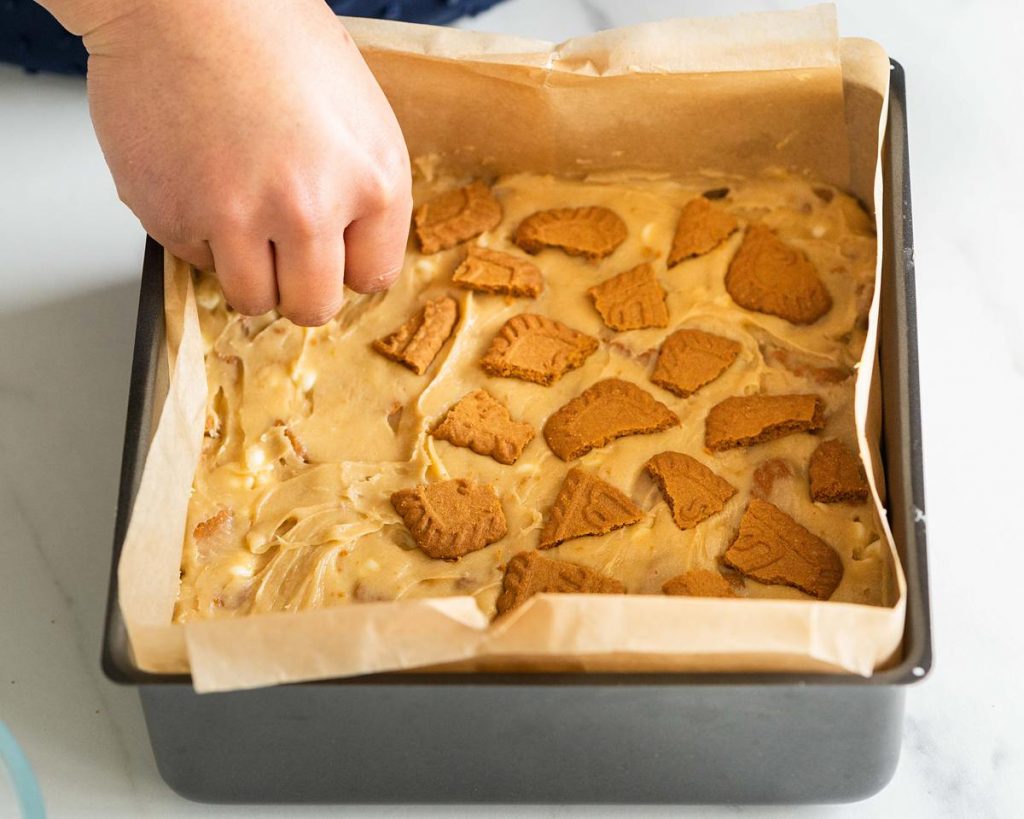
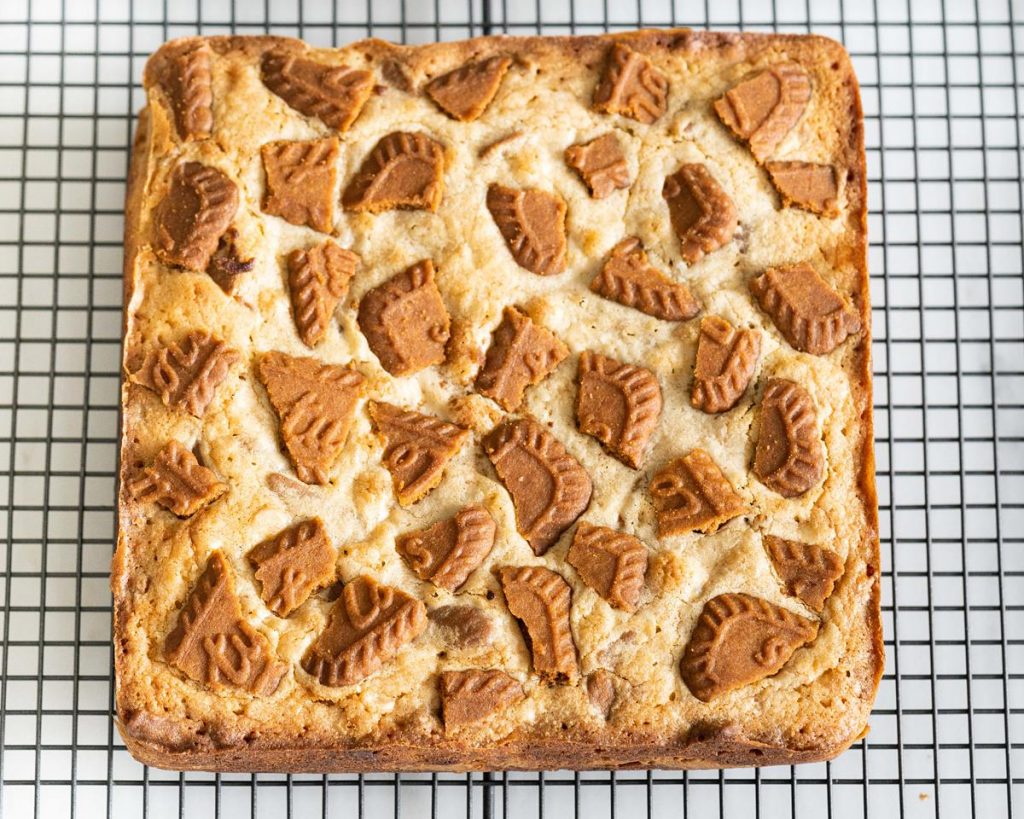
Step 4: Tip half this mixture into your prepared pan, smoothing it into the corners and levelling the top. Place your frozen Biscoff layer on the bottom layer of your blondie batter, pressing down gently. Top with the remaining blondie batter, once again pushing and smoothing into the corners and levelling the top. Break your remaining Biscoff biscuits into large chunks and push them into the top of your blondie mixture.
Step 5: Bake in your preheated oven for 35-45 minutes until golden at the edges and ever so slightly wobbly in the middle (mine takes 40 minutes to bake), then leave to cool in the tin on a cooling rack.
For the decoration
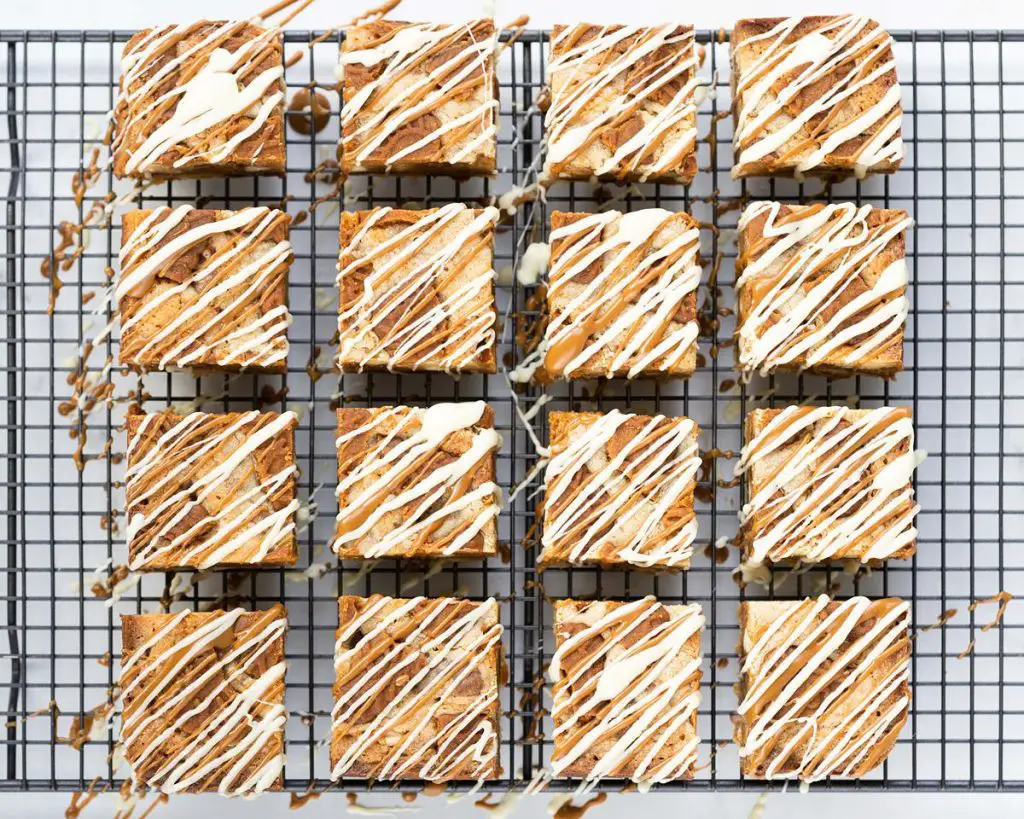
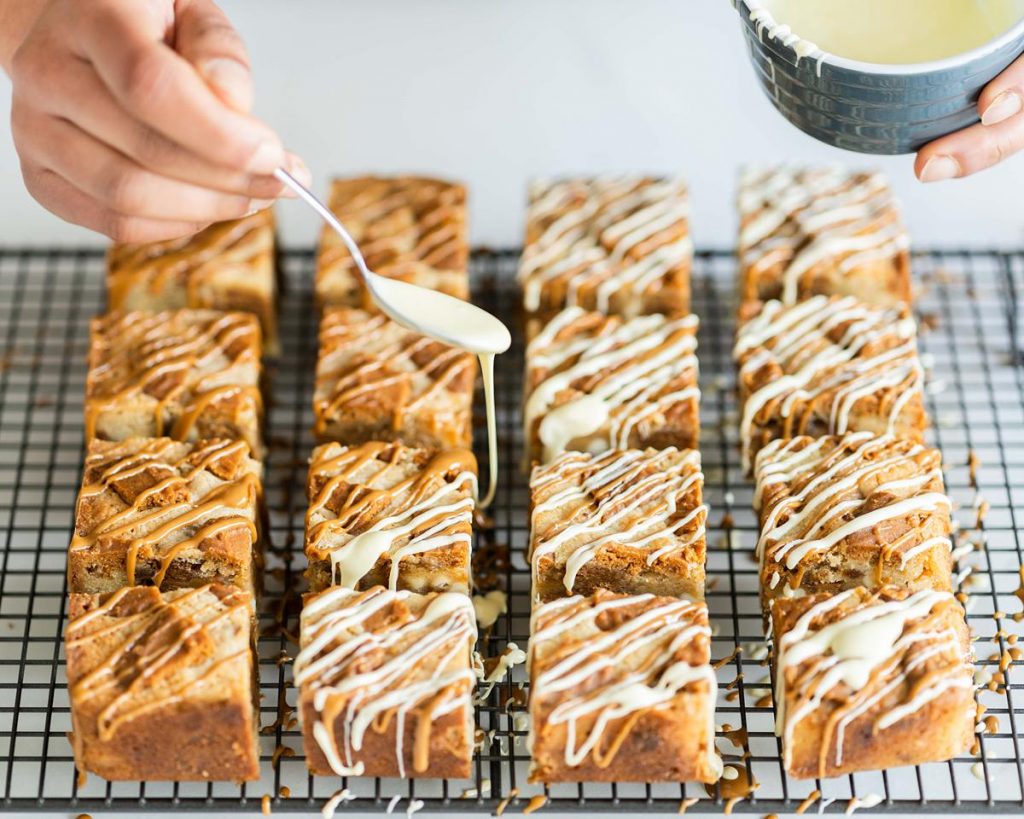
Step 1: Once your blondie is cool, cut into squares with a sharp knife (I cut into 16 chunky squares, but you can cut smaller if you wish).
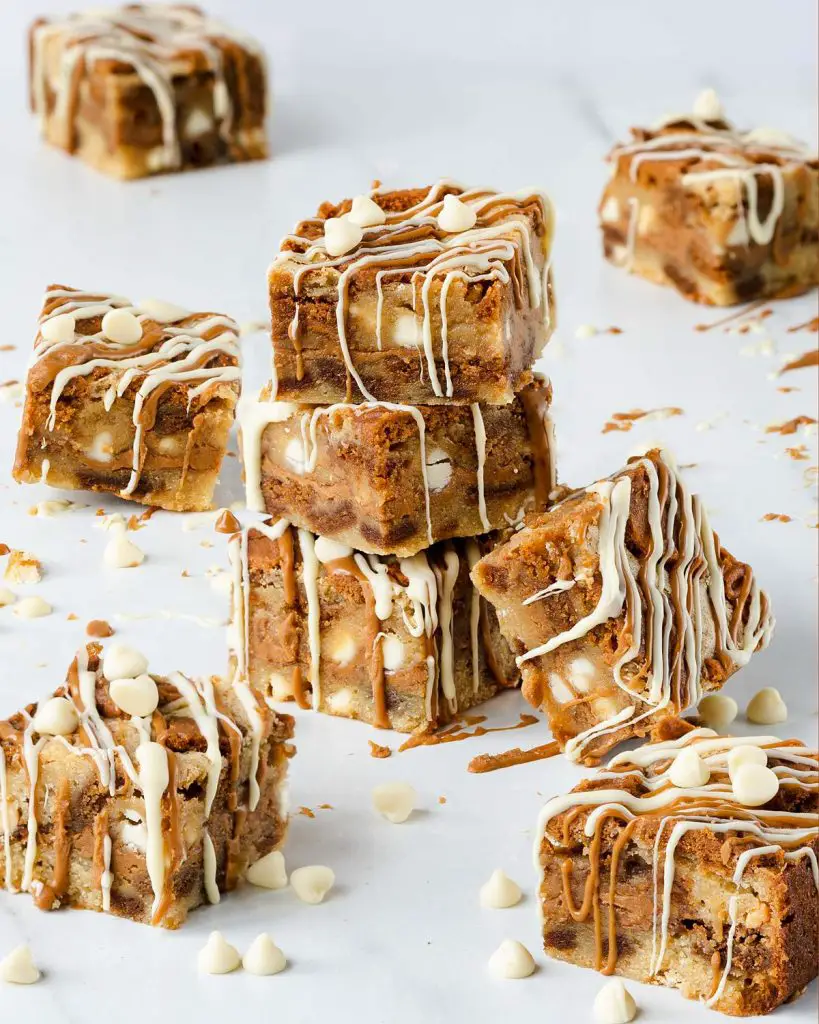
Step 2: In two small bowls, heat your additional Biscoff spread and white chocolate separately, then drizzle these over your blondies. Leave to set for a few minutes then enjoy!
How do I line my baking tin?
There are several ways to line your baking tin. The simplest way is to cut two strips of parchment paper slightly smaller than the width of your greased tin and place them in a cross in the tin, so you have an overhang over all four sides of your baking tin. Make sure to fold along the bottom and side edges so you get nice clean lines when your blondies bake, and your paper doesn’t get “baked into” your blondies!
How do I know when my Biscoff blondies are done?
You can tell when your blondies are done because they will start to pull away from the sides of your pan slightly and the edges will be golden. Remember not to overbake your blondies or they will end up being hard and dry, not fudgy, dense and chewy as blondies are meant to be. I find these blondies take a little longer to bake than my white chocolate blondies, so don’t fret if you find this too!
Why did my blondies sink in the middle?
If you beat your ingredients together and incorporate a lot of air in the mixture, blondies can grow too much whilst baking. This results in the blondie not being able to support itself once baked and out of the oven, and so it sinks in the middle. To avoid this, don’t overbeat (ie incorporating air) the batter, instead mix gently as you add each egg and subsequent ingredient in. Unlike in a cake, you want to have less air in your blondies in order to get the fudgy, chewy texture.
How long do these Biscoff blondies last and how do I store them?
These blondies will last 4-5 days if stored in an airtight container. You don’t need to keep them in the fridge, just a cool spot in your kitchen is perfect.
Can you freeze blondies?
Absolutely! These Biscoff blondies will freeze well for up to three months, though they are always better eaten freshly baked.
How to freeze blondies
I use a large (sealable) food or freezer bags to freeze my blondies. Wrap each individual blondie piece tightly in cling film and place into your freezer bag. Gently push as much air out of the bag as possible and seal, leaving a little part unsealed. Using a straw, carefully slip it into the unsealed part of your bag and use it to suck the remaining air out of the bag. This will make it look like it’s shrinking and make the bag contract against the blondies, which is exactly what you want. Once you’ve got as much air out as you can, seal the bag and lay it flat in your freezer.
How to thaw blondies
When you want to enjoy your frozen blondies again, just thaw them in the fridge overnight. About half an hour before you want to eat them, pull your blondies out of the fridge to allow them to come up to room temperature.
Can I make these blondies gluten free and dairy free?
Yes! You can substitute your plain/all purpose flour for a gluten free plain flour, but do add an additional ¼ tsp Xanthan gum if you can tolerate it. Please be aware though that Biscoff is not gluten free, so you will need an alternative cookie butter.
For dairy free options you can use a plant based butter (not spread, it must be the kind you get in a block) and chocolate as swaps in your bake.
Additional tips for making this Biscoff blondies recipe
- Make sure you’ve prepared your tools before you start mixing: line your pan and preheat your oven. It’s easy to forget once you start mixing!
- Give your Biscoff layer as long as you can in the freezer. I have done it for just 30 minutes, but it was a little sticky, so I’ve found nearer an hour better. Also keep it in the freezer as long as you can to keep it from melting into your cling film and being a pain to release!
- Break the biscuits for the top of your blondies into larger chunks and gently push into the top. The blondie will rise a little around them as it bakes, but you want to ensure good contact too.
- Leave your blondies to cool completely before cutting. Your blondies will continue to bake from the residual heat once out of the oven, so leaving to cool also allows them to firm up enough so they don’t fall apart when you cut into them.
Troubleshooting
If you have any other questions about this recipe, please use the comments below to ask away and I’ll do my best to help! And if you made and enjoyed this, I’d love to hear from you too!
And don’t forget: if you make this recipe for Biscoff blondies, please do consider leaving a rating and review below, I would love to know how you enjoy making them. Plus, it really helps others looking for a good recipe too! You could even post a picture on Instagram and tag me when you share it with the world, I’d love to see it!
More blondie recipes to enjoy
Don’t forget too to check out these other beautiful blondie recipes on my blog:
White chocolate blondies: fudgy and chewy and oh so delicious, these blondies are super easy and so so good, you’ll find it hard to resist another piece!
Raspberry white chocolate blondies: these blondies are chewy and utterly delicious, with the stunning flavours of sweet white chocolate and tart fresh raspberries perfectly complementing each other. If you’re looking for a bake guaranteed to be adored by everyone who tries it, look no further: this is the one!
Cherry Bakewell blondies: beautiful soft squidgy and chewy blondies made with yummy ground almonds and then swirled with a decadent rich cherry compote. Blondie AND Bakewell together = heaven!
So, to all my fellow Biscoff lovers and blondie lovers out there: this one’s for you!
Happy baking, my friends! x
Recommended equipment and ingredients I used *
| Baking tin | Digital kitchen scales |
| Measuring spoons | Sieve |
| Mixing bowl/Small bowls | Spatula |
Biscoff Blondies
16
servings30
minutes35
minutes550
kcal1
hour30
minutesBiscoff fans and blondie fans, this one’s for you! Chewy, chunky, irresistible Biscoff blondies!
Keep the screen of your device on
Ingredients
- For the Biscoff layer
220 g (¾ cup) Biscoff spread, smooth
- For the blondies
170 g (¾ cup) unsalted butter
160 g (¾ cup + 1 tbsp) brown sugar
100 g (½ cup + 1 tbsp) white chocolate, chopped or broken into chunks
2 large eggs
2 tsp vanilla extract
200 g (1¼ cups) plain (all purpose) flour
0.5 tsp salt
100 g (½ cup + 1 tbsp) white chocolate chips
20 Biscoff biscuits
- For the decoration
60 g (⅓ cup) white chocolate
60 g (3 tbsp + 1 tsp) Biscoff spread, smooth
Directions
- For the Biscoff layer
- Line your baking tin with cling film/plastic wrap, making sure it’s as flat as you can get it. Melt your Biscoff spread in the microwave in short blasts until a little runny, then pour it into your prepared tin, tipping the pan to spread it out evenly across the tin. Place your tin, as flat as possible, into your freezer to set your Biscoff spread for at least 30 minutes, but an hour would be better.
- When your spread has set, remove the cling film square from your tin and leave it in the freezer while you make your blondie batter. Line your baking tin once more, with some parchment/baking paper this time and set it aside. Preheat your oven to 180C/350F while you make your blondies mixture.
- For the blondies
- In a large mixing bowl, place your butter, sugar and white chocolate. Melt together in the microwave in 10-20 second blasts, stirring in between, until completely melted and combined. Leave to cool slightly.
- Add your eggs and vanilla into the bowl one at a time and mix it all together well.
- Sift in the flour and salt. Fold into your wet mix until just a few streaks remain. Tip in the chocolate chips and break in sixteen Biscoff biscuits, then fold it all in until evenly combined.
- Tip half this mixture into your prepared pan, smoothing it into the corners and levelling the top. Place your frozen Biscoff layer on the bottom layer of your blondie batter, pressing down gently. Top with the remaining blondie batter, once again pushing and smoothing into the corners and levelling the top. Break your remaining Biscoff biscuits into large chunks and push them into the top of your blondie mixture.
- Bake in your preheated oven for 35-45 minutes until golden at the edges and ever so slightly wobbly in the middle (mine takes 40 minutes to bake), then leave to cool in the tin on a cooling rack.
- For the decoration
- Once your blondie is cool, cut into squares with a sharp knife (I cut into 16 chunky squares, but you can cut smaller if you wish).
- In two small bowls, heat your additional Biscoff spread and white chocolate separately, then drizzle these over your blondies. Leave to set for a few minutes then enjoy!