
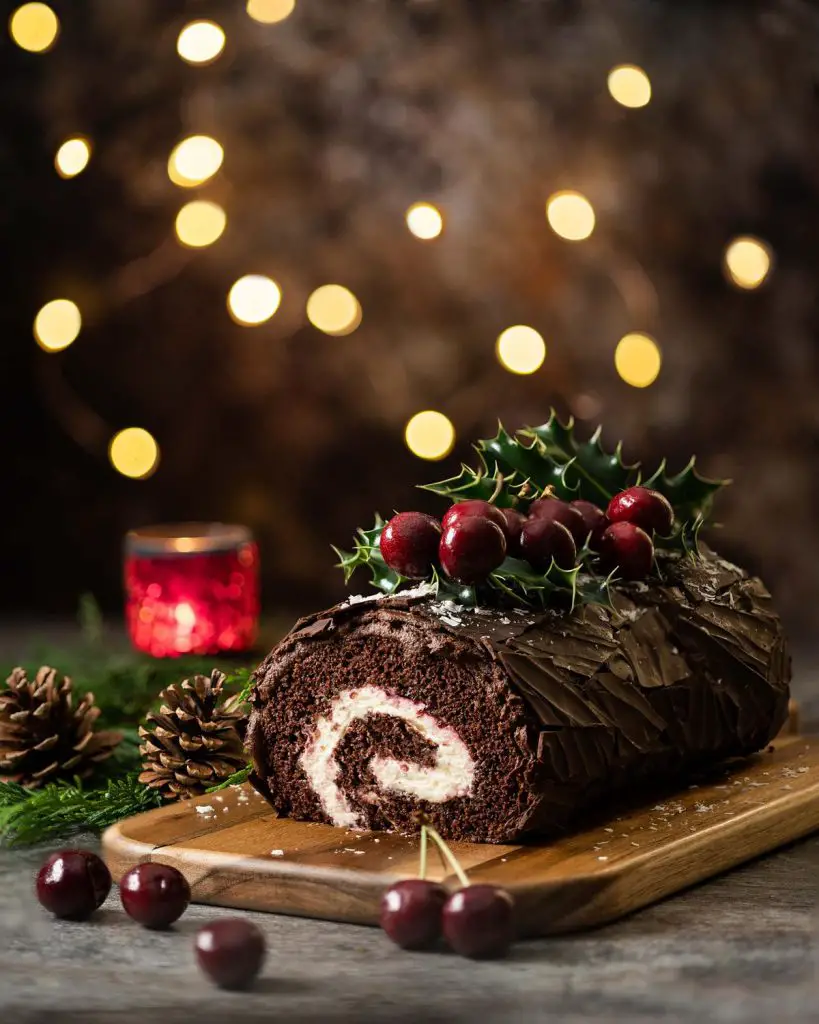
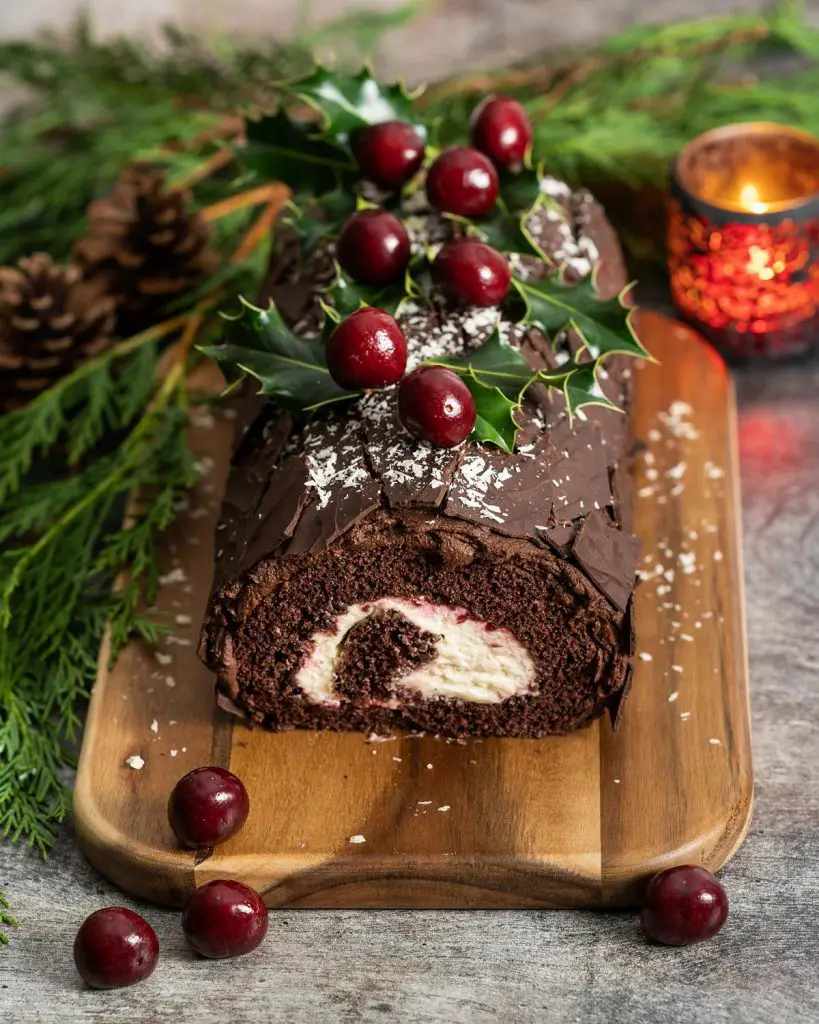
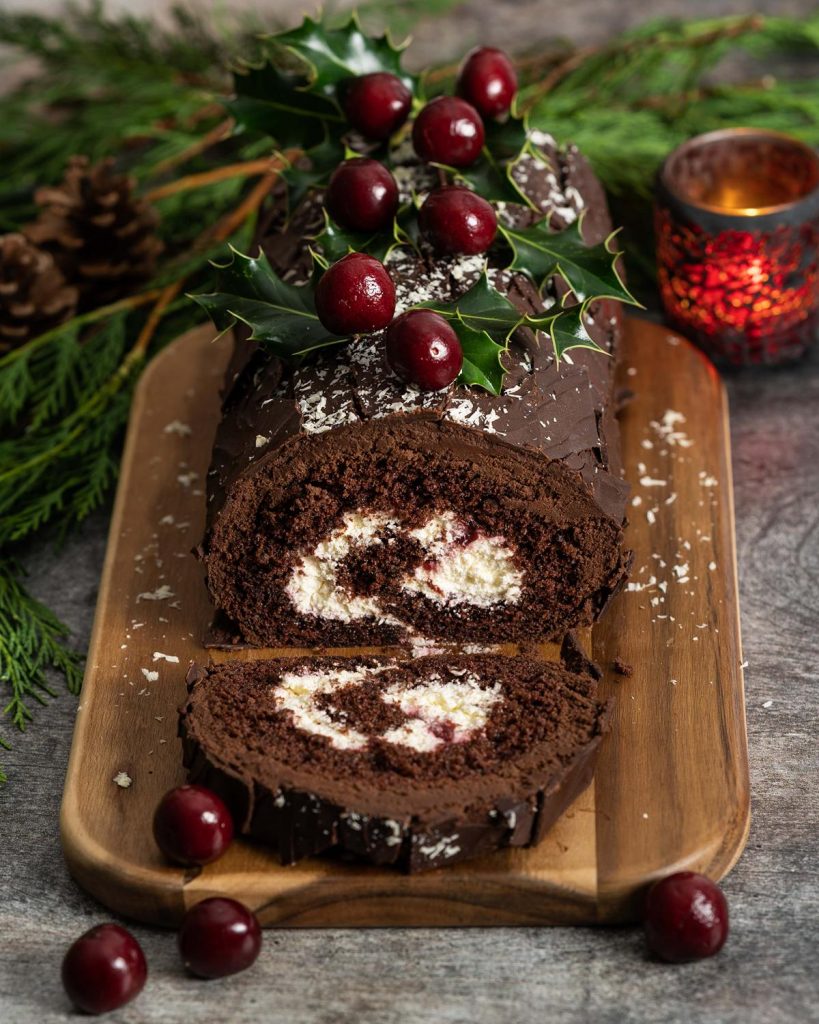
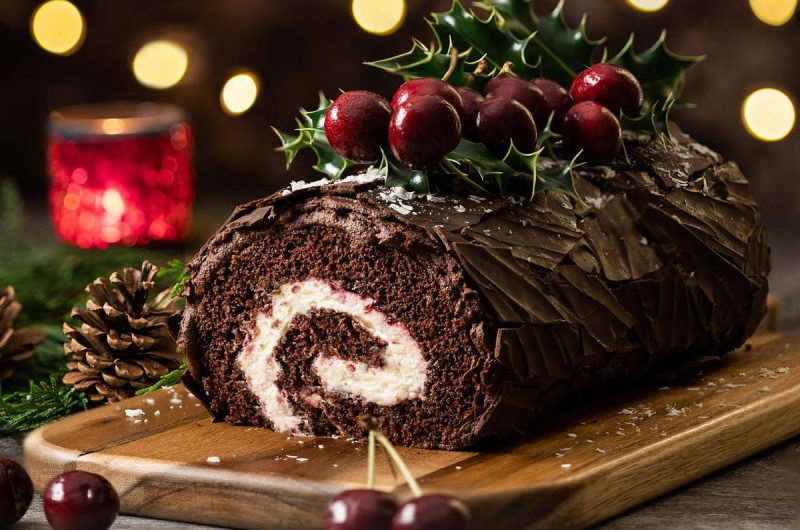
My Black Forest yule log is the ultimate festive dessert, perfect if you want more than a traditional chocolate Bûche de Noël. Laced with kirsch, filled with rich dark cherries and softly whipped kirsch cream, this decadent dessert is the perfect finale to a sumptuous festive feast!
What are Black Forest flavours?
Contrary to common misconception, Black Forest as a flavour combination is not named after the region of its origin, the Black Forest (Schwarzwald) mountain range in Germany. Rather, it actually gets its name from the distinctive kirsch alcohol made from Black Forest sour cherries, known as Schwarzwälder Kirsch or Kirsch Wasser: cherry firewater. Since Black Forest cake can only be so named if it includes this liquor, anything made without it would quite simply be a delicious chocolate cherry flavour instead!
What is a yule log?
Some centuries ago, yule logs were literal trees that were burned in people’s homes. The were different reasons for this, from blessing a home to warding off evil during the darkest part of the year. Eventually, as people stopped burning whole trees for warmth in their homes, the size of the yule log became smaller and turned more into a table decoration at the festive dining table. It became more an edible centrepiece when the log was hollowed and filled with sweets before finally being made entirely edible and into the Christmas yule log cake we know and enjoy today.
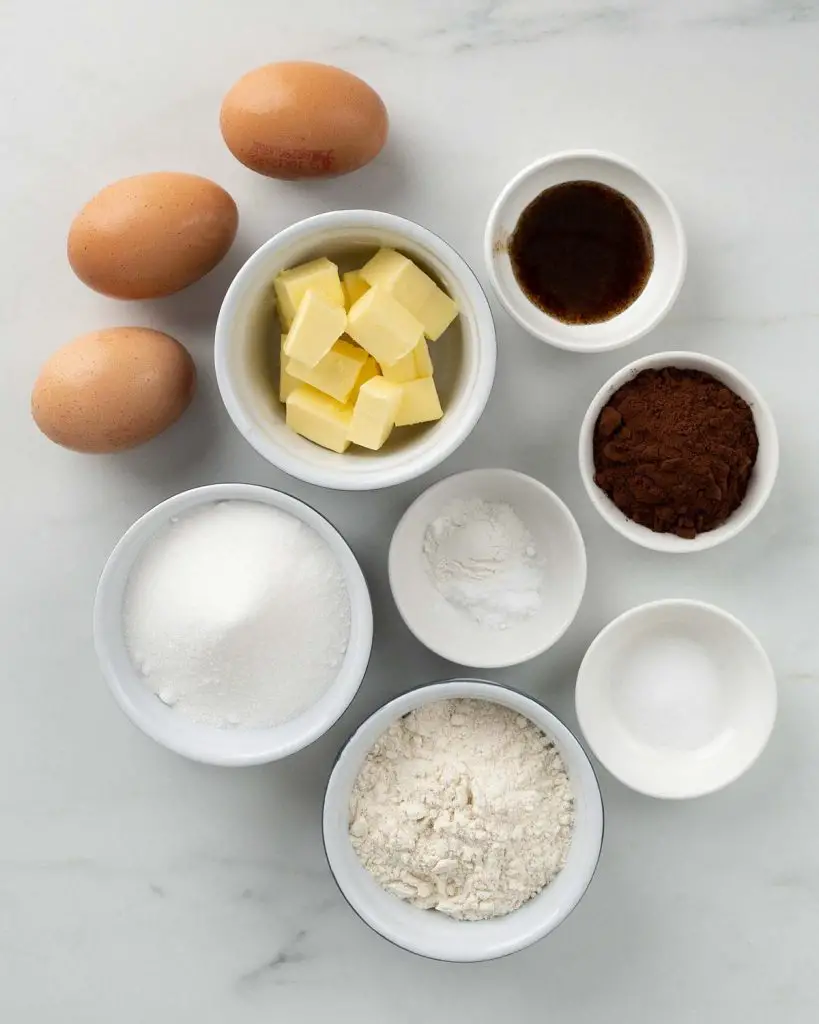
What ingredients do I need to make these Black Forest yule log?
- Plain/all purpose flour: I use plain flour here and add in raising agents so I have full control over how much my Black Forest log cake will rise.
- Cocoa powder: for all that chocolatey yumminess!
- Eggs: forms the structure of the cake. The eggs in this Black Forest roll cake are whipped with the sugar to a pale and delicate mixture, giving the cake a wonderful, light texture.
- Caster sugar: for sweetness in the cake. I prefer using caster over granulated sugar as I find it dissolves better when beaten with the eggs.
- Baking powder/bicarbonate of soda: the leavening agents in this chocolate yule log, to give the cake rise and lightness!
- Salt: enhances the flavours in the bake. You will not taste it, I promise!
- Unsalted butter: as with all my recipes, I like to use unsalted butter so I can control how much salt is in the bake. In this cake, the butter is melted and cooled before it is mixed into the cake.
- Vanilla: for delicious flavour in this Christmas yule log recipe.
- Kirsch: because Black Forest baby!
- Dark chocolate: used to make the rich dark chocolate ganache to cover the chocolate roll cake as well as the chocolate bark for the tree effect on the outside of this Bûche de Noël.
- Black cherry conserve/jam: to generously fill the cake for a beautiful indulgent layer in the roll!
- Double/heavy cream: used in the cherry liquor laced whipped filling for the roll as well as when making the smooth chocolate ganache to coat the outside of the cake with. Make sure to use double/heavy cream as single will not whip up as double cream will.
- Icing/powdered sugar: just a little bit used in the whipped cream filling. You can add more sugar if you prefer it sweeter.
- Cherries: to decorate the top of the Black Forest yule log.
- Holly leaves: for additional decoration on the cake.
- White chocolate: grated over the top of the finished Black Forest yule log to mimic snow. You can also use icing/powdered sugar if you prefer.
What equipment do I need to make this Black Forest yule log?
- Digital kitchen scales*: I provide all my measurements in cups too, however I would encourage all bakers to weigh out ingredients using weighing scales when baking. A set of digital kitchen scales is so useful and totally an essential baking tool for me.
- Measuring spoons*: a set of measuring spoons is essential for any baker. This is because these are more accurate than using everyday teaspoons and tablespoons, which can vary greatly in size.
- Small mixing bowl*: a smaller bowl, used to sift together dry ingredients for the Black Forest yule log cake, and also to melt chocolate for the bark in.
- Sieve*: useful to remove lumps from dry ingredients before blending everything together.
- Stand mixer*/electric hand mixer*: I would highly recommend investing in a good electric mixer, whether stand mixer or hand held electric mixer, to help with all baking. In this recipe especially, it is worth having at least one of these tools as there is a lot of whipping and beating involved in making this Black Forest yule log.
- Mixing bowl*: a larger mixing bowl, used to make the whipped cream filling and the whipped dark chocolate ganache for this Black Forest chocolate log.
- Spatula*: to scrape the bowl down, making sure everything is well combined together.
- Swiss roll tin*: to bake the cake in. My tin for this bake measures 13”x9”.
- Offset spatula*: SUCH a useful tool in making this Black Forest yule log! Used to level cake mixture, spread on fillings and ganache and smooth over the chocolate bark. You can use a regular knife, but this offset spatula makes it a whole lot easier and is definitely worth having to hand!
- Baking tray*: to spread the dark chocolate onto when making the chocolate bark for the decoration.
- Grater*: to add the final touch of white chocolate magic!
How to make Black Forest yule log
There are a fair few elements to this yule log. They are all simple enough to do, just follow the steps and your Black Forest log cake will come together in no time!
For the cake
Step 1: Preheat the oven to 180C/350F. Lightly brush a 13”x9” swiss roll tin with melted butter, line the base of the tin with parchment paper, then brush lightly again to stick the paper down evenly. Set aside.
Step 2: Into a small bowl, sift together the flour and cocoa.
Step 3: Place the eggs, sugar, baking powder, bicarbonate of soda and salt into the bowl of a stand mixer. Using the whisk attachment, whisk at a medium-low speed for 3 minutes to combine and dissolve the sugar. The mixture will have fine bubbles throughout.
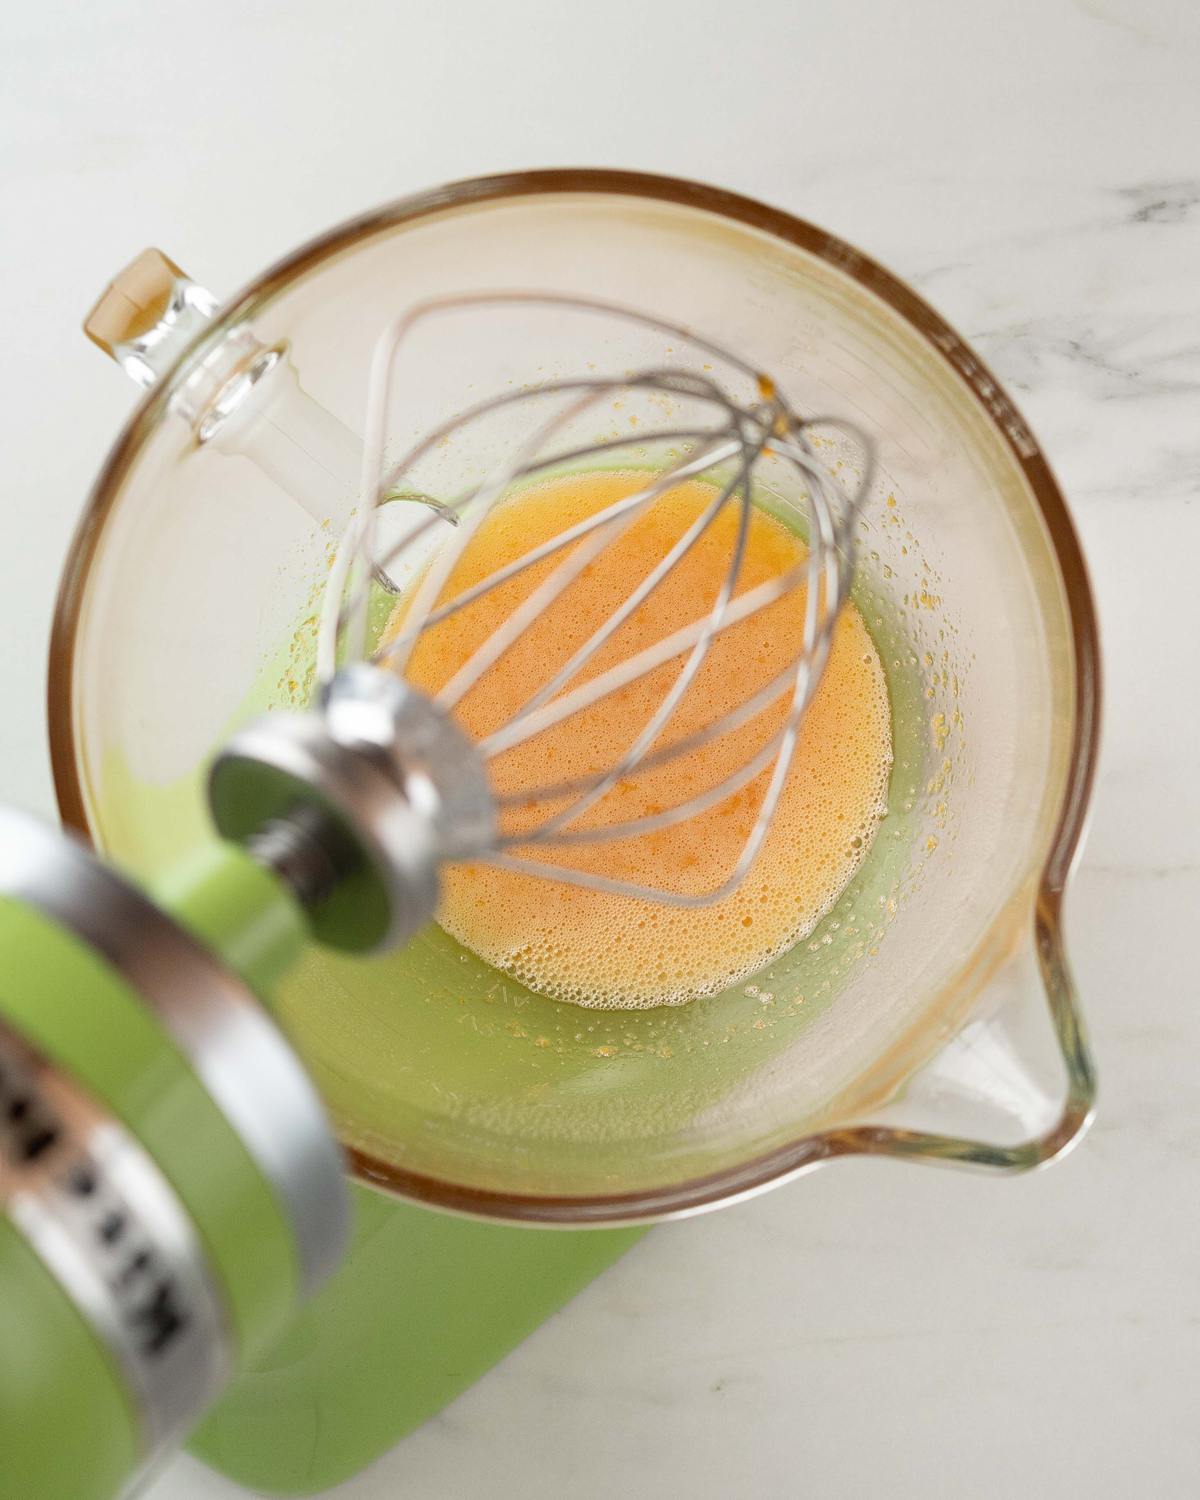
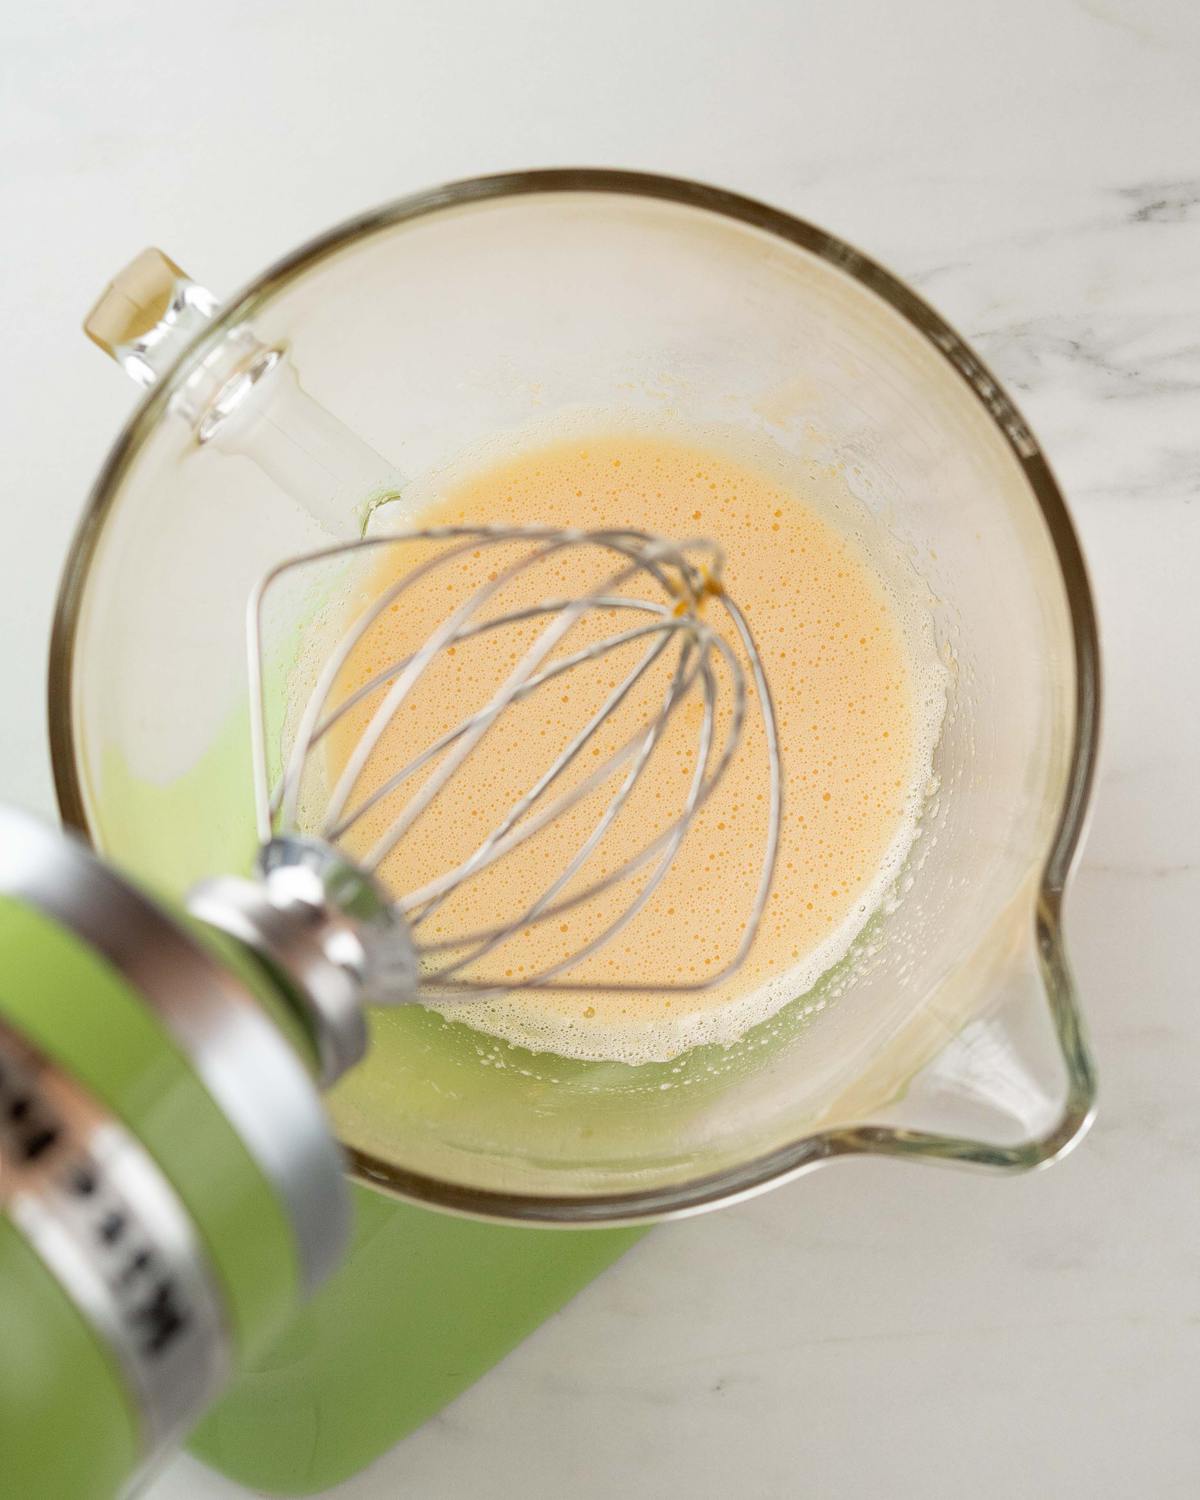
Step 4: Increase the speed to medium-high and whisk until thickened and pale with fine, foamy bubbles. This is around 5 minutes of beating time.
Step 5: Increase the speed again to high and whisk the eggs mixture until pale and doubled in size, another 5 minutes.
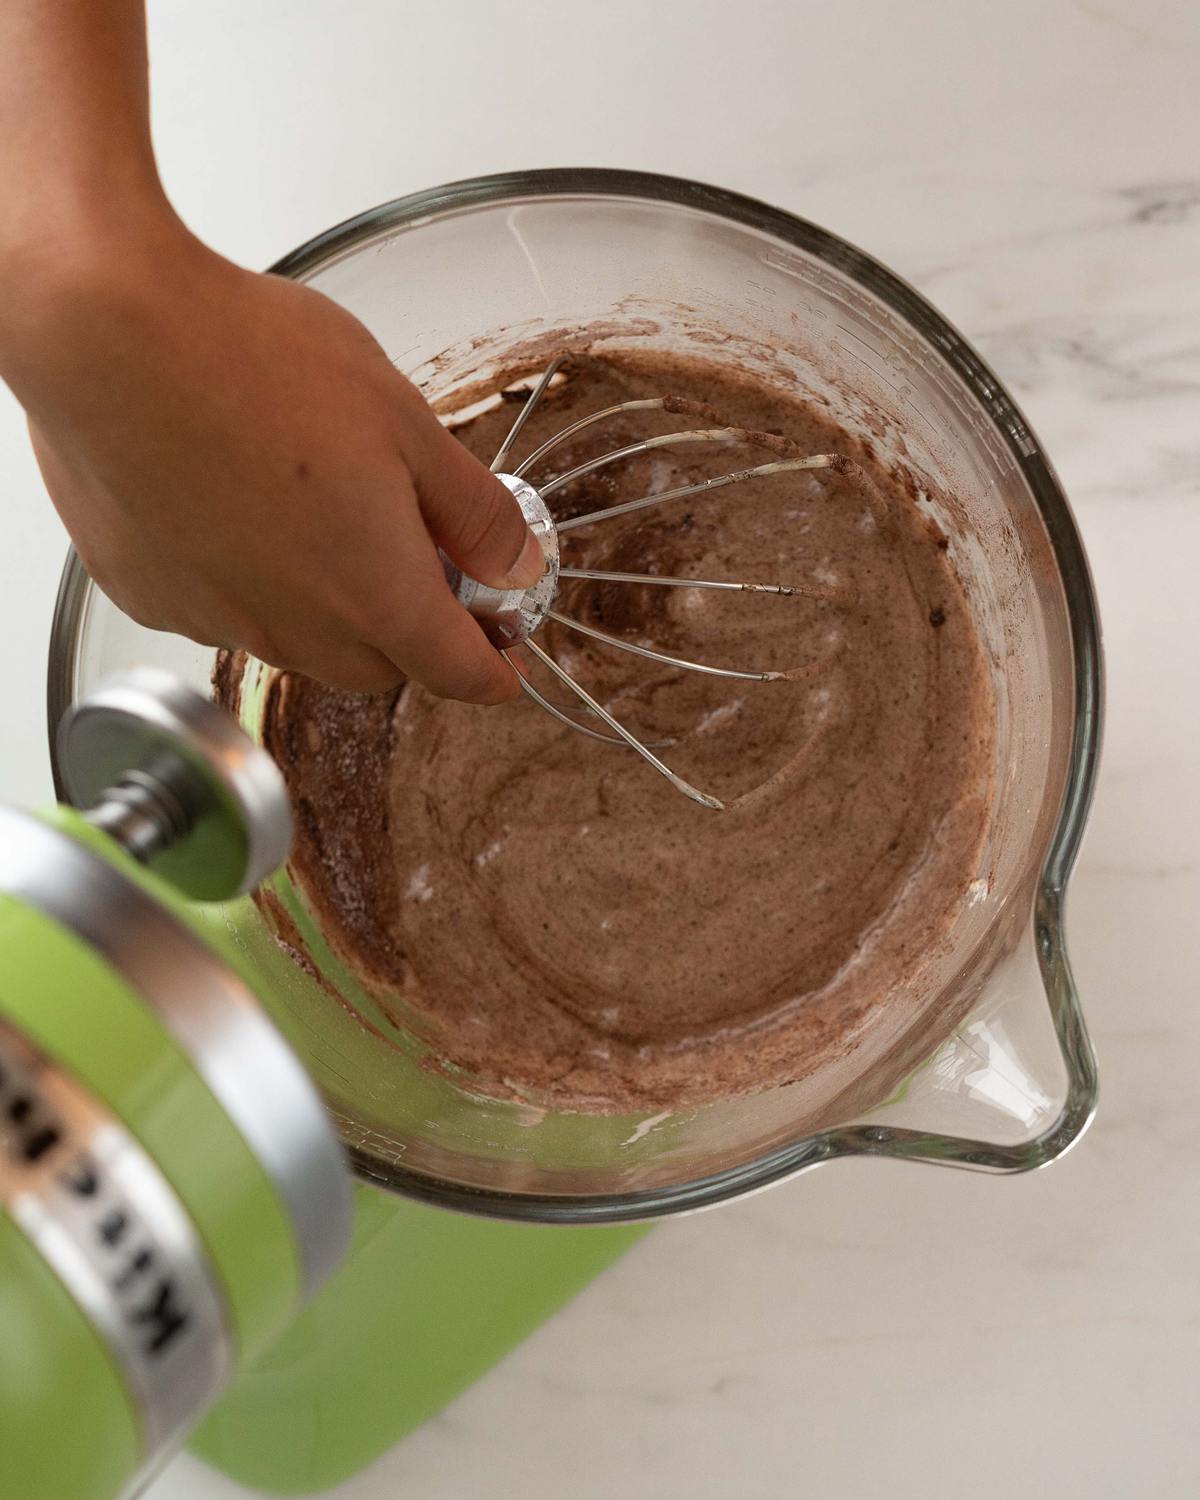
Step 6: Reduce the speed to medium low and drizzle in the melted butter and vanilla, mixing together. Immediately reduce the speed to low and add in the sifted flour and cocoa powder, mixing until nearly combined. Turn the mixer off, detach the whisk attachment and use it to finish folding the flour in by hand, to avoid losing too much air from the mixture.
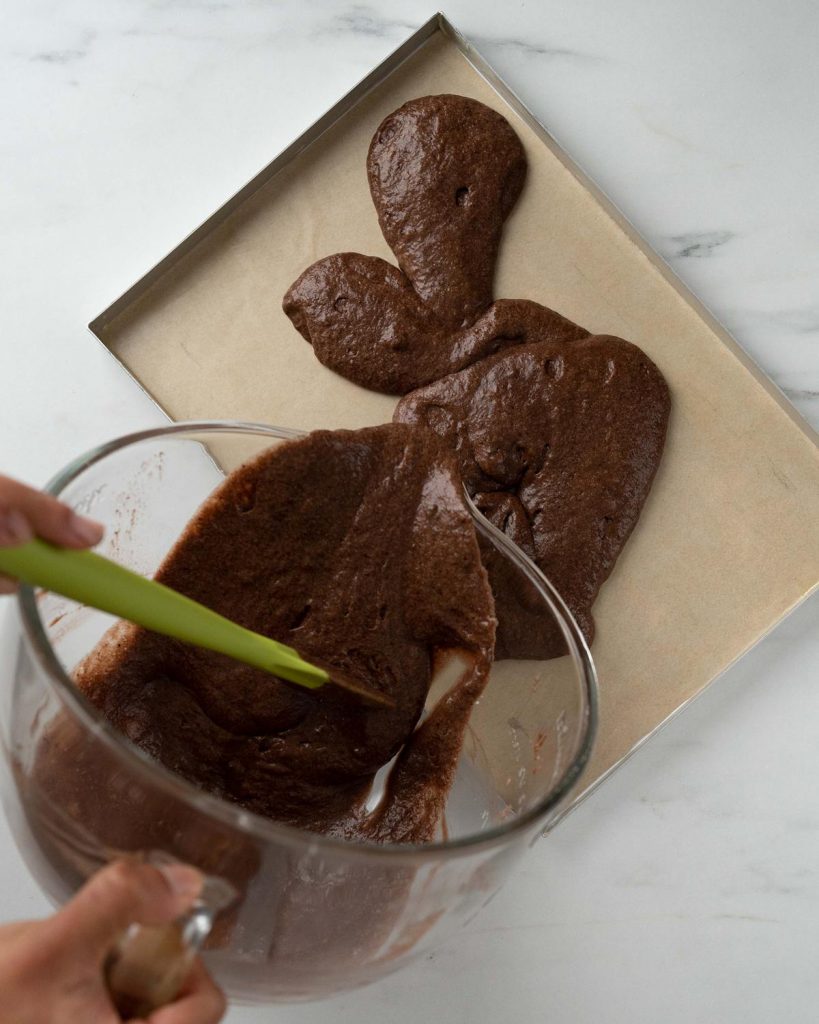
Step 7: Carefully pour the mixture evenly over the pan, then gently tip the pan to spread the cake mixture out across the pan. Use an offset spatula to help, if required.
Step 8: Gently drop the pan twice on your worktop to help level the mixture. Bake until puffed and firm to the touch, but still soft enough to hold a shallow impression when gently poked, about 12 minutes.
Step 9: Immediately after removing the baked cake from the oven, place on a cooling rack and cover tightly with some foil, crimping around the sides to seal. This keeps the cake moist whilst cooling, so it will roll more smoothly and not crack. Allow to cool to room temperature, about 30-60 minutes.
For the chocolate bark
Step 1: Line a baking sheet with parchment paper. Set aside.
Step 2: Melt the chocolate. You can do this either using a bowl over a pan of simmering water or in the microwave in short bursts. Stir until smooth and shiny with no lumps of unmelted chocolate.
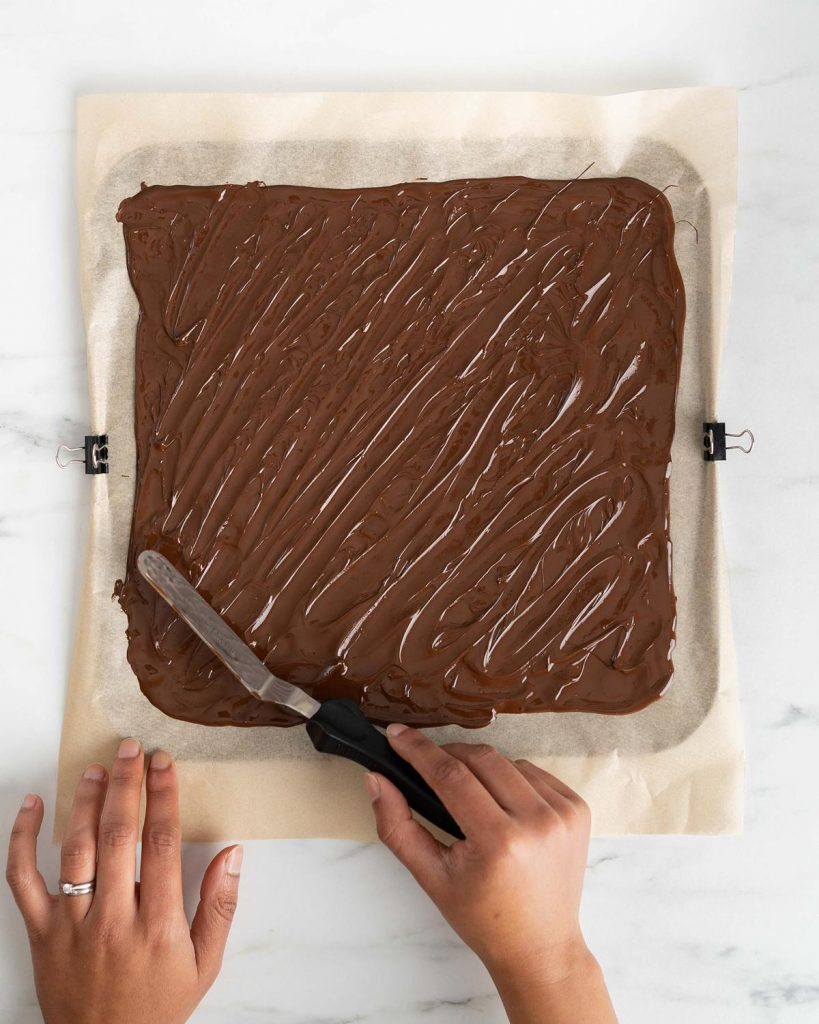
Step 3: Spread the chocolate out over the prepared parchment paper to a few millimetres thickness. Using an offset spatula or spoon, create texture and ruffles in the chocolate, to resemble the bark of a tree.
Step 4: Place in the fridge for the chocolate to firm up and set.
For the filling
Step 1: Place the cream and sugar in a large bowl and whisk until you reach the soft peak stage.
Step 2: Tip in the kirsch and mix in, adding more according to your taste.
To assemble the cake
Step 1: Once the cake is cool, remove from the tin and place on a clean worktop, parchment side down. I like to place a clean tea towel under the parchment to stop it sliding around whilst I’m filling and rolling it. Brush the cake generously all over with the kirsch.
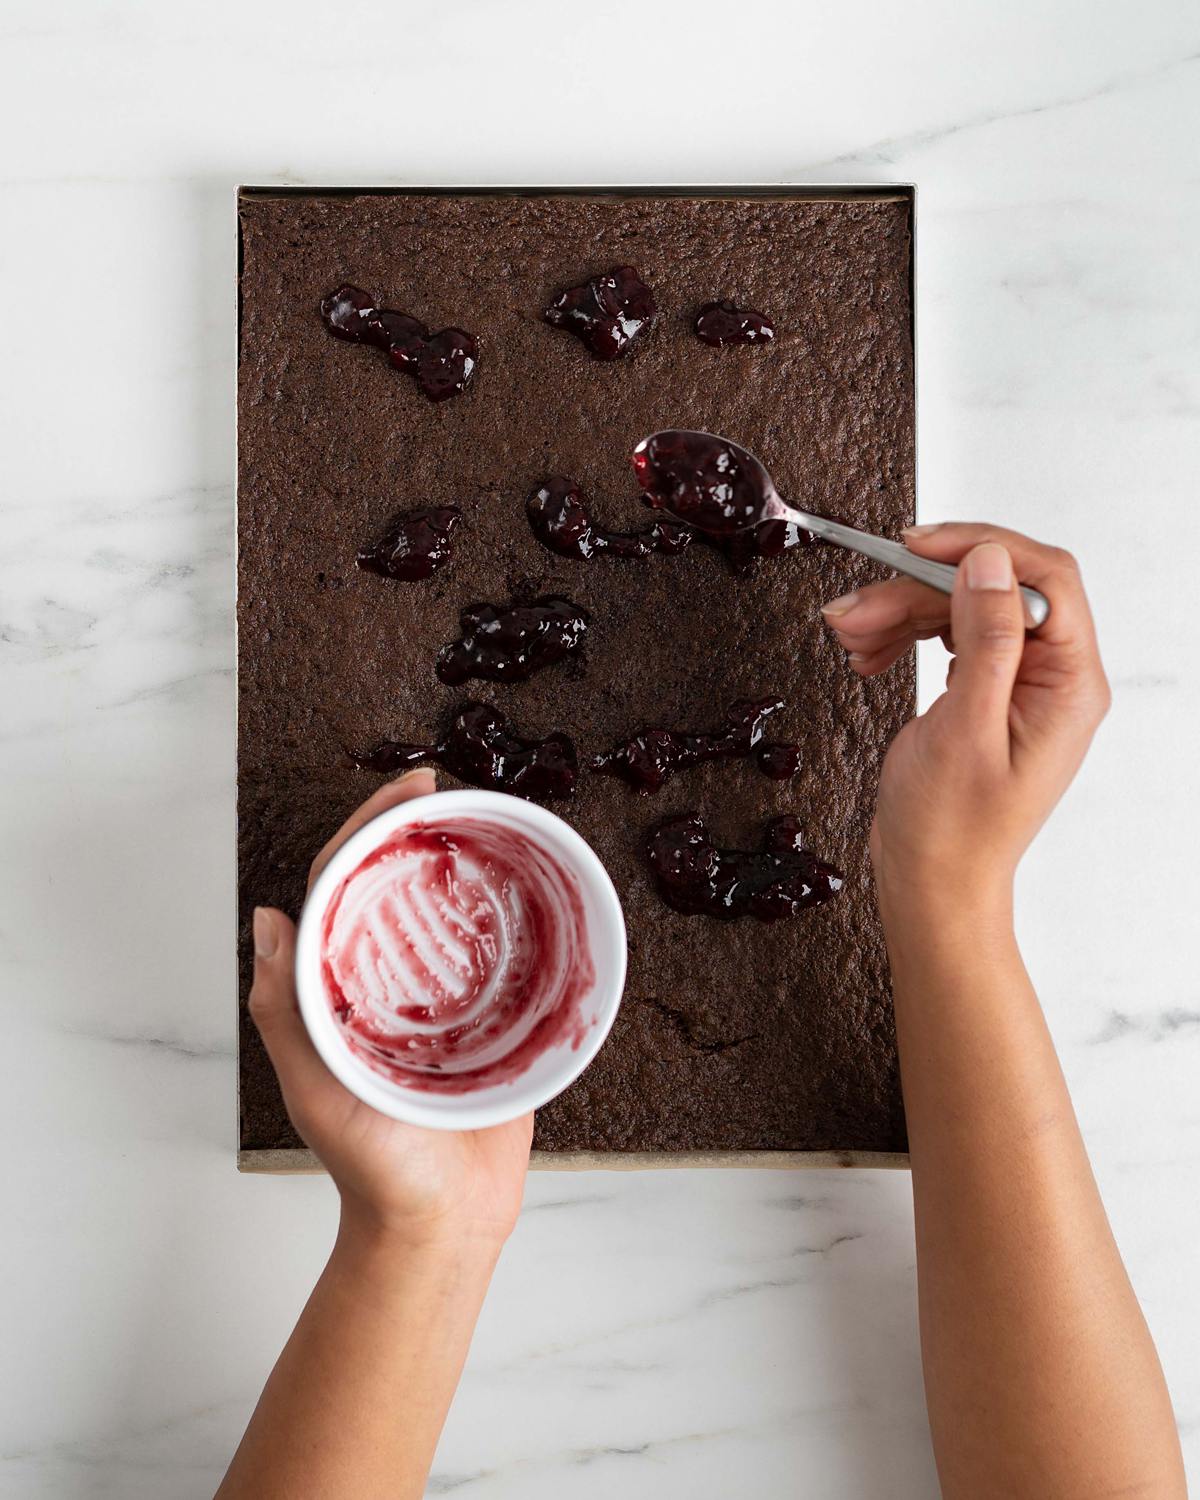
Step 2: Gently spread the cherry conserve over the cake. Make sure to leave a border of around 1cm all round the edges of the cake.
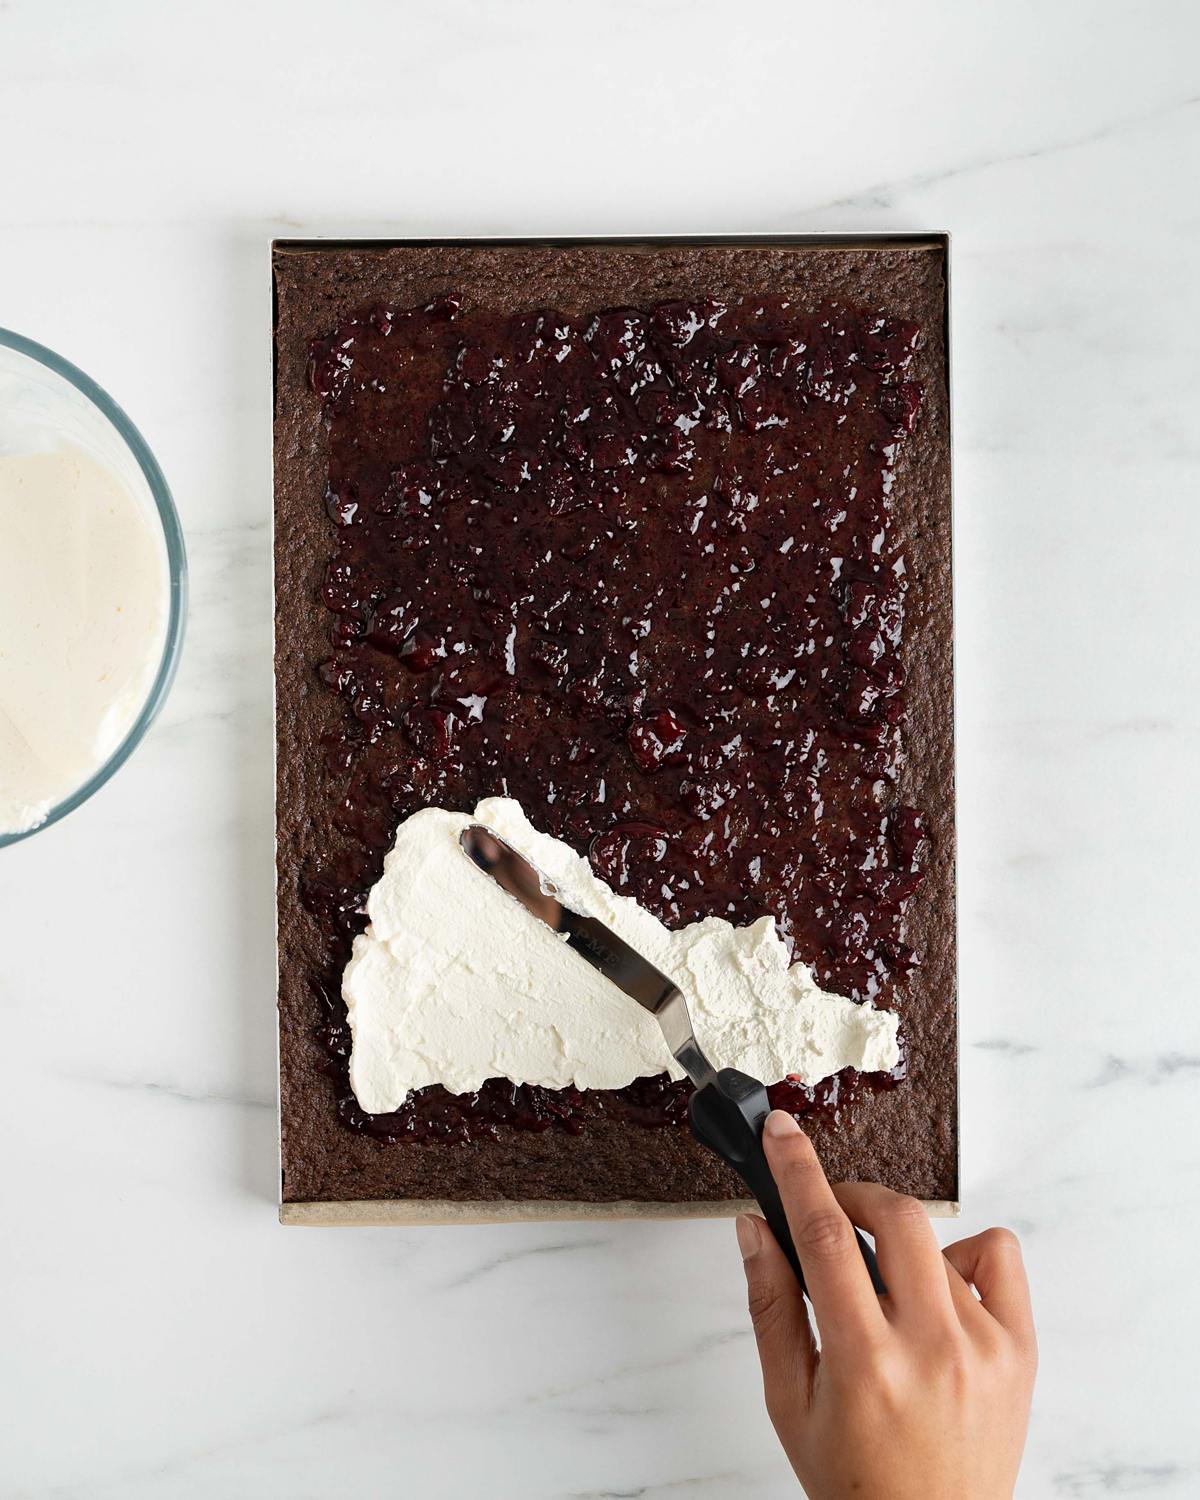
Step 3: Spread the whipped kirsch cream over the conserve, again leaving the border around the edge of the cake as before.
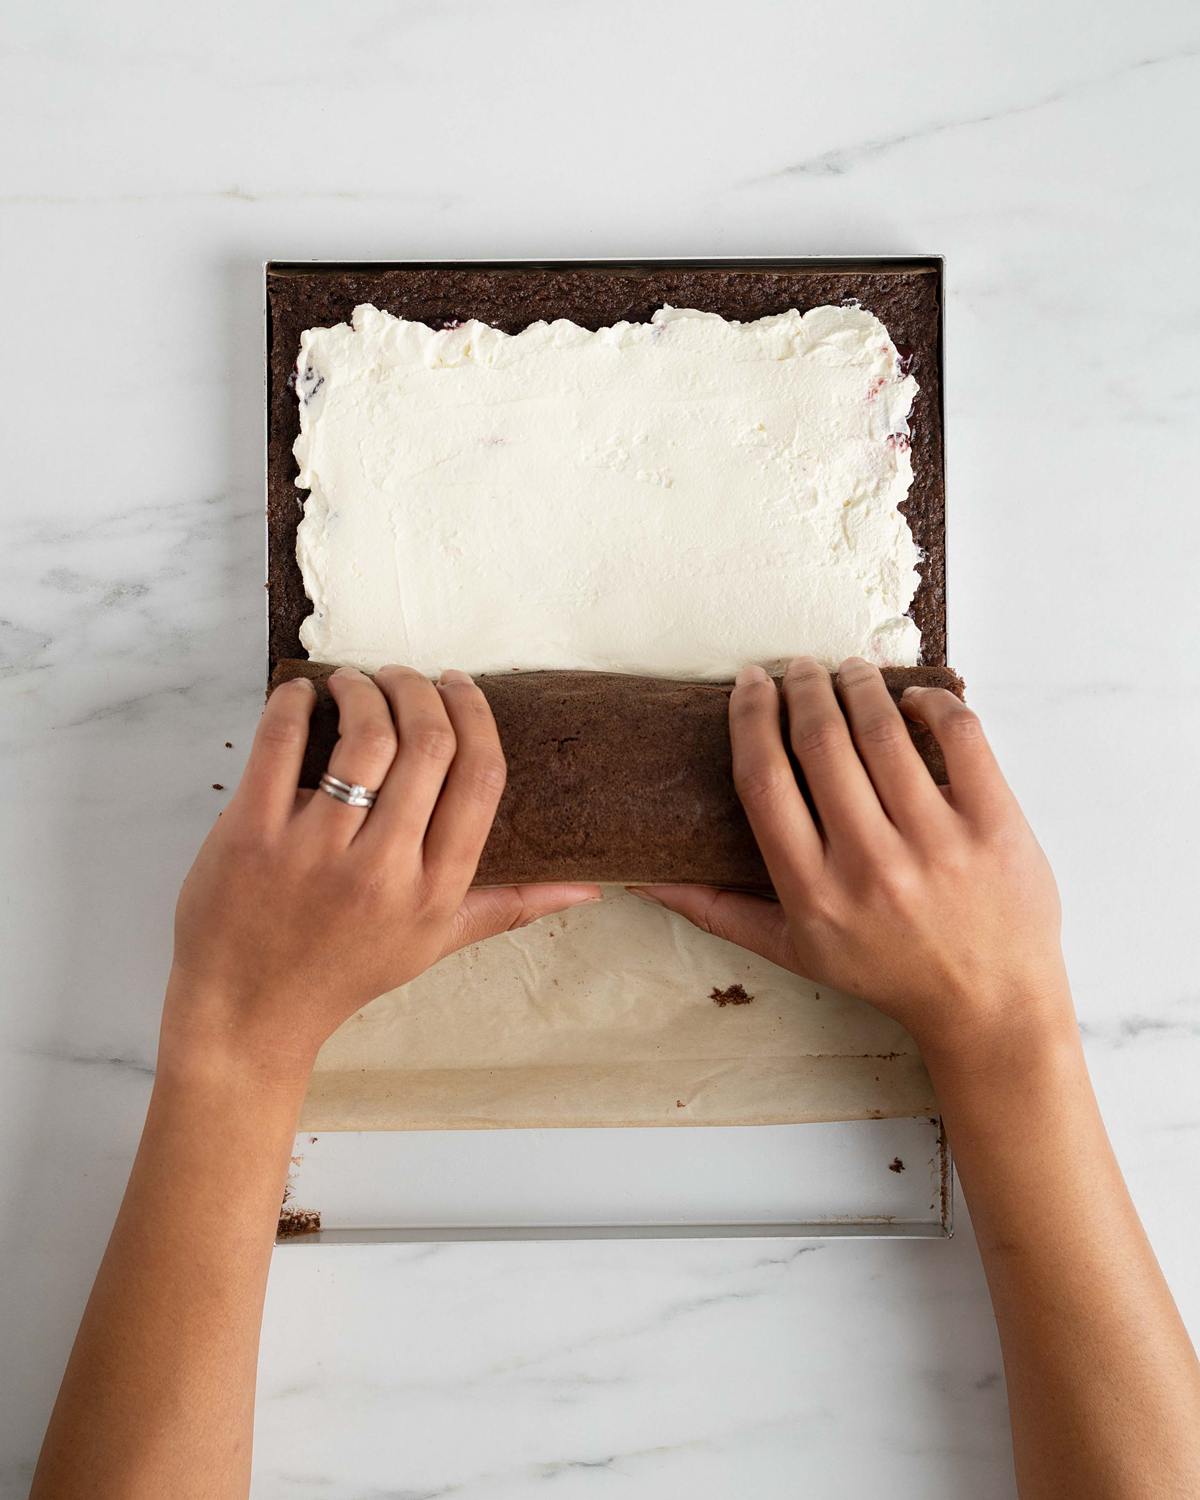
Step 4: Starting from a shorter end of the cake, roll it up fairly tightly, removing the parchment paper from the bottom as you go. I keep the last bit of parchment on, and use it to wrap the whole cake up once rolled so I can make sure it’s a firm roll. Place the cake roll in the fridge whilst making the ganache.
For the whipped ganache
Step 1: Place the chocolate in a large mixing bowl. Heat the cream in a pan until steaming and the edges are starting to bubble. Pour the hot cream into the bowl with the chocolate, pushing to immerse the chocolate into the hot cream. Leave to stand for a few minutes, then stir to combine. If the chocolate has not completely melted, pop it into the microwave for a few seconds to heat some more and stir until melted together and velvety smooth. Pop in the fridge to speed up the cooling process.
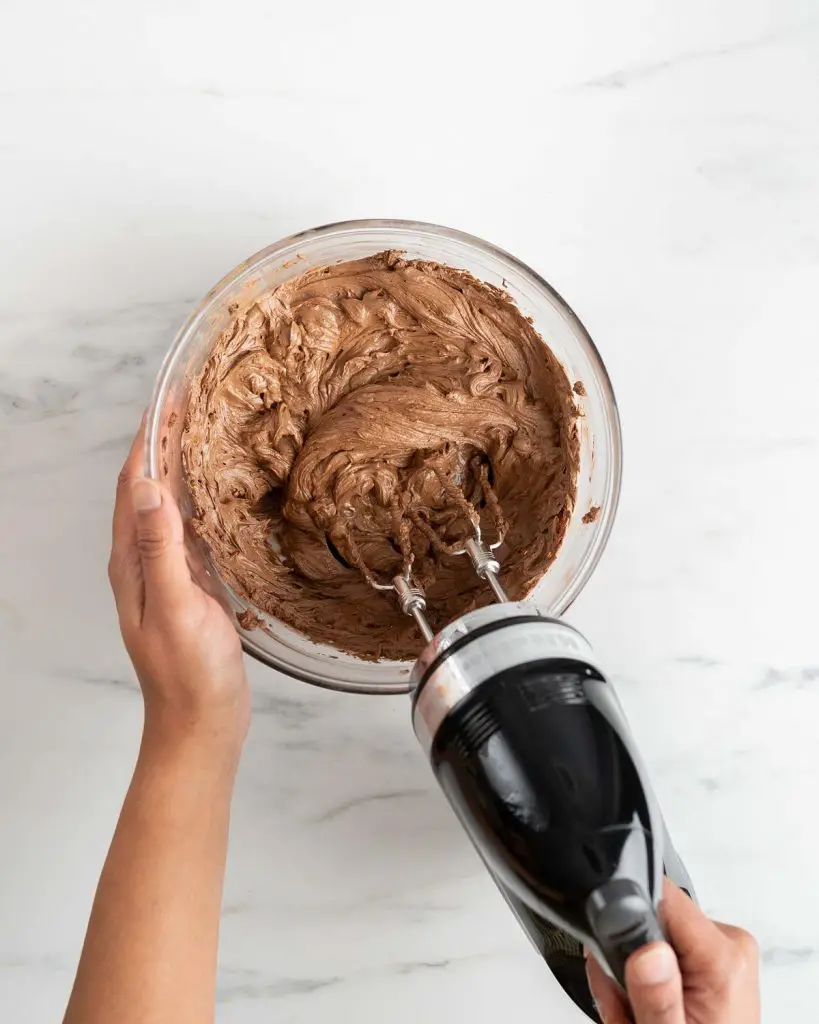
Step 2: Once the ganache has cooled sufficiently (it should still be soft but not firm), beat using an electric whisk until light and slightly paler.
Finishing up
Step 1: Remove the cake from the fridge and unroll from the parchment. It should have firmed and be easier to handle. Place on your serving plate.
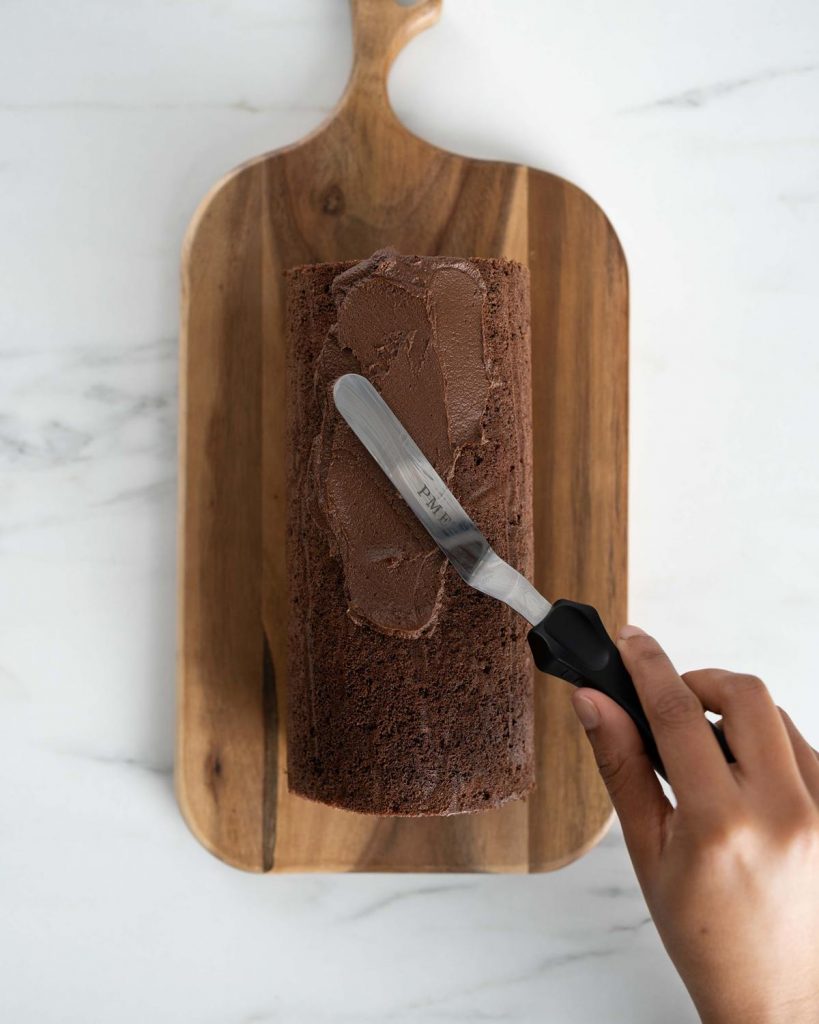
Step 2: Cover the top of the cake generously with the soft whipped chocolate ganache. You may not need it all.
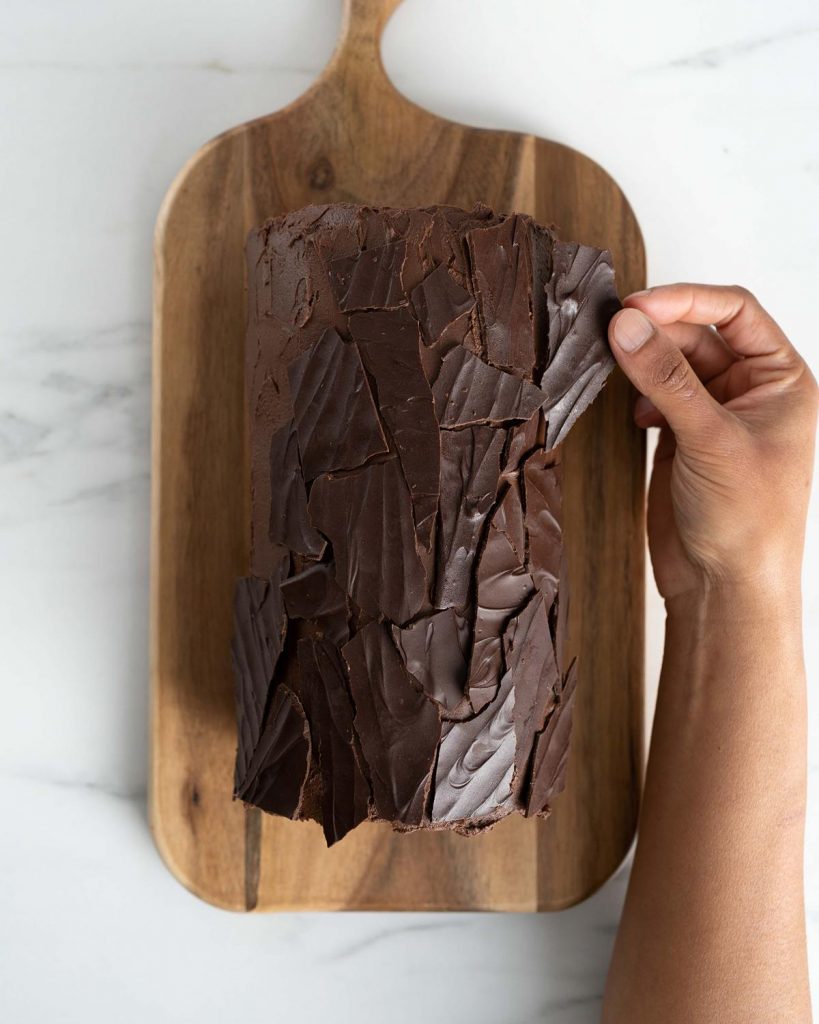
Step 3: Remove the baking tray with the chilled chocolate from the fridge. Break the chocolate into small shards. I use a knife to break it to avoid melting it with the warmth of my hands. Gently press pieces of chocolate all over the ganache, textured side up, to create the “bark” of the log.
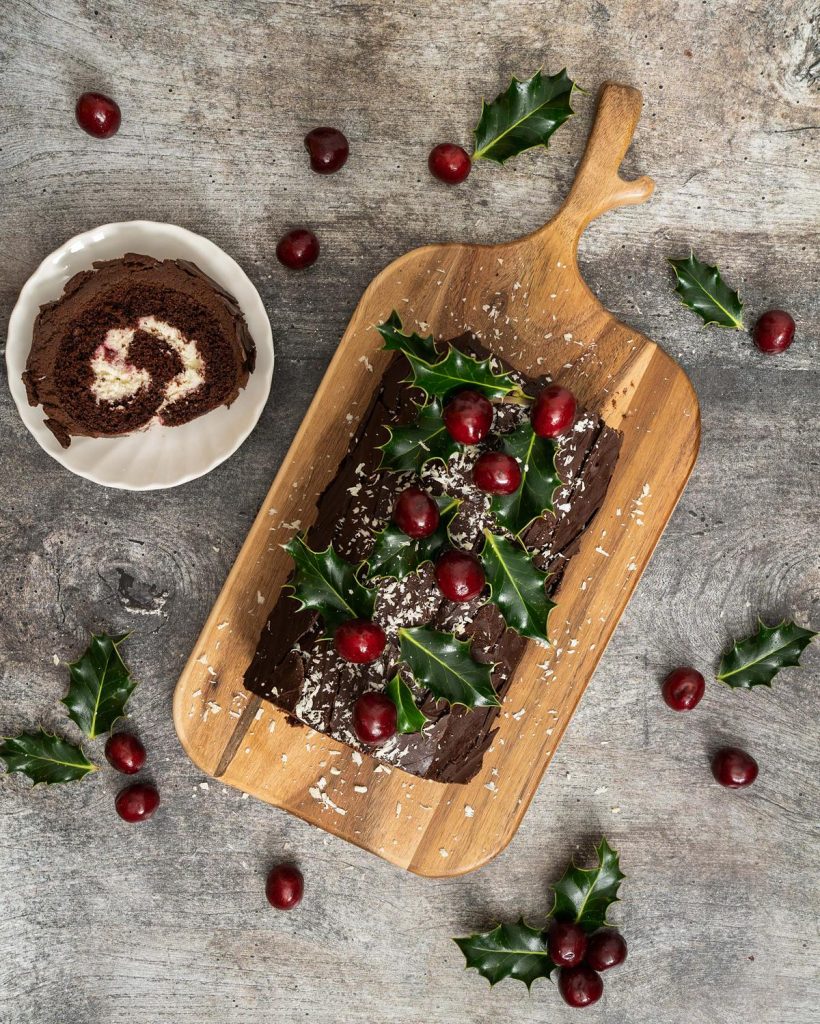
Step 4: Grate some white chocolate over the yule log, then decorate the top with some holly leaves and a few cherries. Enjoy!
How do I line my tin?
To line the tin, simply cut a piece of parchment paper about two inches larger in length and width than the baking tin. Lay the tin on the parchment and cut slits into each corner, then fold the flaps to create sharp lines. Lightly brush the tin with melted butter (to help the paper stick better), then press the paper in, smoothing out any air bubbles and creases. Brush the paper lined tin again with a little melted butter to secure the paper evenly into the tin.
How do I know when my chocolate swiss roll is done?
You can tell the Black Forest swiss roll is done when it is puffed and firm to the touch, but still soft enough to hold a shallow impression when gently poked. This takes around 11-12 minutes of baking time.
How long will this Black Forest buche de noel last? How do I store it?
This Black Forest yule log will keep for 2-3 days once made. It should be stored in an air tight container in the fridge due to the whipped cream filling. Remove from the fridge for about a half hour to bring to room temperature before serving.
Can I make this Black Forest yule log recipe gluten and dairy free?
Yes, you certainly can! To make it gluten free, swap out the flour for a gluten free flour blend, adding a little xanthan gum if you can tolerate it too for better texture.
To make this Black Forest yule log dairy free, you will need to use dairy free alternatives for block butter, double cream and chocolate in this bake. Please make sure to use a dairy free double cream that can be whipped to stiff peaks so the filling and chocolate ganache will firm up and not remain a liquid.
Can I freeze Black Forest yule log?
This yule log will freeze well. Freeze the cake roll, without the icing or decoration, on a parchment lined baking tray until completely frozen solid. Wrap it tightly in two layers of cling film (plastic wrap) and then snugly with foil. The cake can be left frozen in this way for up to three months.
To thaw the cake, unwrap it completely and place on a cooling rack. Place a domed piece of foil over the top (it should not touch the cake) and leave to thaw overnight like this. The following day, continue with icing and decorations according to the recipe. Once thawed, the cake should not be refrozen and will need to be eaten within 3 days.
Additional tips for making this Black Forest yule log recipe
- Always make sure all tools and ingredients are prepared before you start making this Black Forest buche de noel recipe. Line the swiss roll tin with parchment paper, preheat the oven and get the ingredients out ready to use.
- Take time to read through the recipe so you are familiar with what steps come next. This black forest yule log cake recipe has a fair few steps and details for best results. I have included as much detail as I could to ensure success every time.
- Remember to melt the butter and leave it to cool a little before adding it to the cake mixture. When adding it to the whipped up eggs, drizzle it in whilst mixing to ensure even distribution. This also means the butter will not solidify before being mixed into the cake batter.
- Whisking the eggs slowly before increasing the speed gives a much more stable mixture. This ensures the cake remains light and soft and does not end up dense once baked.
- When adding the dry ingredients to the egg mixture, use the whisk attachment but do not whisk until fully combined. Instead, whisk in the dry ingredients until only streaks remain, then finish off the mixing by hand. This gives an even mix without beating out all the air we incorporated earlier in the recipe!
- While the cake is baking, prepare a large sheet of foil to cover the cake when it comes out. As soon as it is out of the oven, cover the cake (still in the tin) with the foil. Crimp around the edges to seal before leaving it to cool. Doing this allows the Black Forest yule log to remain moist and soft, so it does not crack when rolled.
- Spread the roll cake fillings evenly over the middle of the cake, making sure to leave a border all around the edges uncovered. When you roll the cake, a little of the filling gets pushed to the edge and fills the space up. Doing this means less filling oozing out the sides and more deliciousness for you to enjoy in the cake instead!
- Once filled and rolled, wrap the cake tightly in the parchment paper it baked in and pop in the fridge. I do this whilst making and preparing the whipped ganache topping. Chilling the cake before the final decoration means the cake will be firmer and hold its shape better. This makes it easier to work with for next steps
- Make sure the ganache has cooled sufficiently before whipping or it will not become lighter and stiffer.
- Use a knife or another tool when breaking up the chocolate shards for the bark. Using your hands may melt the chocolate, making it lose the bark like texture it set in.
- You could make variations in the chocolate bark by using milk or white chocolate. Or you could do a mix of all three different types if you wish!
Troubleshooting
If you have any other questions about this recipe, please use the comments below and I will do my best to help! And if you make this Black Forest yule log cake recipe, please do consider leaving a rating and review below. I would love to know how you enjoy making it and it really helps others looking for a recipe too! Remember to share a picture on Instagram and tag me too when you share it with the world!
More festive recipes for you to enjoy
In a festive baking mood? Check out these Christmassy recipes too!
Christmas pudding cookies: These adorable chocolate Christmas pudding cookies are soft and chewy and just oh-so-cute! Perfect for seasonal baking for little and big kids alike!
Gingerbread biscotti: This is totally and utterly the BEST biscotti recipe for the festive season, and then some! Packed with delicious warming spices and dipped in white chocolate, this biscotti recipe is perfect for gifting or enjoyed with a hot drink!
Sticky toffee pudding cake: This beauty combines the best of everyone’s favourite sticky toffee pudding in a cake. Beautiful, rich sticky toffee sponge cake, filled with caramelised white chocolate buttercream and a perfect toffee drip. Topped with absolutely spectacular caramelised white chocolate shards, this bake makes for a truly jaw-dropping celebration cake!
Mince pie cupcakes: These delicious cupcakes with brandy butter icing are a fabulously festive and extravagant cupcake for the season! Light and fluffy vanilla cupcakes are filled with homemade mincemeat and topped with a heavenly, smooth and indulgent brandy buttercream. I love decorating with simple silver sugar pearls for a classic but festive and special finish. Christmas baking at its best!
Thanks for joining me today, my friends! Wishing you a very happy festive season and happy baking! x
Equipment used to make this Black Forest yule log
| Digital kitchen scales | Measuring spoons |
| Small mixing bowl | Sieve |
| Stand mixer | Electric hand mixer |
| Mixing bowl | Spatula |
| Swiss roll tin | Offset spatula |
| Baking tray | Grater |
Black Forest Yule Log
12
servings1
hour12
minutes487
kcal1
hour2
hours12
minutesA delightfully festive yule log, packed with delicious chocolate, cherry and kirsch flavours!
Keep the screen of your device on
Ingredients
- For the cake
80 g (½ cup + 1 tbsp) plain (all purpose) flour
20 g (3 tbsp) cocoa powder
3 large eggs, cold from the fridge
150 g (¾ cup) caster sugar
0.5 tsp baking powder
0.25 tsp bicarbonate of soda (baking soda)
0.5 tsp salt
65 g (¼ cup + 1 tbsp) unsalted butter, melted
1 tsp vanilla
2 tbsp kirsch
- For the chocolate bark
150 g (1 cup + 2 tbsp) dark chocolate
- For the filling
4 tbsp morello cherry conserve
220 ml (¾ cup + 3 tbsp) double (heavy) cream, cold
1.5 tbsp icing sugar
1-2 tbsp kirsch
- For the whipped ganache
275 g (2 cup + 2 tbsp) dark chocolate, broken into chunks
265 ml (1 cup + 2 tbsp) double (heavy) cream
- For decoration
white chocolate
fresh cherries
holly leaves
Directions
- For the cake
- Preheat the oven to 180C/350F. Lightly brush a 13”x9” swiss roll tin with melted butter, line the base of the tin with parchment paper, then brush lightly again to stick the paper down evenly. Set aside.
- Into a small bowl, sift together the flour and cocoa.
- Place the eggs, sugar, baking powder, bicarbonate of soda and salt into the bowl of a stand mixer. Using the whisk attachment, whisk at a medium-low speed for 3 minutes to combine and dissolve the sugar. The mixture will have fine bubbles throughout.
- Increase the speed to medium-high and whisk until thickened and pale with fine, foamy bubbles. This is around 5 minutes of beating time.
- Increase the speed again to high and whisk the eggs mixture until pale and doubled in size, another 5 minutes.
- Reduce the speed to medium low and drizzle in the melted butter and vanilla, mixing together. Immediately reduce the speed to low and add in the sifted flour and cocoa powder, mixing until nearly combined. Turn the mixer off, detach the whisk attachment and use it to finish folding the flour in by hand, to avoid losing too much air from the mixture.
- Carefully pour the mixture evenly over the pan, then gently tip the pan to spread the cake mixture out across the pan. Use an offset spatula to help, if required.
- Gently drop the pan twice on your worktop to help level the mixture. Bake until puffed and firm to the touch, but still soft enough to hold a shallow impression when gently poked, about 12 minutes.
- Immediately after removing the baked cake from the oven, place on a cooling rack and cover tightly with some foil, crimping around the sides to seal. This keeps the cake moist whilst cooling, so it will roll more smoothly and not crack. Allow to cool to room temperature, about 30-60 minutes.
- For the chocolate bark
- Line a baking sheet with parchment paper. Set aside.
- Melt the chocolate. You can do this either using a bowl over a pan of simmering water or in the microwave in short bursts. Stir until smooth and shiny with no lumps of unmelted chocolate.
- Spread the chocolate out over the prepared parchment paper to a few millimetres thickness. Using an offset spatula or spoon, create texture and ruffles in the chocolate, to resemble the bark of a tree.
- Place in the fridge for the chocolate to firm up and set.
- For the filling
- Place the cream and sugar in a large bowl and whisk until you reach the soft peak stage.
- Tip in the kirsch and mix in, adding more according to your taste.
- To assemble the cake
- Once the cake is cool, remove from the tin and place on a clean worktop, parchment side down. I like to place a clean tea towel under the parchment to stop it sliding around whilst I’m filling and rolling it. Brush the cake generously all over with the kirsch.
- Gently spread the cherry conserve over the cake. Make sure to leave a border of around 1cm all round the edges of the cake.
- Spread the whipped kirsch cream over the conserve, again leaving the border around the edge of the cake as before.
- Starting from a shorter end of the cake, roll it up fairly tightly, removing the parchment paper from the bottom as you go. I keep the last bit of parchment on, and use it to wrap the whole cake up once rolled so I can make sure it’s a firm roll. Place the cake roll in the fridge whilst making the ganache.
- For the whipped ganache
- Place the chocolate in a large mixing bowl. Heat the cream in a pan until steaming and the edges are starting to bubble. Pour the hot cream into the bowl with the chocolate, pushing to immerse the chocolate into the hot cream. Leave to stand for a few minutes, then stir to combine. If the chocolate has not completely melted, pop it into the microwave for a few seconds to heat some more and stir until melted together and velvety smooth. Pop in the fridge to speed up the cooling process.
- Once the ganache has cooled sufficiently (it should still be soft but not firm), beat using an electric whisk until light and slightly paler.
- Finishing up
- Remove the cake from the fridge and unroll from the parchment. It should have firmed and be easier to handle. Place on your serving plate.
- Cover the top of the cake generously with the soft whipped chocolate ganache. You may not need it all.
- Remove the baking tray with the chilled chocolate from the fridge. Break the chocolate into small shards. I use a knife to break it to avoid melting it with the warmth of my hands. Gently press pieces of chocolate all over the ganache, textured side up, to create the “bark” of the log.
- Grate some white chocolate over the yule log, then decorate the top with some holly leaves and a few cherries. Enjoy!
Notes
- Always make sure all tools and ingredients are prepared before you start making this Black Forest buche de noel recipe. Line the swiss roll tin with parchment paper, preheat the oven and get the ingredients out ready to use.
- Take time to read through the recipe so you are familiar with what steps come next. This black forest yule log cake recipe has a fair few steps and details for best results. I have included as much detail as I could to ensure success every time.
- Remember to melt the butter and leave it to cool a little before adding it to the cake mixture. When adding it to the whipped up eggs, drizzle it in whilst mixing to ensure even distribution. This also means the butter will not solidify before being mixed into the cake batter.
- Whisking the eggs slowly before increasing the speed gives a much more stable mixture. This ensures the cake remains light and soft and does not end up dense once baked.
- When adding the dry ingredients to the egg mixture, use the whisk attachment but do not whisk until fully combined. Instead, whisk in the dry ingredients until only streaks remain, then finish off the mixing by hand. This gives an even mix without beating out all the air we incorporated earlier in the recipe!
- While the cake is baking, prepare a large sheet of foil to cover the cake when it comes out. As soon as it is out of the oven, cover the cake (still in the tin) with the foil. Crimp around the edges to seal before leaving it to cool. Doing this allows the Black Forest yule log to remain moist and soft, so it does not crack when rolled.
- Spread the roll cake fillings evenly over the middle of the cake, making sure to leave a border all around the edges uncovered. When you roll the cake, a little of the filling gets pushed to the edge and fills the space up. Doing this means less filling oozing out the sides and more deliciousness for you to enjoy in the cake instead!
- Once filled and rolled, wrap the cake tightly in the parchment paper it baked in and pop in the fridge. I do this whilst making and preparing the whipped ganache topping. Chilling the cake before the final decoration means the cake will be firmer and hold its shape better. This makes it easier to work with for next steps
- Make sure the ganache has cooled sufficiently before whipping or it will not become lighter and stiffer.
- Use a knife or another tool when breaking up the chocolate shards for the bark. Using your hands may melt the chocolate, making it lose the bark like texture it set in.
- You could make variations in the chocolate bark by using milk or white chocolate. Or you could do a mix of all three different types if you wish!