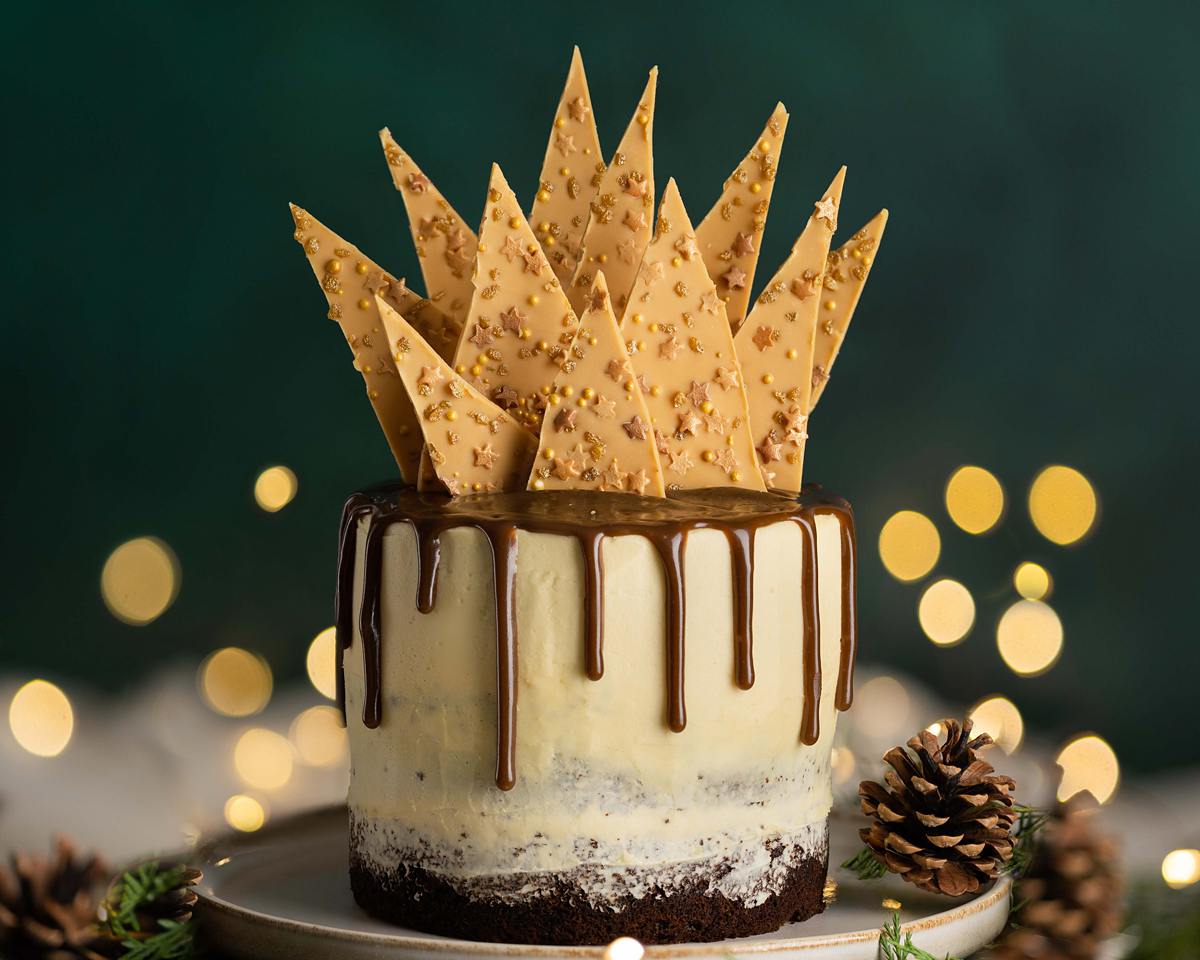
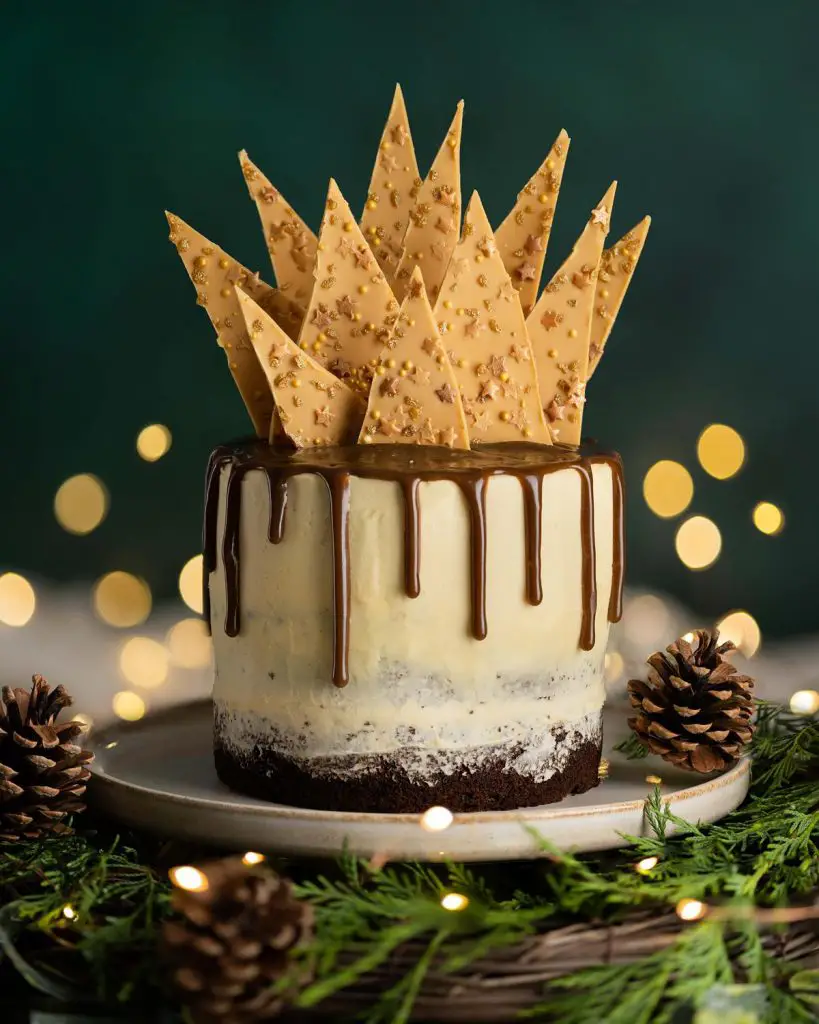
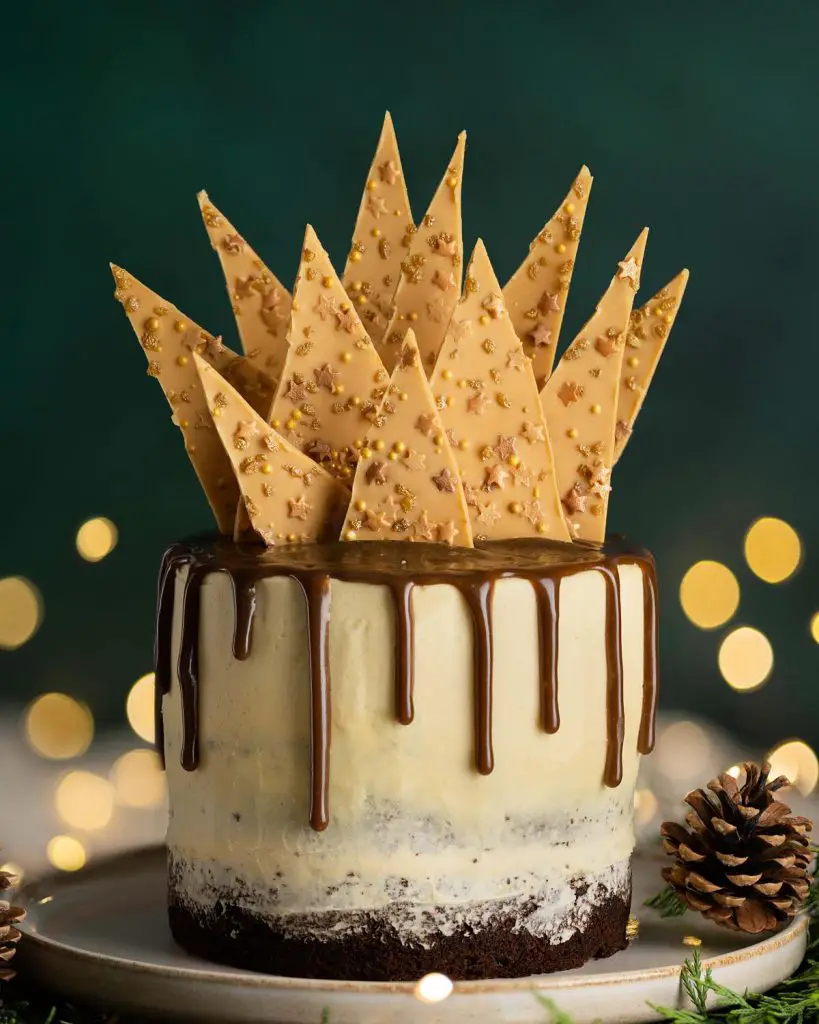
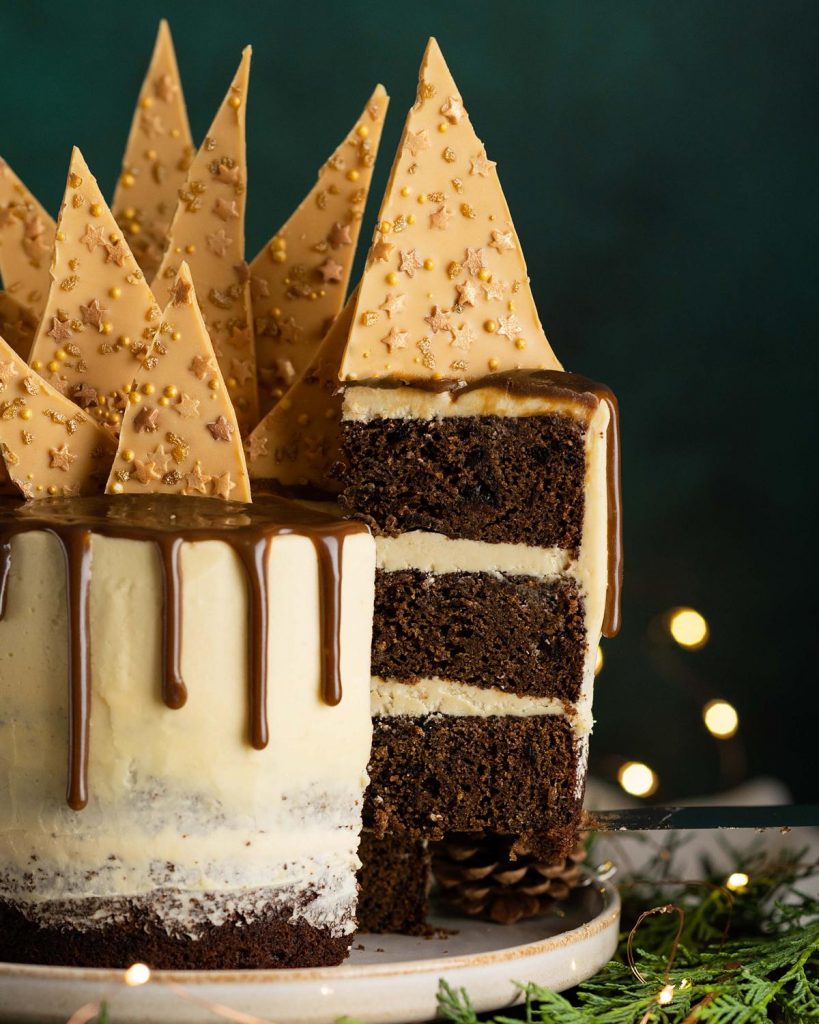
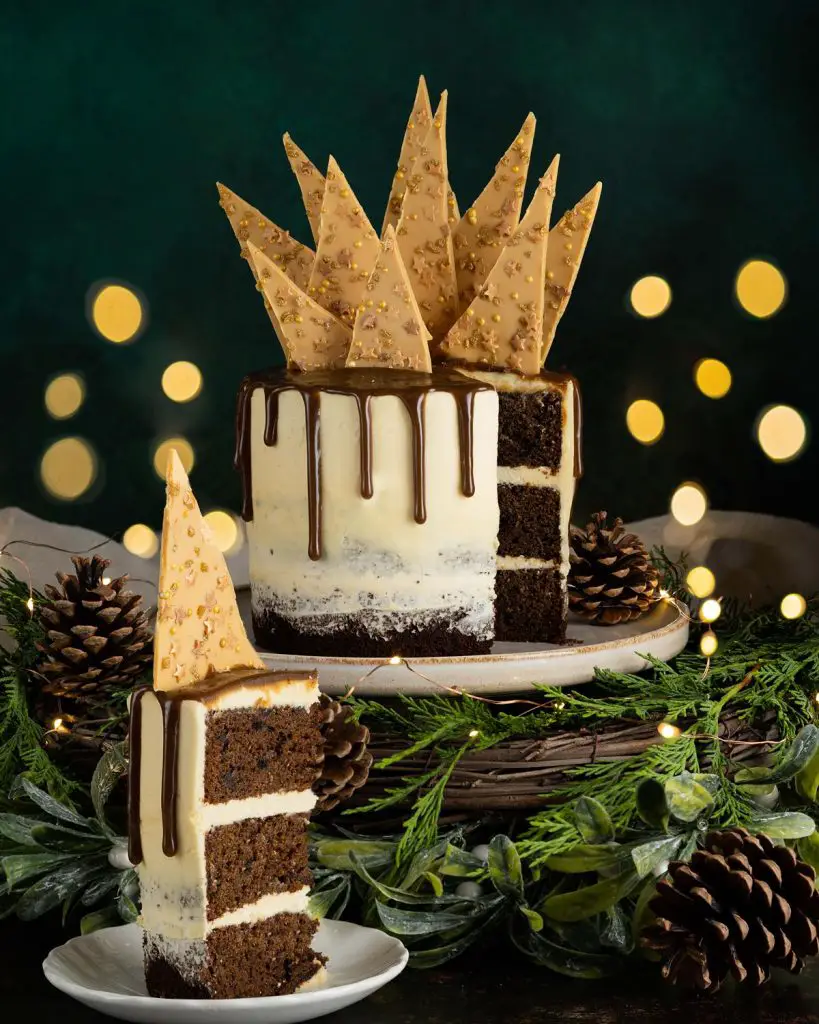
My sticky toffee pudding cake combines the best of everyone’s favourite sticky toffee pudding in a cake. Beautiful, rich sticky toffee sponge cake, filled with caramelised white chocolate buttercream and a perfect toffee drip. Topped with absolutely spectacular caramelised white chocolate shards, this bake makes for a truly jaw-dropping celebration cake!
What is sticky toffee pudding?
Sticky toffee pudding, or sticky date pudding if you are in Australia or New Zealand, is quite simply one of the best British desserts I have come across to date! It is basically a sponge cake, made with chopped dates, topped with a rich toffee sauce and normally served warm with ice cream. It is, for me, one of the best comfort foods ever, especially as the nights draw in and the weather gets colder. If you have never tried it, check out my recipe for sticky toffee pudding below and make it. I promise you will not regret it!
What does sticky toffee taste like?
Sticky toffee pudding has wonderful caramel and toffee flavours and because of the dates too, makes for an absolutely amazingly decadent and cosy cold weather dessert! Despite it being a sponge cake, the dates add a sticky and slightly chewy texture, making it denser and more pudding like.
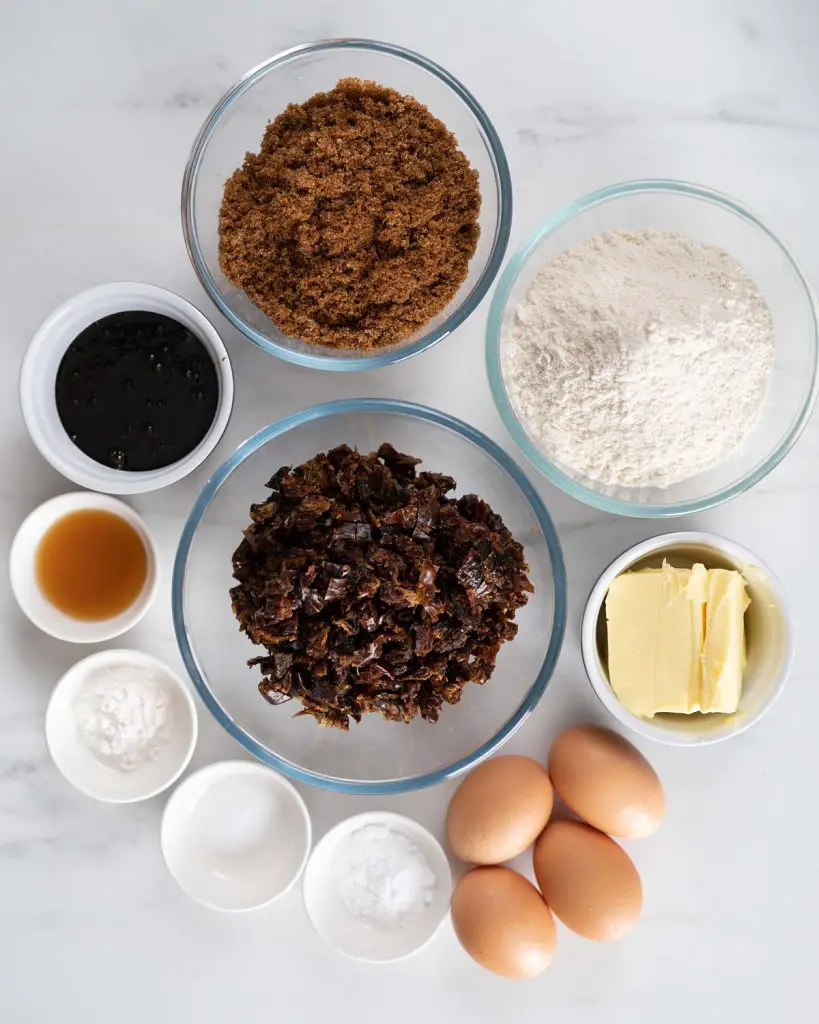
What ingredients do I need to make this sticky toffee pudding cake?
- Dates: one of the key ingredients in making this sticky toffee date cake, makes for a moist, chewy and absolutely delicious cake!
- Bicarbonate of soda (baking soda): helps soften the dates before they are mixed into the cake batter, plus aids the rising of the bake.
- Boiling water: mixed with the bicarb and dates, used to help prepare the dates ahead of making this cake.
- Butter: I use unsalted butter, so I can control the amount of salt in the bake. Used in the cake, buttercream and the toffee sauce.
- Dark brown sugar: using dark brown sugar here makes for a deeply caramel flavoured cake. This suits the flavour profile of this sticky toffee cake perfectly.
- Eggs: gives structure and stability to the cakes as they bake.
- Vanilla: rounds off the sweet caramel and toffee notes of this bake beautifully.
- Treacle: adds darkness and depth to the flavour profile, along with a little bitterness to balance the sweetness. Used in the cake and the toffee sauce.
- Flour: I use plain (all purpose) flour to make this sticky date cake. I prefer this here as I can control the amount of rise in my cakes better.
- Baking powder: for rise and lightness in the sticky toffee sponge cakes.
- Salt: just a little added, to enhance the flavours. You will not be able to taste it, but it is worth adding in!
- Dark muscovado sugar: the darker flavour profile of this makes a really wonderful, rich toffee sauce.
- Double cream: to make the toffee sauce, gives a rich, decadent texture to the drip on the cake.
- Icing (powdered) sugar: an essential ingredient in making the buttercream.
- White chocolate: used to make the caramelised white chocolate for the buttercream and the shards on top of the cake.
- Sprinkles: to decorate the shards of caramelised chocolate.
What equipment do I need to make this sticky toffee date cake?
- Cake tins*: to bake the cakes in. I use three tins to make this three layer cake, rather than baking as one and slicing in three.
- Parchment/baking paper: to line the tins before baking the sticky toffee date cake in it.
- Digital kitchen scales*: I provide all my measurements in cups, however I would encourage all bakers to weigh out ingredients when baking. A set of digital kitchen scales is so useful and totally an essential baking tool for me.
- Measuring spoons*: a set of measuring spoons is essential for any baker. This is because these are more accurate than using everyday teaspoons and tablespoons, which can vary greatly in size.
- Stand mixer*/Handheld electric mixer*: both useful tools to make life easier in the kitchen! You can, of course, make this whole recipe entirely by hand. But it will be quite the workout for your arm!
- Sieve*: to sift the dry ingredients before mixing in for the sticky toffee pudding cake.
- Spatula*: to scrape down the bowl with as ingredients are added, ensuring everything mixes together thoroughly. Also useful to fold through the dates into the sticky date cake.
- Jug*: I use a jug to mix together my wet ingredients separately before adding in with the dry ingredients.
- Mixing bowl*: to soak the date mixture in.
- Piping bag*: used to spread the icing evenly between and on the sticky toffee date cake.
- Offset spatula*: to help spread the icing over the cake smoothly and evenly, as well as spreading the caramelised white chocolate for the shards.
- Baking tray*: to spread the white chocolate on when making the shard topping.
- Small saucepan*: to make the toffee sauce in.
- Drip bottles*: whilst it is possible to do the toffee drip on the cake using a spoon, I find putting my toffee and dripping from a bottle gives me loads more control, and better drips.
How to make sticky toffee pudding cake
There are four parts to making this celebration cake. First, the sticky toffee sponge cake. Alongside this is the caramelised white chocolate (for the shards and the buttercream) and a beautiful thick toffee sauce for the drip. And a light buttercream to bring all the layers together.
For the cake
Step 1: Brush three 6″ circle cake tins with some melted butter. Line the bases with parchment paper and brush with a little butter again to make sure it sticks down well. Set the tins aside. Preheat the oven to 180C/350F whilst making the cake batter.
Step 2: In a small bowl, combine the chopped dates, bicarbonate of soda (baking soda) and boiling water. Stir it all together, pressing down to submerge the dates. Cover with a plate (to keep the heat in to soften the dates) and set aside whilst making the cake mixture.
Step 3: In the bowl of a stand mixer, cream together the butter and sugar until fluffy and slightly paler. Add in the eggs one at a time, mixing between additions, then mix in the vanilla and treacle. If the mixture looks a little curdled at this stage, don’t worry! It will all come together in the next steps.
Step 4: Sift in the flour, baking powder and salt and mix to combine (do not overmix at this stage). Tip in the date mixture (liquid and all), and fold in using a spatula.
Step 5: Divide the cake mixture between the three prepared tins. I do this by spooning equal amounts into each tin, but if you wish you could be really accurate and weigh out mixture for each tin. Bake the cakes for 30-35 minutes until the cakes have shrunk slightly from the sides and the tops are firm to touch. A wooden skewer inserted into the middle of each cake should come out clean. Leave the cakes to cool for 5 minutes in the tins, then turn out onto a wire rack to cool completely.
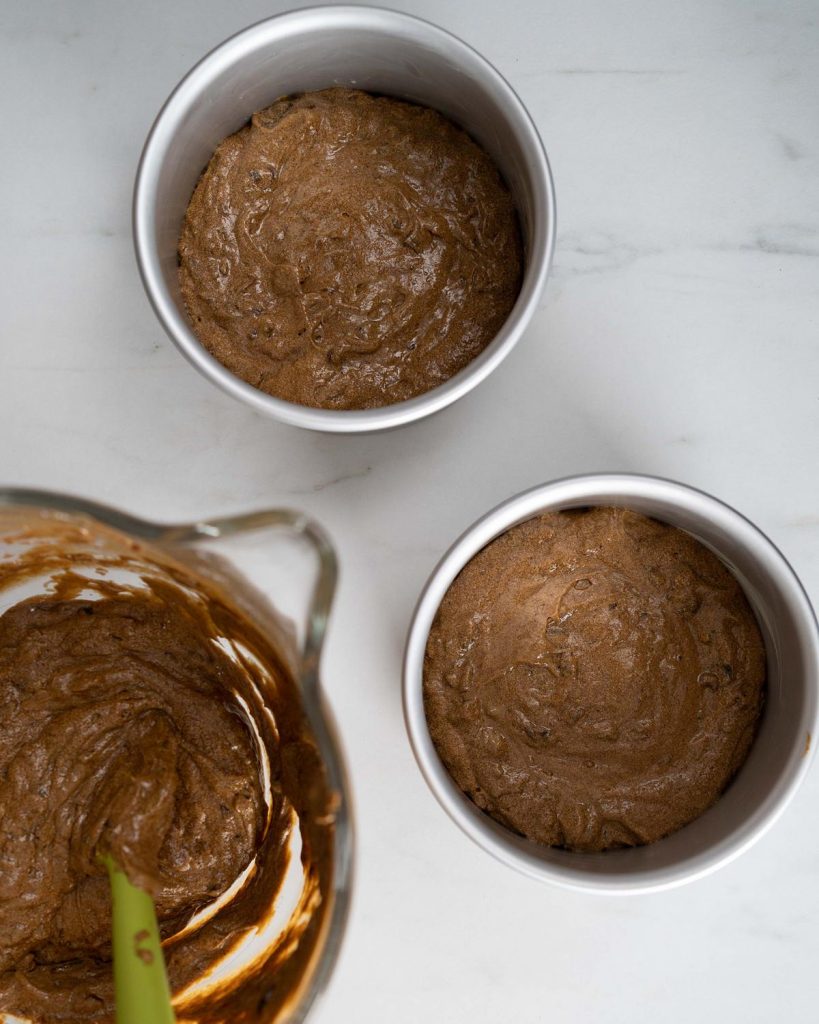
For the caramelised white chocolate shards
Step 1: Line a baking tray with parchment paper and set aside ready for the caramelised white chocolate.
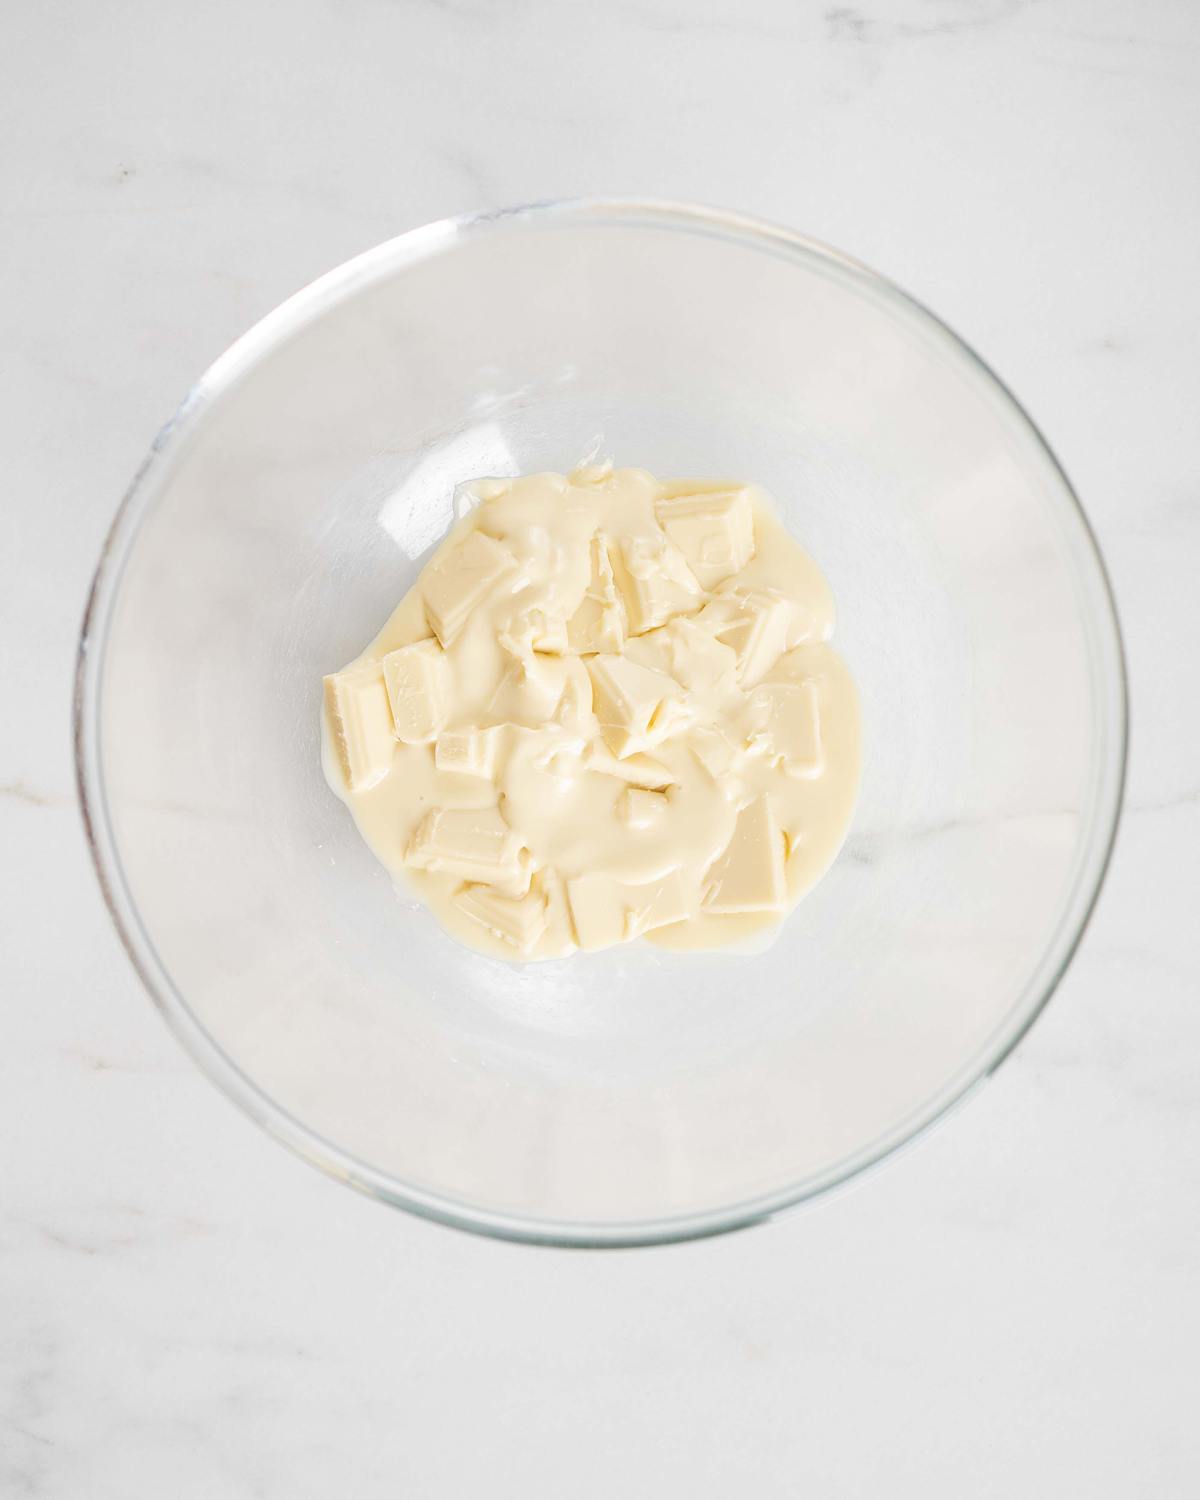
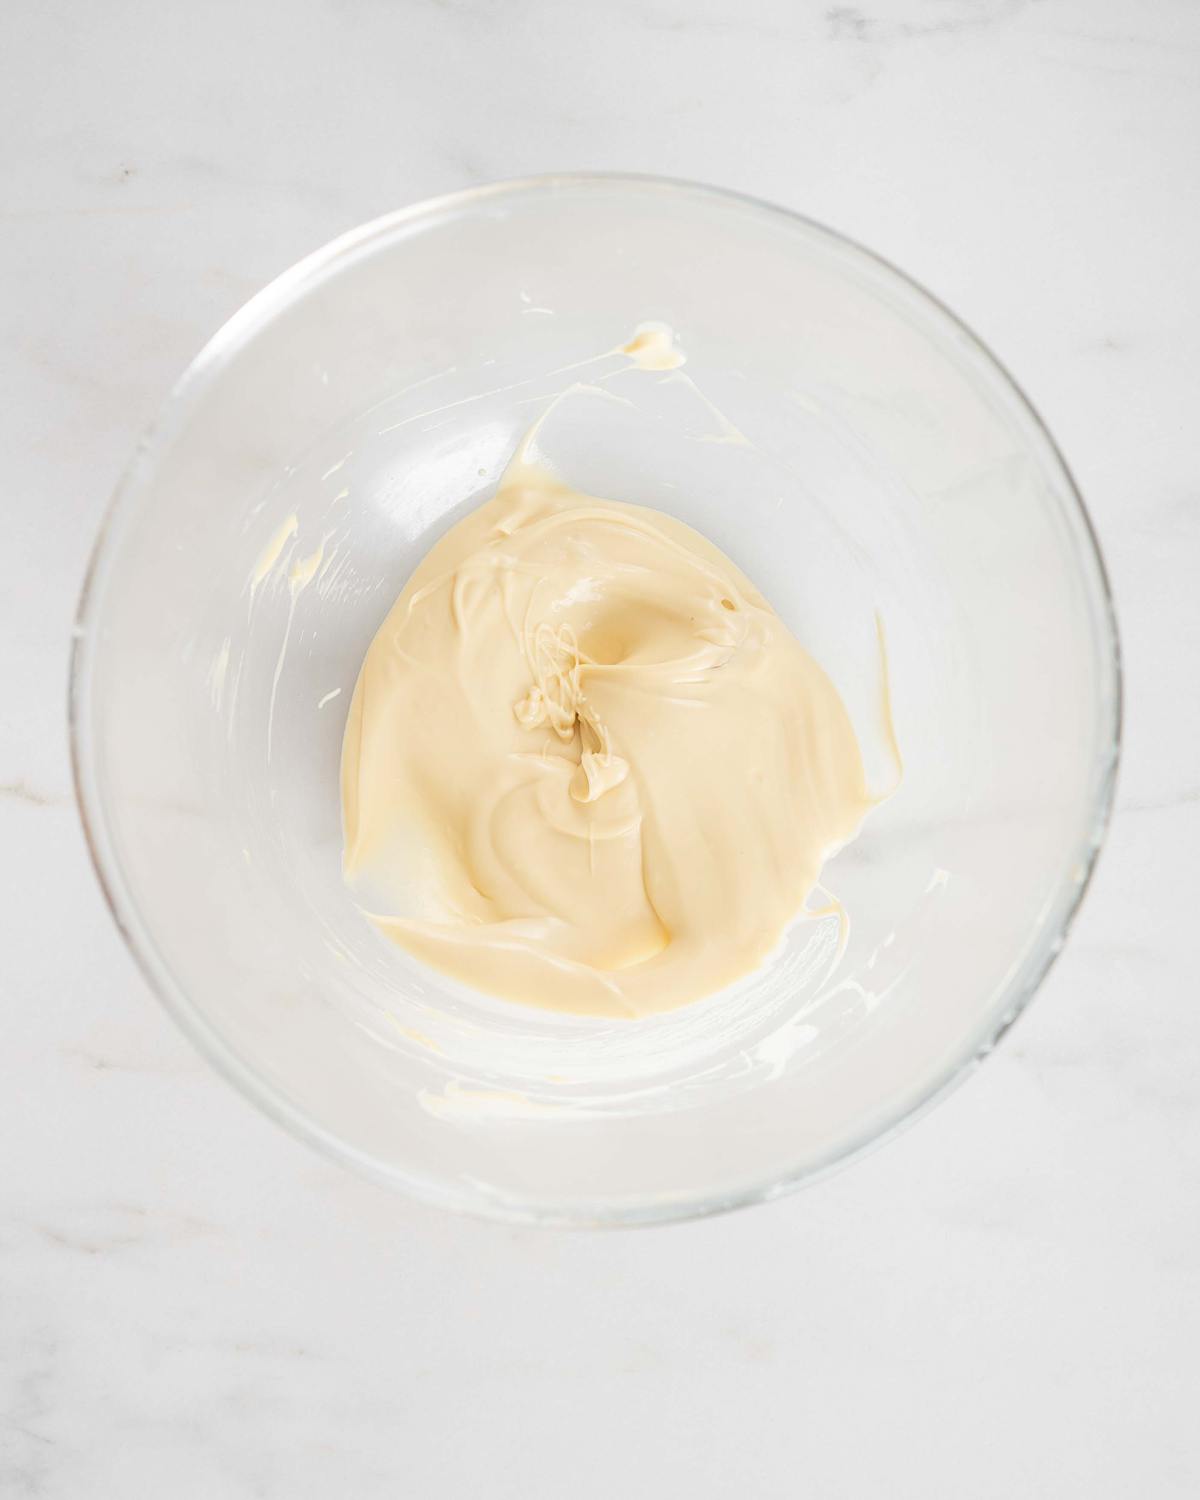
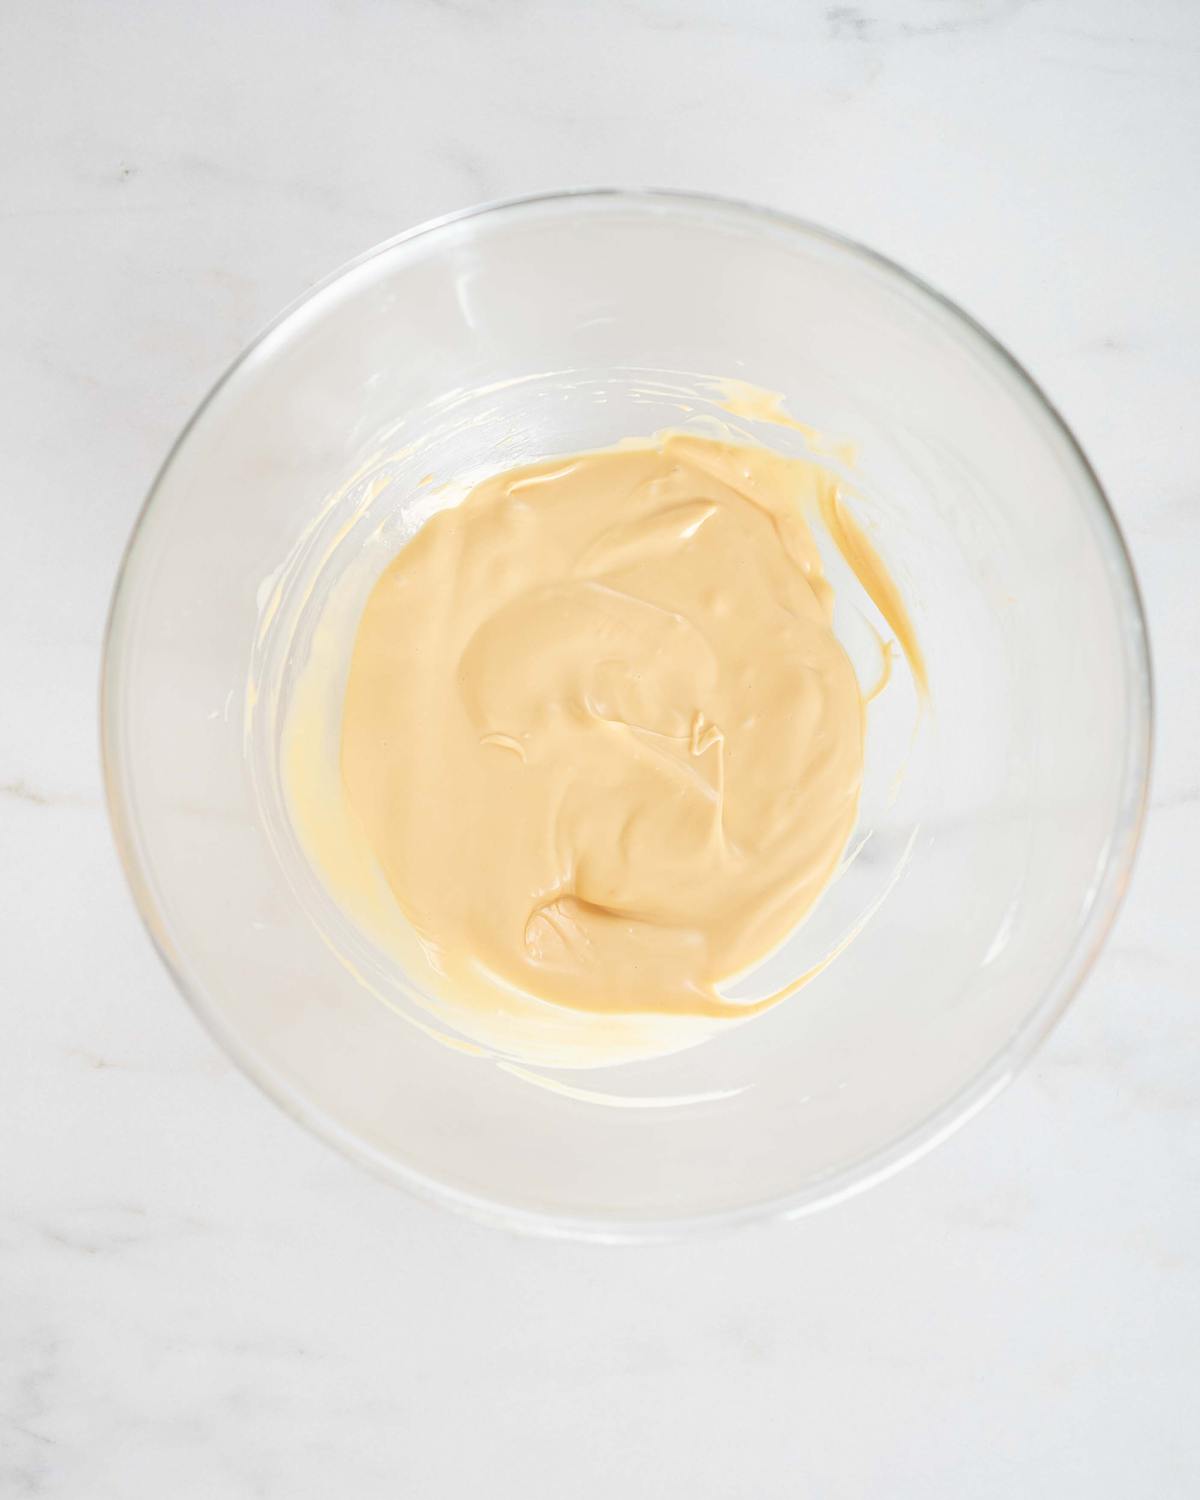
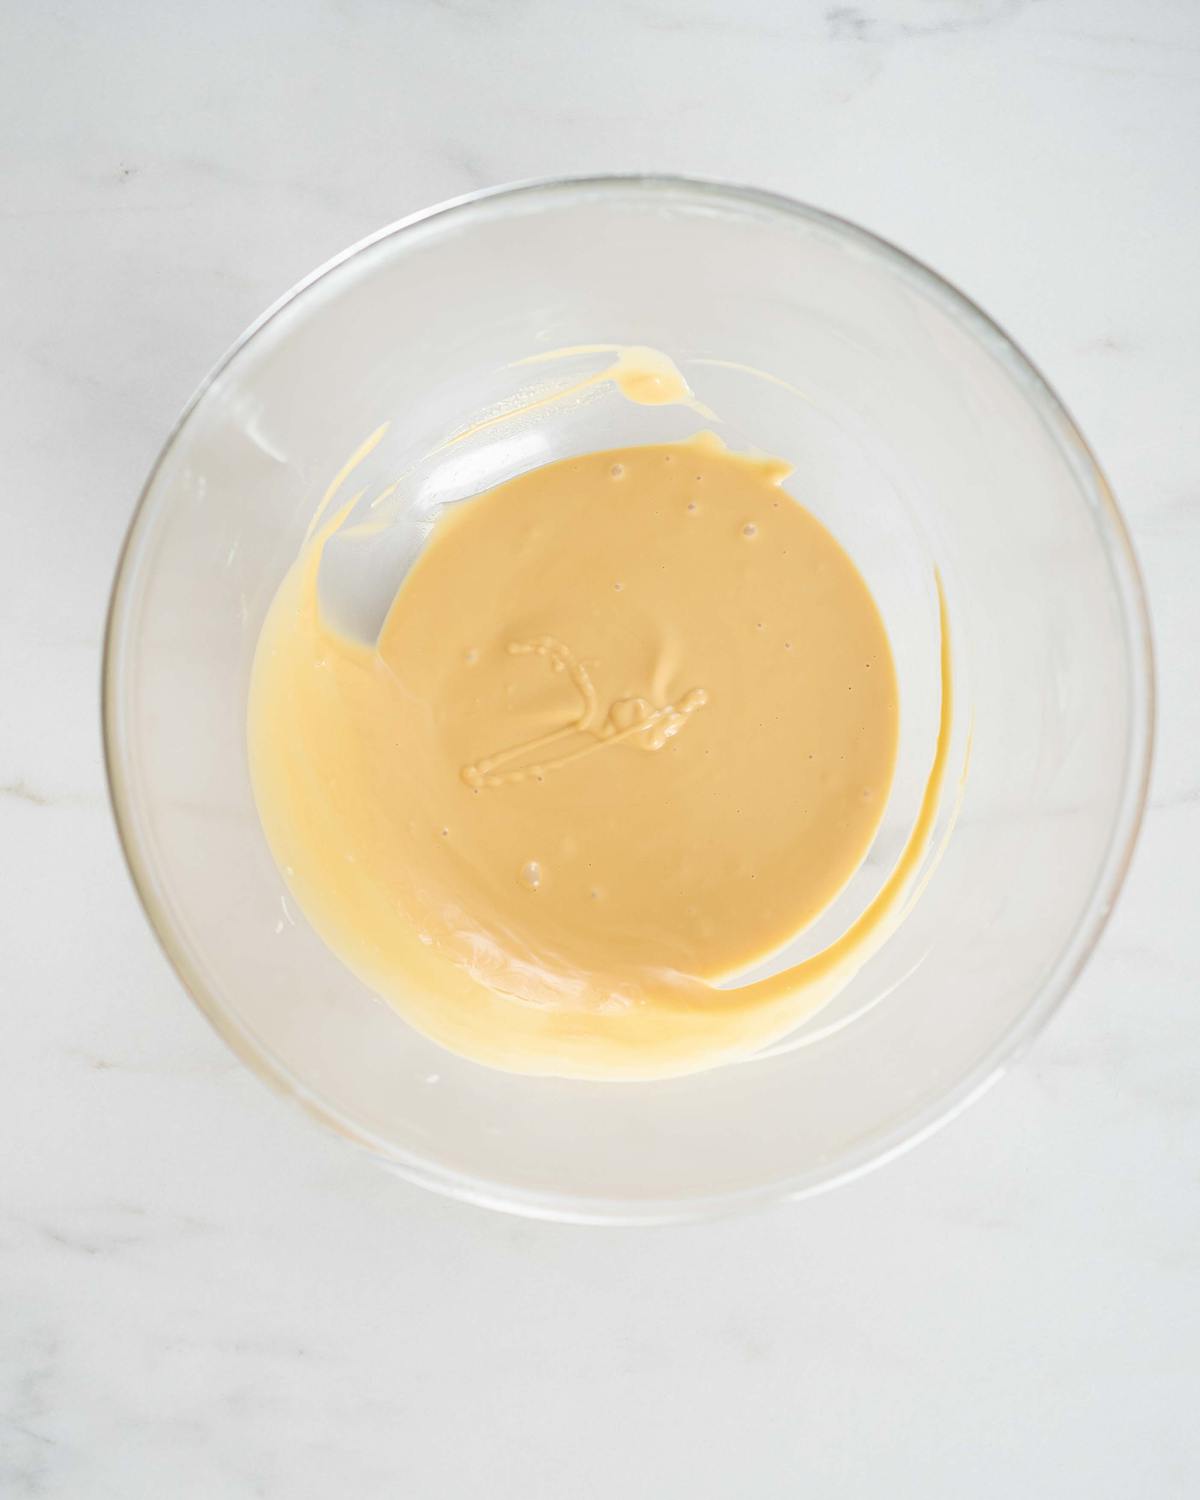
Step 2: Place the chocolate in a microwave safe bowl. Heat for 20 seconds and stir, then another 20 to melt completely. Once melted, microwave the chocolate for 10-15 second increments (adjust according to your microwave’s power). Stir well in between heating, until the chocolate turns a beautiful golden caramel colour. You may find you need to heat it less as it starts to caramelise, or risk burning the chocolate. Make sure to stir it really well in between each heating, to evenly spread the heat spots and ensure the chocolate does not burn. The chocolate should never go gritty and seize up, but remain smooth and runny throughout this process.
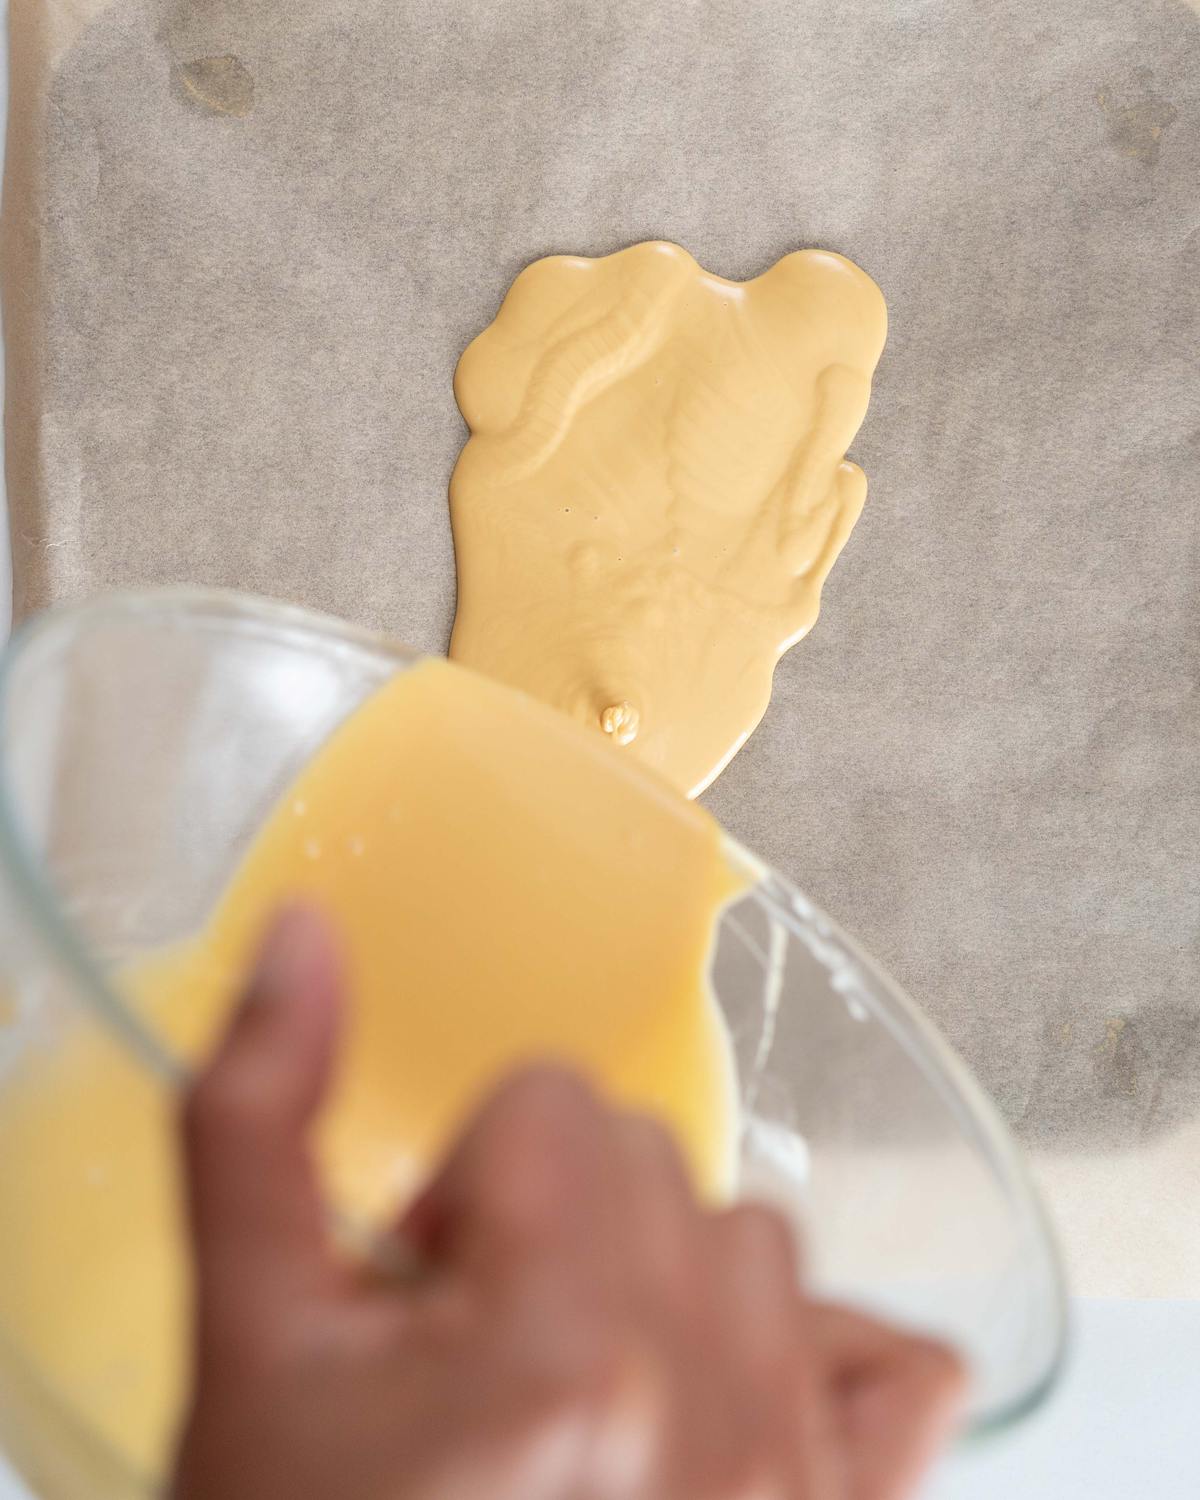
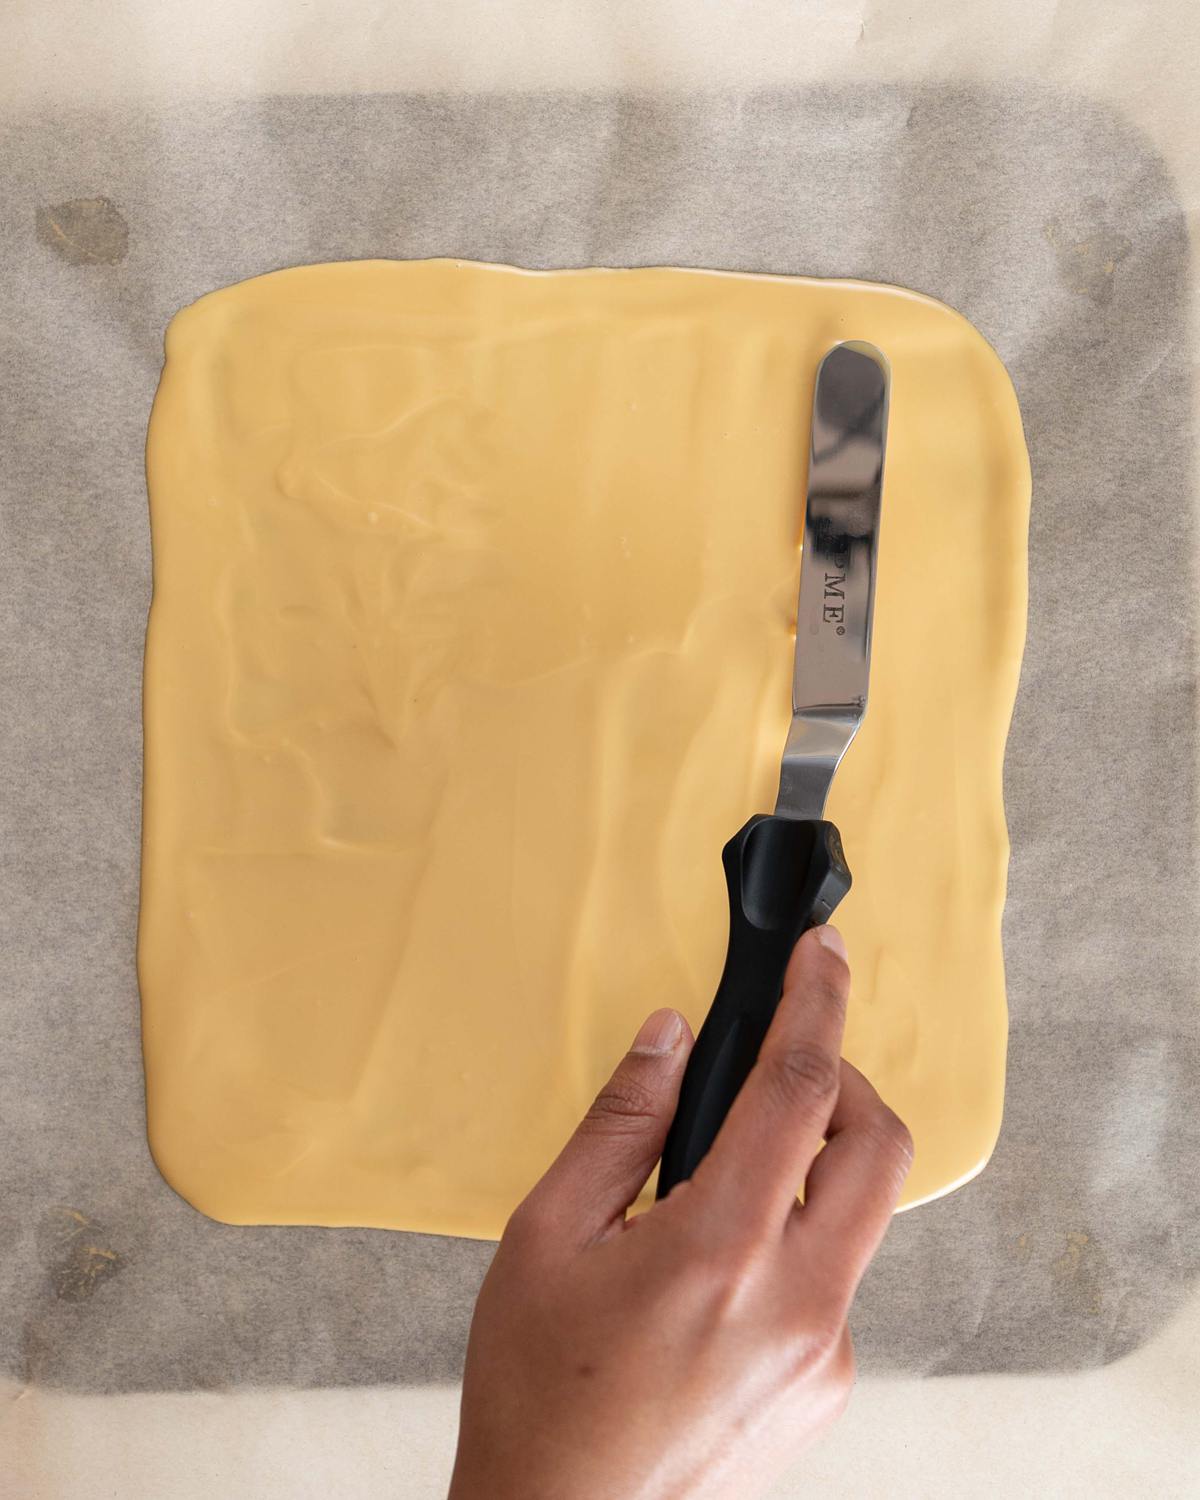
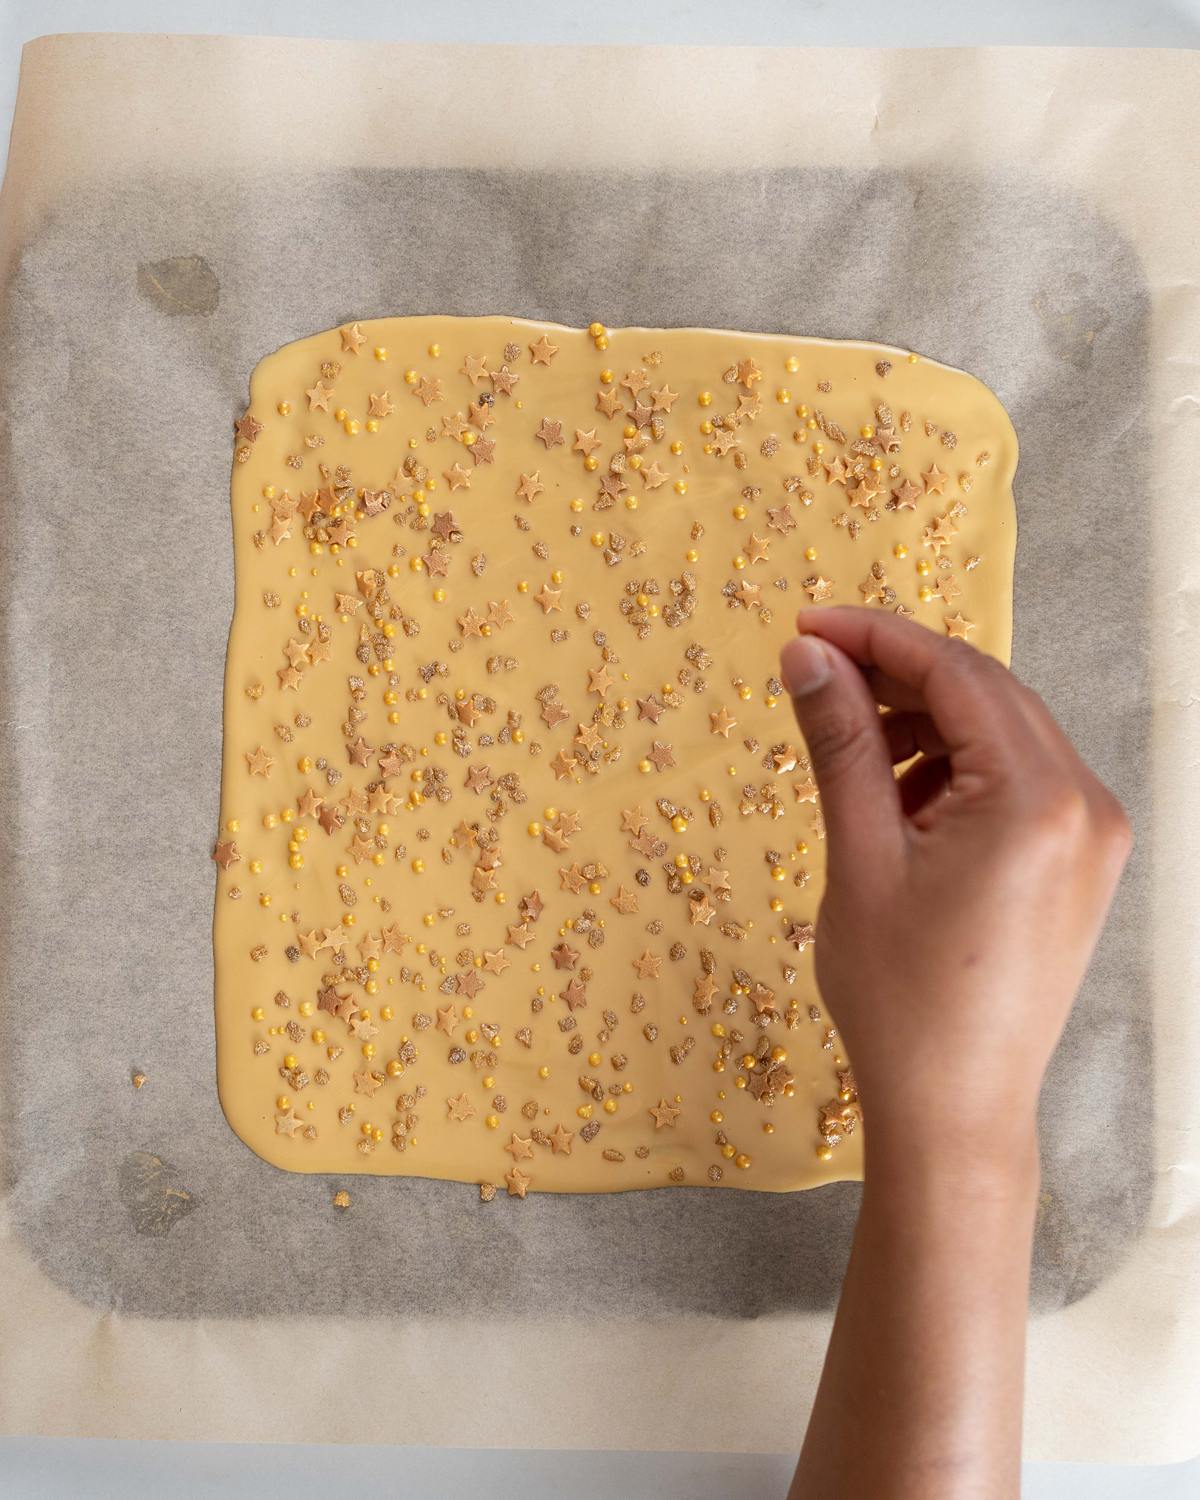
Step 3: Pour the caramelised chocolate onto the prepared baking tray. Using an offset spatula or knife, smooth the chocolate out into an even layer, about 4-5mm thick. Leave the chocolate to cool for a few minutes and form a skin, then sprinkle generously with your chosen sprinkles.
Step 4: Pop the tray in the fridge for the chocolate to set for about 10 minutes, then use a sharp knife to score lines, dividing up the chocolate into shard shapes. Place back in the fridge to set completely before removing from the paper and breaking into shards.

For the toffee sauce
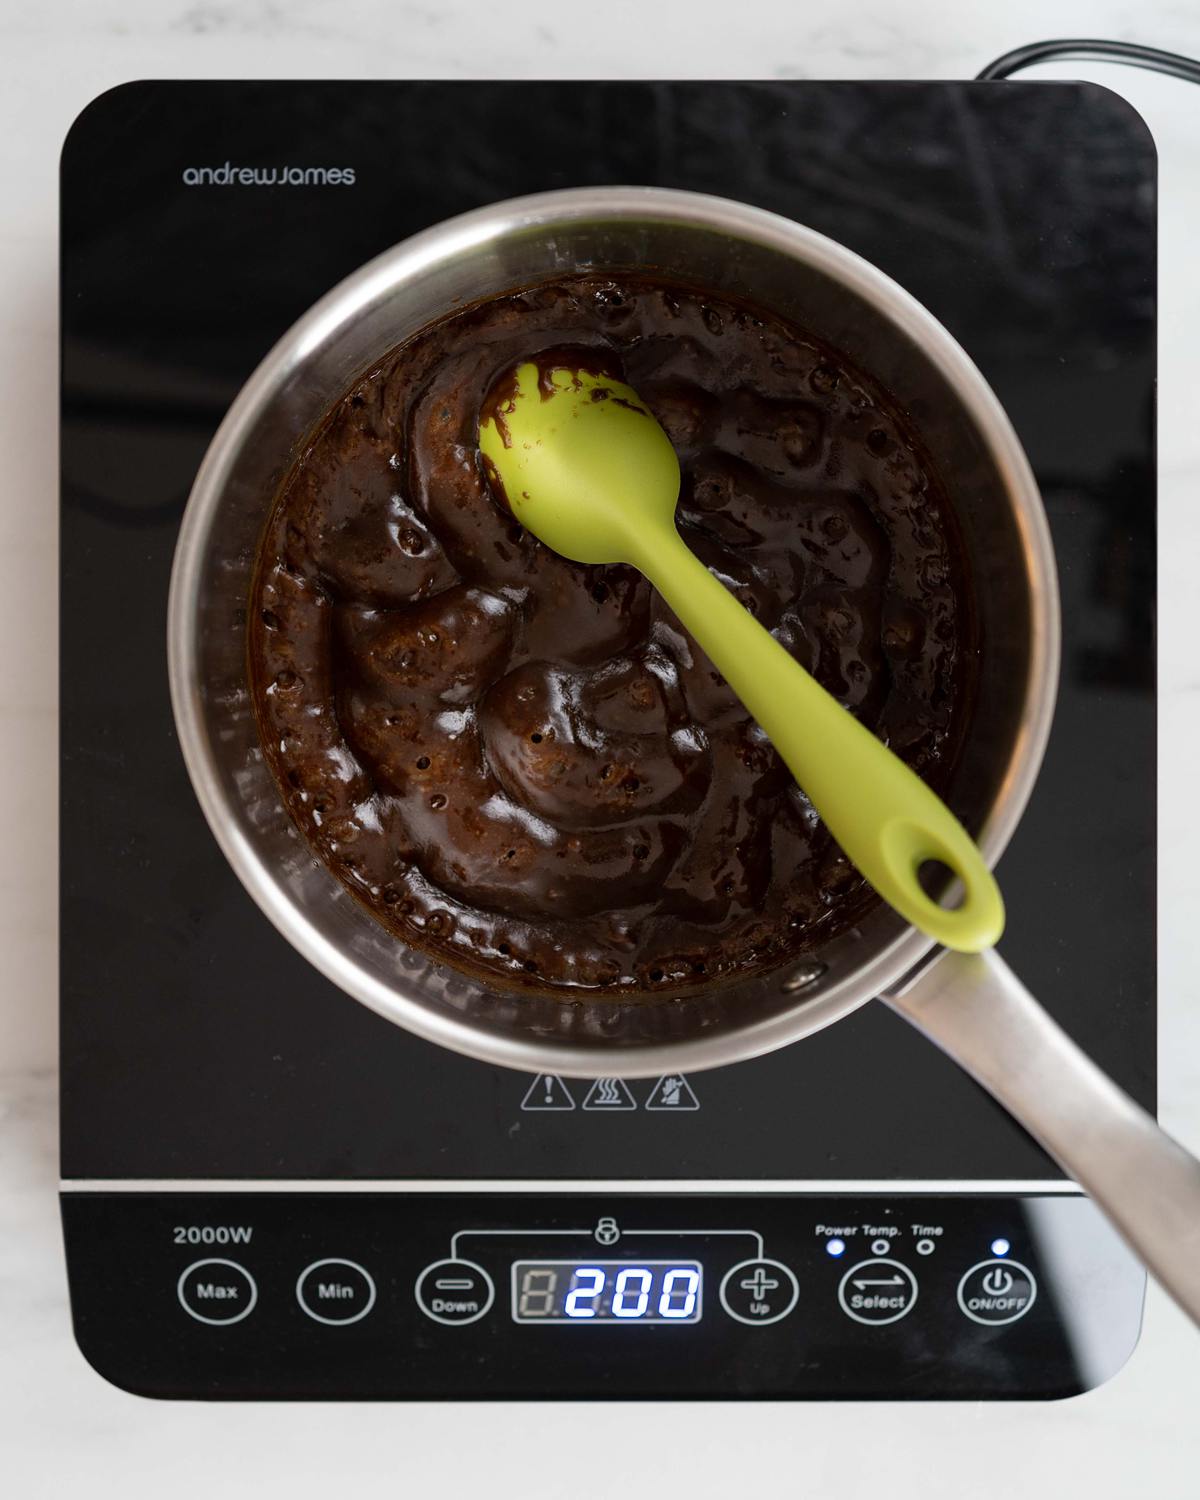
Step 1: Place the sugar, treacle and butter into a saucepan. Heat to melt the butter and sugar.

Step 2: Heat the mixture to bubbling, stirring, for 3-4 minutes.
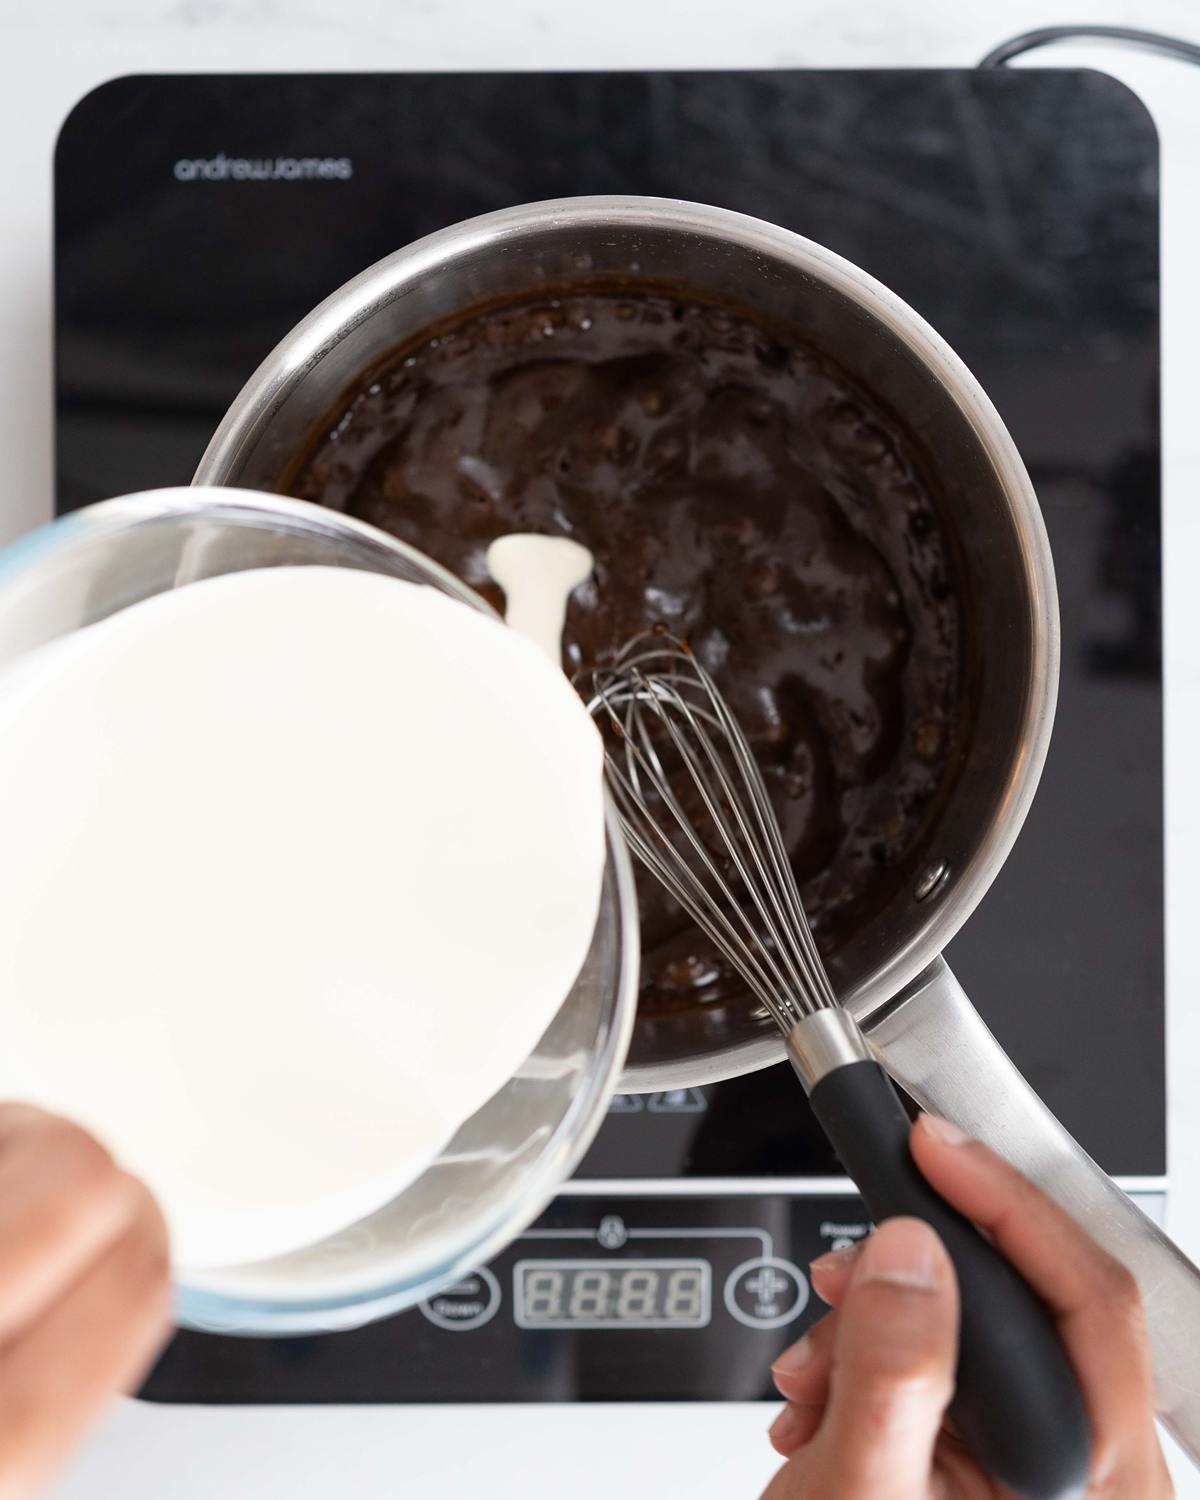
Step 3: Remove the pan from the heat. Add in the cream and whisk through.
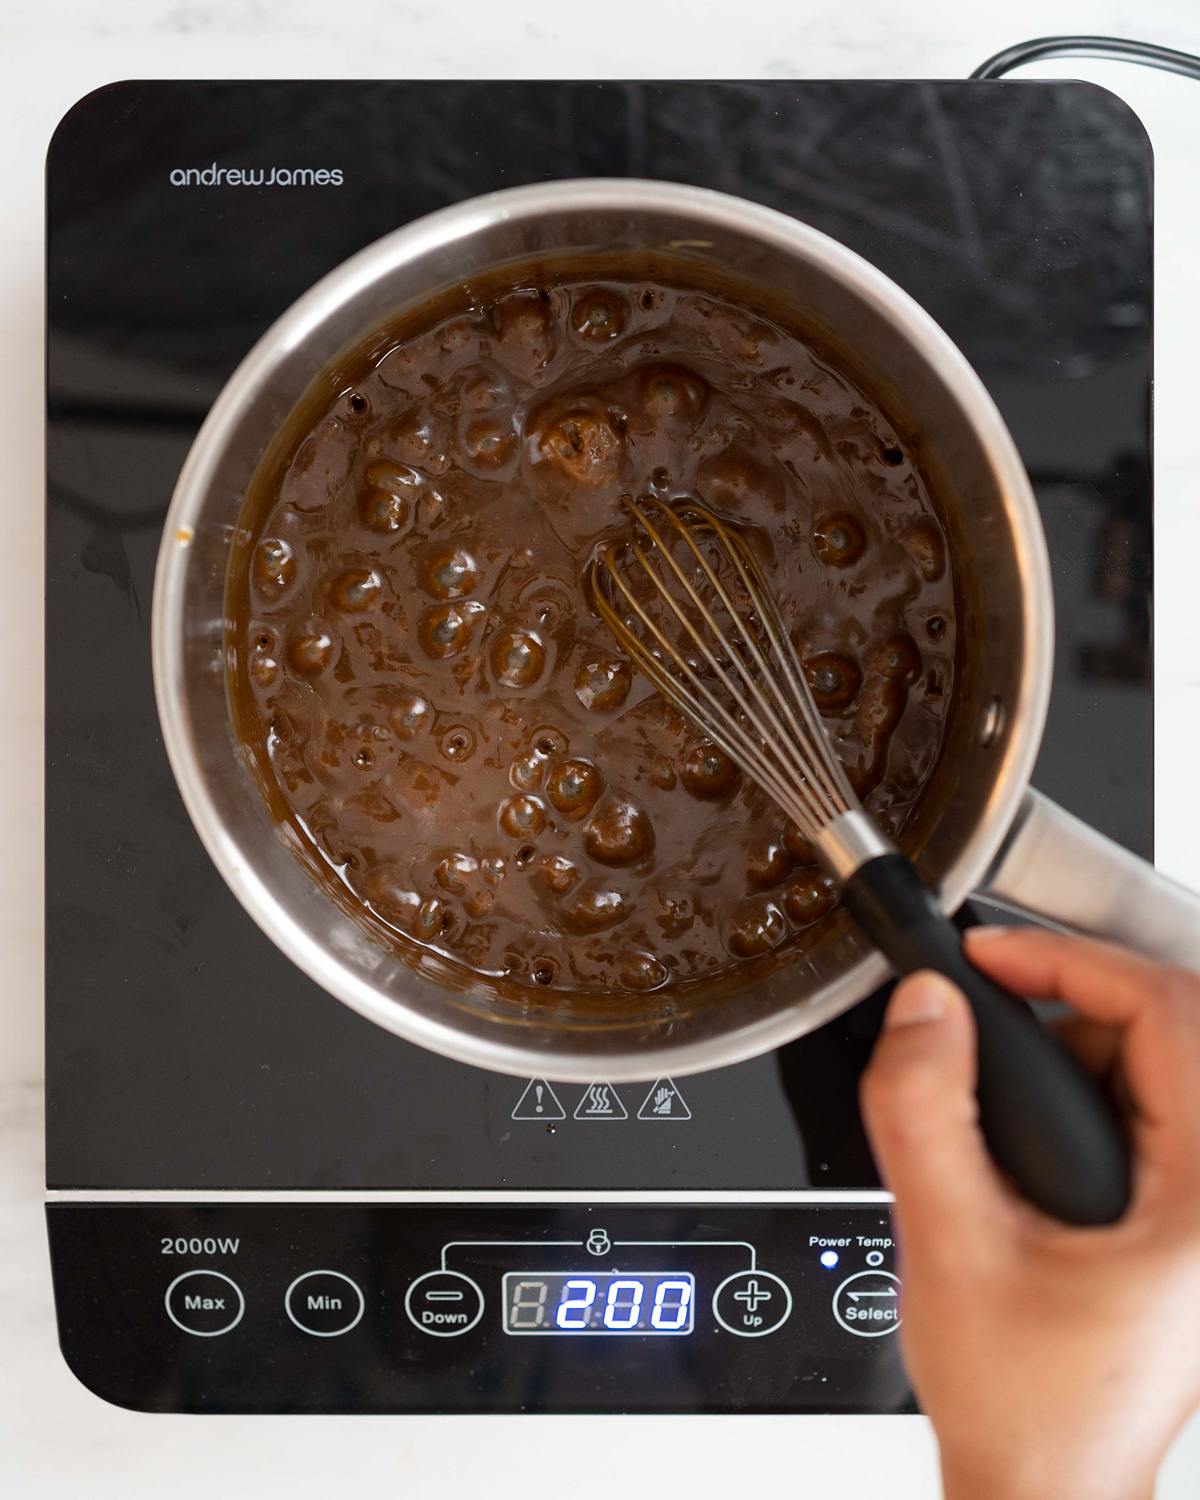
Step 4: Return the pan to the heat and bring to boil, letting the sauce bubble and thicken for another 4-5 minutes. Remove from the heat, stir through the salt and then set aside to cool. Transfer into drip bottles, if using. The sauce can be made up to a week in advance, see notes for further information on this.
For the buttercream
Step 1: Make the caramelised chocolate as previously for the shards. Cool a little so it does not melt the butter and buttercream when mixed together.
Step 2: Beat the butter using a stand mixer or electric whisk for at least 5 minutes until it is fluffy and really pale and soft. This step is important, it gives a wonderfully light buttercream, so be patient!
Step 3: Gradually add in the icing (powdered) sugar and salt, beating in with the butter until the buttercream is smooth and light.
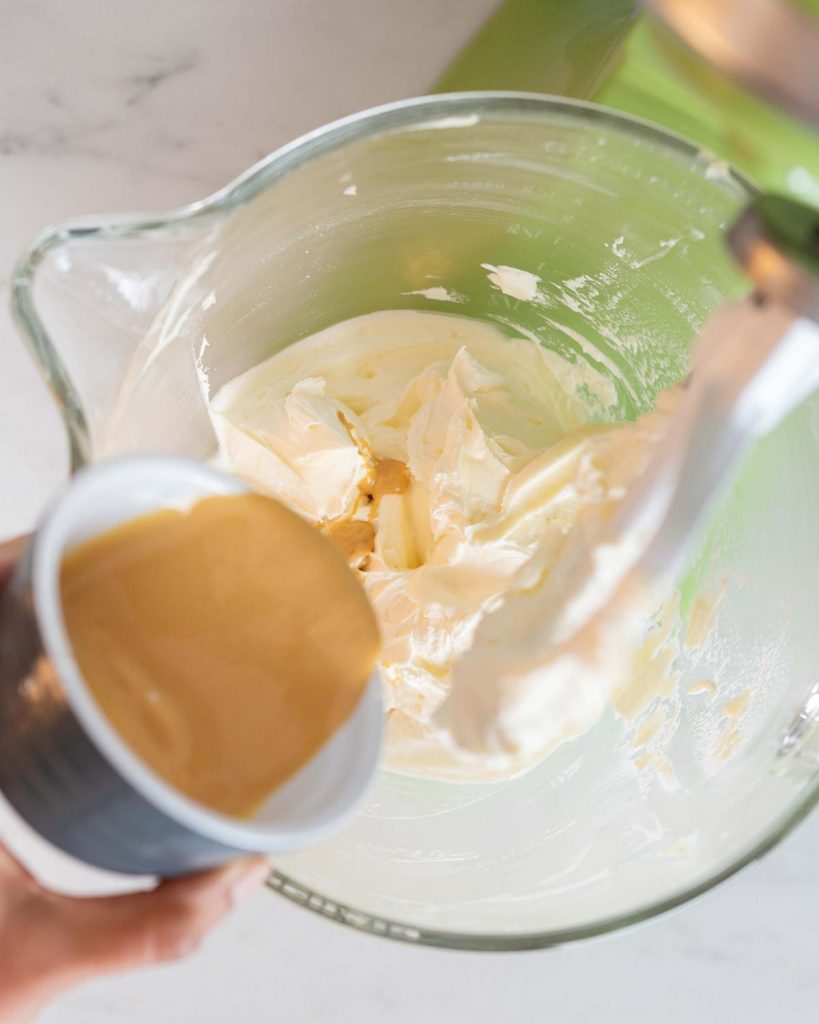
Step 4: Pour in the caramelised white chocolate, mixing it through the buttercream. Once combined, turn the speak up and beat for 2 minutes until really smooth and fluffy.
Step 5: This step is not essential, but helps smooth the buttercream and get rid of a lot of the air bubbles. Using a spatula, vigorously stir the buttercream in the mixing bowl, pushing it against the sides of the bowl to push the air bubbles out. The buttercream is now ready to be used! Transfer to a piping bag, if using.
Assembling the sticky toffee pudding cake
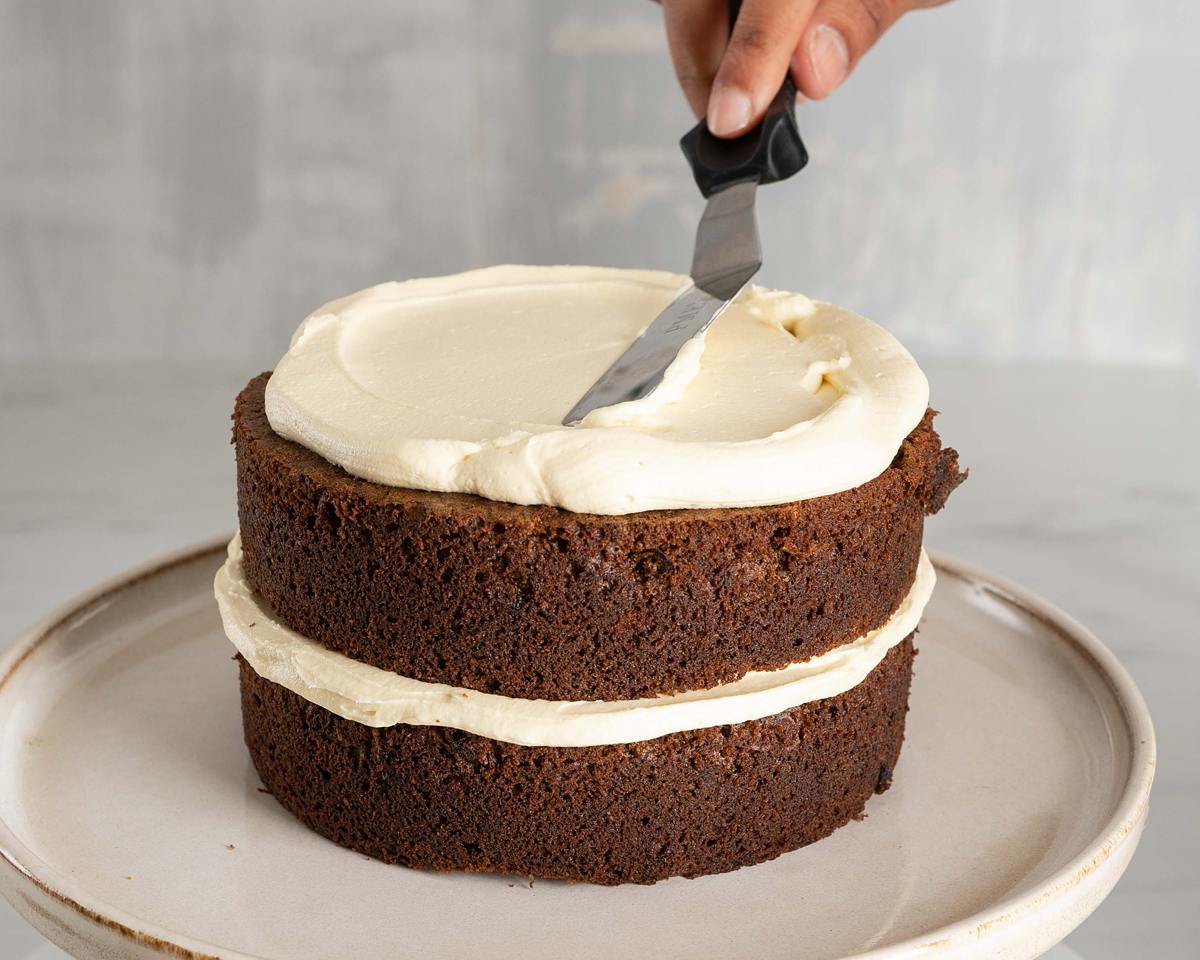
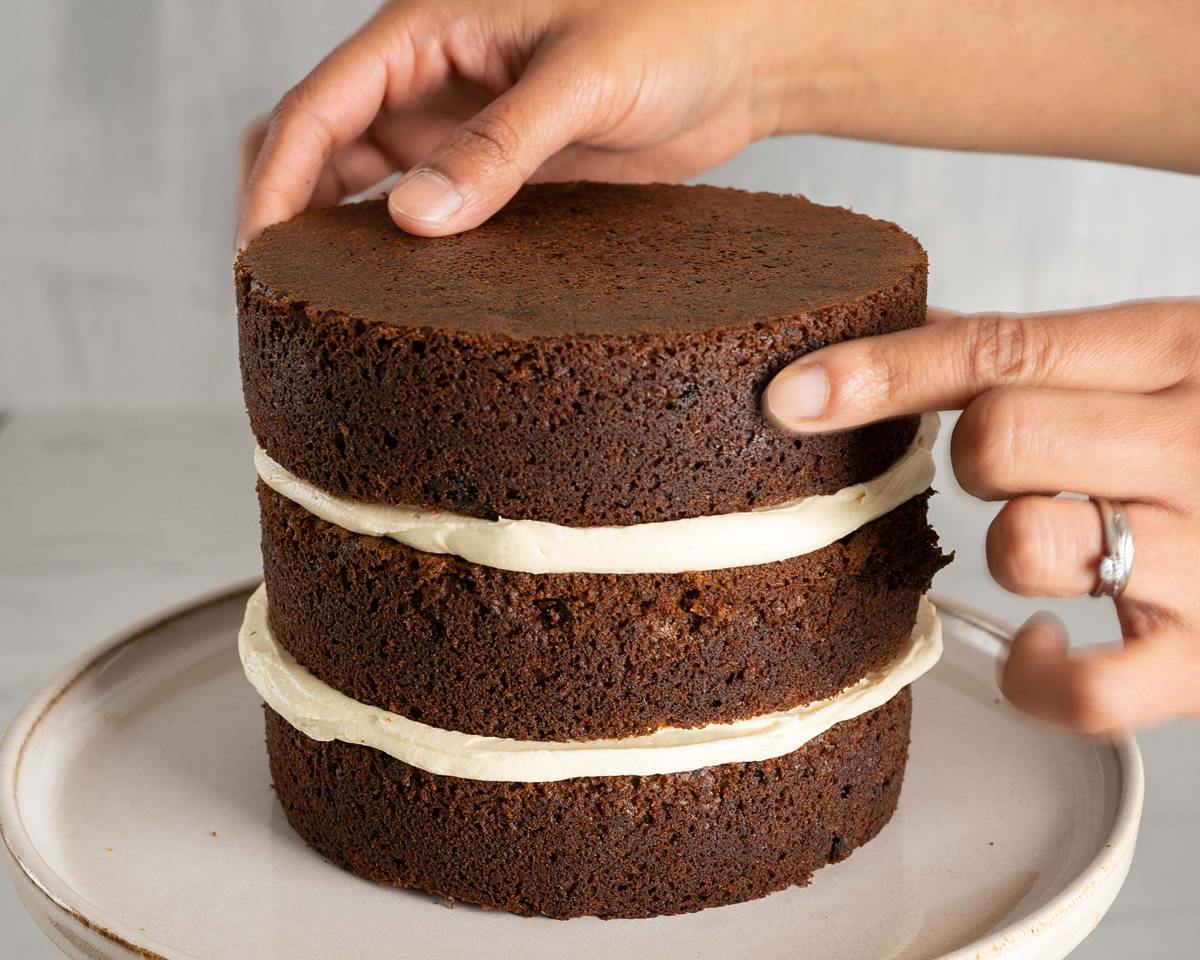
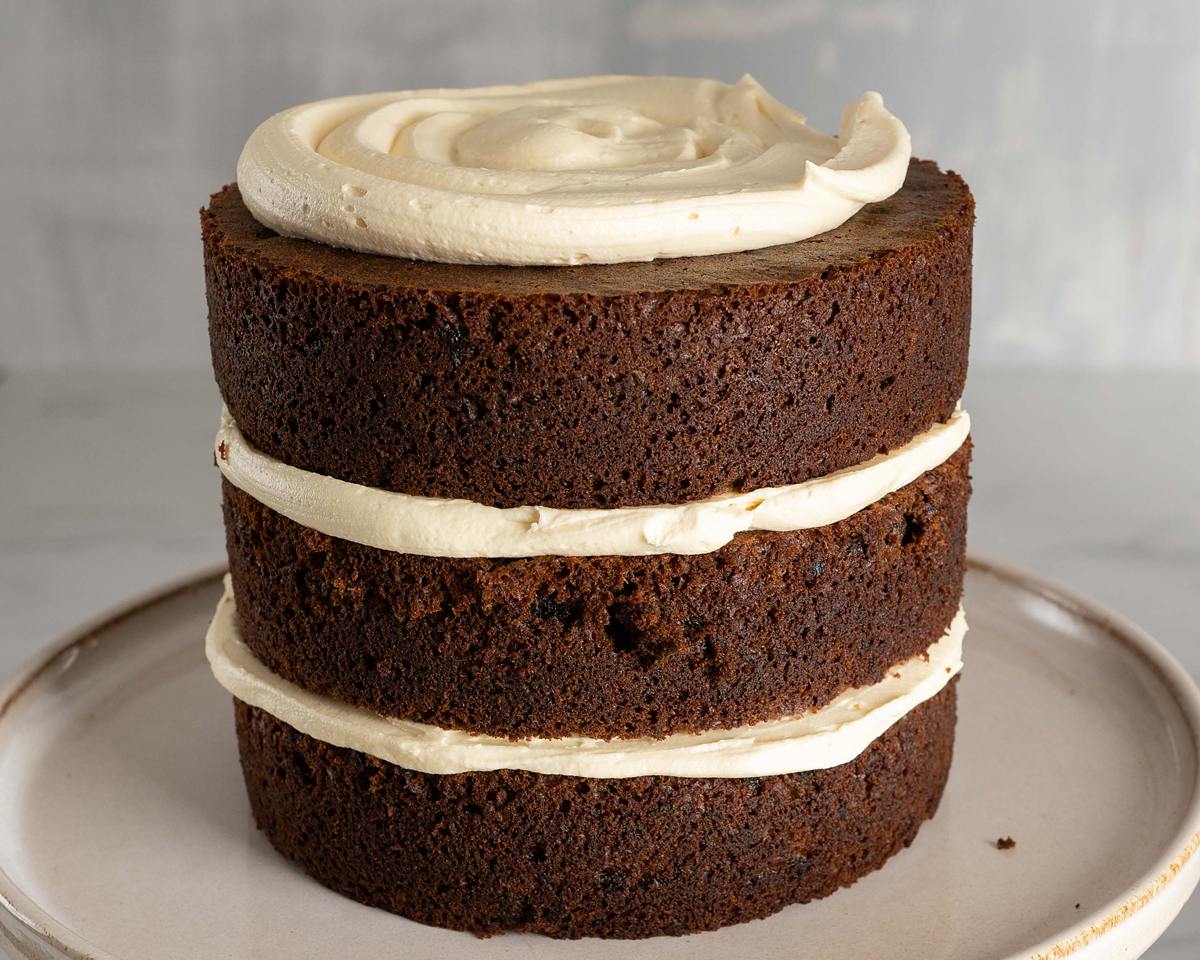
Step 1: Place a blob of buttercream on the plate or cake board. This stops it sliding around as you decorate. Place the first layer of cake on the plate, then pipe or spread an even layer of buttercream over it. Repeat for the next two cake layers. Optionally, you can drizzle some toffee sauce in between layers, if you want extra decadence!
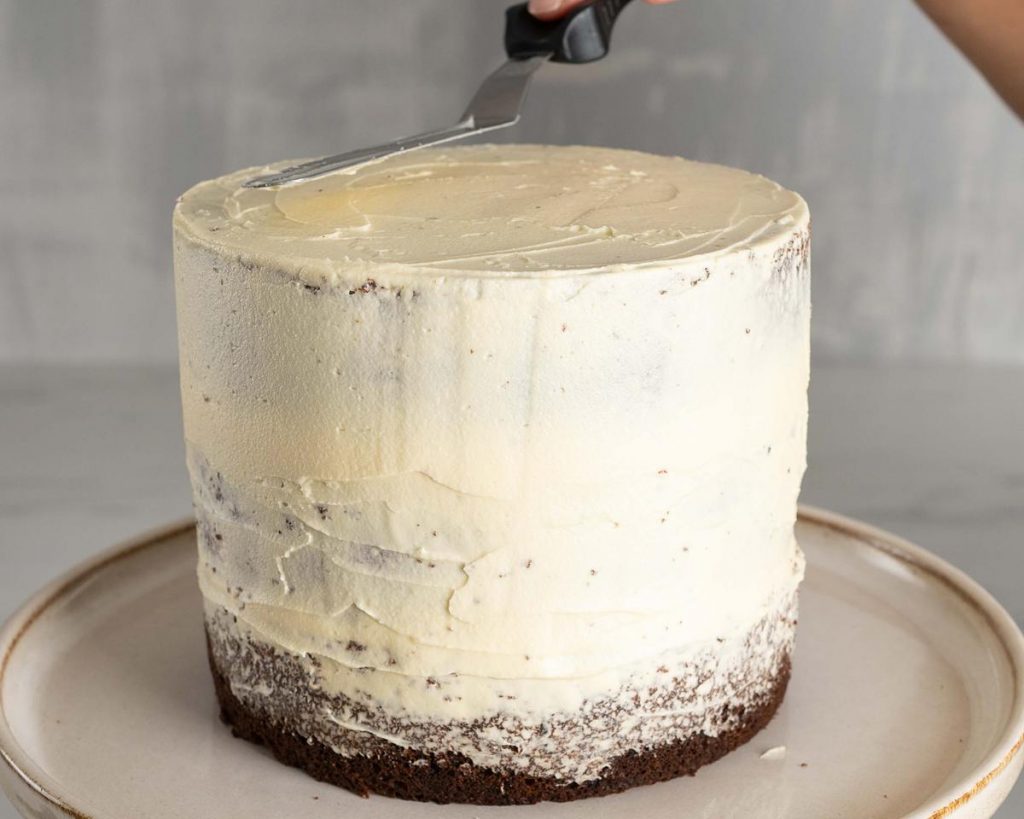
Step 2: Crumb coat the top and down the sides of the top two layers of cake. This stops any cake crumbs showing on the outside layer of the finished sticky toffee pudding cake. Remember not to cover the bottom layer at all. Pop the cake in the fridge for 30-60 minutes for the buttercream to firm up.
Step 3: Once the crumb coat has set, cover the top and top two layers of cake with some more buttercream. Smooth and level until smooth. Place the cake in the fridge for 30 minutes to allow the buttercream to set.
Step 4: While the cake is setting, warm the toffee sauce. It should still be quite thick and not too hot or it will melt the buttercream and slide right off the cake. Test the consistency of the toffee sauce on the side of a mug. It should drip lazily down rather than falling down in a toffee lump!
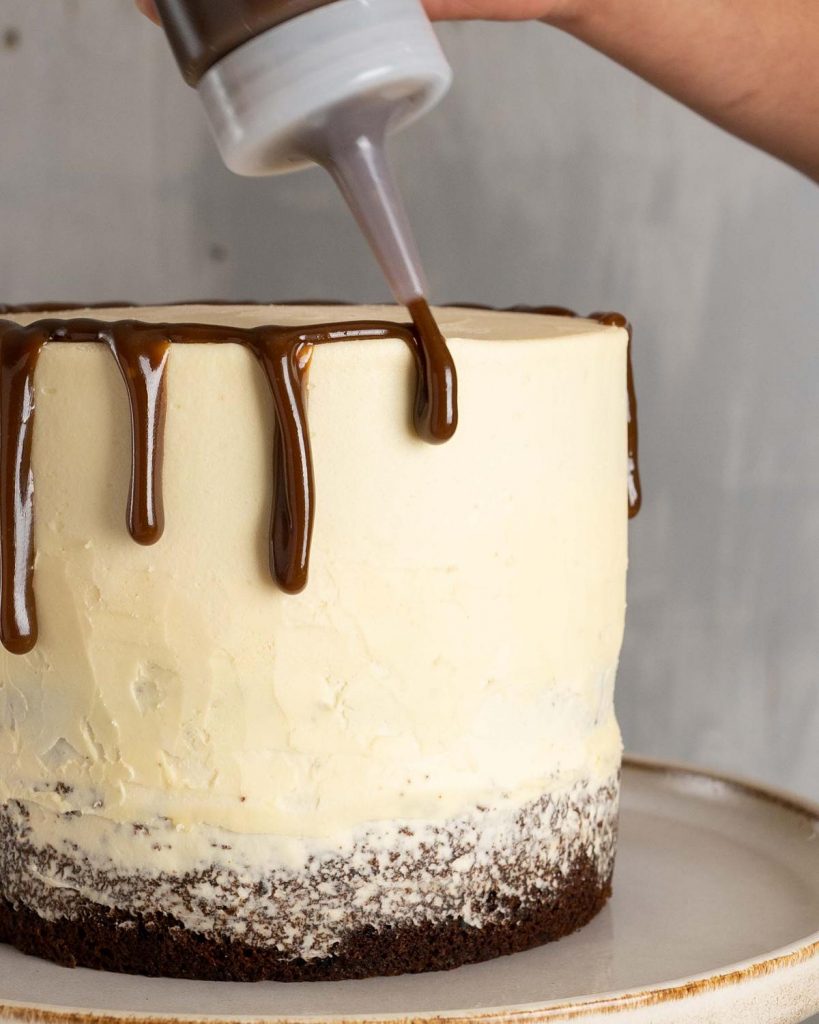
Step 5: Once the cake has chilled, create the drip on the cake, spacing evenly and dripping into different sizes. Spread a layer of sauce over the top of the cake then level with an offset spatula.
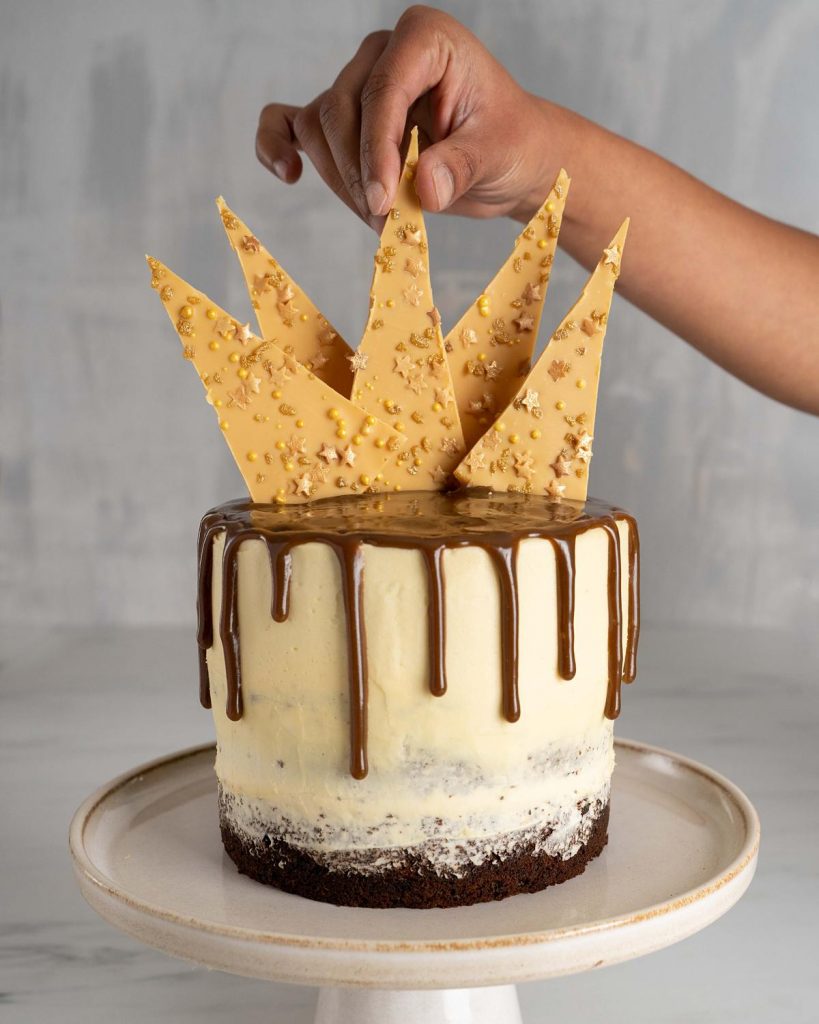
Step 6: Gently, to break the shards, push the white chocolate decorations into the top of the cake. If needed, use a sharp knife to create slits in the top of the cake to push each shard into. Your celebration cake is done, enjoy!
How do I line my cake tins?
Place the cake tin on some parchment paper and trace around the base of the tin. Cut out this shape (three times, for three cake layers) and set aside. Melt some butter and use it to brush inside the base of the cake tin. Place the cut out circle of parchment paper on the buttered base and use the brush to flatten and ease it into the corners. Brush a little more butter over the parchment circle and up the sides of the cake tin. The tins are now ready to be used.
How can I tell when my cakes are baked?
You will know when the sticky toffee sponge cakes are done as they will be firm to touch and will have shrunk away from the sides of the pan slightly. Additionally, a toothpick or wooden skewer inserted into the cake will come out clean or with one or two crumbs only.
How long does this sticky toffee pudding cake last? How do I store sticky toffee date cake?
This cake is best eaten within 2-3 days of being made to be enjoyed at its best. It can be stored at room temperature, but if it is especially warm I would recommend storing it in the fridge so the shards remain intact. If storing in the fridge, leave the cake out for about 20-30 minutes before serving. This date cake with toffee sauce is best enjoyed at room temperature.
How to freeze cake
If you wish to make this cake ahead of time and freeze it, this is no problem. I would recommend not freezing the assembled sticky toffee pudding cake, but the individual cake layers instead. Then, when you are ready, you can defrost the layers, make the buttercream, and decorate the cake.
To freeze the cake layers, first make sure they are completely cool. Wrap each layer of cake tightly and securely in cling film, then a layer of tin foil and another tight layer of cling film. You do not want any moisture getting to the cakes, or they will turn out a soggy mess or risk freezer burn, hence thoroughness. Freeze the cakes on a flat surface until frozen before stacking in the freezer.
How to defrost your frozen cake layers
When you are ready to defrost and decorate the sticky toffee sponge cake, simply remove the layers from the freezer and unwrap them. Place each cake in a single layer on a cooling rack, brushing off any remaining ice crystals, and leave to come to room temperature. The cakes are ready to be decorated once defrosted.
Additional tips for making this sticky toffee cake recipe
- The toffee sauce can be made up to a week in advance. Store in a sealed container in the fridge until ready to use. Warm it to the right temperature for a drip either in the microwave or by placing the drip bottle in a mug of boiling water.
- Be patient when making caramelised white chocolate. If heated too quickly, the chocolate will burn and will need to be thrown away. You can tell if the chocolate starts burning or seizing up if it turns grainy and has dark spots. If you notice a stiff patch of chocolate when stirring, just give it a good stir and put it on for less time on next heating. If needed, reduce the microwaving time down to 10 seconds a blast. The whole process does take about a half hour, but it is totally worth the effort!
- If you do not have a microwave, you can caramelise chocolate in the oven. Spread the chocolate on a tray with a lip and heat in a low oven, stirring occasionally, until golden and beautiful. This method does take a little longer, closer to an hour.
- Be careful not to spread the caramelised chocolate too thinly, or you will have very fragile shards for the top of the cake.
- Allow the chocolate to set a little before adding the sprinkles so that they are not totally sunken into the chocolate.
- Set the chocolate until still soft but not completely solid again before marking the shards. This will give clean lines for the chocolate to break along, giving you control of what each shard looks like in shape and size.
- When making the buttercream, beating the butter for at least 5 minutes before adding in the sugar. Trust me, it is worth the extra time spent!
- You can drizzle a little toffee sauce in between the cake layers if you want the additional toffee hit. I find the sauce is enough just on top, but if you are a huge toffee fan, there is no reason not to!
Troubleshooting
If you have any questions about this sticky toffee pudding cake recipe, please comment below and I will do my best to help. And do remember: if you enjoy this sticky date cake recipe, please leave a rating and review below. You could even post a picture on Instagram and tag me when you share it with the world. You already know I would love to see!
More recipes from my blog for you to enjoy
If you enjoyed this cake, please do have a look at these recipes I think you will love too!
Sticky toffee pudding: this cake is light and delicious, especially served with lashings of smooth toffee sauce and vanilla ice cream. This classic British bake is the ultimate comfort food, and it is so easy to make!
Banoffee cupcakes: banoffee lovers, this one is for you! All your favourite parts of the iconic pie in a cupcake. A true banana and caramel dream!
Red velvet cake (eggless): You will love this rich and moist eggless red velvet cake recipe. It has three layers of beautiful decadent red velvet sponge with a smooth and totally irresistible cream cheese icing. This is one showstopper of a cake you will not want to miss!
Thanks so much for joining me today. Enjoy my friends! x
Recommended equipment I used *
| Cake tins | Digital kitchen scales |
| Measuring spoons | Stand mixer |
| Handheld electric mixer | Sieve |
| Spatula | Jug |
| Mixing bowl | Piping bag |
| Offset spatula | Baking tray |
| Small saucepan | Drip bottles |

Sticky Toffee Pudding Cake
Ingredients
For the cake
- 330 g (1 ½ cups + 2 tbsp) dates, destoned and chopped
- 1.5 tsp bicarbonate of soda (baking soda)
- 200 ml (¾ cup + 1 tbsp) boiling water
- 140 g (½ cup + 2 tbsp) unsalted butter
- 250 g (1 ¼ cups + 1 tbsp) dark brown sugar
- 4 large eggs
- 2 tsp vanilla
- 140 g (¼ cup + 3 tbsp) treacle (molasses)
- 280 g (2 cups) plain (all purpose) flour
- 2 tsp baking powder
- 0.5 tsp salt
For the caramelised white chocolate shards
- 150 g (1 cups + 2 tbsp) white chocolate
- sprinkles, to decorate
For the toffee sauce
- 75 g (¼ cup + 2 tbsp) dark muscovado sugar
- 0.5 tbsp treacle (molasses)
- 40 g (3 tbsp) unsalted butter
- 120 ml (½ cup) double cream
- 0.125 tsp salt
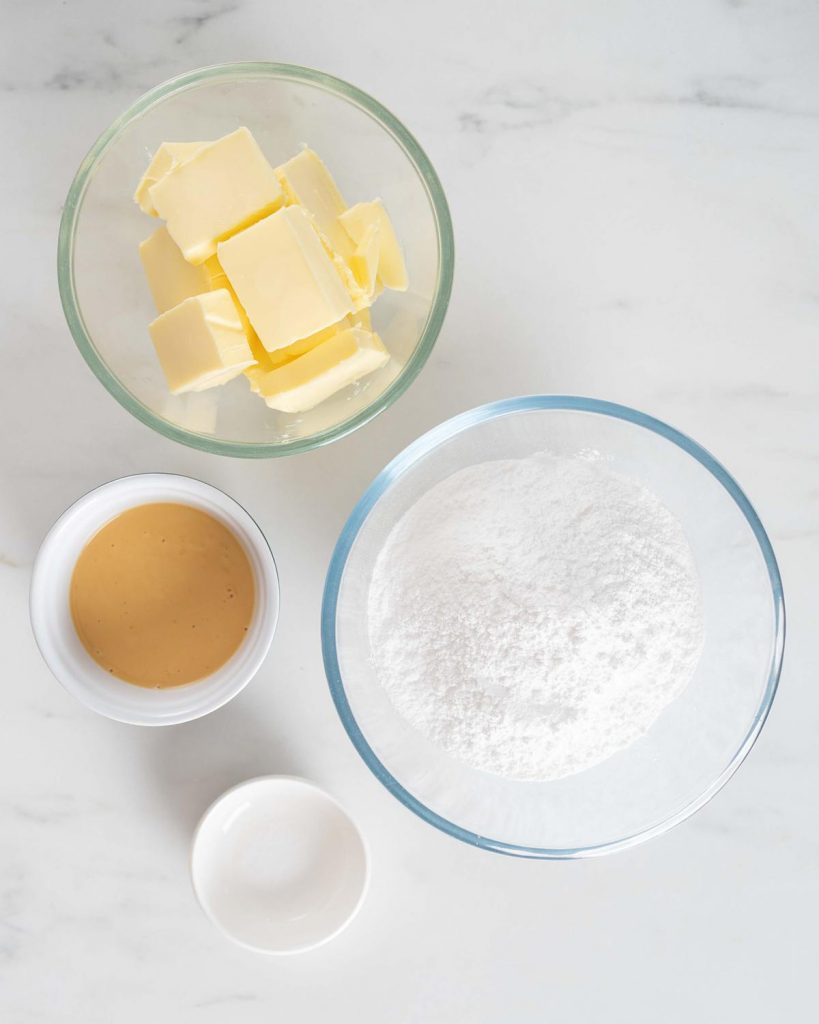
For the buttercream
- 280 g (1 ¼ cups) unsalted butter
- 280 g (2 cups + 1 tbsp) icing sugar
- 100 g (¾ cup) white chocolate, caramelised (as for shards)
- 0.5 tsp salt
Instructions
For the cake
- Brush three 6" circle cake tins with some melted butter. Line the bases with parchment paper and brush with a little butter again to make sure it sticks down well. Set the tins aside. Preheat the oven to 180C/350F whilst making the cake batter.
- In a small bowl, combine the chopped dates, bicarbonate of soda (baking soda) and boiling water. Stir it all together, pressing down to submerge the dates, then cover with a plate (to keep the heat to soften the dates) and set aside whilst making the cake mixture.
- In the bowl of a stand mixer, cream together the butter and sugar until fluffy and slightly paler. Add in the eggs one at a time, mixing between additions, then mix in the vanilla and treacle. If the mixture looks a little curdled at this stage, don’t worry! It will all come together in the next steps.
- Sift in the flour, baking powder and salt and mix to combine (do not overmix at this stage). Tip in the date mixture (liquid and all), and fold in using a spatula.
- Divide the cake mixture between the three prepared tins. I do this by spooning equal amounts into each tin, but if you wish you could be really accurate and weigh out mixture for each tin. Bake the cakes for 30-35 minutes until the cakes have shrunk slightly from the sides and the tops are firm to touch. A wooden skewer inserted into the middle of each cake should come out clean. Leave the cakes to cool for 5 minutes in the tins, then turn out onto a wire rack to cool completely.
For the caramelised white chocolate shards
- Line a baking tray with parchment paper and set aside ready for the caramelised white chocolate.
- Place the chocolate in a microwave safe bowl. Heat for 20 seconds and stir, then another 20 to melt completely. Once melted, microwave the chocolate for 10-15 second increments (adjust according to your microwave’s power). Stir well in between heating, until the chocolate turns a beautiful golden caramel colour. You may find you need to heat it less as it starts to caramelise, or risk burning the chocolate. Make sure to stir it really well in between each heating, to evenly spread the heat spots and ensure the chocolate does not burn. The chocolate should never go gritty and seize up, but remain smooth and runny throughout this process.
- Pour the caramelised chocolate onto the prepared baking tray. Using an offset spatula or knife, smooth the chocolate out into an even layer, about 4-5mm thick. Leave the chocolate to cool for a few minutes and form a skin, then sprinkle generously with your chosen sprinkles.
- Pop the tray in the fridge for the chocolate to set for about 10 minutes, then use a sharp knife to score lines, dividing up the chocolate into shard shapes. Place back in the fridge to set completely before removing from the paper and breaking into shards.
For the toffee sauce
- Place the sugar, treacle and butter into a saucepan. Heat to melt the butter and sugar.
- Heat the mixture to bubbling, stirring, for 3-4 minutes.
- Remove the pan from the heat. Add in the cream and whisk through.
- Return the pan to the heat and bring to boil, letting the sauce bubble and thicken for another 4-5 minutes. Remove from the heat, stir through the salt and then set aside to cool. Transfer into drip bottles, if using. The sauce can be made up to a week in advance, see notes for further information on this.
For the buttercream
- Make the caramelised chocolate as previously for the shards. Cool a little so it does not melt the butter and buttercream when mixed together.
- Beat the butter using a stand mixer or electric whisk for at least 5 minutes until it is fluffy and really pale and soft. This step is important, it gives a wonderfully light buttercream, so be patient!
- Gradually add in the icing (powdered) sugar and salt, beating in with the butter until the buttercream is smooth and light.
- Pour in the caramelised white chocolate, mixing it through the buttercream. Once combined, turn the speak up and beat for 2 minutes until really smooth and fluffy.
- This step is not essential, but helps smooth the buttercream and get rid of a lot of the air bubbles. Using a spatula, vigorously stir the buttercream in the mixing bowl, pushing it against the sides of the bowl to push the air bubbles out. The buttercream is now ready to be used! Transfer to a piping bag, if using.
Assembling the sticky toffee pudding cake
- Place a blob of buttercream on the plate or cake board. This is for the first layer of cake to sit on, and stops it sliding around as you decorate. Place the first layer of cake on the plate, then pipe or spread an even layer of buttercream over the cake. Repeat for the next two cake layers, sandwiching with buttercream. Optionally, you can drizzle some toffee sauce in between layers, if you want extra decadence!
- Crumb coat the flat top and down the sides of the top two layers of cake. This stops any cake crumbs showing on the outside layer of the finished sticky toffee pudding cake. To do this, spread a thin layer of buttercream over the cake, not covering the bottom layer at all. If some crumbs get stuck in this, it’s all good, we will cover it up with another layer of buttercream soon. Pop the cake in the fridge for 30-60 minutes for the crumb coat to firm up.
- Once the crumb coat has set, cover the flat top and top two layers of cake with some more buttercream. Smooth and level it out until you are pleased with it. Place the cake in the fridge for 30 minutes again to allow the buttercream to chill and set.
- While the cake is in the fridge setting, warm up the toffee sauce. If in a bowl, you can gently reheat it in the microwave. If in a bottle, place the bottle in a mug of boiling water. You want the toffee sauce to still be quite thick and not too hot or it will melt the buttercream and slide right off the cake. I test the consistency of the toffee sauce on the side of a mug. If it drips lazily down, rather than falling down in a toffee lump, it is good to go!
- Once the cake has chilled, create the drip on the cake, spacing them evenly and making the drips different sizes. After dripping toffee sauce all around the cake, spread a layer of the sauce over the top of the cake. Use an offset spatula to level it off.
- Gently, so as not to break the shards, push the caramelised white chocolate decorations into the top of the cake. If it feels like the chocolate may break, use a sharp knife to create little slits in the top of the cake to push the shard into. Your celebration cake is done, enjoy!
Such a well-written piece, you made Sticky Toffee Pudding sound incredibly comforting and satisfying