

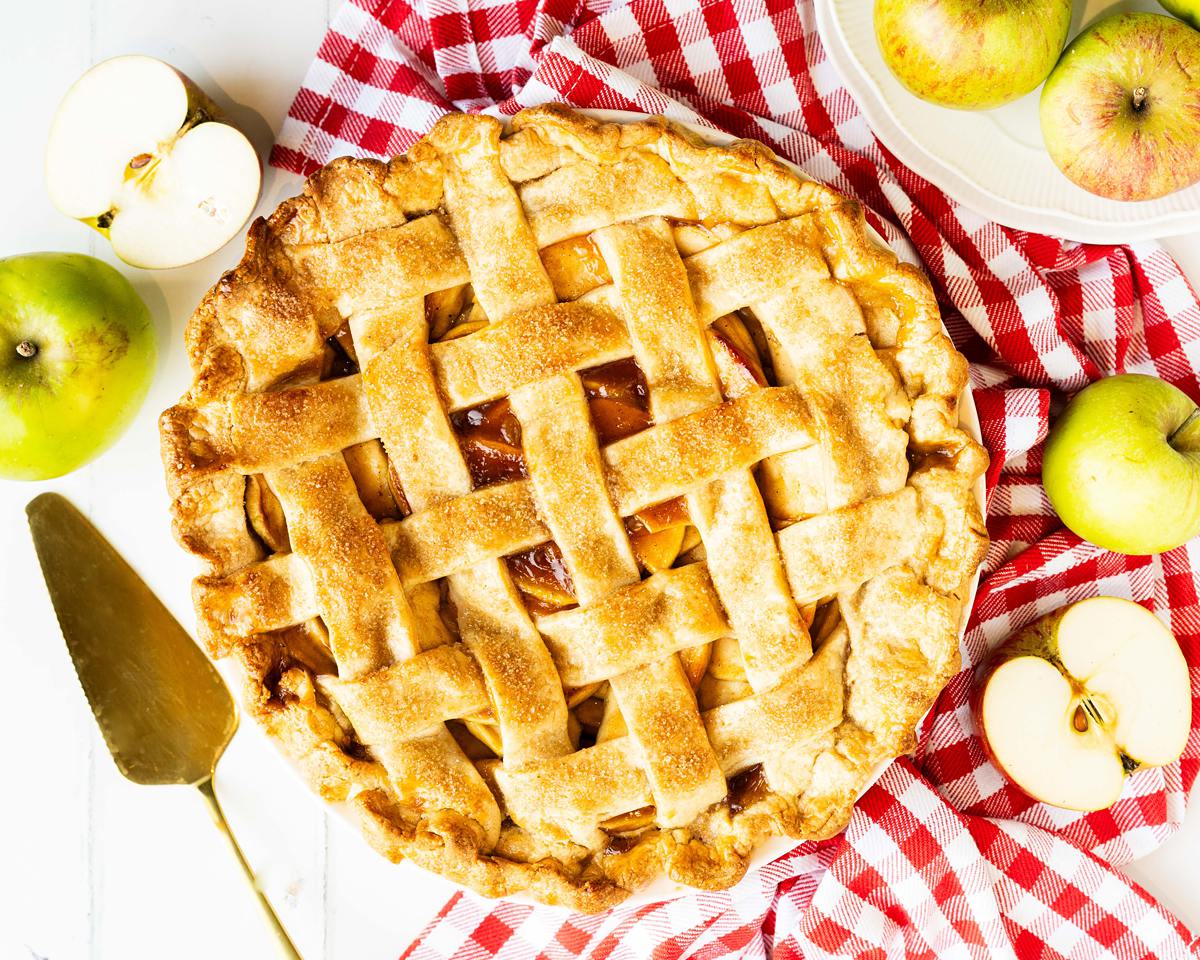
For me, there’s nothing quite like the comfort of a homemade apple pie. The cosy, warming smells of autumnal baking are utterly irresistible, and this glorious apple pie recipe really is so much easier than you think!

Truly scrumptious apple pie
Whilst homemade apple pie is a welcome bake all year round, it is especially popular in our home as the seasons change from warm summer days to cooler winter evenings. We enjoy ours in a variety of ways, whether warm or cold, served with whipped cream, ice cream or custard. It is really versatile and always a hit, and actually so much easier to make than you might think!
Here’s why you’ll love this apple pie too
- Simple baking, stunning results. This recipe apple pie easy is so much easier than you think! There are no challenging skills required, it is simply pastry, apple pie filling and a gorgeous latticed top. No blind baking, no precooking the filling. Just simple, step-by-step instructions for my recipe for best apple pie ever!
- Crisp, buttery pastry contrasts beautifully with the tender juicy apple filling. This beautiful pairing match perfectly together for the ultimate, all time favourite pie around the world!
- A crowd pleasing dessert. Loved by children and adults alike, this simple apple pie recipe is always a popular dessert whatever the weather or occasion!
- Make ahead for convenience. I would highly recommend making this pie the day before serving to allow it to cool down and for the filling to chill and set before serving. If you wanted it warm, it can easily be reheated, but the chill is important to allow the pastry and filling to set and hold when cut.
Best apples for pie
My favourite fruit to use when making my homemade apple pie filling has to be Granny Smith apples. They are brilliant for holding their shape and not turning mushy once baked, making them a great choice for homemade apple pie easy. However, I also love their crisp tart flavour too which perfectly complements the sweet cinnamon flavours and rich buttery pastry in this comforting, homely bake.
What you need to make apple pie filling
- Flour: I use plain flour for my pastry when making this recipe as I do not want any rise in it.
- Sugars: icing (powdered) sugar is used in making the pastry, and I used brown sugar for the apple pie filling for a delicious caramelly flavour. I also sprinkle the top of the pie with demerara sugar before baking, but this is an optional extra.
- Butter: I use unsalted butter so I can control how much salt is in the bake. For best results, use cold butter when making the pastry in this easy sweet shortcrust pastry recipe.
- Eggs: yolks only used in this recipe for sweet shortcrust pastry.
- Ice cold water: make sure to use cold water when making pastry. You want to keep the dough as cold as possible throughout the whole process.
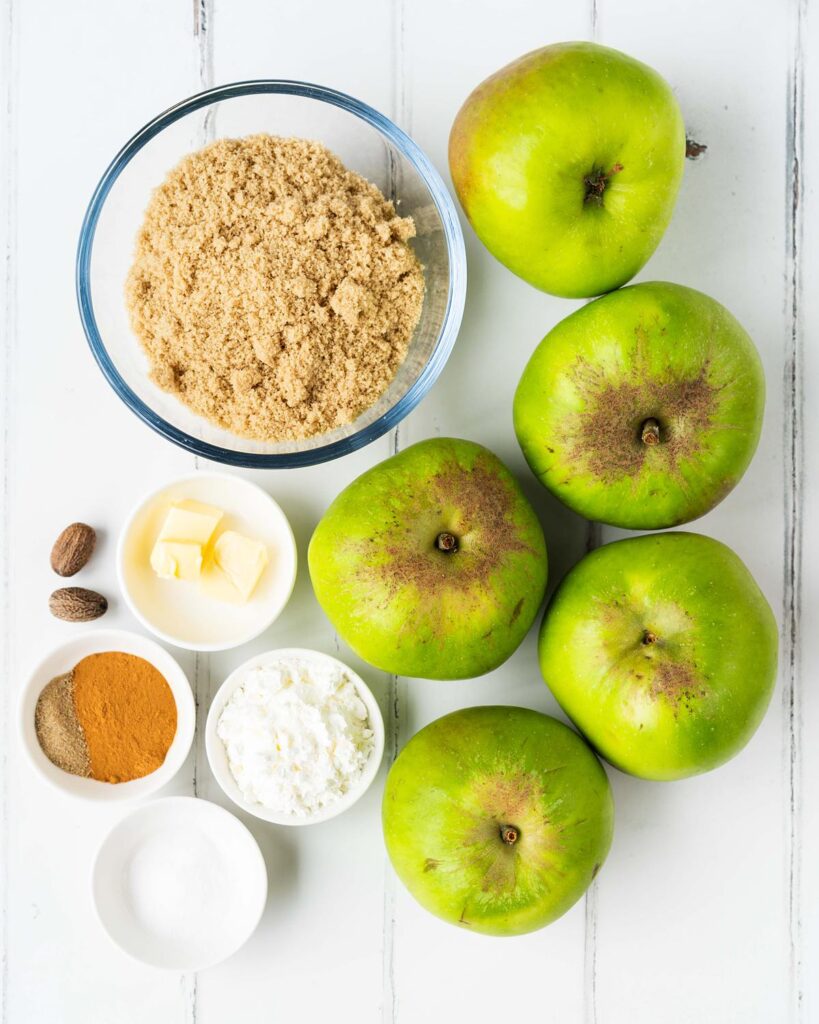
- Apples: I use Granny Smith, which is a tart variety of apples for extra apple flavour. Whichever apples you choose to use, make sure they are a firm variety that will hold their shape once baked.
- Spices: the warming spices used in this apple pie homemade filling will make your whole home smell so cosy and inviting. Perfect for a homely, comforting bake!
- Salt: just a little is used to balance the flavours in the apple pie filling. You won’t taste it, I promise!
- Cornflour/cornstarch: helps with thickening up the liquids for the filling creating a gloriously silky finished bake.
Equipment needed to make this pie
- Digital kitchen scales*: my recommended method of measuring ingredients is to weigh them out using grams rather than cups. I do provide cup measures too, if you prefer working with this method.
- Measuring spoons*: for measuring smaller quantities such as tablespoons (tbsp) and teaspoons (tsp). A set of dedicated measuring spoons are far more accurate than using everyday eating spoons, so is a small investment well worth making.
- Food processor*: a quick way to make the pastry. If you do not have a food processor, you can simply use your fingers to rub the ingredients together too.
- Sieve*: useful to remove lumps from the dry ingredients before blending together when making the pastry.
- Rolling pin*: for rolling out the pastry. If you do not have a rolling pin, get creative! A tall glass or even a wine bottle works well!
- Large mixing bowl*: to mix together the apple pie pastry filling in.
- Pie dish*: to bake this easy and irresistible apple pie recipe in.
- Small saucepan*: a small extra step of cooking down the apple pie filling juices until thick and glossy gives the bake real wow factor!
- Spatula*: used when heating and thickening the saucy part of the filling before adding to the pie.
- Pastry brush*: to egg wash the pastry before baking. An egg wash gives the pastry a beautiful golden colour that is so gorgeously appetising!
How to make apple pie from scratch
Whilst there are only really two parts to making an apple pie – namely the pastry and the filling – it pays to have a game plan when it comes to pie-making. Essentially, make the pastry and prepare the apples separately before assembling together and baking. Check out my game plan below for a quick summary:
Game plan: my apple pie workflow
Make the pastry
Whizz the pastry together before squishing into a disc and leaving to chill and rest for at least 30 minutes before rolling out.
Prepare the apples
Peel, core and slice the apples, then combine the filling ingredients, tossing well. Leave to macerate for about an hour before continuing.
Roll/cut the pastry, line the pie dish
A larger circle to cover the base and sides of the dish, and a smaller circle cut into strips for the lattice top.
Add in the apple filling
Lay the slices in the prepared pastry base. Cook down the juices and spices until glossy and silky, then pour over the filling.
Create the lattice top
The fun bit! arrange the strips on top to form the lattice pattern, then roll the edges and finger crimp to seal.
Time to bake
Brush with egg wash and sprinkle with sugar if using, then bake until golden and bubbling. Allow to cool and chill before serving and enjoying!

Make the pastry
Step 1: In a food processor, blitz the flour and sugar. Add in the cold butter and pulse until the mixture resembles fine breadcrumbs.
Step 2: Add in the egg yolks and blend again until just combined. Add in the ice water a little at a time until the pastry comes together in clumps.
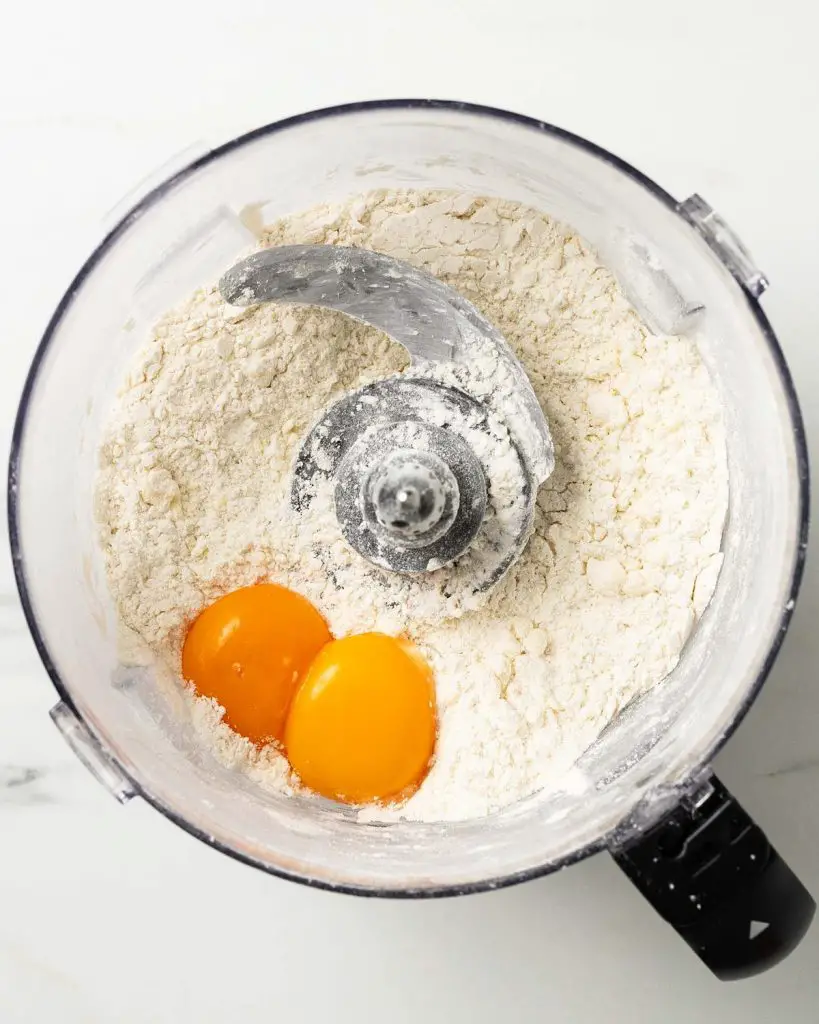

Step 3: Tip the dough out onto a clean work surface and gather it together. Squeeze to bring it together, but try to avoid kneading and working it too much or the pastry will be tough. Divide the pastry dough into two parts of 2/3 and 1/3 of the pastry, then flatten into discs. Wrap each disc tightly in cling film then pop in the fridge to chill for at least 30 minutes whilst preparing the apples.
Prepare the apples
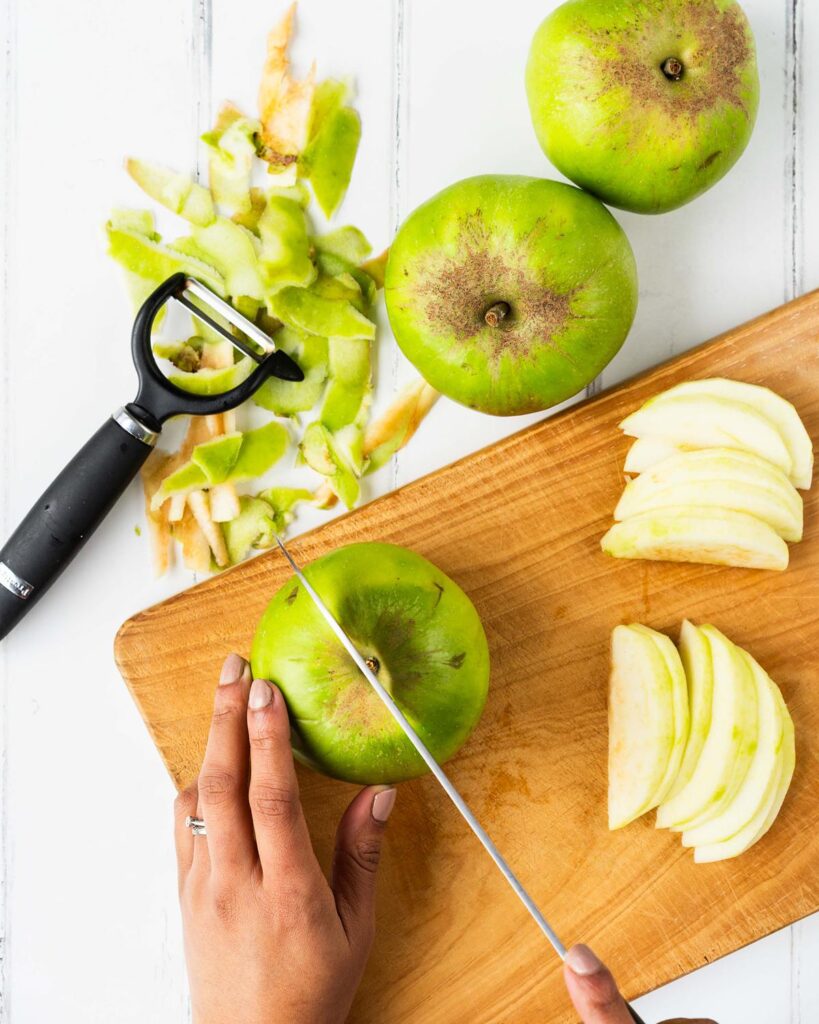
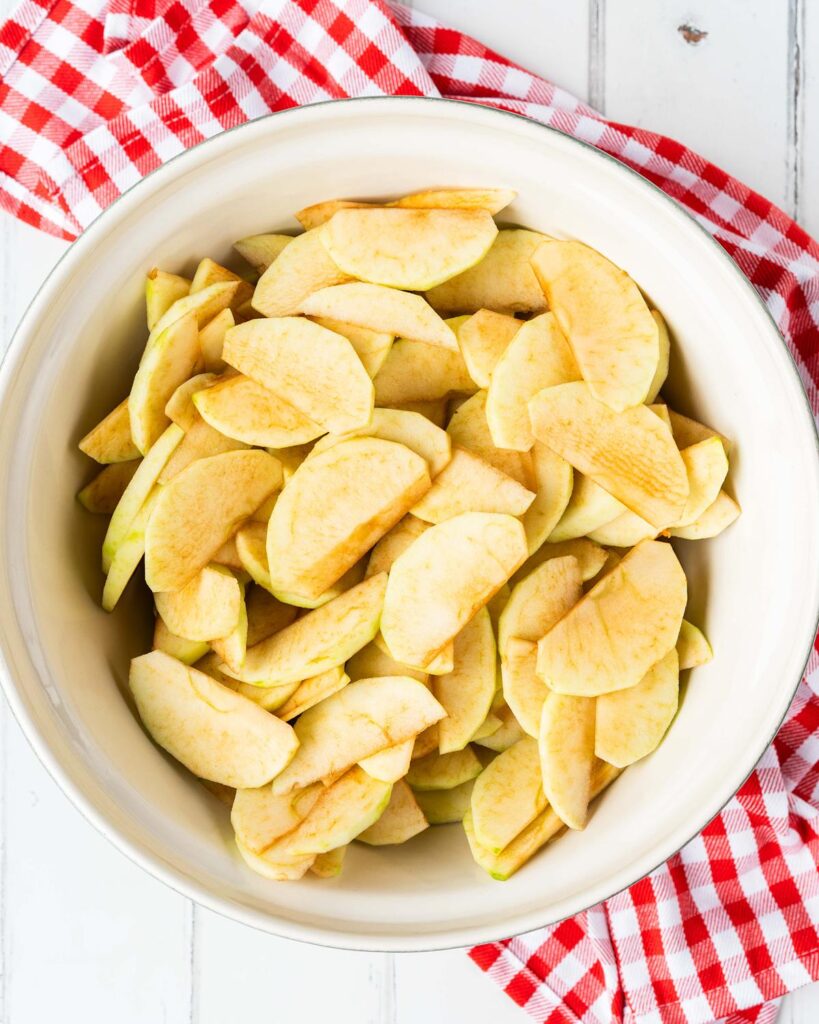
Step 1: Peel and core the apples, then slice them into thin slices. Place in a large bowl.
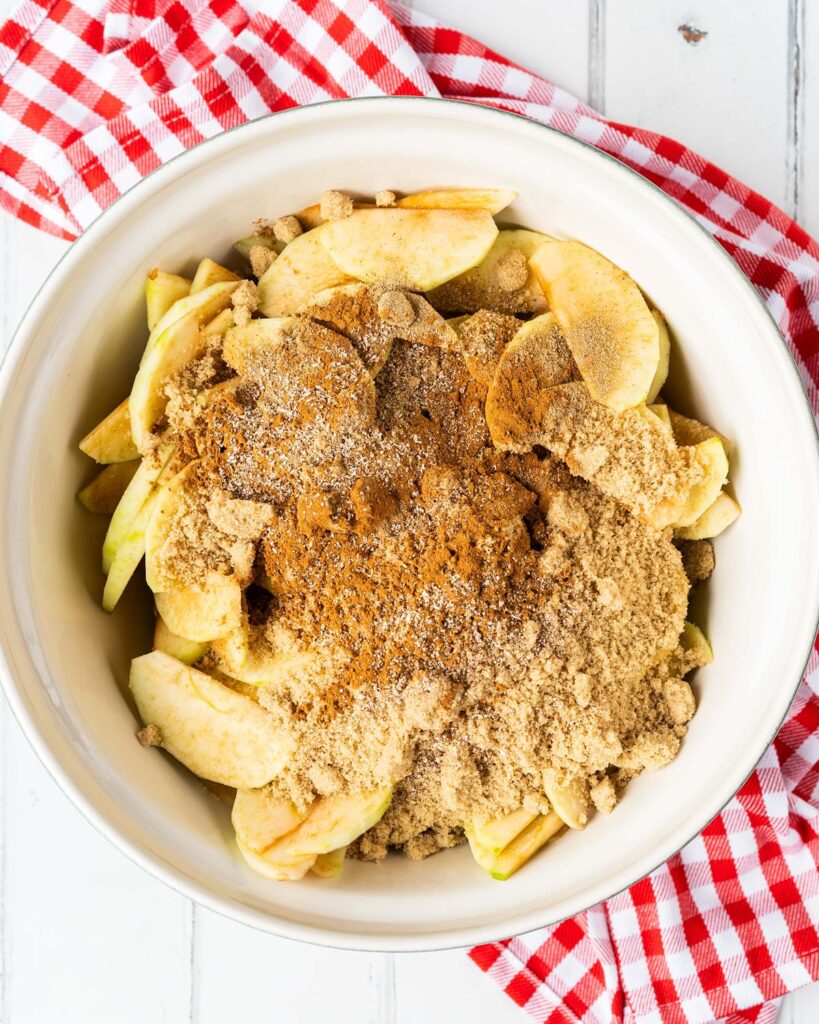
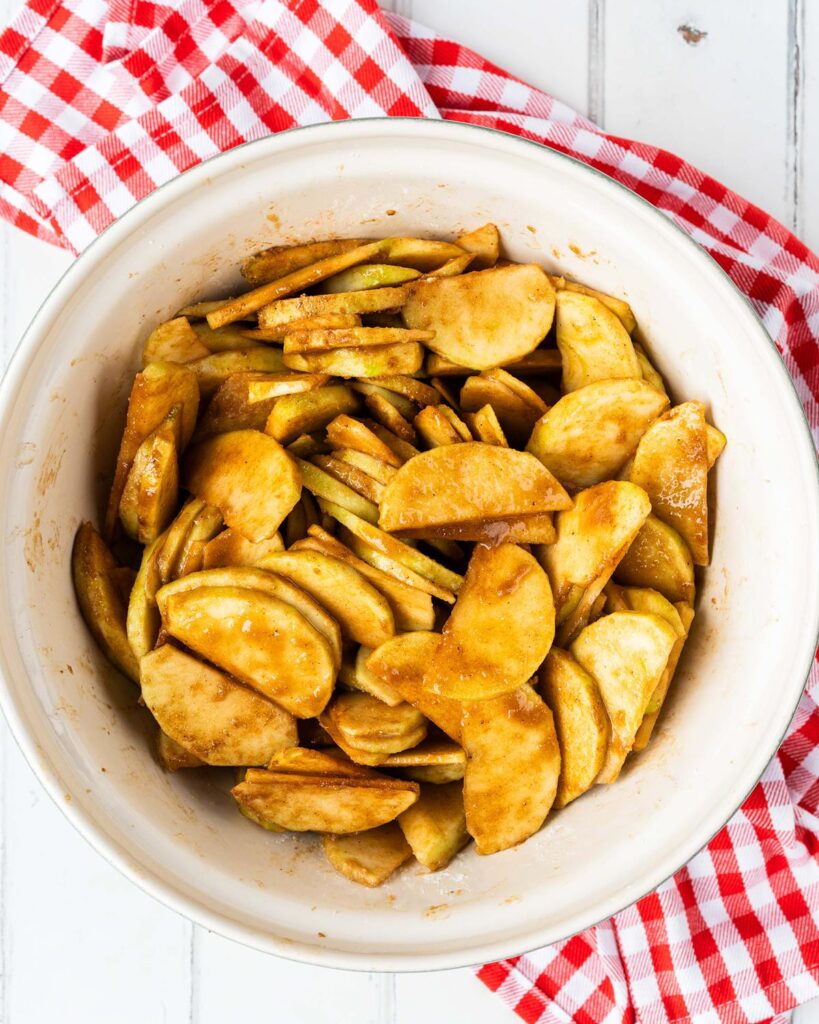
Step 2: Tip in the sugar, spices, cornflour (cornstarch) and salt before tossing everything together to completely coat the apples. Set aside to macerate for an hour.
Roll/cut the pastry, line the pie dish
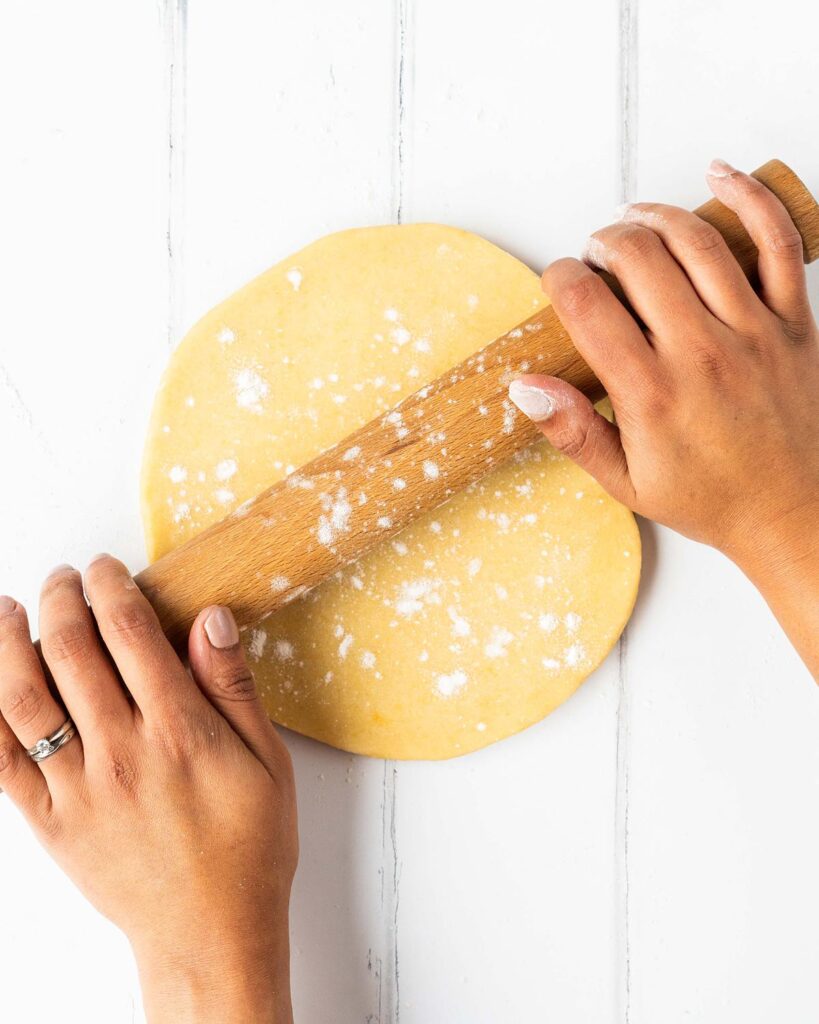
Step 1: Once the pastry dough has chilled, roll out the larger chilled pastry disc into a circle about 3″ wider than the base of the pie dish.
Step 2: Drape it carefully over the rolling pin and lift it into the tin, easing the pastry into the crevices. Do not stretch the pastry to make it fit.
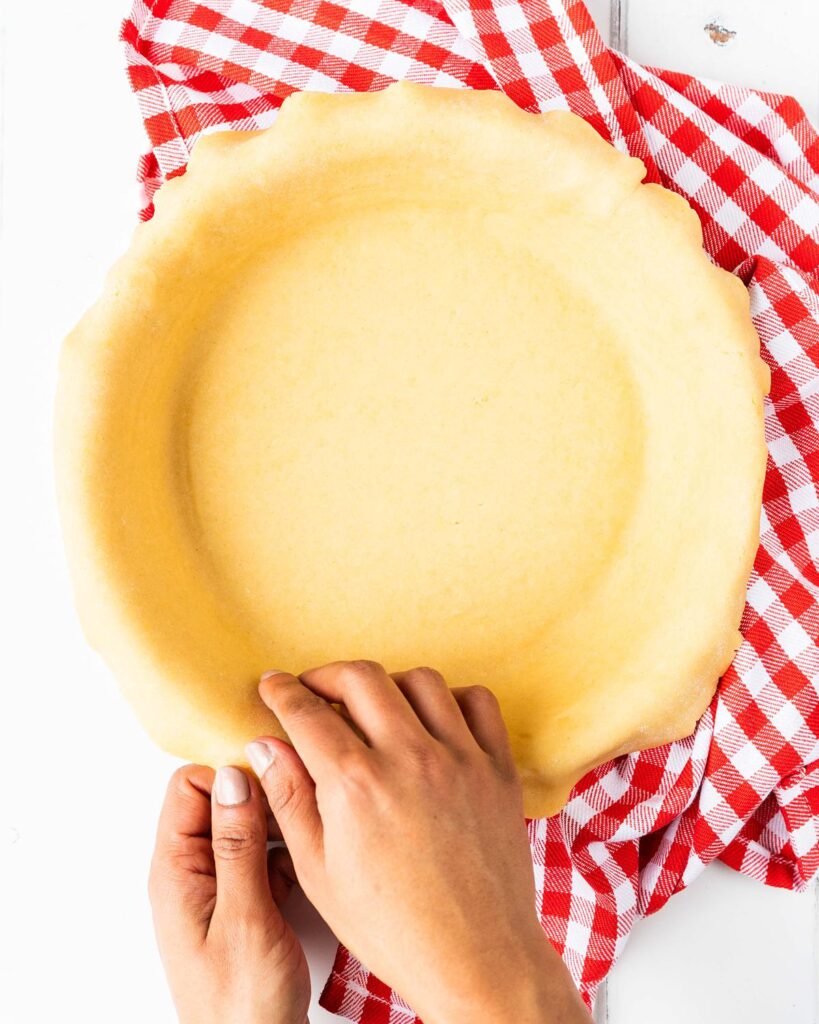
Step 3: After lining the tin with pastry, gently fold the overhang of pastry over the lip of the pie dish, allowing it to drape over and down the side. Put to the side, but keep nearby and pull out the bowl with the filling.
The apple filling
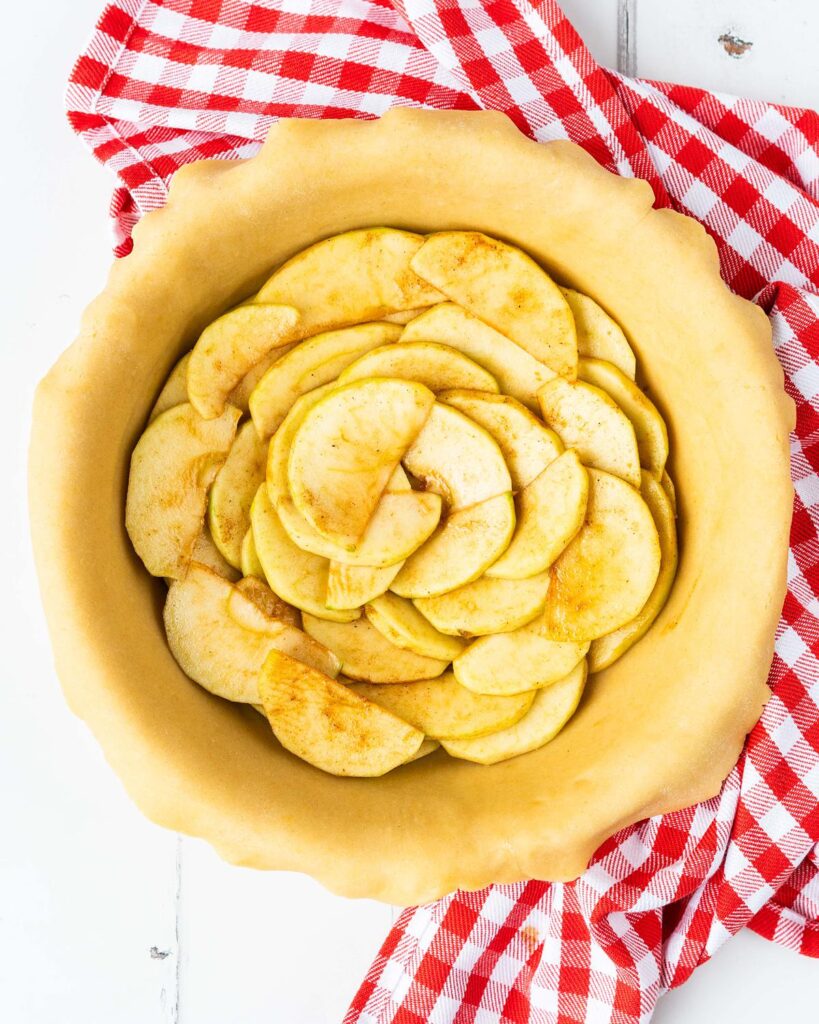
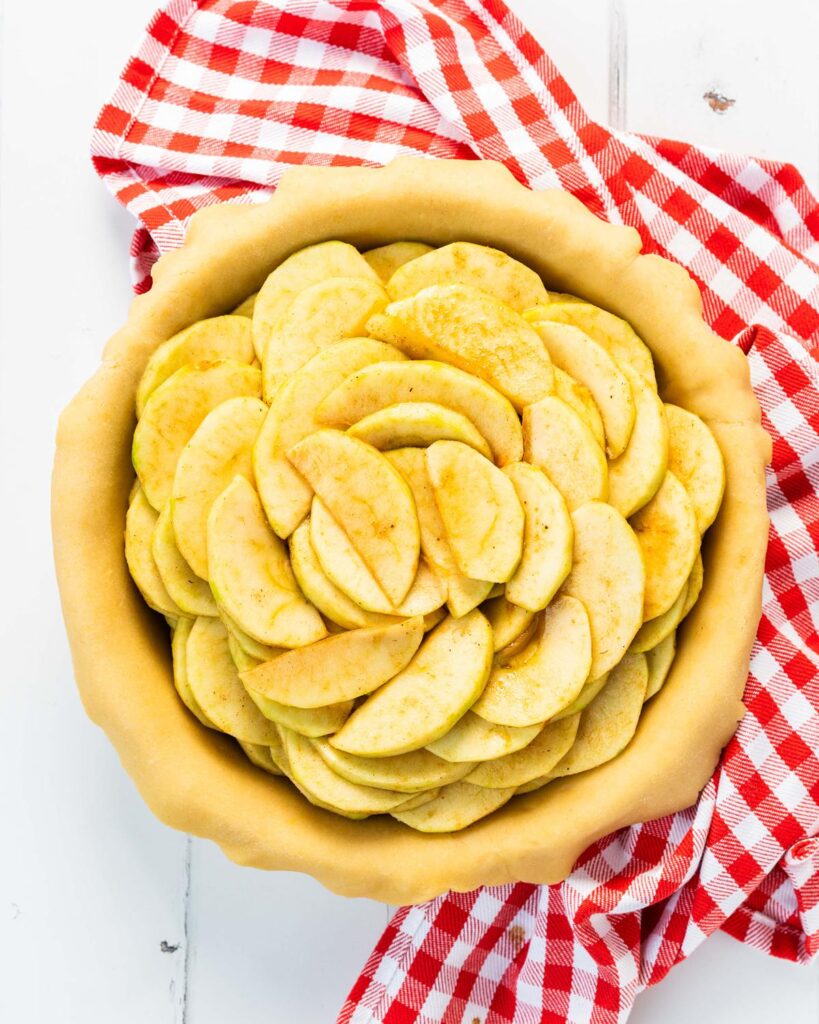
Step 1: Using a slotted spoon, carefully remove the apples from the bowl, allowing the juices to drip off. Arrange the slices in the pastry shell in as flat and even a layer as you can, allowing some of the fruit to mound slightly in the middle of the pie.
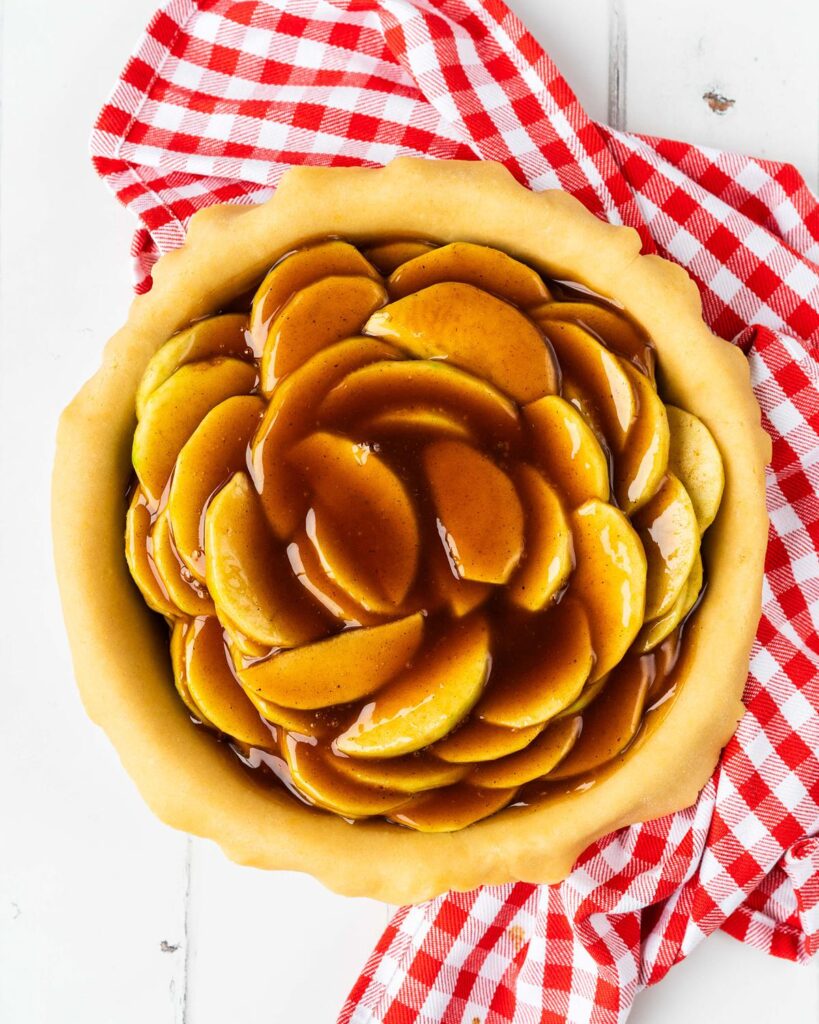
Step 2: Once all the slices have been arranged in the pastry, transfer all the remaining liquid and spices into a small saucepan. Cook the juice down, stirring to keep it smooth, until it is syrupy, glossy and thickened, about 5 minutes. Stir in the butter until melted and gorgeously shiny. Pour this liquid evenly over the apple slices.
Create the lattice top
Step 1: Remove the smaller disc of pastry from the fridge and roll out to a circle about the same thickness of the base pastry. Using a pizza cutter or sharp knife, cut the pastry into 1″ thick strips.
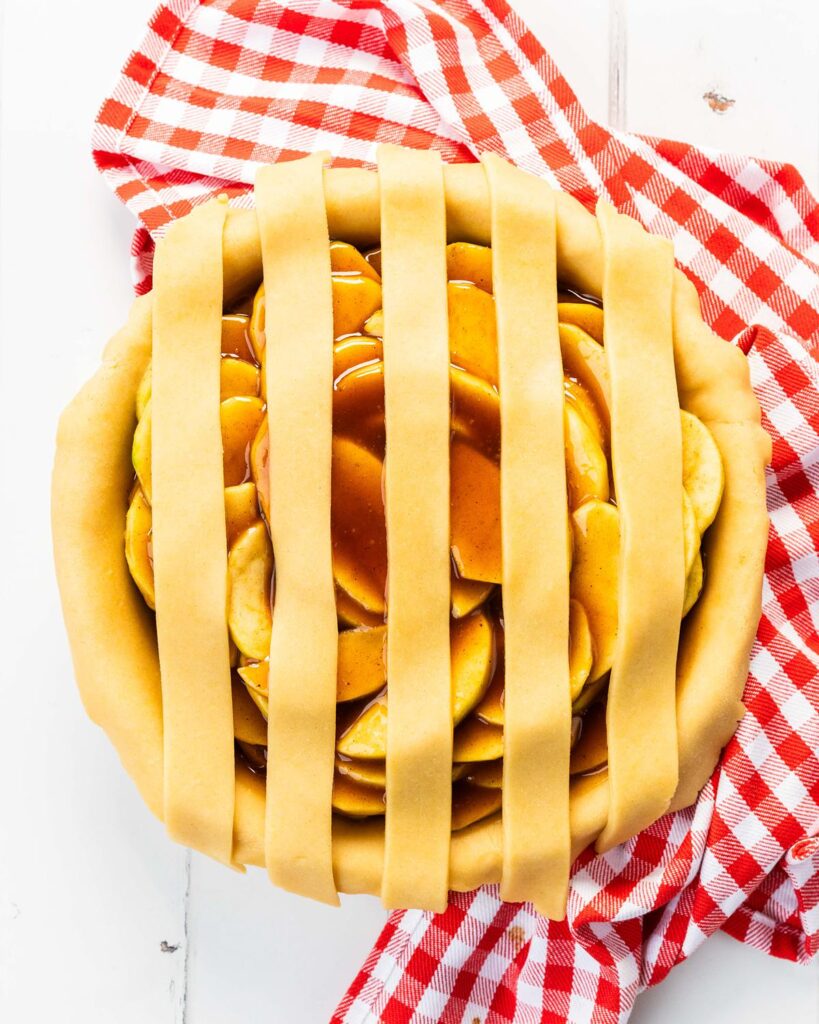
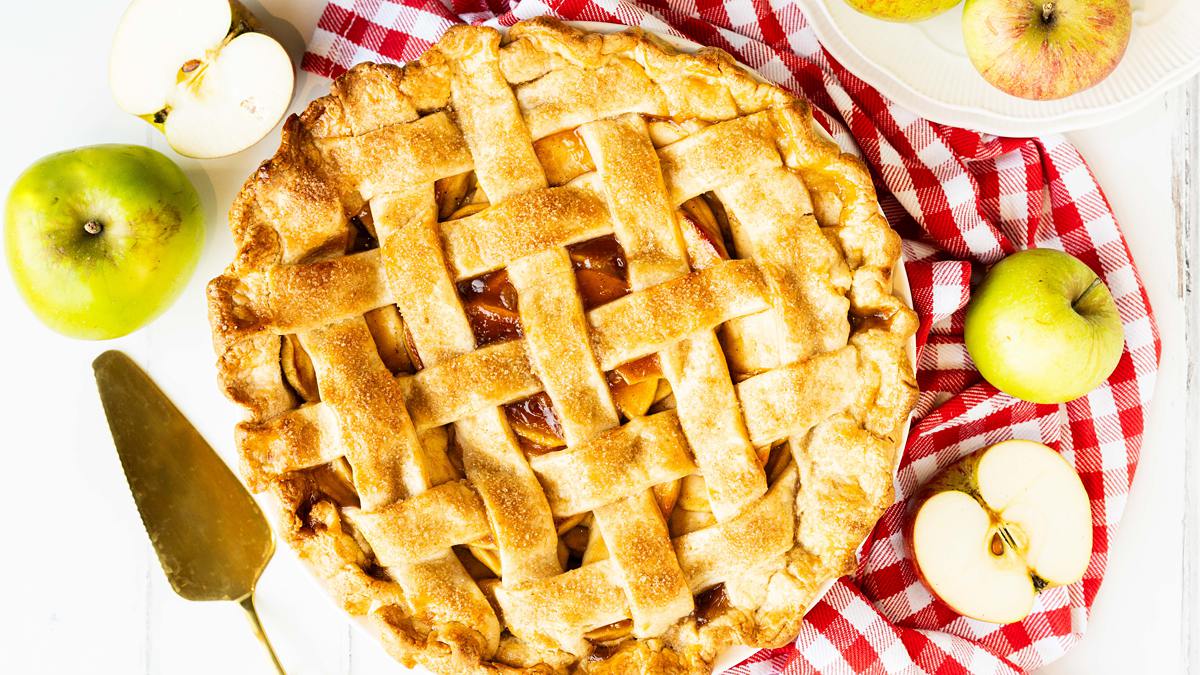
Step 2: Carefully lay five strips of pastry vertically on top of the apples, spacing them apart evenly to cover the top of the filling (image 1 below).
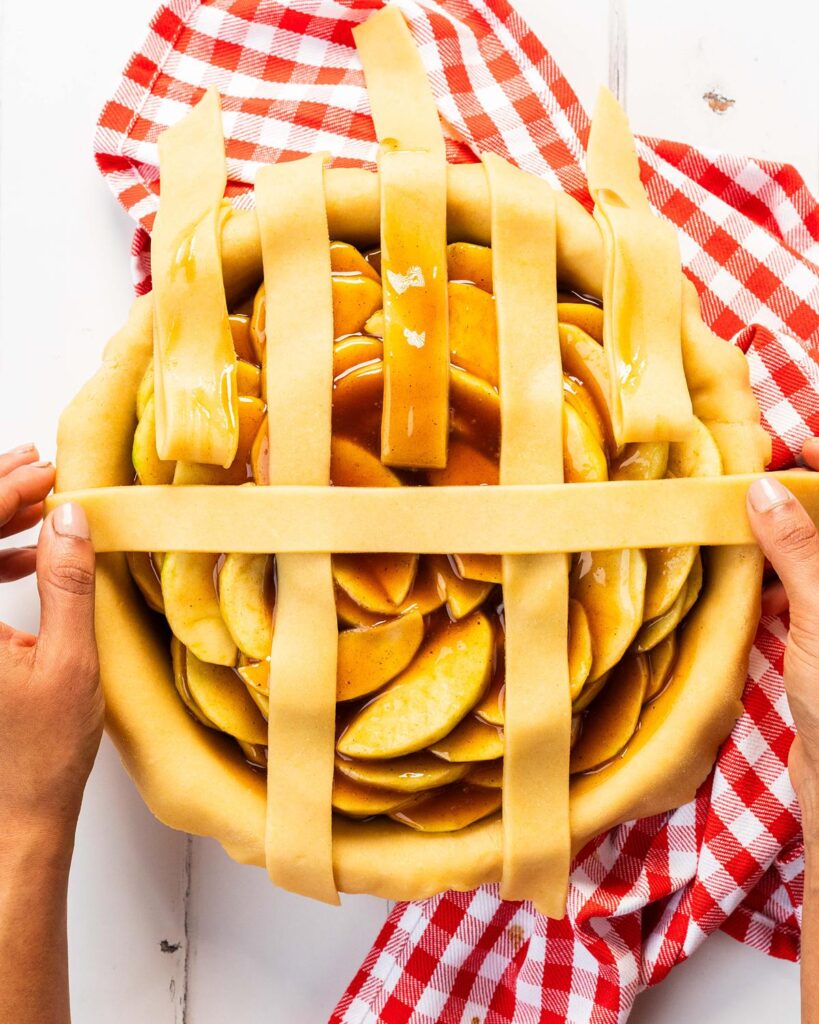
Step 3: Gently fold over the first, third and fifth strips of pastry, then lay a new strip of pastry across the middle of the pie (image 2). Return the folded over pastry strips to their original positions.
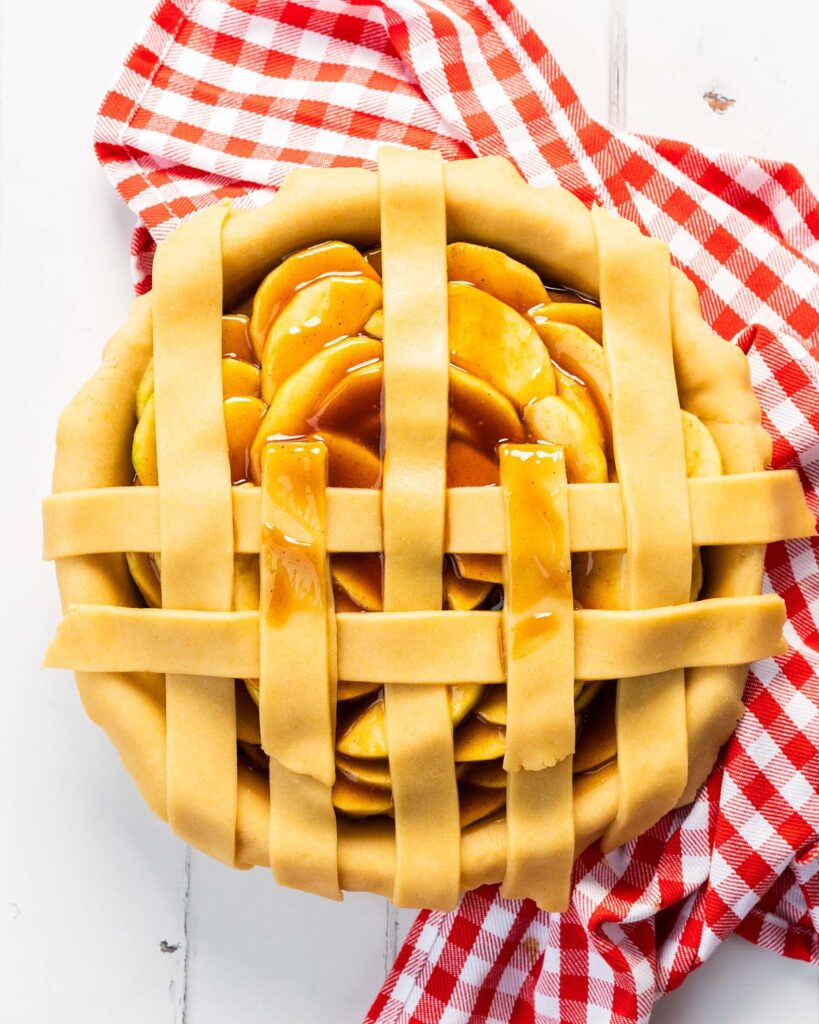
Step 4: Lift and fold over the second and fourth pastry strips, then place another strip of pastry horizontally across the other vertical strips before folding the strips back over. Repeat this process until you have ten strips of pastry in total, five vertical and five horizontal, forming a lattice on top of the pie (image 3).
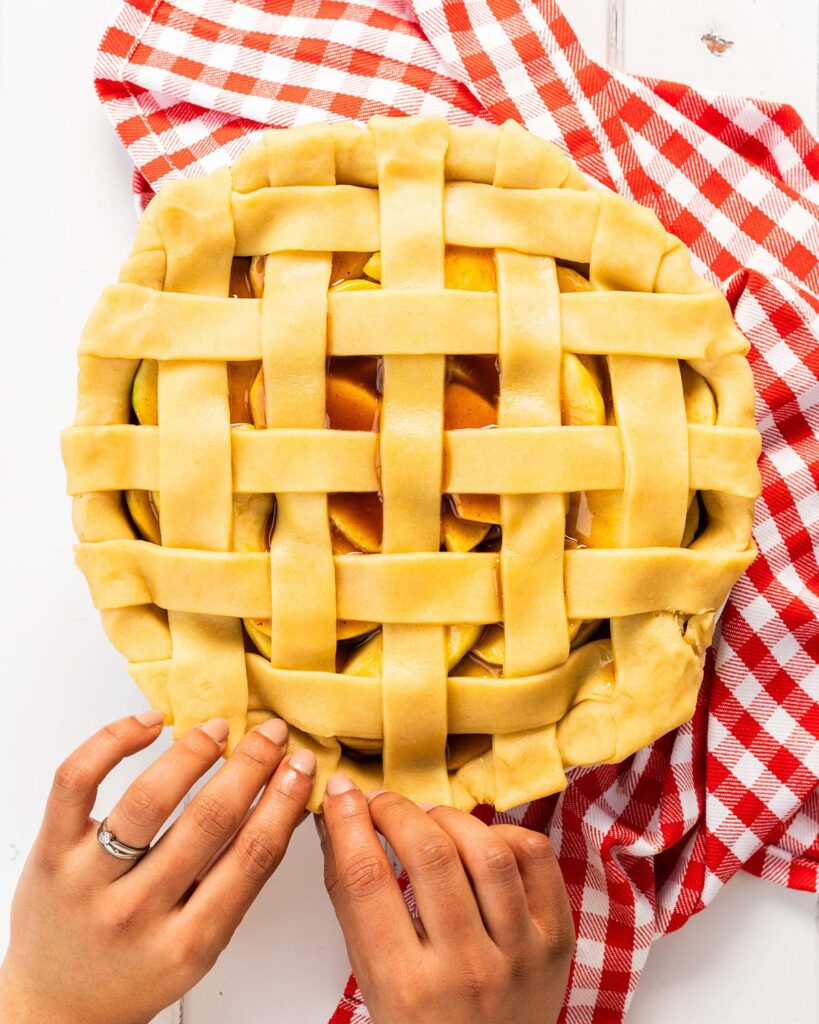
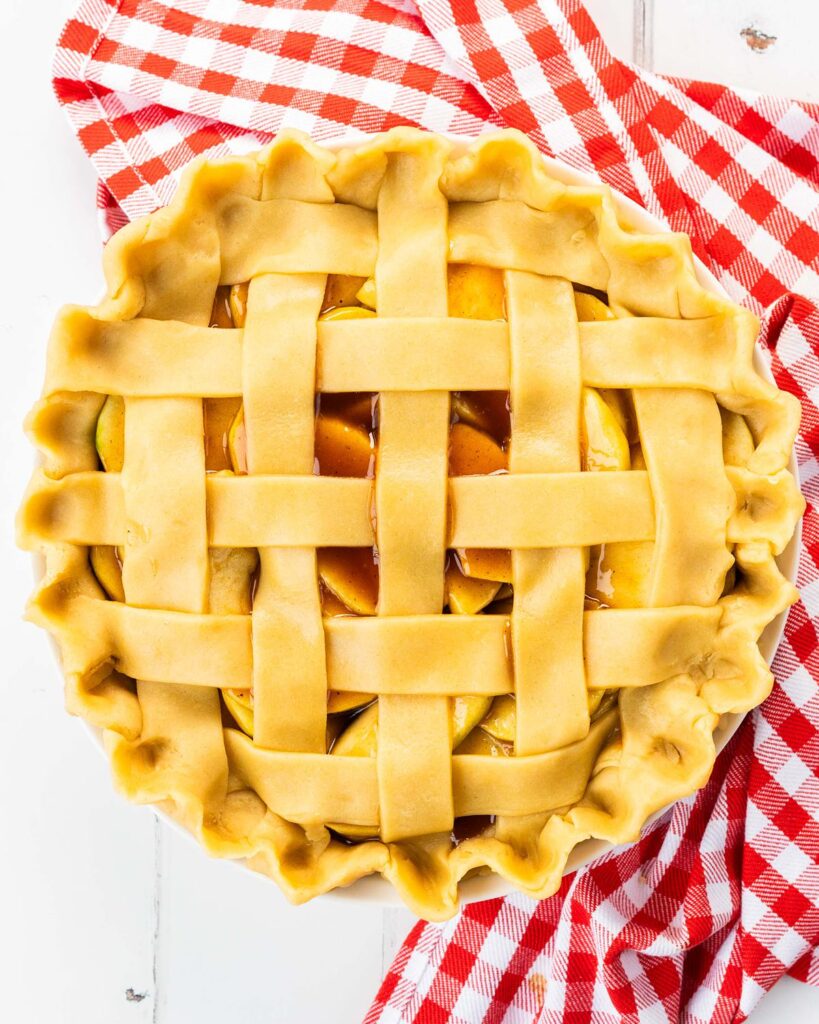
Step 5: Fold the edges of the pastry under to create a smooth rounded edge (image 1). Crimp the edge by pushing the pastry in between two fingers of the opposite hand. This gives a pretty edge, but also seals the pastry, creating a lovely lip around the edge.
Time to bake
Step 1: Preheat the oven to 190C/375F.
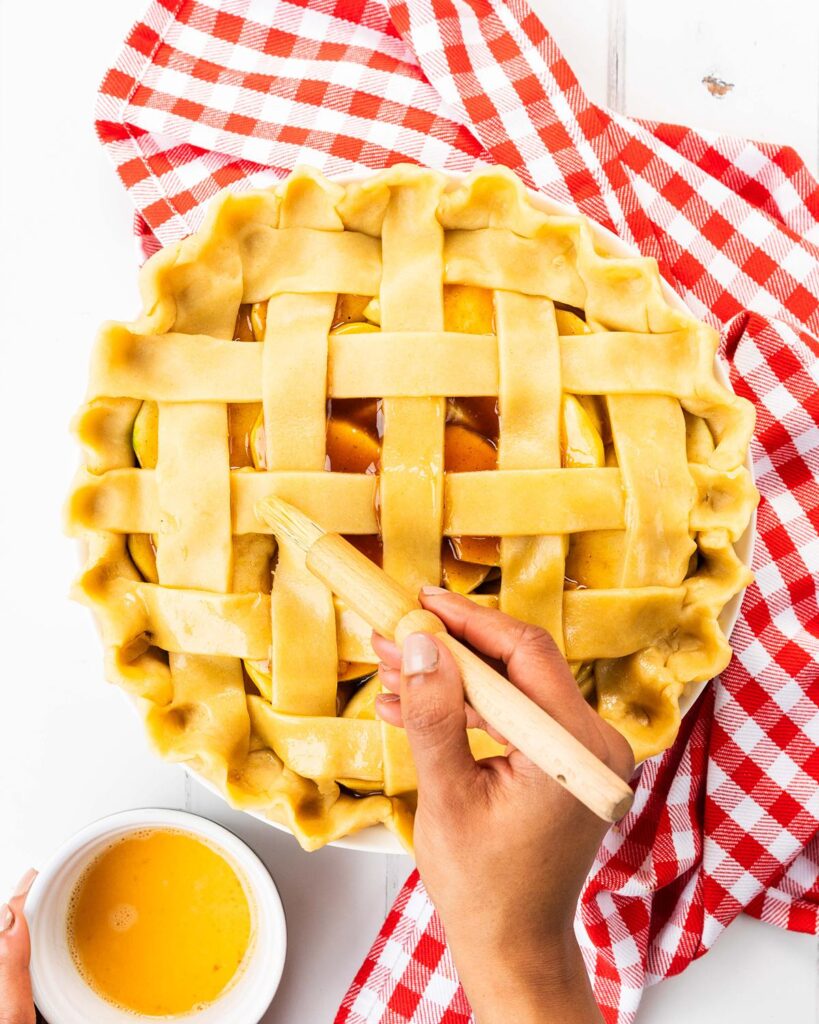
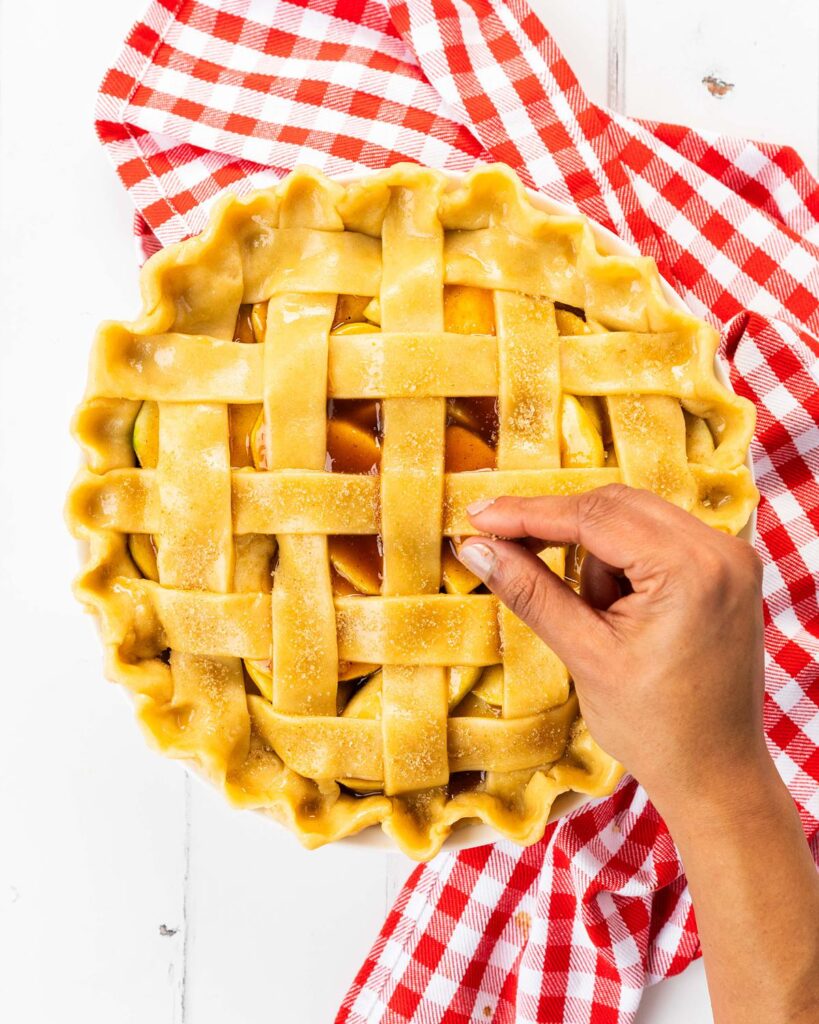
Step 2: Lightly brush all the visible pastry with a lightly beaten egg. Sprinkle as generously as you wish with demerara sugar, if using.
Step 3: Take a long strip of foil and fold it lengthways twice to create a long narrow strip of foil. Use this strip to create a guard or shield for the crimped edge of the pie during initial baking, to stop it over browning and burning.
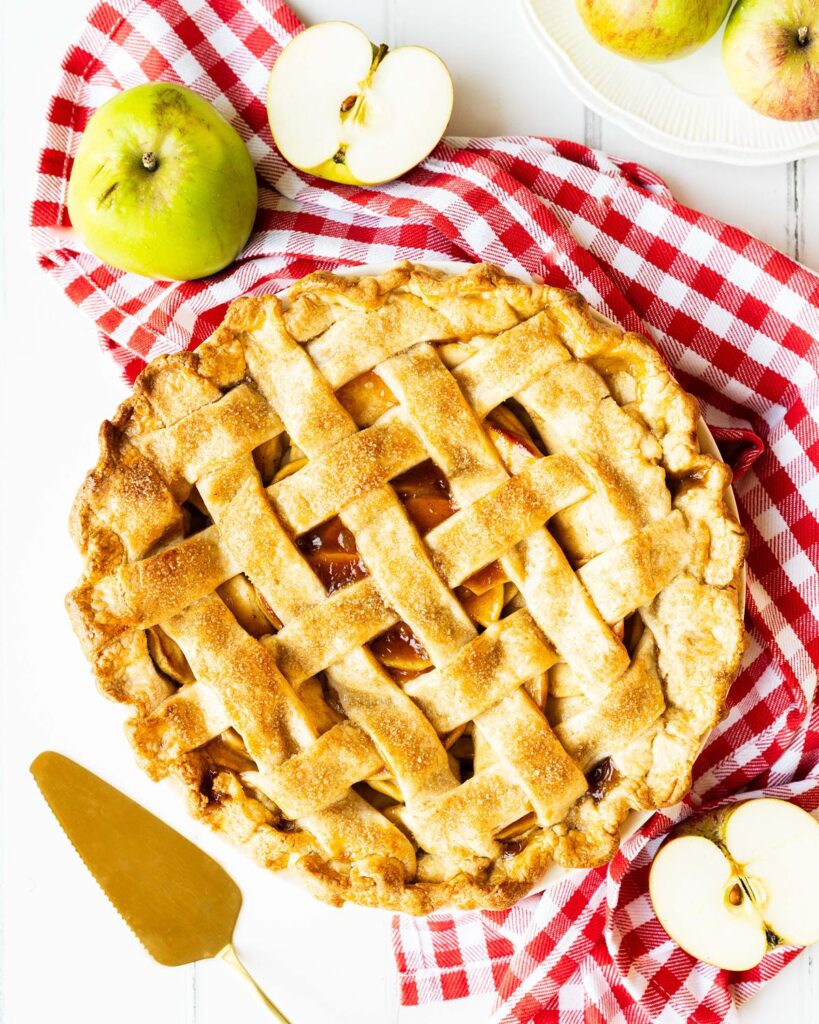
Step 4: Place the pie in the preheated oven and bake for 55-65 minutes. Check on the pie around 30 minutes and periodically after for the rest of baking, covering with a foil tent if required to prevent the pastry from burning. Remove the foil as required to aid the browning of the pastry. The pie is done when the filling is bubbling through and the apples can easily be pierced with a skewer.
Step 5: Once removed from the oven, allow your apple pie to cool completely. Place it in the fridge for a few hours or overnight to allow it to firm up completely. When ready to serve, you can either reheat in the oven at 180C/350F for 10 minutes or in the microwave. Or enjoy simply at room temperature. Enjoy!
Frequently asked questions about pastry
Pastry is one of the bakes that has a few factors that could go wrong, and bit of information worth knowing. I have tried to answer as many commonly asked questions as I can, but please do use the comments below if you have any I have not answered for you here.
Why is my shortcrust pastry fragile and crumbly?
This is likely because the dough is too dry and needs a little more liquid adding to it. Break it up into crumbs again and gently mix through enough liquid until the dough naturally forms clumps before bringing back together, chilling and then rolling again.
Why is my shortcrust pastry tough?
If the pastry is tough or gummy, it is likely that too much gluten has developed. The most likely cause of this is overworking (over mixing or over kneading) the dough.
Why my shortcrust pastry sticking to my work surface/rolling pin?
The moisture in the dough makes it stick to surfaces. A very simple solution is to lightly dust the work surface and rolling pin with a little extra flour (not too much, you do not want to dry out your pastry!) and try rolling it out again. As you roll, keep turning the pastry through 90º so it doesn’t stick to the work surface. If you find it is not rolling out too easily, gently lift the pastry over your rolling pin and lightly dust the surface under it with flour before rolling again. This should allow you to get beautiful and evenly rolled out pastry!
Do I need to blind bake my pastry?
In this recipe, you do not need to blind bake the pastry. Whilst apples do release liquid during baking, the use of cornflour in the filling coupled with macerating the fruit before baking will help ensure the pastry does not end up being soggy.
How do I know when apple pie is done?
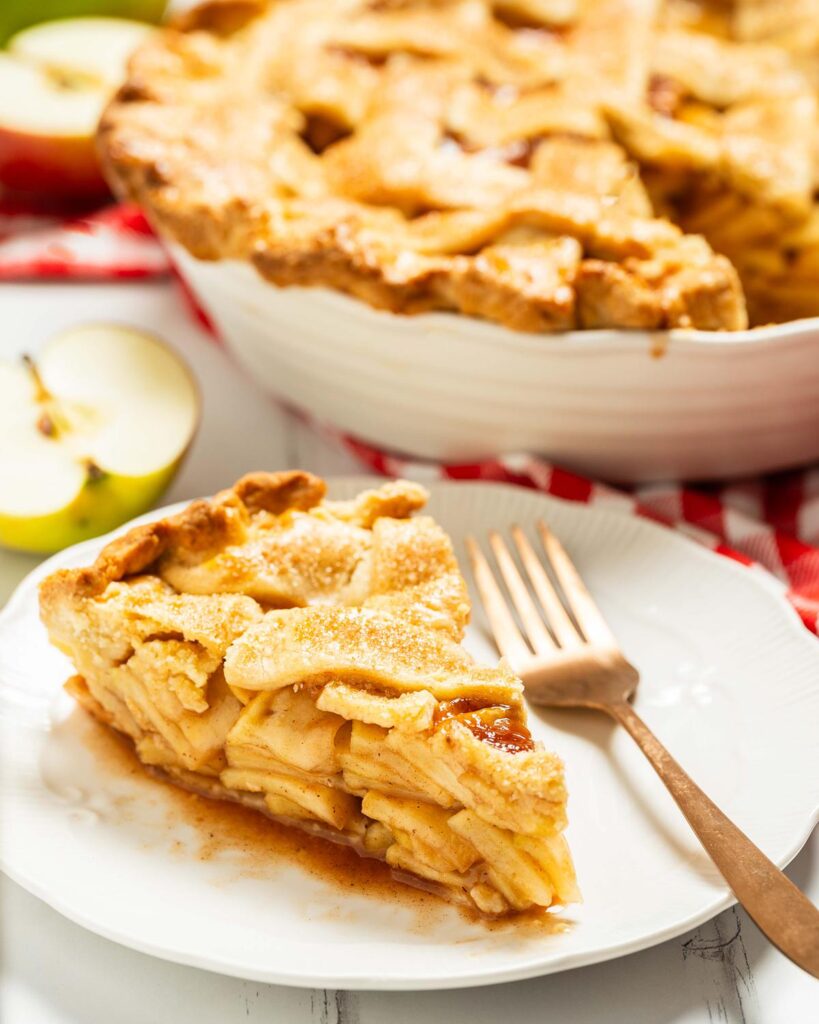
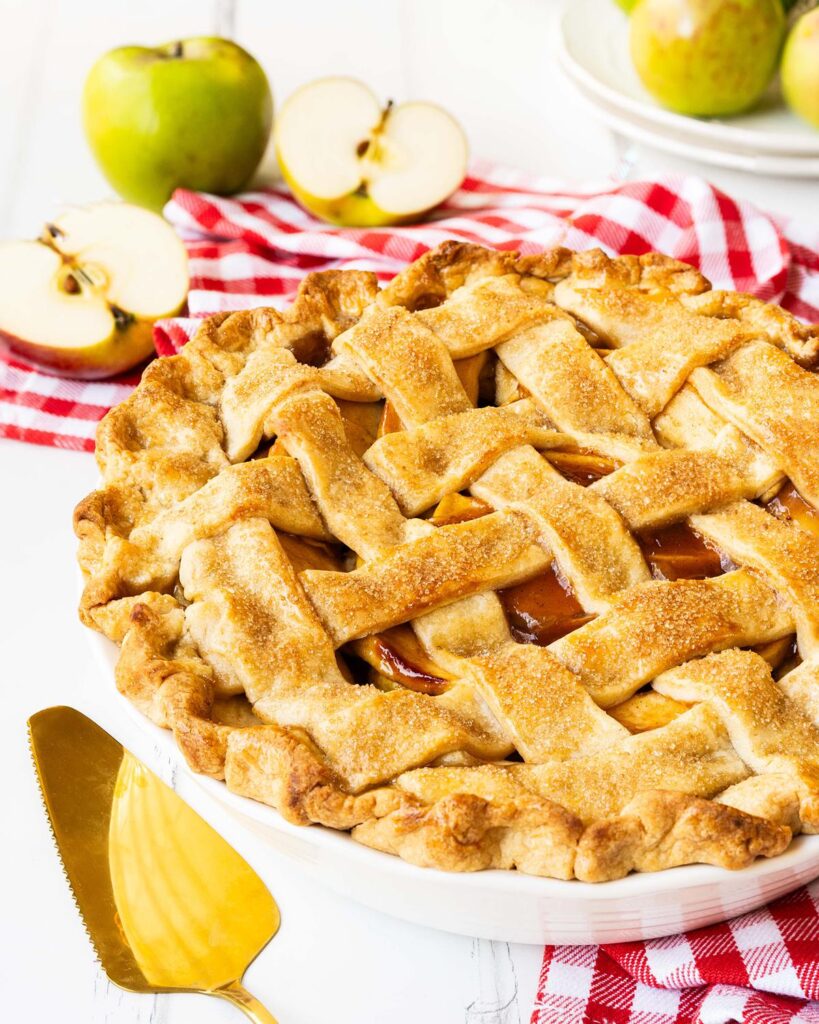
You will know the easy apple pie recipe is done when the pastry is beautifully golden brown, the filling is thick, glossy and bubbling through and the apples can easily be pierced with a skewer.
Should apple pie be refrigerated?
Apple pie should be refrigerated overnight once it has cooled following baking. This allows the pastry to really firm up and the filling to set, making it easier to cut and serve. Beyond this, I would recommend storing the pie at room temperature for up to a day, or up to three days in the fridge.
How to serve apple pie
I love a slice of apple pie served warm with a generous scoop of vanilla or clotted cream ice cream. However, it is just as comforting served with lashings of custard as a true winter warmer dessert. It also works well served at room temperature exactly as is, or with a drizzle of cream too. So many choices!
Can apple pie be frozen?
If you wish to freeze the apple pie, I would recommend doing so either as two individual components (the pastry and the apple filling), or once baked and cooled. Either way, defrost in the fridge overnight then either continue with the making and assembling or reheat in the oven at 180C/350F for 10-15 minutes.
Can apple pie filling be frozen?
Yes, you can freeze the uncooked filling if you wish. See my notes in the question above.
Apple pie success tips
- Use ingredients as cold as possible when making pastry: cubed butter from the fridge and ice cold water. This helps avoid overworking the gluten and therefore avoid shrinkage during baking.
- Handle the pastry dough as little as possible. This is especially important when bringing it together, as overworked gluten equals tough pastry.
- When placing the pastry into the pie dish, do not to stretch the dough to make it fit. Stretching the dough will result in it shrinking back to its pre-stretched size and shape during baking, spoiling the look of the crust on your homemade apple pie recipe.
- Drain the macerated apples well before placing in the pastry base to avoid making the pastry too soggy to start with. This will help it firm and cook better without being soggy as a final result.
- Lay apples in as flat and even a layer as possible as they will soften and shrink during baking. Fill out as much of the space with the slices as you can for best final results.
- Cooking down the macerated juices gives the filling a head start to being silky and luscious in the end, but also helps avoid the dreaded soggy bottom for the pastry!
- Brushing with egg wash gives the baked pie a gorgeous golden finish. The sprinkling of extra sugar on top is optional, but is reminiscent of bakery apple pies, with their beautiful crunchy tops!
- Cooling is REALLY important as this allows the pie to firm up and better hold its shape when cut. As tempting as it is to avoid it, I would definitely recommend being patient for this step!
Troubleshooting
If you have any other questions about this homemade apple pie recipe, please use the comments below to ask away and I will do my best to help. And if you do make this recipe for apple pie, please take a moment to leave a rating and review below. I would love to know how you enjoy making it and following along, plus it really helps others looking for a similar recipe too. You could even post a picture on Instagram and tag me when you share it with the world, you know I love seeing all your bakes!
If you love this recipe try these out

Apple pie cookies. These heavenly autumnal cookies have all the joy of apple pies, but in a cookie! Pastry + apple pie filling + lattice top = perfect autumn treat!
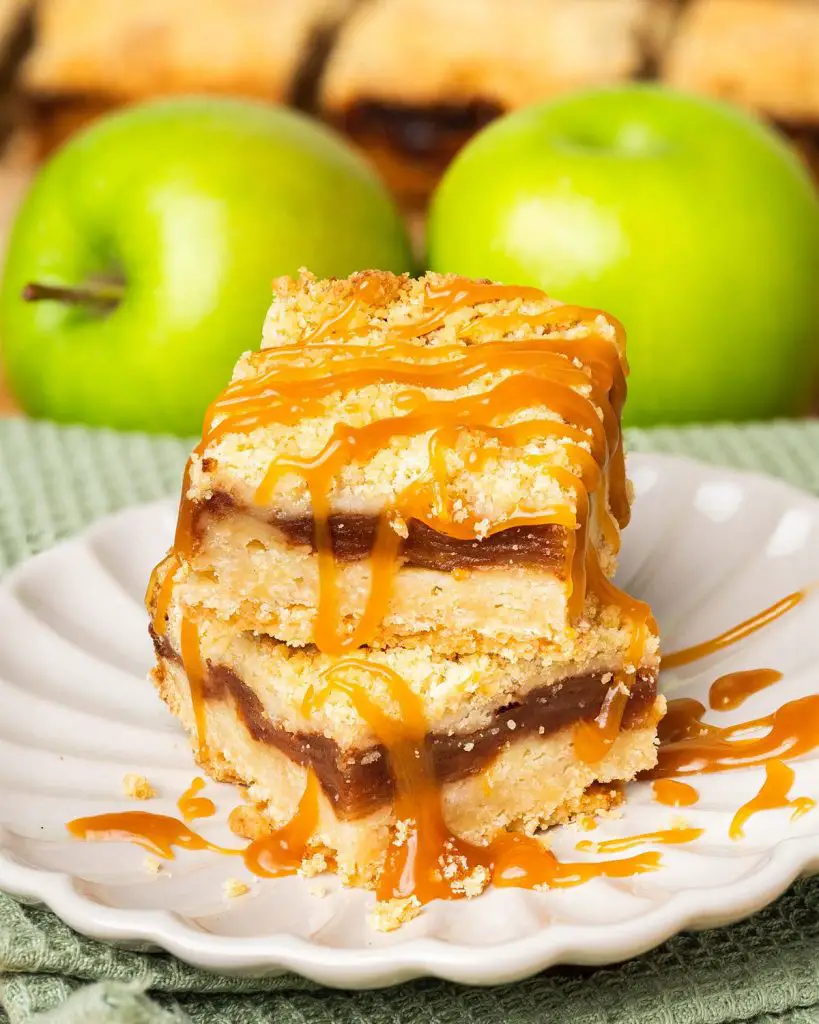
Easy apple caramel bars: These delicious bars make the best of the abundance of the season’s apples! Cinnamon apples, buttery shortbread and a lush caramel drizzle. Autumnal heaven!
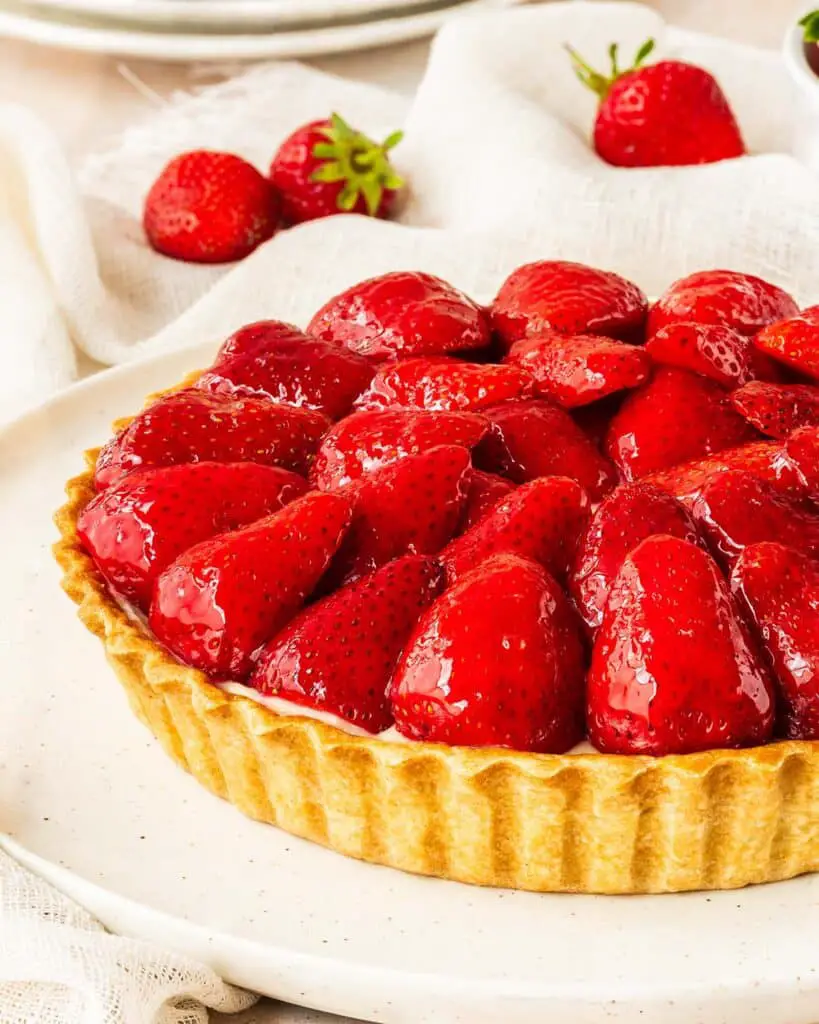
Classic Strawberry tart: Buttery pastry, creamy custard, and vibrant fresh strawberries: this classic French strawberry tart is truly a triumph of summertime baking!
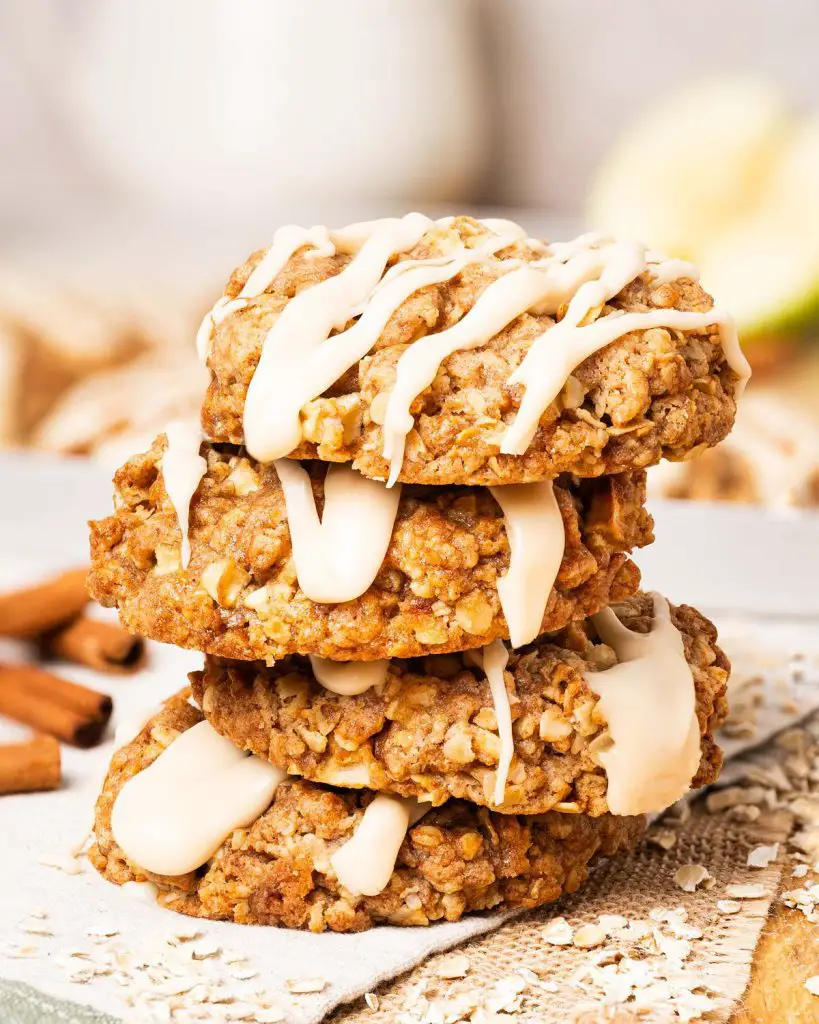
Apple and cinnamon cookies: With crunchy edges, chewy oats and lots of apple and cinnamon flavour all topped with a moreish maple glaze. A perfect cosy seasonal cookie treat!
And that’s all from me for today! Hope you enjoy making my ever popular apple pie recipe as much as I enjoy sharing with you. Happy baking lovelies! x
Recommended equipment I used *
| Digital kitchen scales | Measuring spoons |
| Food processor | Sieve |
| Rolling pin | Large mixing bowl |
| Pie dish | Small saucepan |
| Spatula | Pastry brush |
My PERFECT Easy Apple Pie Recipe
Ingredients
For the pastry
- 375 g (2½ cups + 3 tbsp) plain (all-purpose) flour
- 90 g (½ cup + 3 tbsp) icing (powdered) sugar
- 180 g (¾ cup + 1 tbsp) unsalted butter, cold and cubed
- 3 large eggs, yolks only
- 3-5 tbsp ice (ie very very cold!) water
For the filling
- 1.5 kg (5-6 large) apples
- 225 g (1 cup + 3 tbsp) brown sugar
- 2 tsp cinnamon
- 0.5 tsp cardamom
- 0.5 tsp nutmeg
- 0.75 tsp salt
- 3 tbsp cornflour (cornstarch)
- 15 g (1 tbsp) unsalted butter
To finish
- 1 egg, beaten
- 3-4 tbsp demerara sugar (optional)
Instructions
Make the pastry
- In a food processor, blitz the flour and sugar. Add in the cold butter and pulse until the mixture resembles fine breadcrumbs.
- Add in the egg yolks and blend again until just combined. Add in the ice water a little at a time until the pastry comes together in clumps.
- Tip the dough out onto a clean work surface and gather it together. Squeeze to bring it together, but try to avoid kneading and working it too much or the pastry will be tough. Divide the pastry dough into two parts of 2/3 and 1/3 of the pastry, then flatten into discs. Wrap each disc tightly in cling film then pop in the fridge to chill for at least 30 minutes whilst preparing the apples.
Prepare the apples
- Peel and core the apples, then slice them into thin slices. Place in a large bowl.
- Tip in the sugar, spices, cornflour (cornstarch) and salt before tossing everything together to completely coat the apples. Set aside to macerate for an hour.
Roll/cut the pastry, line the pie dish
- Once the pastry dough has chilled, roll out the larger chilled pastry disc into a circle about 3" wider than the base of the pie dish.
- Drape it carefully over the rolling pin and lift it into the tin, easing the pastry into the crevices. Do not stretch the pastry to make it fit.
- After lining the tin with pastry, gently fold the overhang of pastry over the lip of the pie dish, allowing it to drape over and down the side. Put to the side, but keep nearby and pull out the bowl with the filling.
The apple filling
- Using a slotted spoon, carefully remove the apples from the bowl, allowing the juices to drip off. Arrange the slices in the pastry shell in as flat and even a layer as you can, allowing some of the fruit to mound slightly in the middle of the pie.
- Once all the slices have been arranged in the pastry, transfer all the remaining liquid and spices into a small saucepan. Cook the juice down, stirring to keep it smooth, until it is syrupy, glossy and thickened, about 5 minutes. Stir in the butter until melted and gorgeously shiny. Pour this liquid evenly over the apple slices.
Create the lattice top
- Remove the smaller disc of pastry from the fridge and roll out to a circle about the same thickness of the base pastry. Using a pizza cutter or sharp knife, cut the pastry into 1" thick strips.
- Carefully lay five strips of pastry vertically on top of the apples, spacing them apart evenly to cover the top of the filling (image 1 below).
- Gently fold over the first, third and fifth strips of pastry, then lay a new strip of pastry across the middle of the pie (image 2). Return the folded over pastry strips to their original positions.
- Lift and fold over the second and fourth pastry strips, then place another strip of pastry horizontally across the other vertical strips before folding the strips back over. Repeat this process until you have ten strips of pastry in total, five vertical and five horizontal, forming a lattice on top of the pie (image 3).
- Fold the edges of the pastry under to create a smooth rounded edge (image 1). Crimp the edge by pushing the pastry in between two fingers of the opposite hand. This gives a pretty edge, but also seals the pastry, creating a lovely lip around the edge.
Time to bake
- Preheat the oven to 190C/375F.
- Lightly brush all the visible pastry with a lightly beaten egg. Sprinkle as generously as you wish with demerara sugar, if using.
- Take a long strip of foil and fold it lengthways twice to create a long narrow strip of foil. Use this strip to create a guard or shield for the crimped edge of the pie during initial baking, to stop it over browning and burning.
- Place the pie in the preheated oven and bake for 55-65 minutes. Check on the pie around 30 minutes and periodically after for the rest of baking, covering with a foil tent if required to prevent the pastry from burning. Remove the foil as required to aid the browning of the pastry. The pie is done when the filling is bubbling through and the apples can easily be pierced with a skewer.
- Once removed from the oven, allow your apple pie to cool completely. Place it in the fridge for a few hours or overnight to allow it to firm up completely. When ready to serve, you can either reheat in the oven at 180C/350F for 10 minutes or in the microwave. Or enjoy simply at room temperature. Enjoy!