
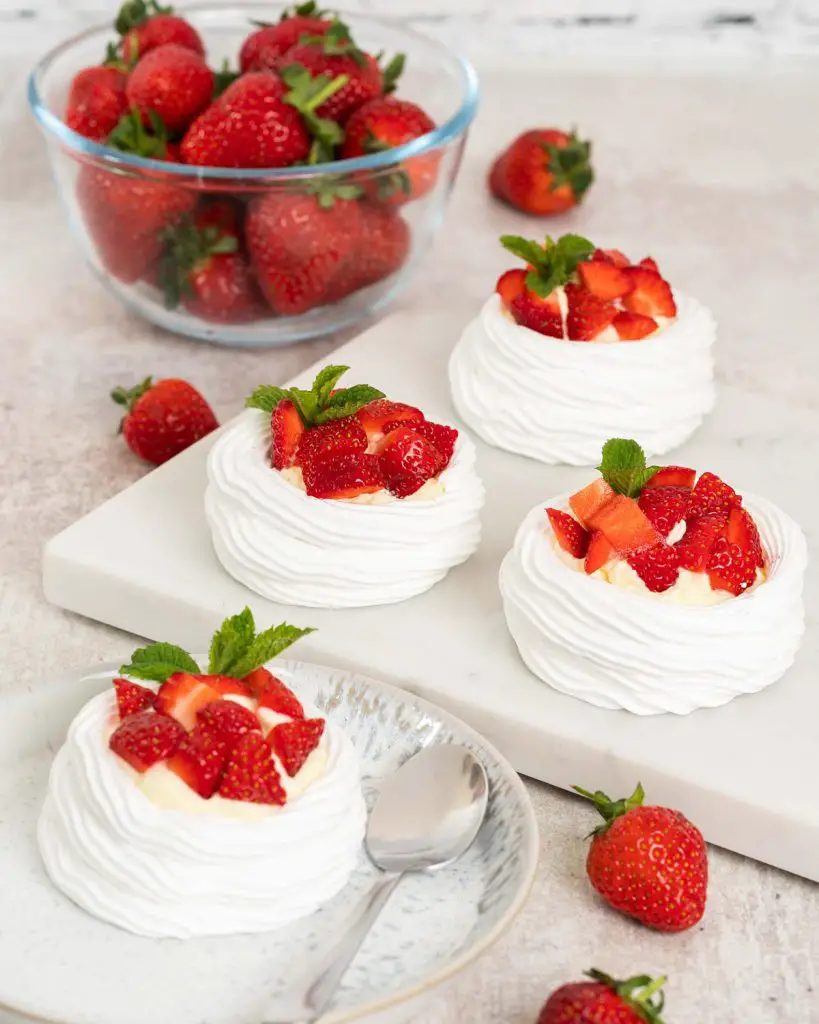
Everyone loves Eton mess and everyone loves pavlova… right? In fact, can you think of anything better than combining the two to make a heavenly strawberries and cream mini pavlova dessert? This was my thought process on how to make delicious Eton mess mini pavlova nests in just a few easy steps. A truly perfect British summertime dessert!
A super versatile bake
Meringues can be made as smaller, individual servings, such as in an Eton mess, or put together into a larger bake, such as a pavlova. I love the versatility of meringues and being able to create so many different desserts, including flavours and fillings to match.
And let’s not forget that meringue is often used as the base for other desserts too. Think macarons or even as the base for fillings and toppings such as swiss meringue buttercream. Being quite so versatile a sweet creation makes the humble meringue recipe all the more special to master, wouldn’t you agree?
What is pavlova?
Pavlova is a sweet meringue-based creation, originating in either Australia or New Zealand (there is some dispute with this!) in the early 20th century. It was created to honour the world renowned Russian ballerina Anna Pavlova during one of her tours to Australia and New Zealand in the 1920s. A pavlova is normally served topped with whipped cream and fresh fruit.
What is the difference between pavlova and meringue?
Both desserts are made of whipped egg whites and sugar, but that is where their similarities end. Meringues are crisp and dry all the way through, resulting in an almost melt-in-the-mouth experience. Pavlovas have a dry outer shell, but are soft and almost marshmallow-like pillowy softness in the middle.
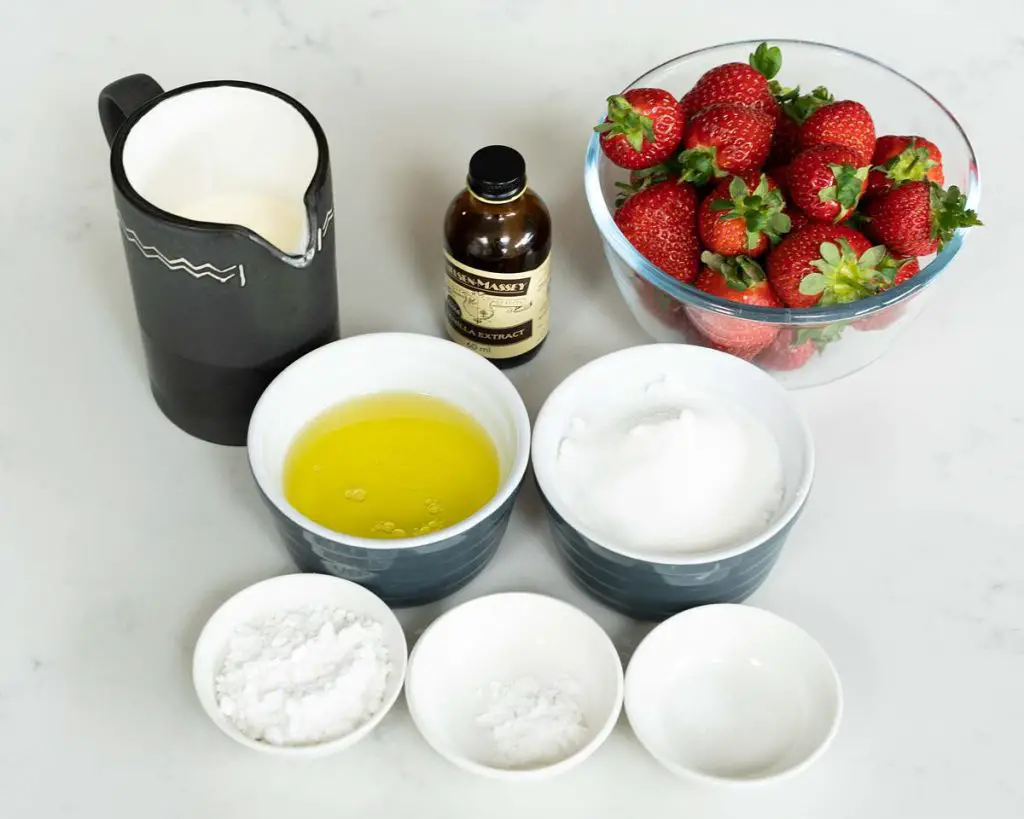
Ingredients for the mini pavlova nests
- Egg whites: the base for pavlovas and meringues are egg whites. Use eggs as fresh as possible, and at room temperature for best results.
- Lemon juice: gives the meringue nest recipe stability when baked.
- Salt: a little pinch, just to round off the flavour of the meringue cake.
- Caster sugar: I use white caster sugar to make these pavlova nests, but you could use golden caster sugar for a slightly more caramel flavour if you wish too.
- Double/heavy cream: essential for the filling in each mini meringue nest.
- Vanilla: used in the filling for beautiful flavour.
- Icing sugar: to sweeten the fillings for meringue nests.
- Fresh strawberries: I used strawberries as this is the traditional fruit used when making a classic Eton mess.
Equipment required for these mini pavlova nests
- Parchment paper: needed to draw the circles on before baking the pavlova nests.
- Baking trays*: to bake the mini pavlova on.
- Digital kitchen scales*: I provide all my measurements in cups too, however I would encourage all bakers to weigh out ingredients when baking. A set of digital kitchen scales is so useful and totally an essential baking tool for me.
- Measuring spoons*: a set of measuring spoons is essential for any baker. This is because these are more accurate than using everyday teaspoons and tablespoons, which can vary greatly in size.
- Stand mixer*/Handheld electric mixer*: both useful tools to make life easier in the kitchen! You can, of course, make this whole recipe entirely by hand. But it will be quite the workout for your arm!
- Large mixing bowl*: to mix together the fillings for meringue nests before using to fill and enjoy these delightful desserts!
- Spatula*: helpful to scoop out the meringue and the cream from the mixing bowls when making this Eton mess recipe.
- Piping bag*: used for piping the pavlova mixture before baking.
- Piping nozzle*: gives a pretty finish to each meringue nest. This is an optional tool though, you can just as easily just snip the end of a piping bag and not use a nozzle.
How to make pavlova
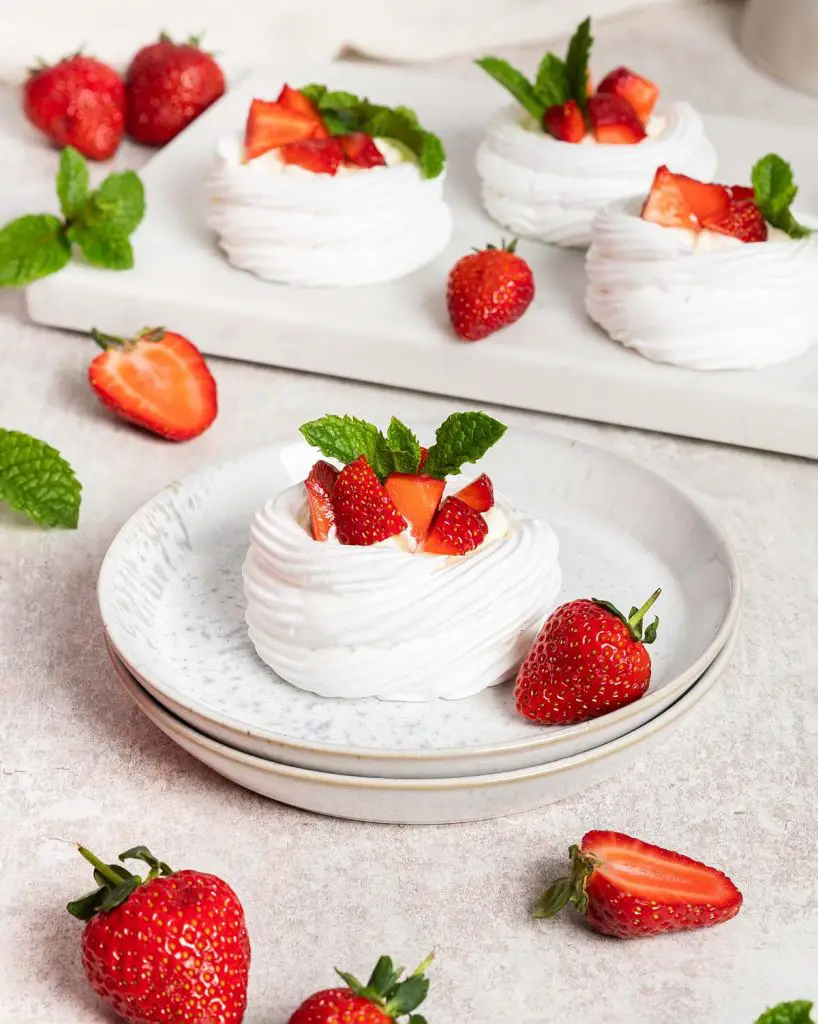
This is a fabulous dessert for summertime entertaining! Make the nests ahead of time, then simply fill with whipped cream and top with fresh fruit when ready to serve. Simple!
To make the mini pavlova nests
Step 1: Draw eight 3″-4″ circles on a piece of parchment paper. Flip it over, so the drawn on side is face down. Use some tape to stick the paper to the baking tray then set it aside. Preheat the oven to 120C/250F.
Step 2: Before you start making the mini meringue nests, clean out the mixing bowl throughly and give it a quick wipe over with a few drops of lemon juice (see notes for why). Tip the egg whites, salt and cream of tartar into the clean bowl and whisk on a medium speed for a few minutes until the mixture is foamy.
Step 3: With the mixer on medium-high speed, slowly add in the sugar one tablespoon at a time. Beat it together for about 10 seconds between additions, to help ensure all the sugar has been incorporated and is dissolved. Keep mixing until the meringue mixture forms stiff peaks and is smooth and glossy. This takes me about 7-8 minutes in total.
Shaping the pavlova
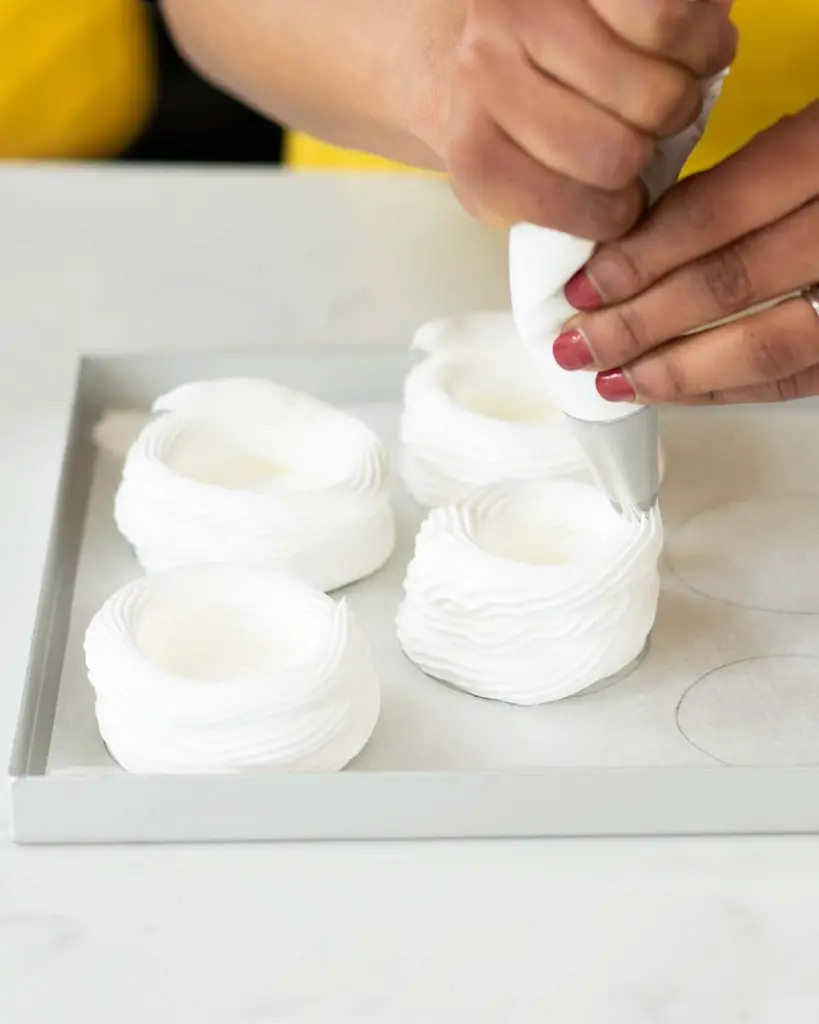
Step 1: Transfer the mixture to a piping bag fitted with a star nozzle. Pipe the mixture starting in the middle of one of the drawn circles, spiralling out to the edge to fill the base. Then pipe a wall of meringue just up the outside edge of the circle, about 3 levels tall. Repeat with the rest of the mixture to create eight nests.
Step 2: Place the baking tray in the oven, and immediately turn the oven down to 100C/210F. Bake for 50 minutes, then turn the oven off leaving the door shut. Leave the nests to cool completely without opening the oven door, ideally overnight.
Assemble the pavlova
Step 1: When ready to assemble the mini pavlova nests, place the double cream in a mixing bowl with the icing (powdered) sugar and vanilla. Beat this together until it reaches soft peaks.
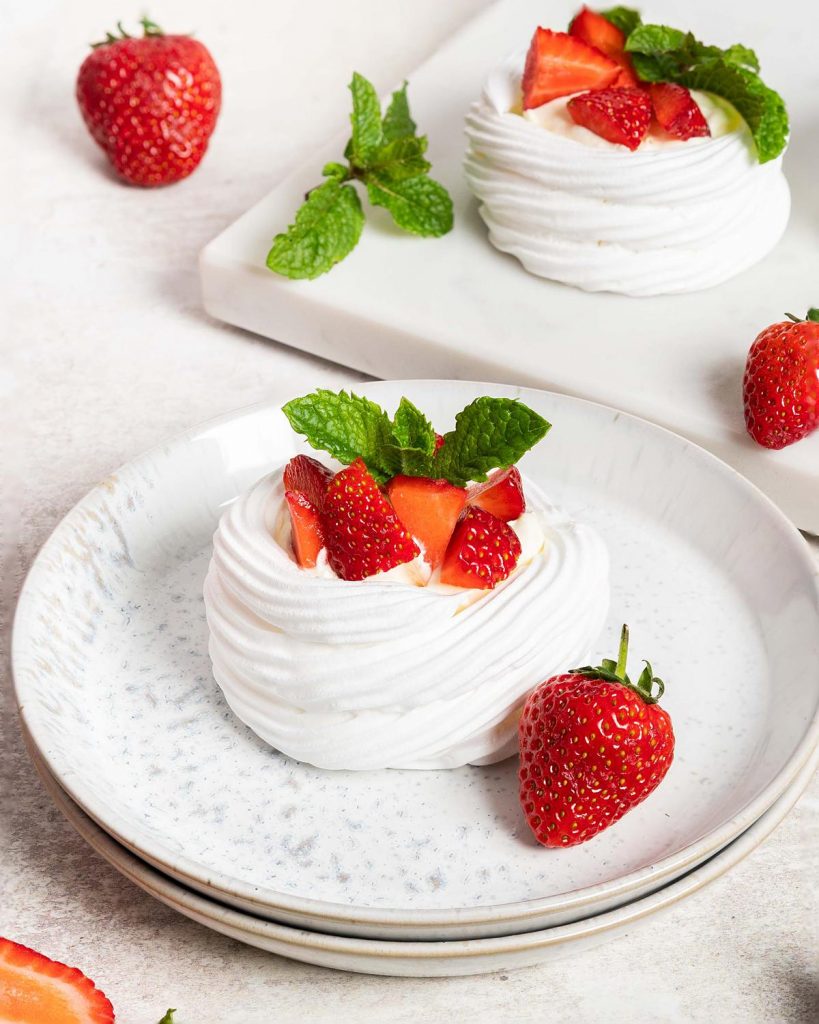
Step 2: Layer the whipped cream and chopped strawberries in the mini pavlova nests, finishing with some chopped strawberries to top the nests. Add an optional sprig of mint for decoration, if you wish. Enjoy!
Do I need to keep these Eton mess mini pavlova nests in the fridge?
The mini strawberry pavlova nests should be served soon after they are assembled. This means they do not need to be kept in the fridge before they are served.
How far in advance can I make the nests?
You can make the pavlova nests recipe up to 24 hours before you wish to serve this dessert. Too much more could result in them starting to soften and lose their crisp outer shell, depending on the weather where you live.
How long does this mini pavlova recipe last?
Once the nests have been assembled, the whole thing is best being consumed immediately. If left too long, the shell will dissolve from the moisture of the filling and the dessert will lose its texture, turning instead into delicious layers of sweet fluff instead!
Storing pavlova nests
Once baked and cool, store the mini pavlova nests in an airtight container in a cool dry place away from direct sunlight.
Can I freeze this mini pavlova recipe?
Unfortunately, this dessert cannot be frozen as neither the meringue nor cream filling will freeze very well.
Tips for making mini pavlovas
- Make sure the mixing bowl is thoroughly clean and grease free before beating the egg whites up. Grease inhibits the egg whites from whipping up, so you will not be able to get it mixed up to bake into a pavlova.
- Separate the eggs carefully, as any egg yolks will have a similar effect as grease, and prevent the egg whites from whipping up.
- When adding sugar to the egg white mixture, add it a spoonful at a time. This will allow the sugar to be properly incorporated with the egg whites and dissolve into the mixture. This is important to give a smooth and not grainy pavlova.
- A great (and rather bold!) way to test if the egg whites ready is to turn the bowl upside down (over your head if you are REALLY brave!). If they are beaten to stiff peaks, the pavlova mixture will remain in the bowl and not fall out. If they are not, they will slide out. Do it slowly so you can check, and also so you can avoid the mess and clean up in case they are not ready yet!
- Once the mini pavlova nests are baked, it is really important NOT to open the oven door. Opening the door will change the temperature of the oven really quickly, resulting in cracks in the nests. This is why it is vital to leave them to cool completely in the oven once baked. Leaving them to cool in the oven overnight is ideal so they can cool slowly.
- Make the whipped cream filling a few hours before you need it and pop it into the refrigerator until required. This makes it much more convenient to bring the whole mini pavlova nest together quickly.
- Serve the mini pavlova nests as soon as they have been assembled for them to be at their best. This bake will not keep well and should be eaten and enjoyed as soon as it is assembled.
Troubleshooting
If you have any questions about this recipe, please comment below and I will do my best to help. And do remember: if you enjoy this recipe for meringue nests, please leave a rating and review below. You could even post a picture on Instagram and tag me when you share it with the world. You already know I would love to see!
More recipes from my blog for you to enjoy
Union Jack meringue cake: I absolutely adore meringues, in all its forms, but a meringue cake has to be one of the most beautiful and special desserts ever! I absolutely love my meringue with fresh fruit, so getting creative with the Union Jack design on top just had to be done!
Chocolate strawberry cheesecake: These beauties have a deep cookies and cream crust, a silky smooth chocolate cheesecake filling and a hidden strawberry middle. I love these as mini no bake chocolate cheesecakes, but this could easily be made as one larger no bake chocolate cheesecake too!
White chocolate and raspberry tart: One of my all time favourite flavour combinations, this white chocolate and raspberry tart is sure to be a popular one with everyone who tries it. Soft set raspberry and white chocolate layers sit on a delicious biscuit crumb base. It is wonderfully easy to make and a truly elegant dessert that will wow your guests.
Thanks for joining me today, my friends. Hope you enjoy making and sharing this stunning dessert and happy baking! x
Recommended equipment I used *
| Baking trays | Digital kitchen scales |
| Measuring spoons | Stand mixer/Handheld electric mixer |
| Large mixing bowl | Spatula |
| Piping bag | Piping nozzle |

Eton Mess Mini Pavlova Nests
Ingredients
For the mini pavlovas
- 3 large egg whites
- pinch salt
- 175 g (¾ cup + 2 tbsp) caster sugar
- 0.5 tsp cream of tartar
For the filling and finishing
- 200 ml (¾ cup + 1 tbsp) double (heavy) cream
- 1 tbsp icing (powdered) sugar
- 1 tsp vanilla
- 200 g (1 cup) strawberries, hulled and chopped
Instructions
To make the mini pavlova nests
- Draw eight 3"-4" circles on a piece of parchment paper. Flip it over, so the drawn on side is face down. Use some tape to stick the paper to the baking tray then set it aside. Preheat the oven to 120C/250F.
- Before you start making the mini meringue nests, clean out the mixing bowl throughly and give it a quick wipe over with a few drops of lemon juice (see notes for why). Tip the egg whites, salt and cream of tartar into the clean bowl and whisk on a medium speed for a few minutes until the mixture is foamy.
- With the mixer on medium-high speed, slowly add in the sugar one tablespoon at a time. Beat it together for about 10 seconds between additions, to help ensure all the sugar has been incorporated and is dissolved. Keep mixing until the meringue mixture forms stiff peaks and is smooth and glossy. This takes me about 7-8 minutes in total.
Shaping the pavlova
- Transfer the mixture to a piping bag fitted with a star nozzle. Pipe the mixture starting in the middle of one of the drawn circles, spiralling out to the edge to fill the base. Then pipe a wall of meringue just up the outside edge of the circle, about 3 levels tall. Repeat with the rest of the mixture to create eight nests.
- Place the baking tray in the oven, and immediately turn the oven down to 100C/210F. Bake for 50 minutes, then turn the oven off leaving the door shut. Leave the nests to cool completely without opening the oven door, ideally overnight.
Assemble the pavlova
- When ready to assemble the mini pavlova nests, place the double cream in a mixing bowl with the icing (powdered) sugar and vanilla. Beat this together until it reaches soft peaks.
- Layer the whipped cream and chopped strawberries in the mini pavlova nests, finishing with some chopped strawberries to top the nests. Add an optional sprig of mint for decoration, if you wish. Enjoy!
5 stars ⭐️ Fabulous recipe, easy to follow & turned out perfectly!