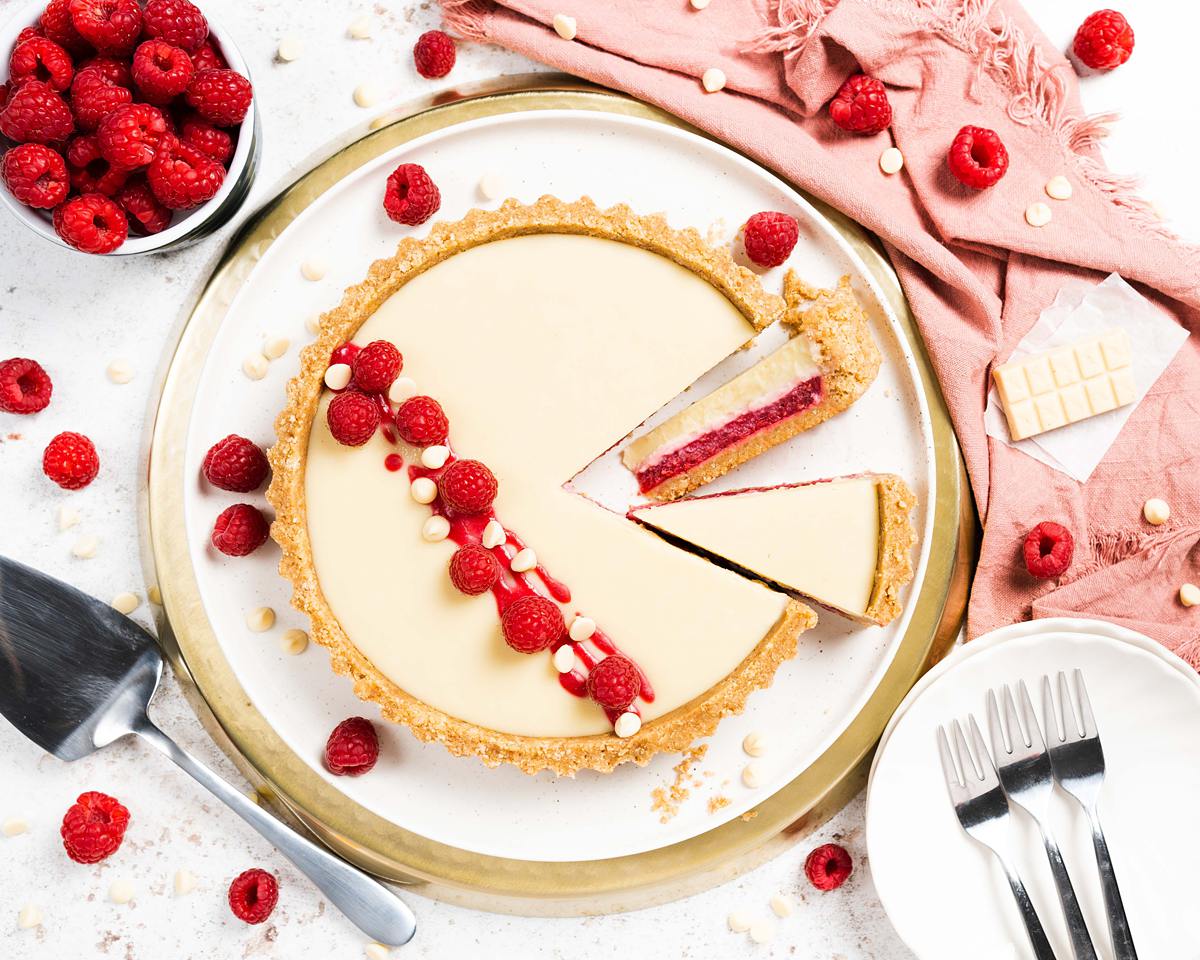
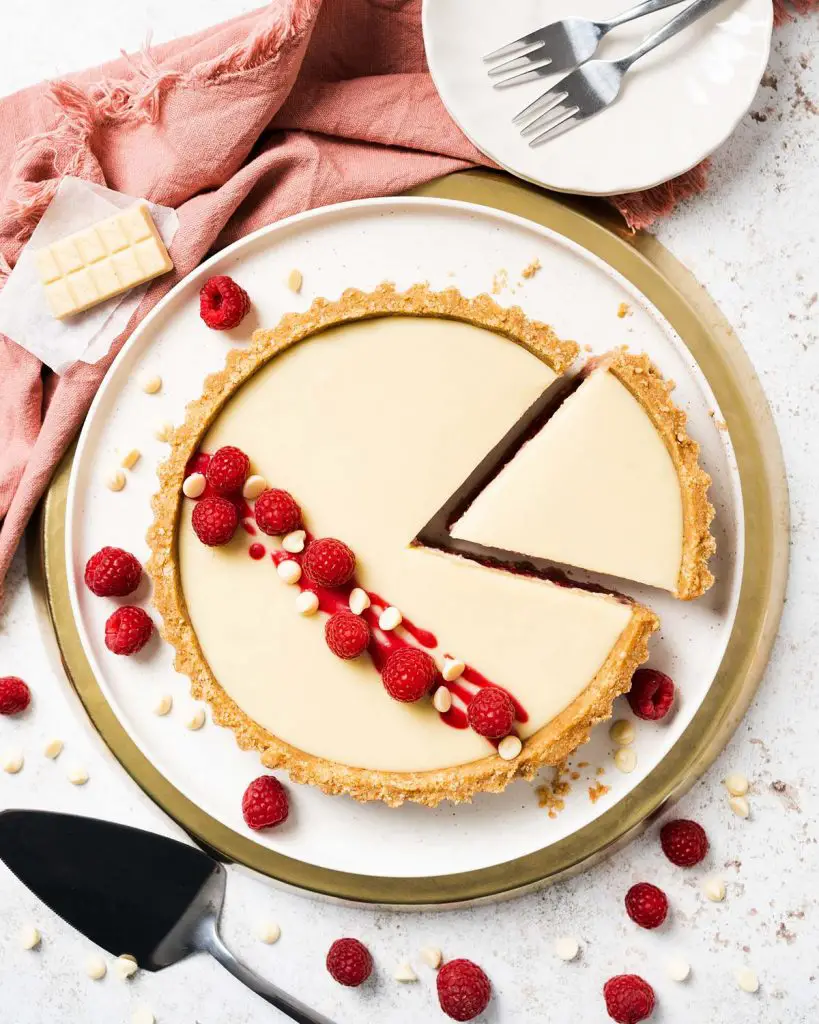
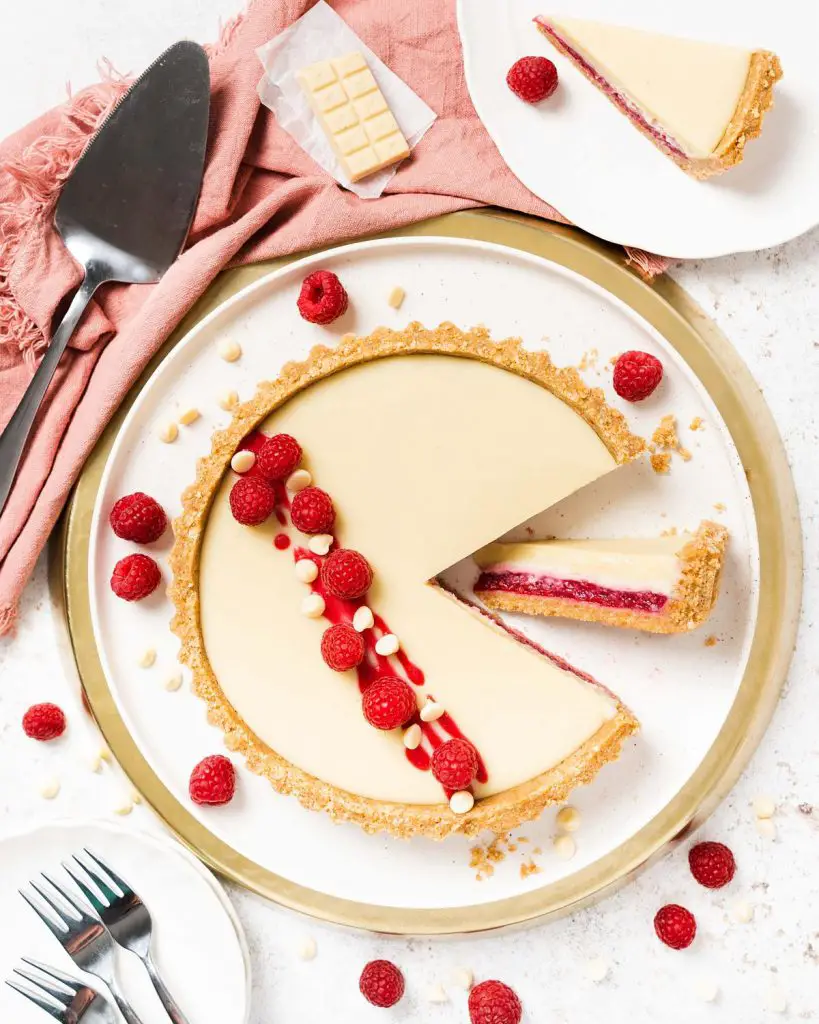
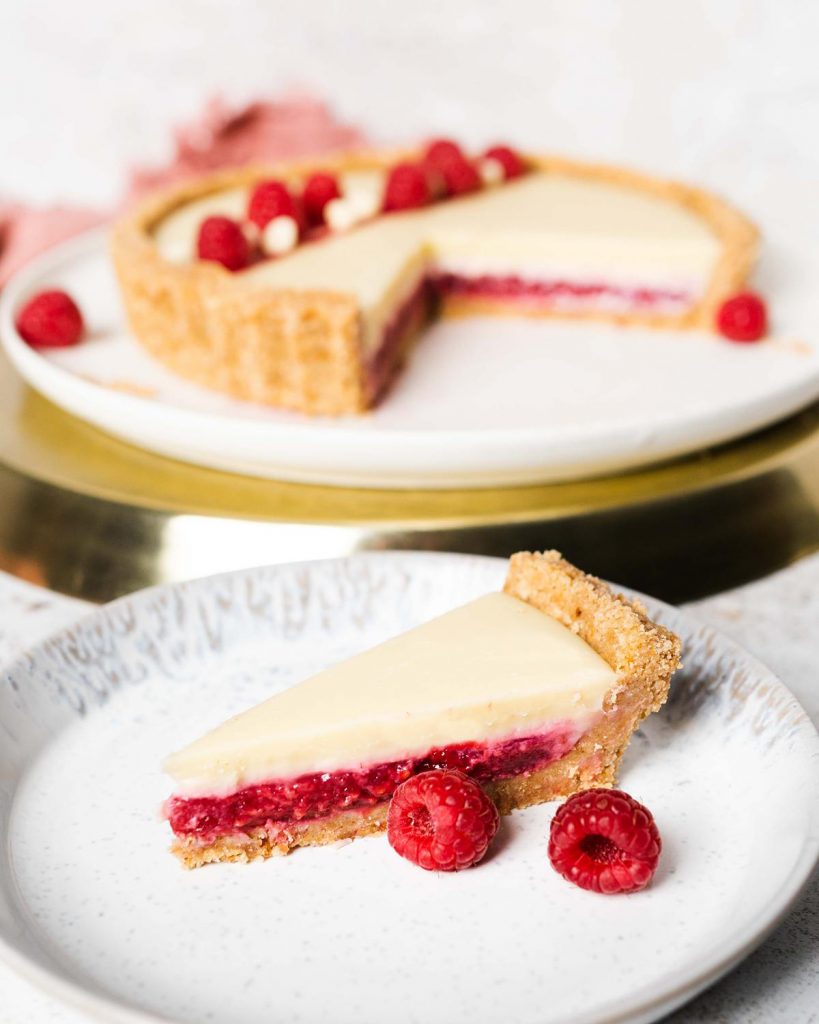
One of my all time favourite flavour combinations, this white chocolate and raspberry tart is sure to be a popular one with everyone who tries it. Soft set raspberry and white chocolate layers sit on a delicious biscuit crumb base. It is wonderfully easy to make and a truly elegant dessert that will wow your guests.
An ever popular choice
As you may already recall, I am a huge fan of white chocolate and raspberry desserts. The blend of sharp raspberries and sweet white chocolate is just pure heaven to me. I honestly could enjoy it all day long! In fact, I would go so far as to say raspberries with any chocolate is just divine. However, white chocolate raspberry desserts have a truly special place in my heart over all other chocolate combinations.
If you love baking with raspberries and chocolate too, I have listed a few of the bakes on my blog lower down this post for you to look at. Go check them out, you will not be disappointed!
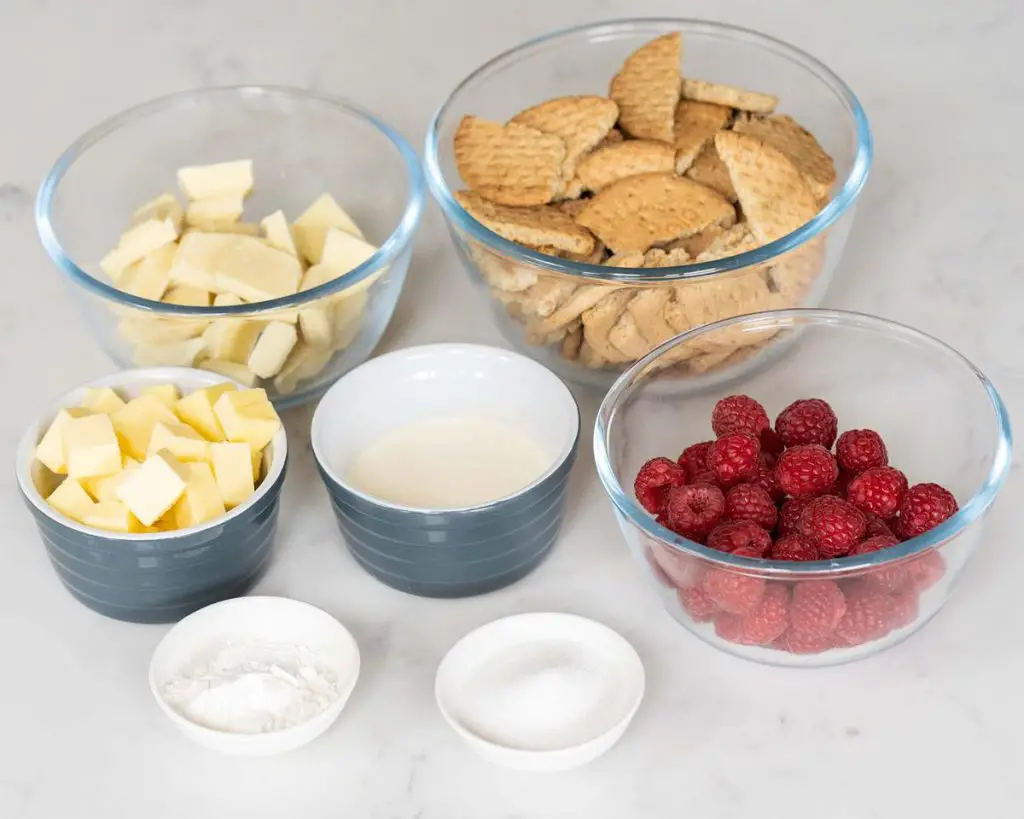
What ingredients do I need to make this white chocolate and raspberry tart?
- Digestive biscuits: for the biscuit base of the chocolate raspberry tart.
- Butter: I use unsalted butter, both in the base and the white chocolate ganache layer in the tart.
- Raspberries: one half of the key flavours in this easy no bake tart.
- Caster sugar: for sweetness in this easy white chocolate raspberry tart.
- Cornflour/cornstarch: helps to thicken the raspberry layer in the tart. This allows it to set and not be runny, but without using gelatin or agar agar.
- White chocolate: the second of the key flavours in this raspberry white chocolate tart. Use a good quality chocolate for best flavour.
- Double/heavy cream: combined with the chocolate and butter. Makes a wonderfully velvety smooth ganache layer to top the white chocolate tart with raspberry.
What equipment do I need to make this tart?
- Digital kitchen scales*: I always recommend using digital kitchen scales to weigh ingredients out over using a volume based measuring system, as cups. Weighing out the ingredients is much more accurate than measuring by volume. It will ensure better results in the tart, so I would definitely take the plunge if you have not already.
- Measuring spoons*: for measuring smaller quantities such as tablespoons (tbsp) and teaspoons (tsp), a set of dedicated measuring spoons is a must! These are far more accurate than everyday eating spoons, and are really easy to get hold of too.
- Mixing bowl*: to mix all the ingredients together to make the base for this white chocolate and raspberry tart.
- Spatula*: to help with mixing ingredients and levelling off the fillings.
- Loose-bottomed tart tin*: makes it a lot easier to remove the tart once chilled without breaking it. I like using one with a fluted edge as I think it looks so very pretty. However even a loose bottomed cake tin will work well too.
- Small saucepan*: to make and thicken the raspberry layer and to melt together the chocolate layer when making this white chocolate raspberry torte.
How to make white chocolate and raspberry tart
There are three basic parts to making this tart. First, make the simple two ingredient base, then either chill or bake before chilling (more on that later) whilst preparing the next layer. Then comes the raspberry layer, which is so simple to make, which is poured on the base and left to chill to start setting. Finally is the white chocolate ganache layer to top the layers, along with an optional decoration if you wish.
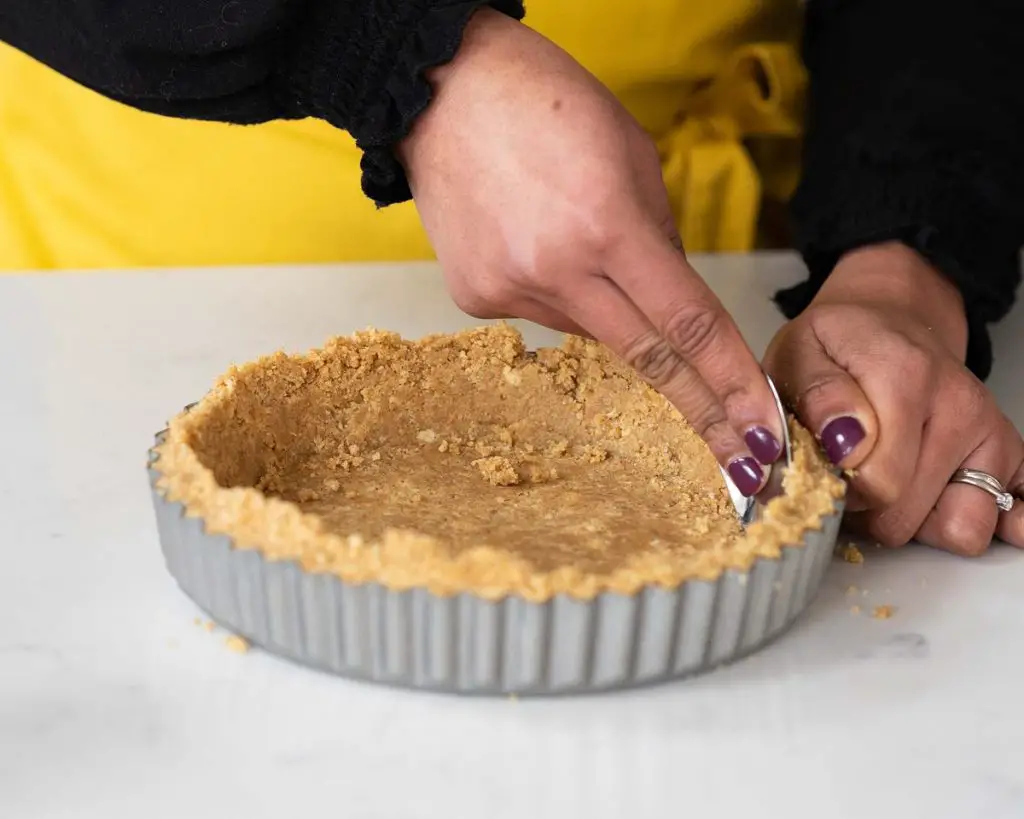
For the base
Step 1: Crush the digestive biscuits into fine crumbs. This can be done by placing the biscuits in a sealable freezer bag and bashing with a rolling pin (great stress relief!) or in a food processor if time is of the essence. Once crushed, mix the biscuits and melted butter together until evenly combined, then press in the bottom and up the sides of the tart tin.
Step 2: OPTIONAL STEP: Preheat the oven to 180C/350F and bake the base for 8-10 minutes. Doing this makes the base firmer and more set, and not as crumbly as the unbaked version. This is a good step to do too if you are making this tart more than a day in advance, as it will seal the base and prevent risk of it absorbing any liquids from the fillings.
For the raspberry layer
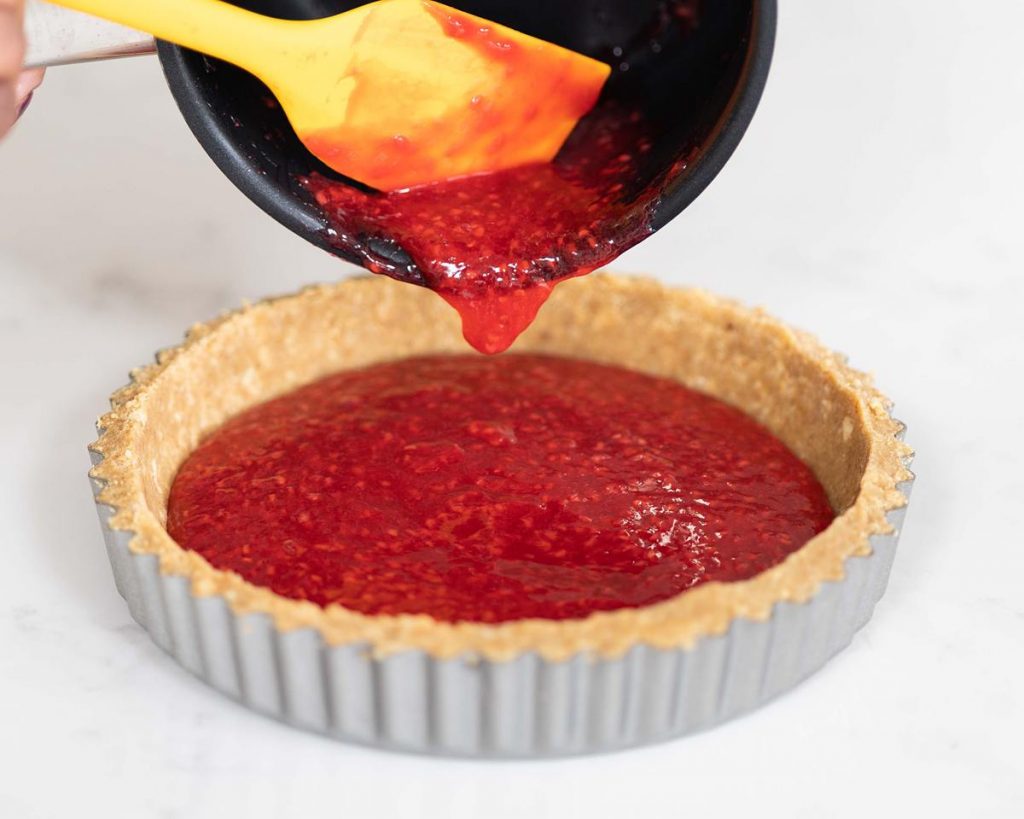
Step 1: While the base is chilling, make the raspberry layer. Place the raspberries in a small saucepan with a splash of the water. Cook until the fruit has broken down and it is easily mashable with a spatula. Remove from the heat and set aside for a moment.
Step 2: In a separate small bowl, combine the remaining water and cornflour into a loose white liquid. Tip this slurry into the mashed raspberries along with the sugar, then return the pan to the heat. Cook for a couple of minutes until the mixture is bubbling and has thickened to a jam like consistency. Reserve a teaspoon or so of just the liquid (trying to avoid the seeds) for decoration if you wish. Cool for a few minutes before pouring onto the chilled base and spreading it out evenly. Return to the fridge to chill for at least 30 minutes.
For the white chocolate layer
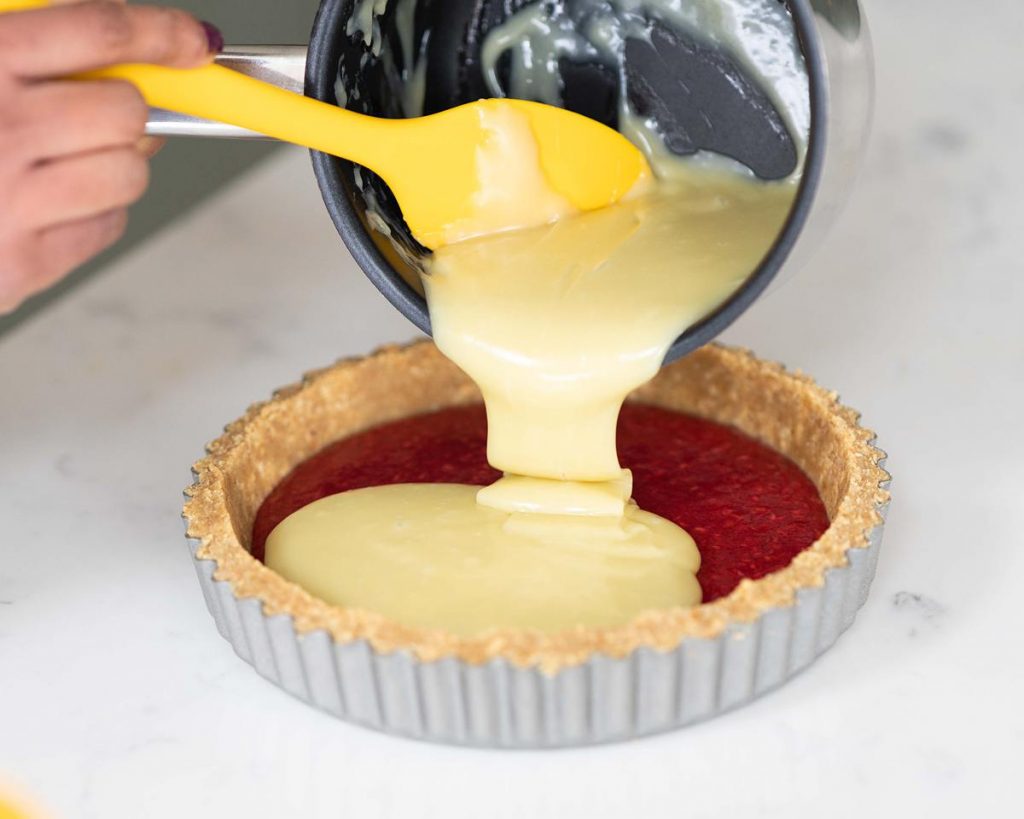
Step 1: Once the raspberry filling has chilled and has a firm skin, make the white chocolate layer. Simply melt the chocolate, cream and butter together gently in a saucepan, stirring to combine until smooth and silky. Carefully pour the white chocolate ganache onto the raspberry coulis layer and spread out evenly.
Step 2: Drop the tin on a work surface a few times to help any air bubbles come to the surface, popping them with a skewer, a toothpick or a knife. Once you are satisfied, ensure the chocolate layer is smooth on top, then return the tart to the fridge to set completely.
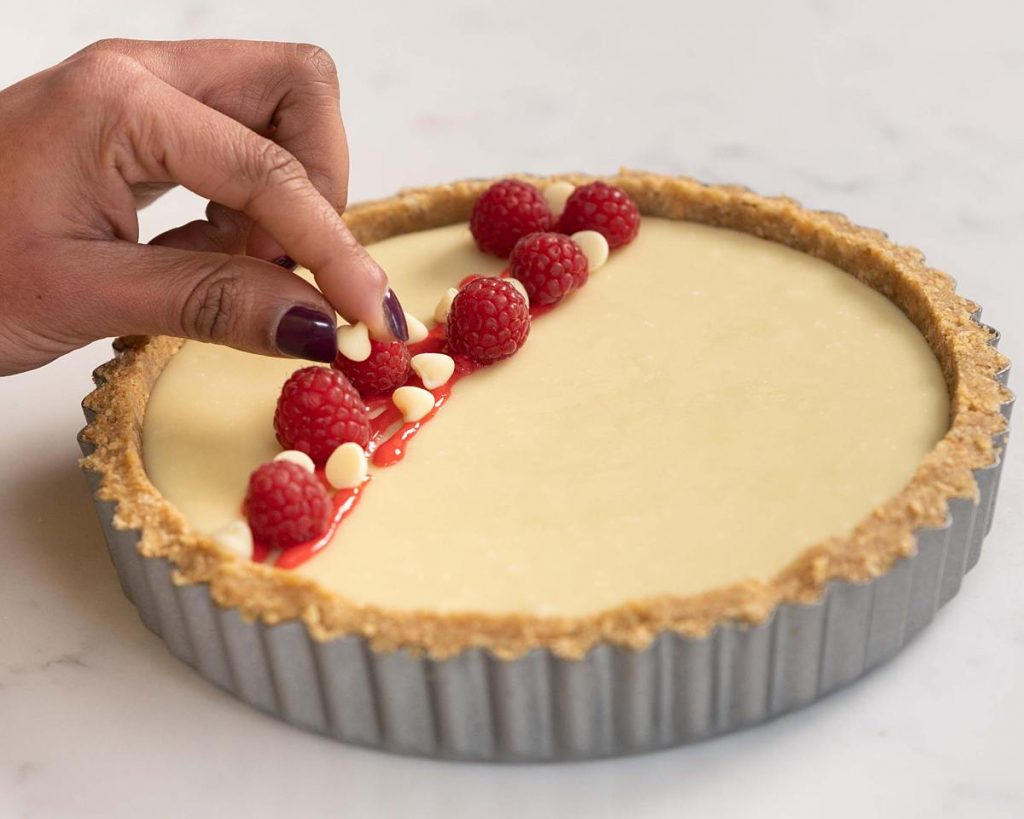
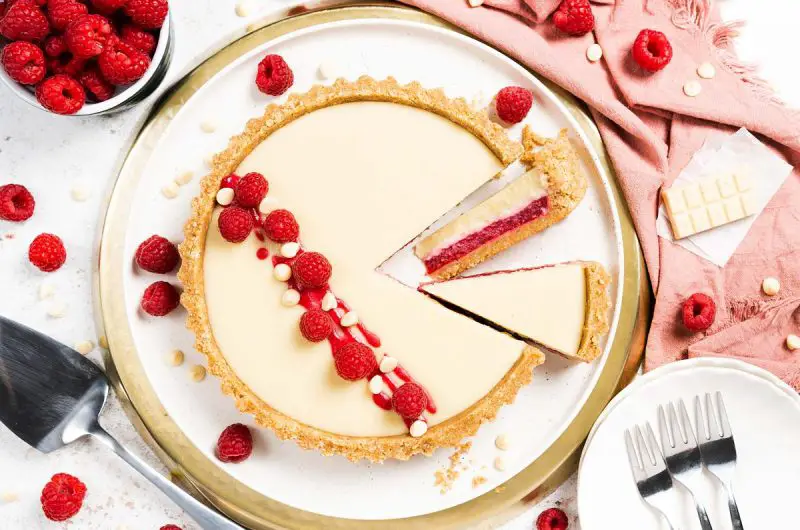
Step 3: As an optional decoration, one the chocolate layer has set, gently warm up the raspberry liquid again and drizzle it over the tart. Finish with a few additional raspberries and some white chocolate chips. Leave the tart to come to room temperature for at least 30 minutes before serving. Enjoy!
Do I need to line my tart tin?
There is no need to line the tin, the white chocolate and raspberry tart should release without too much drama. If you wish to make it even easier to release, place a circle of parchment in the base of the tin before pushing the base in. However this is absolutely not necessary, would just make it slightly easier to release.
How long does the white chocolate and raspberry tart need to set?
The base and raspberry layer can be done back to back, unless you bake the base. In this case I would recommend allowing the base to cool to room temperature before adding the raspberry filling. The white chocolate layer should be put on once the fruit layer has a thin skin formed on top. This prevents them from bleeding together. The fruit layer takes about 30 minutes to form this layer once chilled. The chocolate layer will need at least a couple of hours in the fridge to set.
How far in advance can I make this white chocolate and raspberry tart recipe?
This recipe can be made the morning before serving or up to two days ahead of when it will be enjoyed.
How to store the raspberry and white chocolate tart
The tart should be stored in the fridge until it is to be served. Pull it out of the fridge and allow to come to room temperature at least 30 minutes before serving.
Additional tips for making the best white chocolate and raspberry dessert
- Use a loose bottomed tin to make the dessert. This makes it so much easier to release the tart from the tin. You could even place a smaller circle of parchment on the base before pressing the biscuit mixture in, to facilitate release from the tin when removing it.
- Baking the base makes it firmer and more stable, so it will not be as crumbly when cut into on serving. I would recommend baking it if you are making this tart more than a day in advance, to help ensure the base does not get too soft from the (wet) fillings. This is totally an optional step, the tart is just fine without baking too.
- When cooking down the raspberry layer once the cornflour slurry has been added, look for it to be fairly thick and almost like hot jam. It will still be a little runny (but thick) when removed from the heat, but will thicken further and set once cooled.
- You can make the white chocolate tart filling in the microwave too if you prefer. Either way works just as well, so do what suits you best!
- Tapping the tin on a work surface brings any air bubbles to the top. This means they can be popped and the layer smoothed over before leaving to set, giving you a nice clean finish to the top of the tart.
- My suggestion for decoration is really just that! Feel free to decorate how you wish, with additional raspberries and drizzles of white chocolate, or just leave plain and enjoy as is!
- Bring the tart out of the fridge for at least 30 minutes before serving. This is important to allow the chocolate layer to soften so that the raspberry layer does not get squished out when the tart is cut.
Troubleshooting
If you have any questions about this no bake chocolate raspberry tart, please comment below and I will do my best to help. And do remember: if you enjoy this recipe for chocolate raspberry ganache tart, please leave a rating and review below. You could even post a picture on Instagram and tag me when you share it with the world. You already know I would love to see!
More recipes from my blog for you to enjoy
Raspberry and white chocolate loaf cake: My raspberry and white chocolate loaf cake is pure HEAVEN! A beautiful soft loaf cake, packed with plenty of white chocolate chips and fresh raspberries. This divine creation is then topped with a lighter than air, to die for white chocolate buttercream. And to finish it off, plenty more raspberries and white chocolate chips. Loaf cake heaven!
Raspberry white chocolate blondies: My raspberry white chocolate blondies are chewy and utterly delicious, with the stunning flavours of sweet white chocolate and tart fresh raspberries perfectly complementing each other. If you’re looking for a bake guaranteed to be adored by everyone who tries it, look no further: this is the one! I kid you not, these blondies are so good, even I have been known to fight for the last piece!
Chocolate raspberry cupcakes: My chocolate raspberry cupcakes are delicious light and fluffy chocolate cupcakes topped with a tangy and sweet fresh raspberry buttercream. It is crowned with chocolate curls and a single raspberry to finish. Perfect for chocolate lovers during raspberry season!
Raspberry ruby chocolate cookies: My raspberry ruby chocolate cookies are chewy and dense and packed with lots of beautiful flavours! Delicious deeply chocolatey cookies are packed with ruby and white chocolate chips and freeze dried raspberries for pops of yummy flavour. Perfect for a fruity chocolatey cookie fix!
Thanks for joining me today, my friends and happy baking! x
Recommended equipment I used *
| Digital kitchen scales | Measuring spoons |
| Mixing bowl | Spatula |
| Loose-bottomed tart tin | Small saucepan |
White Chocolate and Raspberry Tart
12
servings30
minutes3
hours20
minutes316
kcal3
hours50
minutesA true raspberry and white chocolate showstopper that will impress all your friends and family!
Keep the screen of your device on
Ingredients
- For the base
250 g (2 ¼ cups) digestive biscuits, crushed
120 g (½ cup + 1 tbsp) unsalted butter, melted
- For the raspberry layer
190 g (1 ½ cups) raspberries (fresh or frozen), plus extra to decorate
115 ml (½ cup) water
1 tbsp cornflour (cornstarch)
2 tbsp caster sugar
- For the white chocolate layer
200 g (1 ½ cups + 1 tbsp) white chocolate
70 ml (¼ cup + 1 tbsp) double cream
30 g (2 tbsp + 1 tsp) unsalted butter
Directions
- For the base
- Crush the digestive biscuits into fine crumbs. This can be done by placing the biscuits in a sealable freezer bag and bashing with a rolling pin (great stress relief!) or in a food processor if time is of the essence. Once crushed, mix the biscuits and melted butter together until evenly combined, then press in the bottom and up the sides of the tart tin.
- OPTIONAL STEP: Preheat the oven to 180C/350F and bake the base for 8-10 minutes. Doing this makes the base firmer and more set, and not as crumbly as the unbaked version. This is a good step to do too if you are making this tart more than a day in advance, as it will seal the base and prevent risk of it absorbing any liquids from the fillings.
- For the raspberry layer
- While the base is chilling, make the raspberry layer. Place the raspberries in a small saucepan with a splash of the water. Cook until the fruit has broken down and it is easily mashable with a spatula. Remove from the heat and set aside for a moment.
- In a separate small bowl, combine the remaining water and cornflour into a loose white liquid. Tip this slurry into the mashed raspberries along with the sugar, then return the pan to the heat. Cook for a couple of minutes until the mixture is bubbling and has thickened to a jam like consistency. Reserve a teaspoon or so of just the liquid (trying to avoid the seeds) for decoration if you wish. Cool for a few minutes before pouring onto the chilled base and spreading it out evenly. Return to the fridge to chill for at least 30 minutes.
- For the white chocolate layer
- Once the raspberry filling has chilled and has a firm skin, make the white chocolate layer. Simply melt the chocolate, cream and butter together gently in a saucepan, stirring to combine until smooth and silky. Carefully pour the white chocolate ganache onto the raspberry coulis layer and spread out evenly.
- Drop the tin on a work surface a few times to help any air bubbles come to the surface, popping them with a skewer, a toothpick or a knife. Once you are satisfied, ensure the chocolate layer is smooth on top, then return the tart to the fridge to set completely.
- As an optional decoration, one the chocolate layer has set, gently warm up the raspberry liquid again and drizzle it over the tart. Finish with a few additional raspberries and some white chocolate chips. Leave the tart to come to room temperature for at least 30 minutes before serving. Enjoy!
Notes
- Use a loose bottomed tin to make the dessert. This makes it so much easier to release the tart from the tin. You could even place a smaller circle of parchment on the base before pressing the biscuit mixture in, to facilitate release from the tin when removing it.
- Baking the base makes it firmer and more stable, so it will not be as crumbly when cut into on serving. I would recommend baking it if you are making this tart more than a day in advance, to help ensure the base does not get too soft from the (wet) fillings. This is totally an optional step, the tart is just fine without baking too.
- When cooking down the raspberry layer once the cornflour slurry has been added, look for it to be fairly thick and almost like hot jam. It will still be a little runny (but thick) when removed from the heat, but will thicken further and set once cooled.
- You can make the white chocolate tart filling in the microwave too if you prefer. Either way works just as well, so do what suits you best!
- Tapping the tin on a work surface brings any air bubbles to the top. This means they can be popped and the layer smoothed over before leaving to set, giving you a nice clean finish to the top of the tart.
- My suggestion for decoration is really just that! Feel free to decorate how you wish, with additional raspberries and drizzles of white chocolate, or just leave plain and enjoy as is!
- Bring the tart out of the fridge for at least 30 minutes before serving. This is important to allow the chocolate layer to soften so that the raspberry layer does not get squished out when the tart is cut.
looks like delicious. what size tart tin do I use for this recipe?
Hi Rosie, thanks so much I’m glad you like it! My tart tin is 20cm/8″. Hope that helps!