
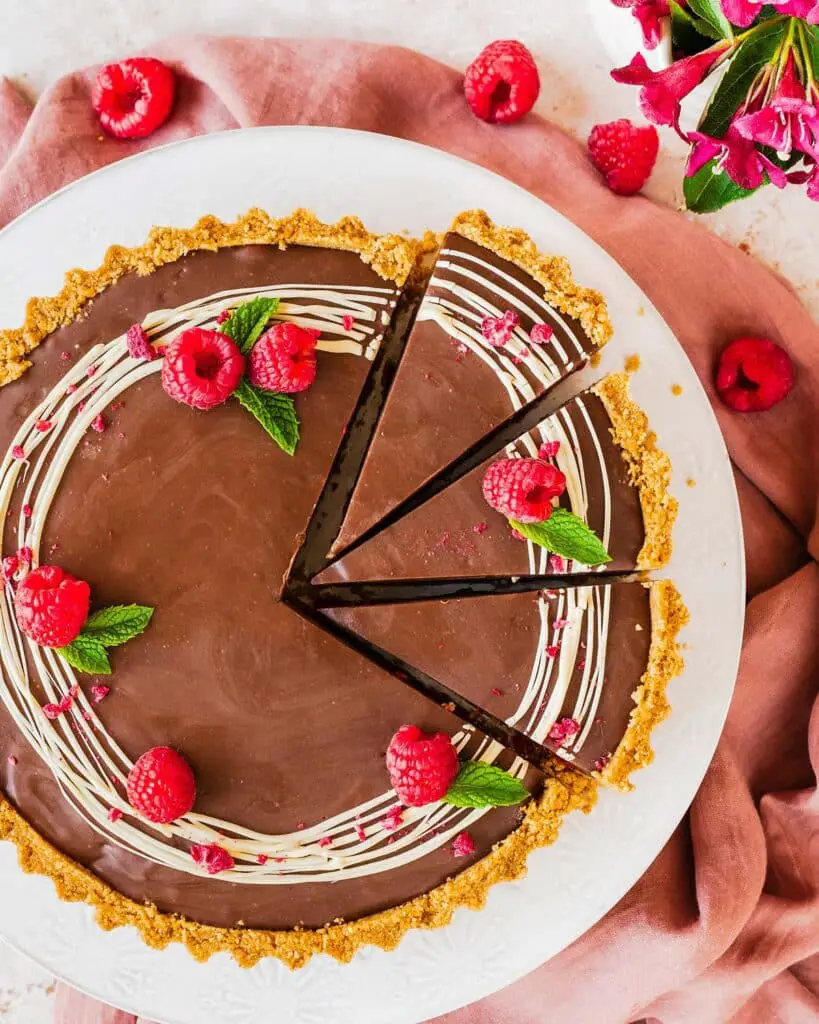
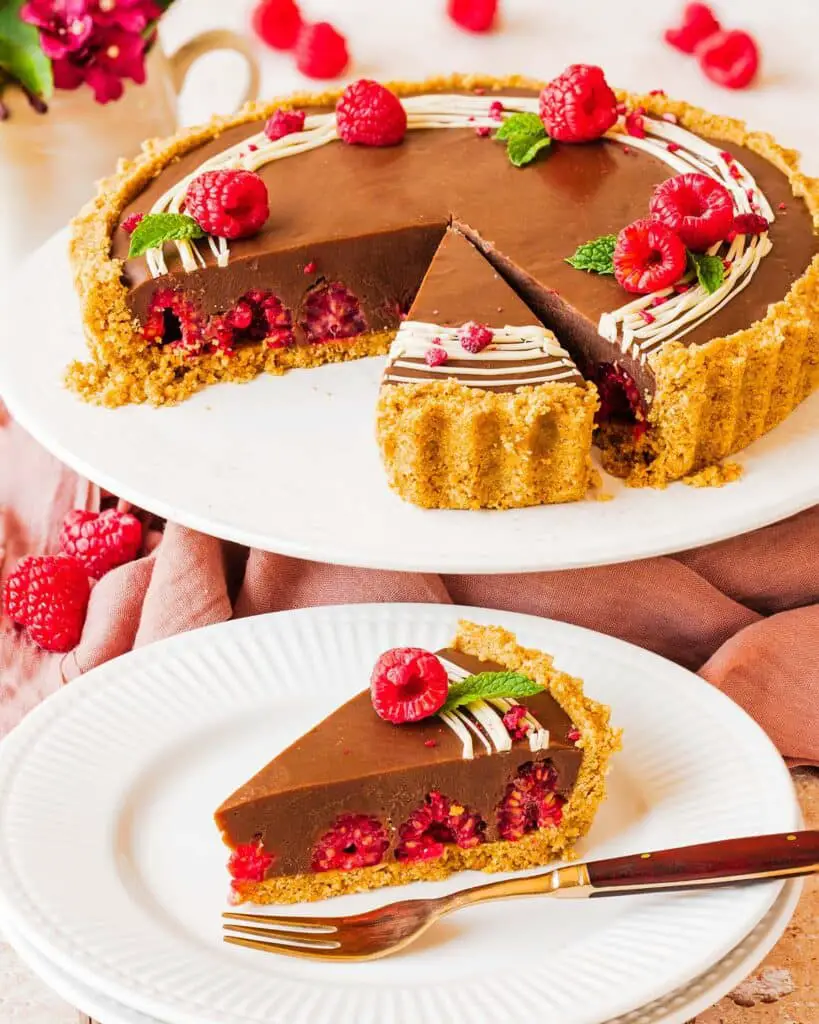
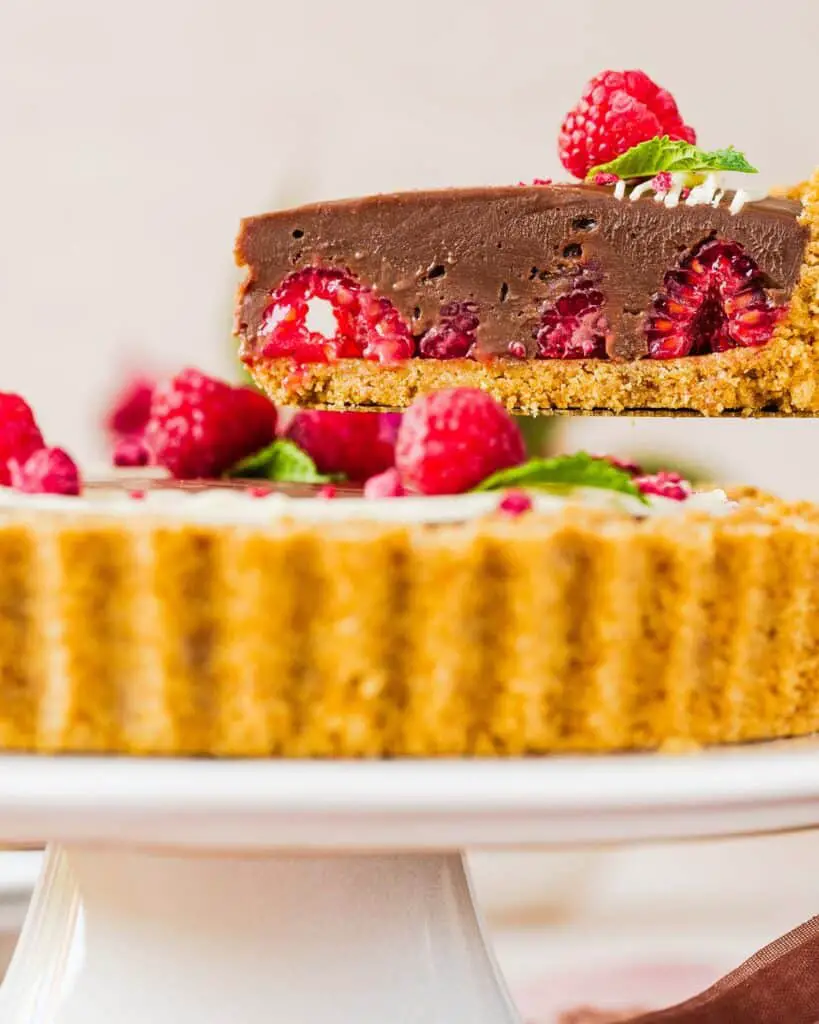
My easy chocolate raspberry tart is the PERFECT summer dessert for entertaining or just a little extra indulgence! With a buttery biscuit base, plenty of beautiful fresh raspberries and a smooth and creamy milk chocolate filling, this dessert is sure to wow anyone who tries it!
Making the most of fresh summer berries
I absolutely love summer for being berry season! Whether it’s fresh raspberries, strawberries, blueberries or blackberries, our whole family loves eating them, baking with them or even going out picking them! And of course, I can never resist putting berries with one of my other favourite ingredients: chocolate! I mean… what’s not to love?
Why you will love this chocolate and raspberry tart
- Just a few ingredients. The beauty of this dessert is that is requires just five ingredients to make it!
- So simple to make. This is the kind of dessert I had my children help me make when they were little. There isn’t really any heat, masses of mixing or anything sharp involved, so it is absolutely brilliant for little hands to get helping!
- Make ahead or last minute. Since the whole dessert is put together in one session before being left to chill, it actually makes for an excellent last minute, low effort dessert. Perfect for those surprise visits you weren’t expecting!
- Low effort, high return. Did I mention how EASY this is to make? And since it looks (and tastes!) so impressive, it is also elegant enough to serve at a special dinner party too.
What ingredients do I need to make this chocolate raspberry tart?
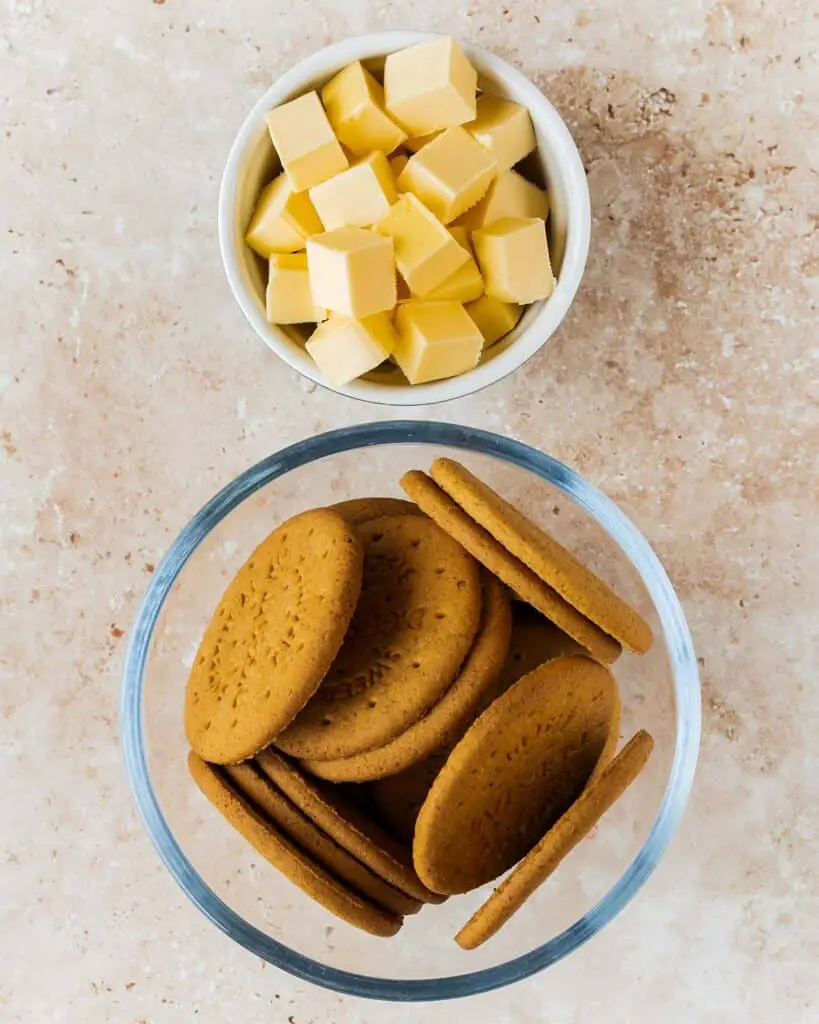
- Digestive biscuits: for the biscuit base of the chocolate raspberry tart.
- Butter: I use unsalted butter, both in the base and the chocolate ganache layer in the dessert.
- Raspberries: one half of the key flavours in this easy no bake tart.
- Milk chocolate: the second of the key flavours in this raspberry chocolate tart. Use a good quality chocolate for best flavour.
- Double/heavy cream: combined with the chocolate and butter. Makes a wonderfully velvety smooth ganache layer to top the chocolate tart with raspberry.
- White chocolate: an optional extra, just a little is used for the decoration of the tart.
What equipment do I need to make this tart?
- Digital kitchen scales*: I provide all my measurements in cups too, however I would encourage all bakers to weigh out ingredients when baking. A set of digital kitchen scales is so useful and totally an essential baking tool for me.
- Measuring spoons*: a set of measuring spoons is essential for any baker. This is because these are more accurate than using everyday teaspoons and tablespoons, which can vary greatly in size.
- Mixing bowl*: to mix all the ingredients together to make the base and chocolate filling for this chocolate and raspberry tart.
- Spatula*: to help with mixing ingredients and levelling off the fillings.
- Loose-bottomed tart tin*: makes it a lot easier to remove the tart once chilled without breaking it. I like using one with a fluted edge as I think it looks so very pretty. However even a loose bottomed cake tin will work well too.
- Small saucepan*: to warm up the cream and butter for the chocolate filling when making this raspberry chocolate tart.
How to make chocolate raspberry tart
So so simple! Mix together the ingredients for the base and press in the tin, then chill. Melt together the chocolate filling before arranging the raspberries in the base and topping with the chocolate. Chill for a couple of hours to set before decorating and serving. Enjoy!

For the base
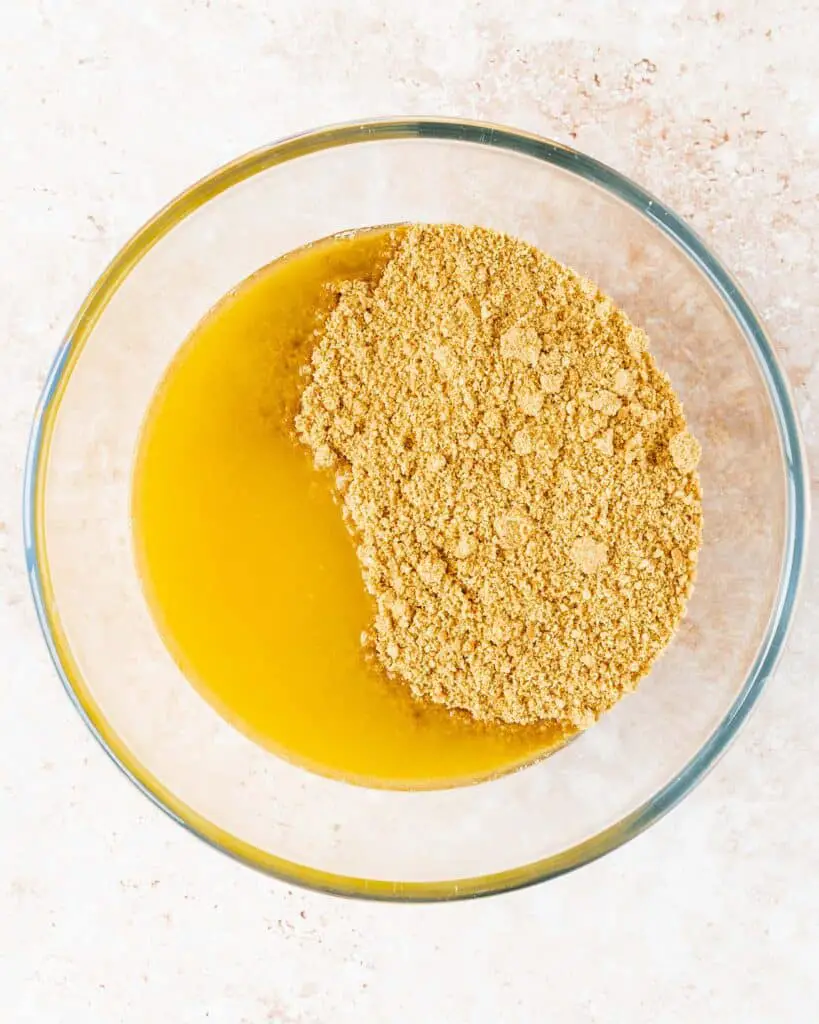
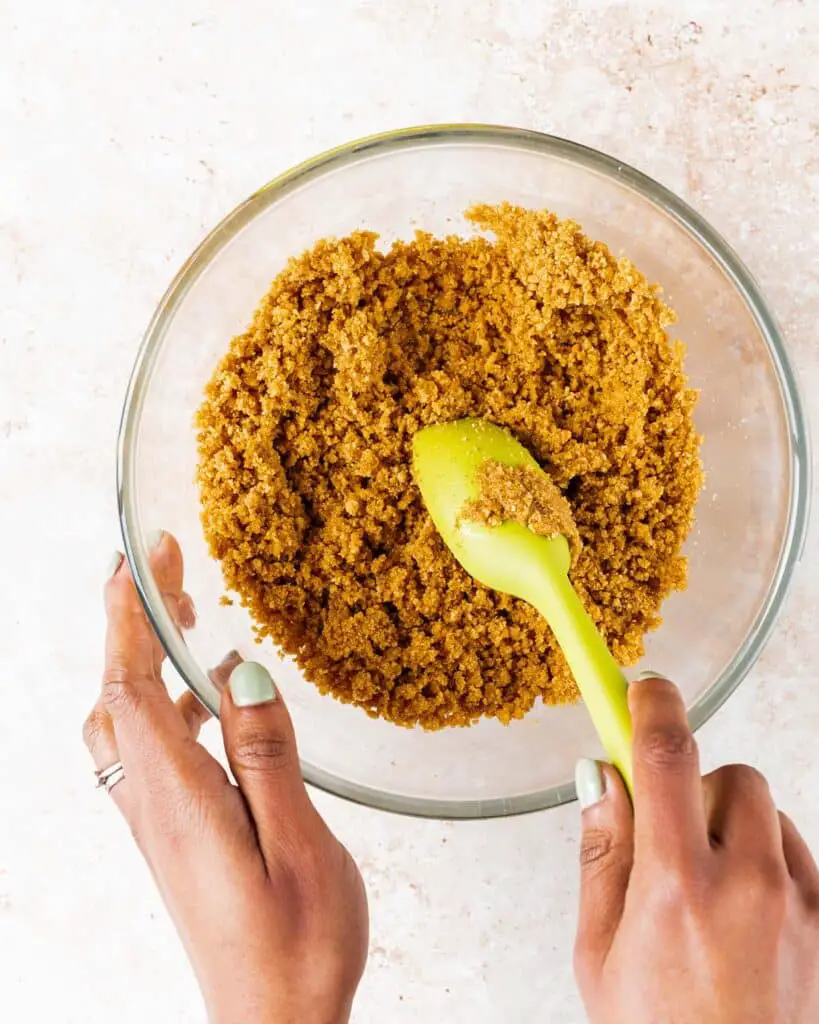
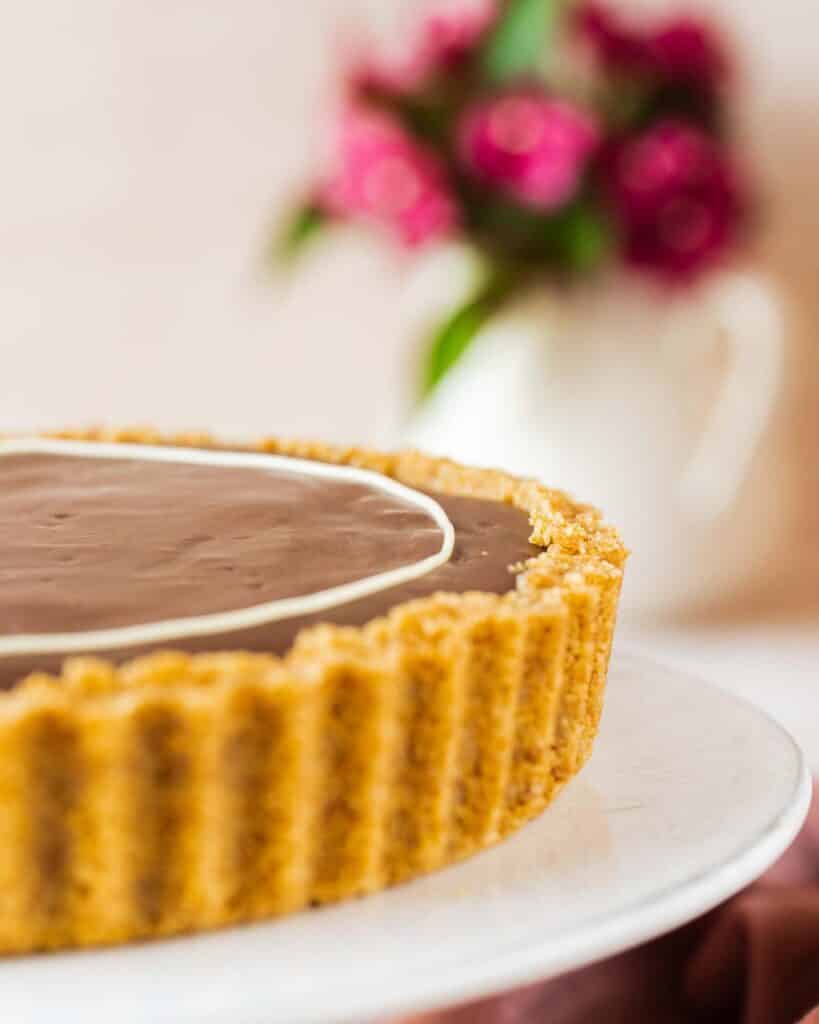
Step 1: Crush the biscuits into fine crumbs. This can be done by placing the biscuits in a sealable freezer bag and bashing with a rolling pin (great stress relief!) or in a food processor if time is of the essence. Once crushed, mix the biscuits and melted butter together until evenly combined, then press into the bottom and up the sides of an 8″/20cm loose bottomed tart tin. Chill whilst preparing the chocolate filling.
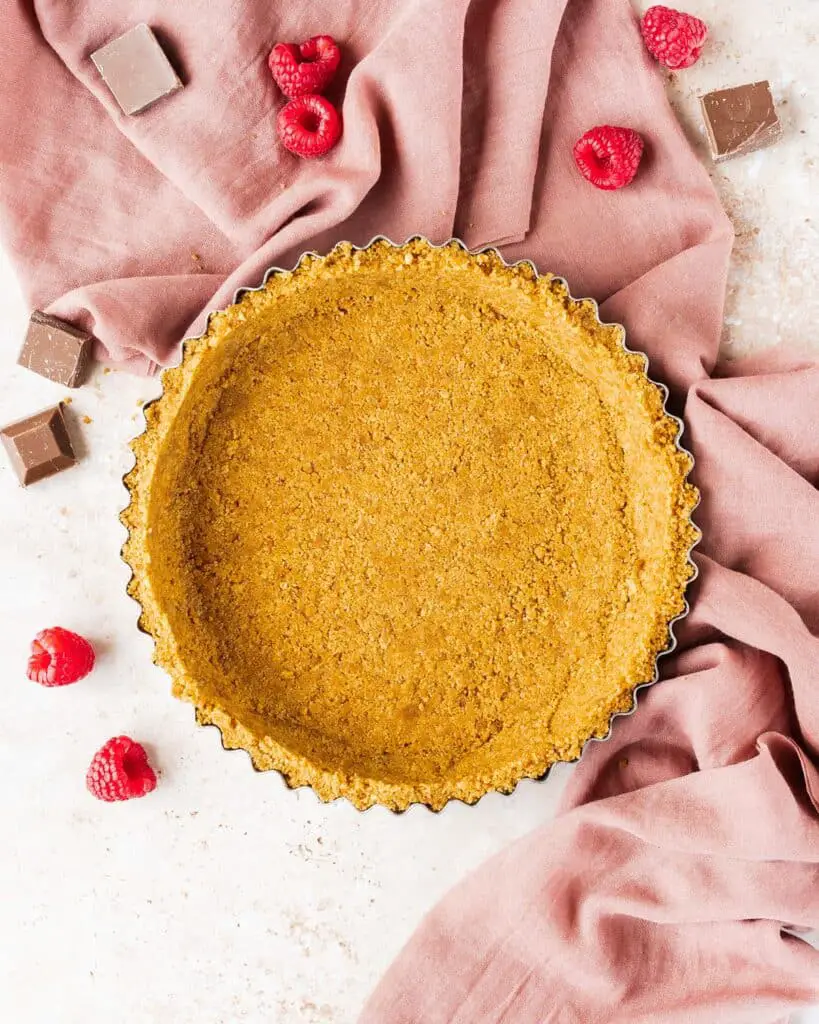
Step 2: OPTIONAL STEP: Preheat the oven to 180C/350F and bake the base for 8-10 minutes. Doing this makes the base firmer, allowing it to set more. This means it won’t be as crumbly as the unbaked version. This is a good step to do too if you are making this tart more than a day in advance, as it will seal the base and reduce the risk of it absorbing any liquids from the filling.
For the raspberry and chocolate filling
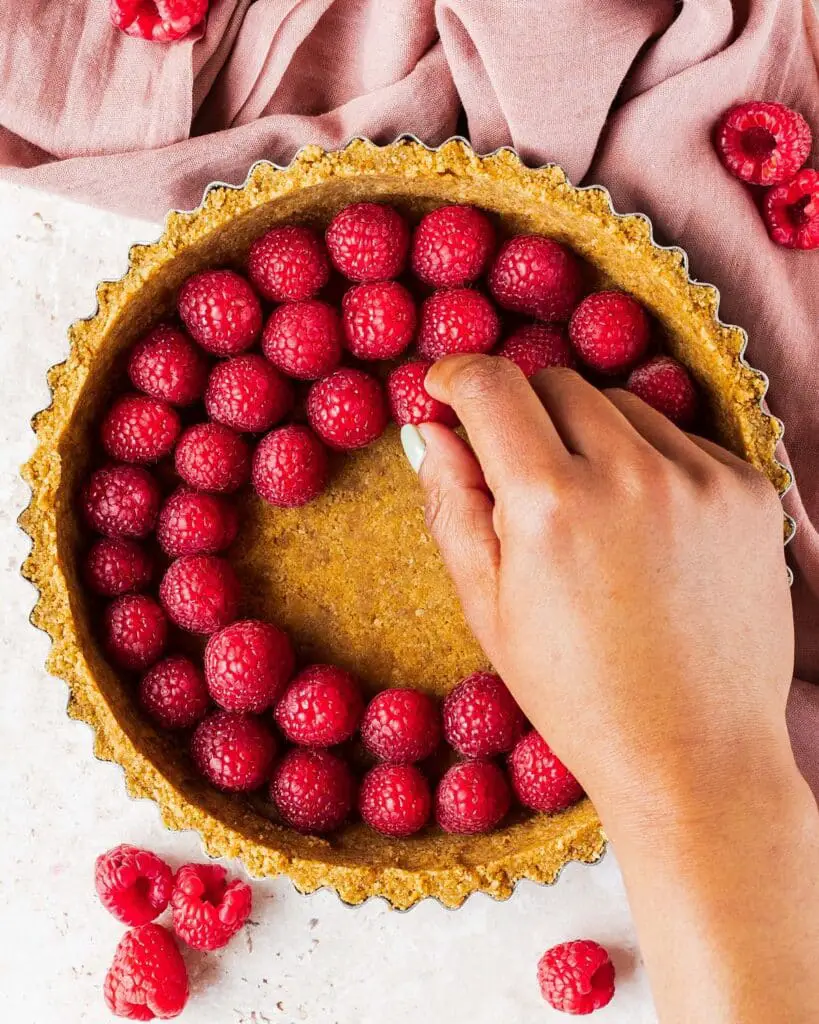
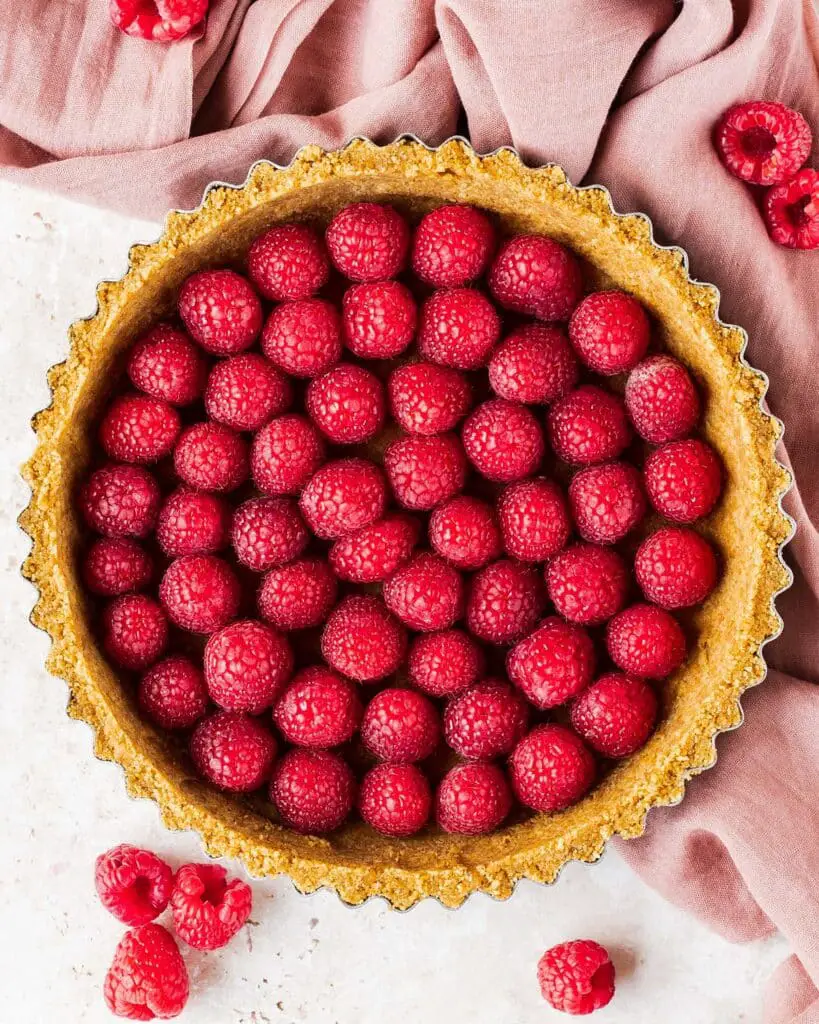
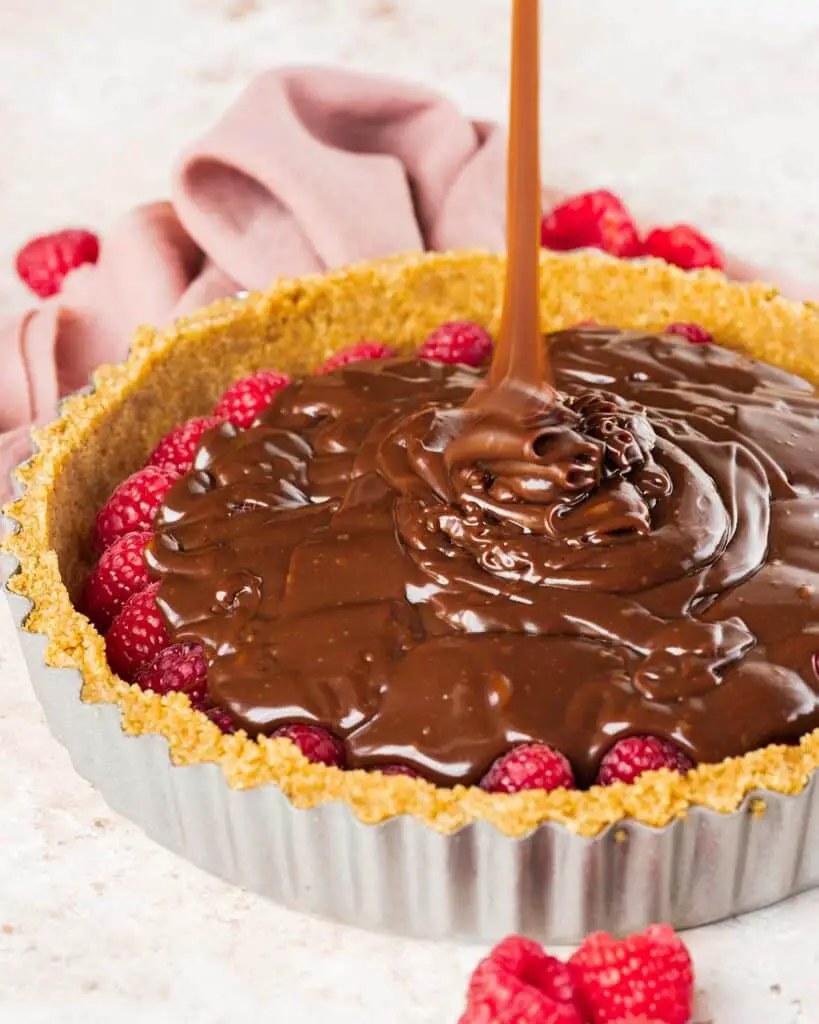
Step 1: Arrange the raspberries, open side down, in an even layer over the chilled biscuit base. Set aside whilst making the chocolate filling.
Step 2: Place the chocolate, cream and butter together in a bowl. Microwave in short bursts, stirring in between, until smooth and silky. Alternatively, place all the ingredients into a saucepan and heat gently until fully melted, stirring gently to avoid any bubbles.
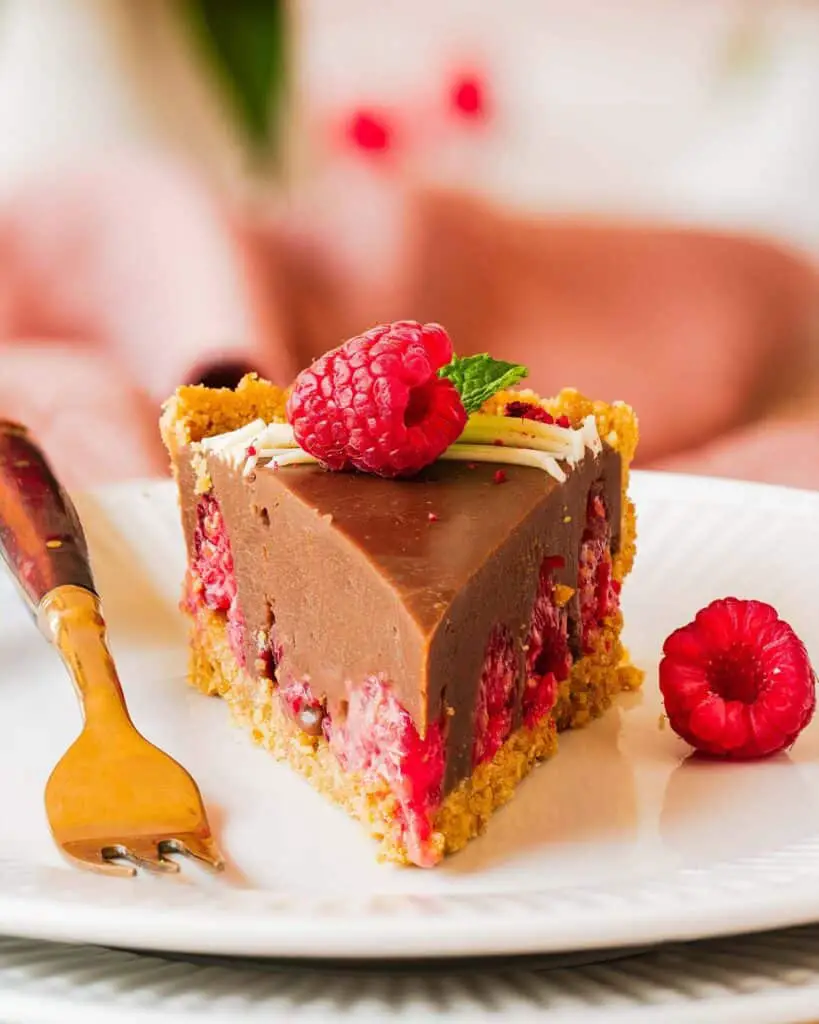
Step 3: Carefully pour the warm chocolate filling over the raspberries. Spread it to the edges, allowing it to fall between the berries. Tap the tin gently to level the filling, then allow the chocolate to set. I like to chill the tart for a couple of hours at this point.

For the decoration
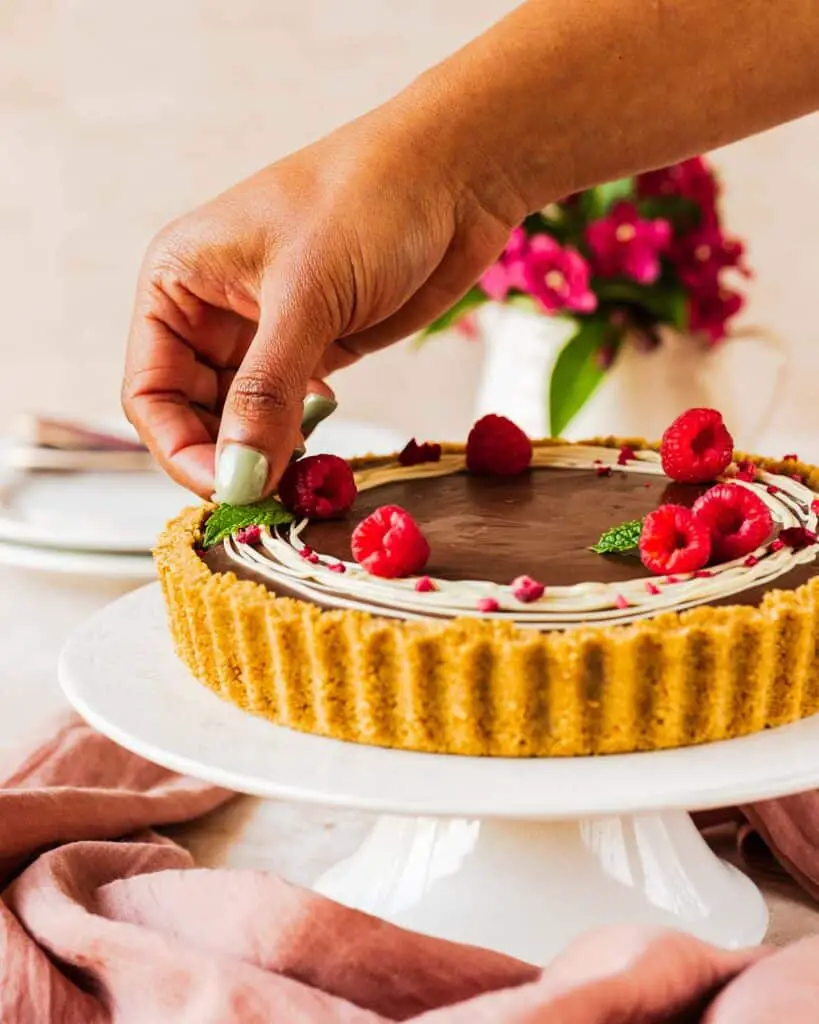
Step 1: Remove the tart from the tin and set on your serving plate or stand.
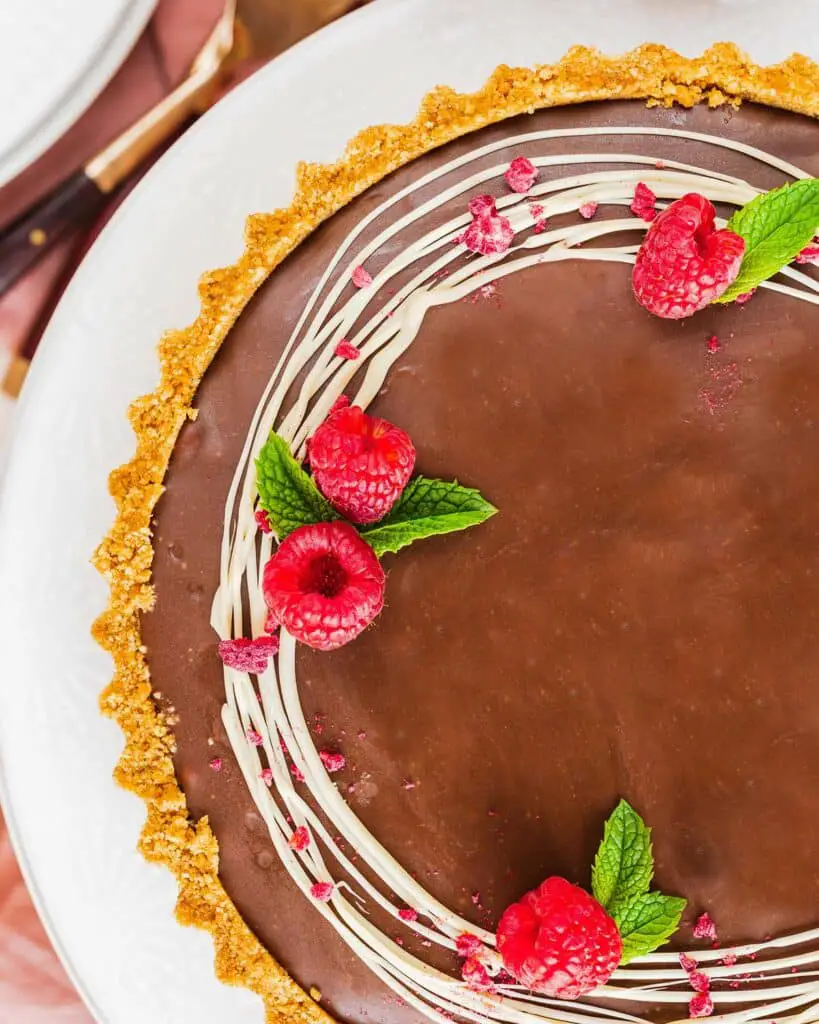
Step 2: Gently melt the white chocolate until completely smooth. Use a spoon or a piping back to decorate the top of the tart with the melted white chocolate however you wish. Decorate with additional raspberries, a few mint leaves and some freeze dried raspberries to finish. Enjoy!
Do I need to line my tart tin?
There is no need to line the tin, the raspberry and chocolate tart should release without too much drama. If you wish to make it super easy to release, place a circle of parchment in the base of the tin before pressing the biscuit mixture in. However this is absolutely not necessary, would just make it a little easier to release should you wish.
How long does the chocolate raspberry tart need to set?
The whole chocolate ganache raspberry tart can be made and assembled in one go, unless you choose to bake the base. In this case I would recommend allowing the base to cool to room temperature before adding the raspberries and chocolate filling. The chocolate layer will need at least a couple of hours in the fridge to set.
Can I make this tart in advance?
I wouldn’t recommend making this tart more than a day in advance, for it to be served and enjoyed at its best. This recipe is brilliant last minute option however, as it can be made just a few hours before serving too.
How to store the chocolate raspberry tarts
The tart should be stored in the fridge until near when it is served. Pull it out of the fridge and allow to come to room temperature about 30 minutes before serving.
What to serve with chocolate raspberry tart
For me personally, this raspberry chocolate ganache tart is perfect on its own without a need to serve with anything else. However, if you did wish to have a little extra, you could always serve it with a little additional whipped cream if you wish.
Additional tips for making the best white chocolate and raspberry dessert
- Use a loose bottomed tin to make the dessert. This makes it so much easier to release the tart from the tin. You could even place a smaller circle of parchment on the base before pressing the biscuit mixture in, to facilitate release from the tin when removing it.
- Baking the base makes it firmer and more stable, so it will not be as crumbly when cut into on serving. This is totally an optional step, the tart is just fine without baking too.
- You can make the chocolate ganache filling in the microwave or on the hob, depending on your preference. Either way works just as well, so do what suits you best!
- Tapping the tin gently on a work surface brings any air bubbles to the top. This means they can be popped and the layer smoothed over before leaving to set, giving you a nice clean finish to the top of the tart.
- My suggestion for decoration is really just that! Feel free to decorate how you wish, with additional raspberries and drizzles of white chocolate, or just leave plain and enjoy as is!
- Bring the tart out of the fridge for about 30 minutes before serving. This is to allow the chocolate layer to warm up and soften a little, for a truly luxurious dessert!
Troubleshooting
If you have any questions about this no-bake chocolate raspberry tart, please leave me a comment below, I would love to help. And if you do make this raspberry chocolate tart recipe, please do consider leaving a rating and review below. I would really appreciate your feedback! Additionally, you could also post a picture on Instagram and tag me when you share it with the world. You already know I would love to see!
What are your go to no bake desserts?
I am so glad you asked! Here are a selection of my favourite no bake desserts, hope you love them too!
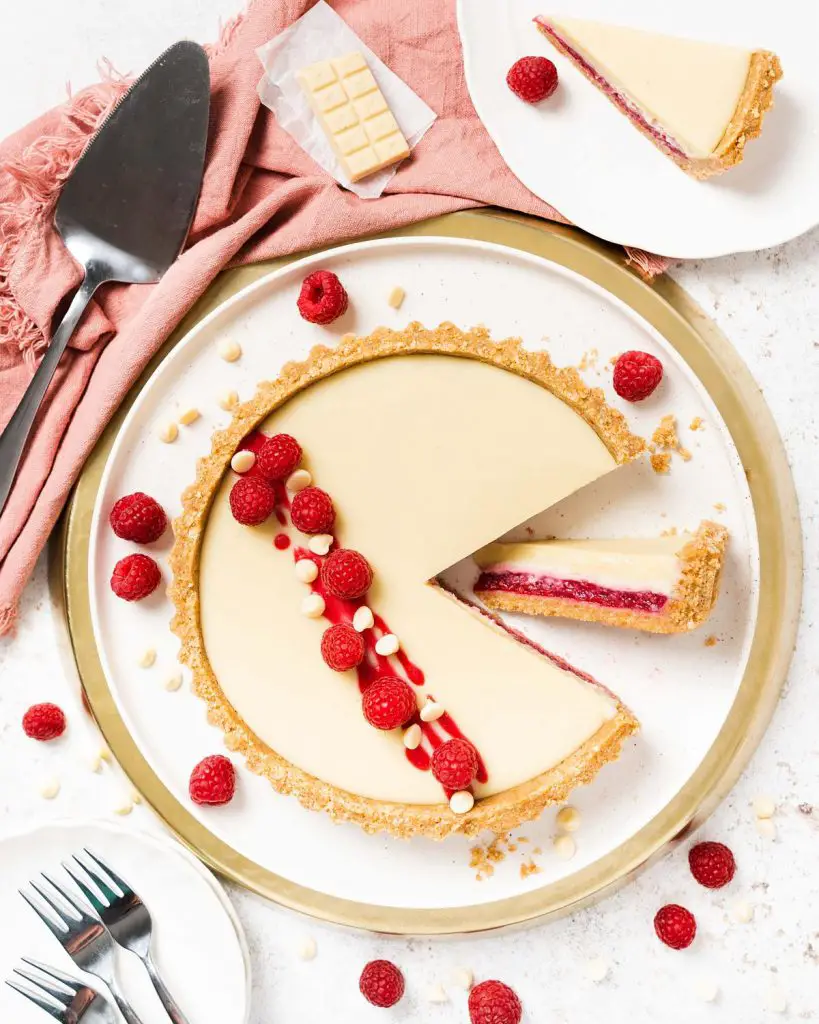
White chocolate and raspberry tart: One of my favourite flavour combinations, this beauty is sure to be popular with everyone! Soft set raspberry and white chocolate layers sit on a delicious biscuit crumb base. It is wonderfully easy to make and a truly elegant dessert that will certainly wow your guests.
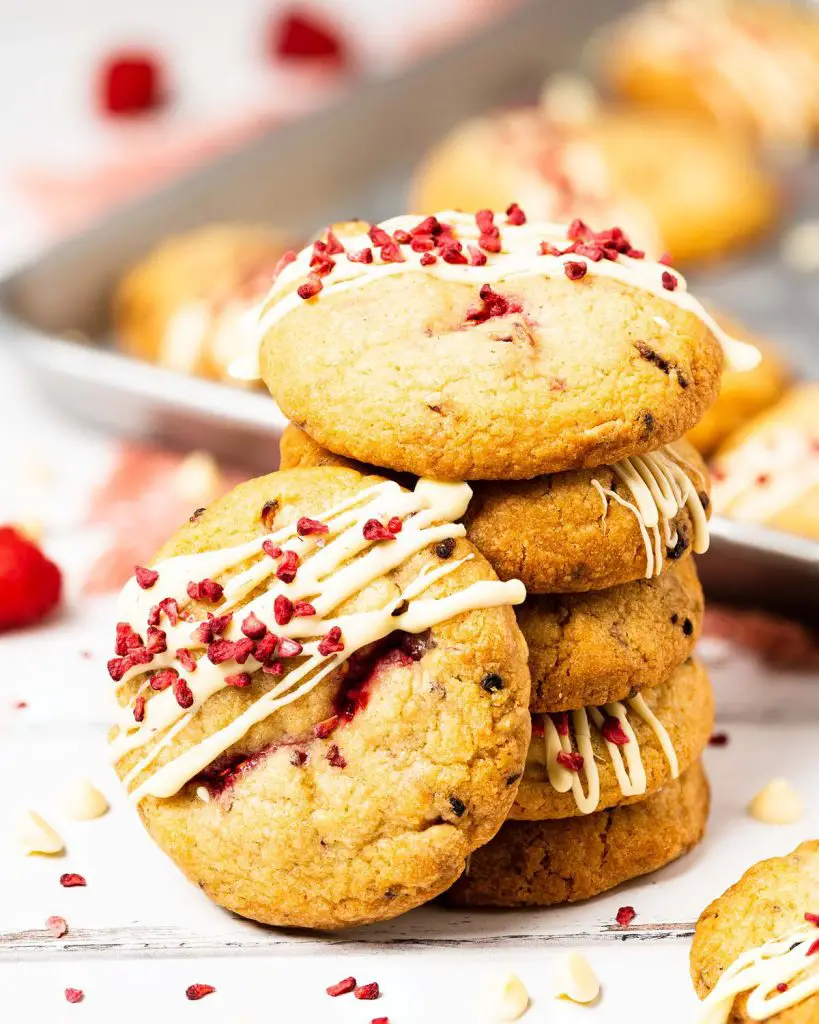
Raspberry and white chocolate cookies: Beautiful chewy cookies, packed with white chocolate chips and freeze dried raspberries, with hidden fresh raspberries in the middle of each cookie. Enjoy exactly as they are, or add extra special decoration of a drizzle of white chocolate and some freeze dried raspberries to finish. Heavenly!
Tarte au citron: Lemon tart is a classic dessert renowned for its bright flavour and simple, elegant presentation. The zesty lemon flavour in a creamy custard filling served in a buttery pastry case can never fail to impress anyone. It is no wonder a lemon tart has remained a firm favourite dessert across the world!
Thanks so much for joining me today, friends. As always, enjoy! x
Recommended equipment I used *
| Digital kitchen scales | Measuring spoons |
| Mixing bowl | Spatula |
| Loose-bottomed tart tin | Small saucepan |

Chocolate Raspberry Tart
Ingredients
For the base
- 250 g (2 ¼ cups) digestive biscuits
- 120 g (½ cup + 1 tbsp) unsalted butter, melted
For the raspberry and chocolate filling
- 275 g (2 cups + 2 tbsp) milk chocolate
- 100 ml (¼ cup + 3 tbsp) double (heavy) cream
- 40 g (3 tbsp) unsalted butter
- 230 g (1 ½ cups + 2 tbsp) fresh raspberries, plus extra to decorate
For the decoration
- 10 g (1 tbsp + 1 tsp) white chocolate, melted
- freeze dried raspberries
- mint leaves
Instructions
For the base
- Crush the biscuits into fine crumbs. This can be done by placing the biscuits in a sealable freezer bag and bashing with a rolling pin (great stress relief!) or in a food processor if time is of the essence. Once crushed, mix the biscuits and melted butter together until evenly combined, then press into the bottom and up the sides of an 8"/20cm loose bottomed tart tin. Chill whilst preparing the chocolate filling.
- OPTIONAL STEP: Preheat the oven to 180C/350F and bake the base for 8-10 minutes. Doing this makes the base firmer, allowing it to set more. This means it won’t be as crumbly as the unbaked version. This is a good step to do too if you are making this tart more than a day in advance, as it will seal the base and reduce the risk of it absorbing any liquids from the filling.
For the raspberry and chocolate filling
- Arrange the raspberries, open side down, in an even layer over the chilled biscuit base. Set aside whilst making the chocolate filling.
- Place the chocolate, cream and butter together in a bowl. Microwave in short bursts, stirring in between, until smooth and silky. Alternatively, place all the ingredients into a saucepan and heat gently until fully melted, stirring gently to avoid any bubbles.
- Carefully pour the warm chocolate filling over the raspberries. Spread it to the edges, allowing it to fall between the berries. Tap the tin gently to level the filling, then allow the chocolate to set. I like to chill the tart for a couple of hours at this point.
For the decoration
- Remove the tart from the tin and set on your serving plate or stand.
- Gently melt the white chocolate until completely smooth. Use a spoon or a piping back to decorate the top of the tart with the melted white chocolate however you wish. Decorate with additional raspberries, a few mint leaves and some freeze dried raspberries to finish. Enjoy!