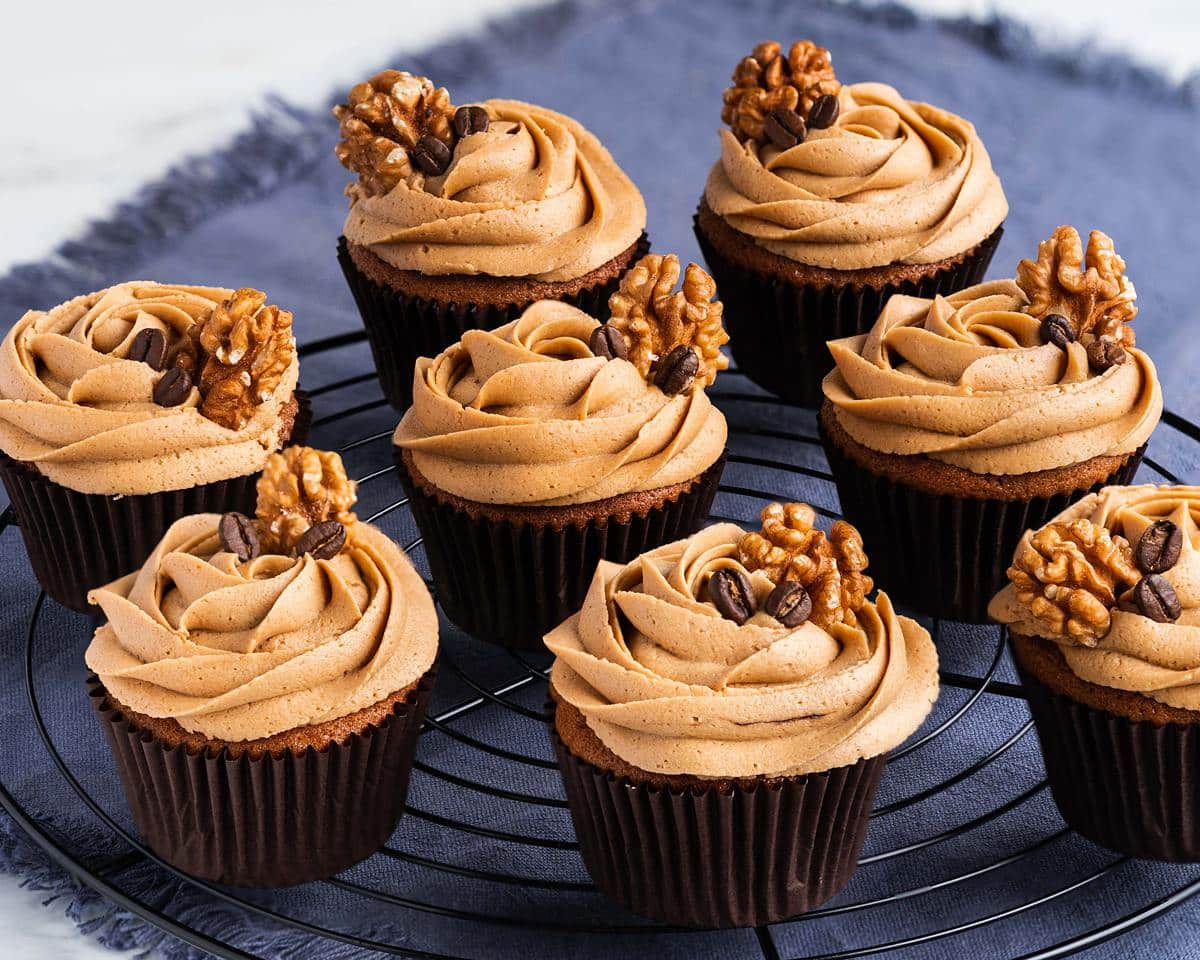
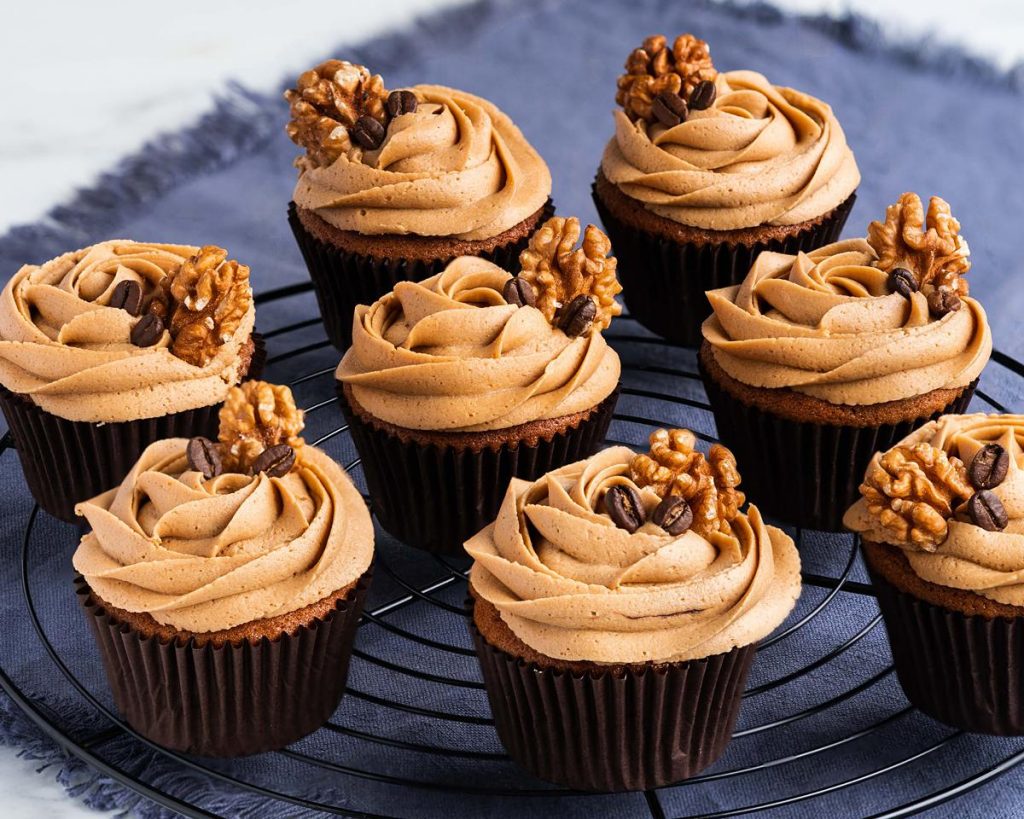
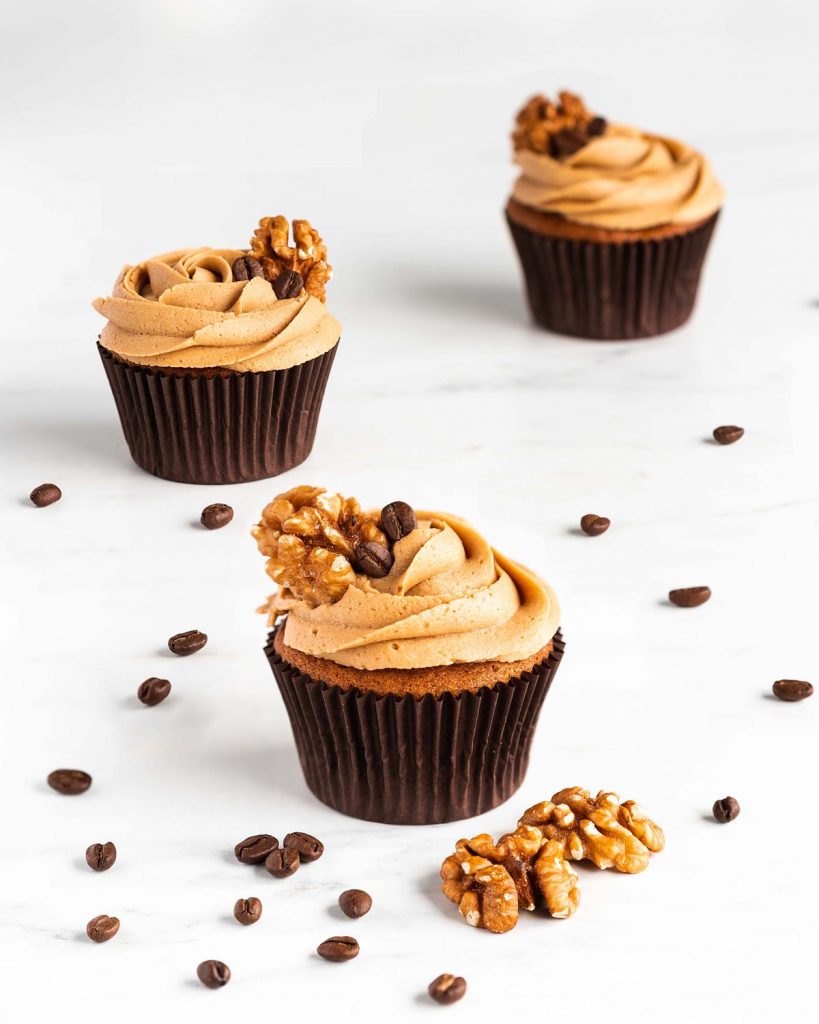
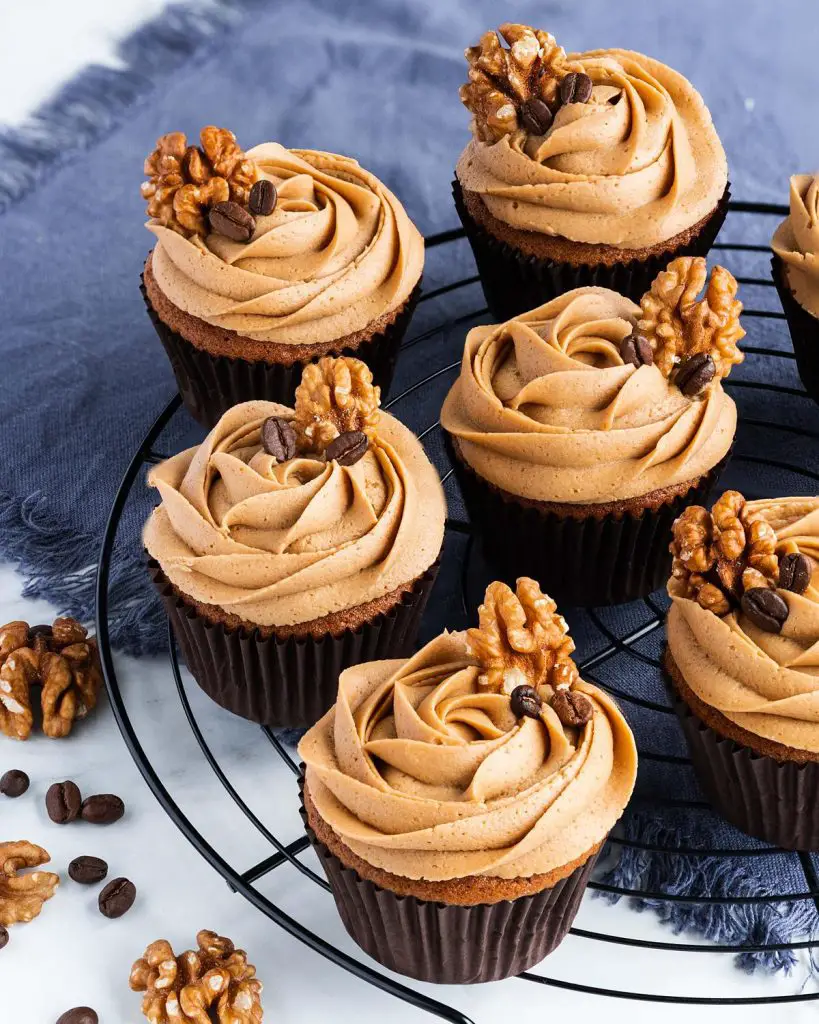
Are you a coffee fan? Then you will adore these coffee and walnut cupcakes! Delicious, soft, light and fluffy cupcakes, packed with coffee flavour and with chunks of walnuts all the way through. They are topped with the most amazing smooth coffee buttercream, then crowned with a walnut and a couple of coffee beans. Coffee heaven!
Not just retro flavours
Coffee and walnut cake is rather a classic British bake, often served as part of afternoon tea and found freely at lots of bake sales and MacMillan coffee mornings every year. Honestly, I used to think of this flavour combination as outdated, something that had its day in the 1970s and was no longer a flavour that was really sought after. That was until I tried it. Now I’m hooked!
In this recipe, I wanted to share a bake that not only encompassed those iconic flavours together of course, but also was a joy to eat: delicate and light cake with a silky smooth buttercream on top. And with the added texture of chunky walnut pieces in the cupcake, there is a bit of something to please everyone!
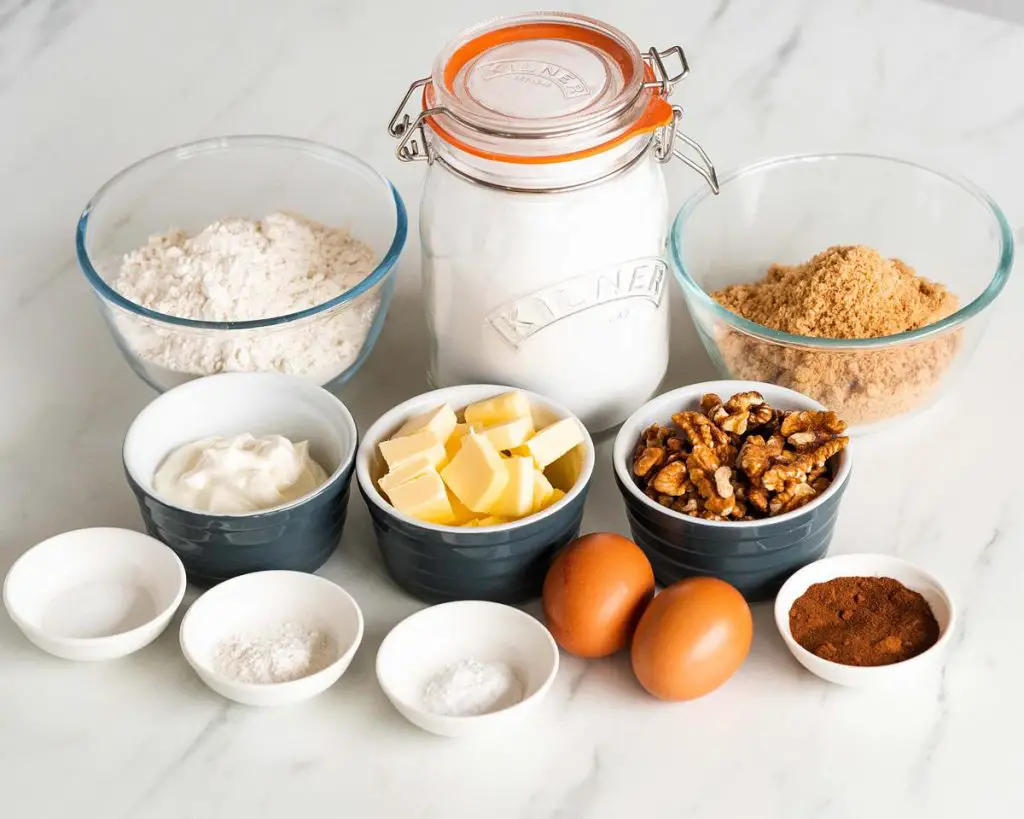
What ingredients do I need to make these coffee and walnut cupcakes?
- Unsalted butter: as with all my recipes, I like to use unsalted butter so I can control how much salt is in the bake. For best results, use butter at room temperature.
- Brown sugar: I use brown sugar over caster sugar in this bake as I find the caramel notes in brown sugar complements the flavour of coffee better than white sugar does.
- Flour: I use plain flour for these cupcakes as it allows me to have control of the amount rising agent used in my bake.
- Baking powder/bicarbonate of soda: just for a little bit of help with rising in your bake.
- Eggs: helps with the structure of the cupcakes.
- Yogurt: keeps the cupcakes moist and tender.
- Espresso powder/coffee: one of the reasons you’re here!
- Walnuts: the other part of the cupcakes flavour.
- Icing/powdered sugar: used to make the buttercream. Dissolves more easily than caster or granulated sugar, so ensuring the buttercream isn’t grainy.
- Vanilla: purely for beautiful flavour!
What equipment do I need to make cupcakes?
- Cupcake tin*: you will need 12 hole cupcake/muffin tin to make these cupcakes.
- Cupcake cases*: to bake your cupcakes in.
- Digital kitchen scales*: whilst I do provide cup measurements for all my recipes, I always recommend using digital kitchen scales to weigh your ingredients out instead. Weighing out your ingredients is much more accurate than measuring by volume, as you do when measuring with cups, and will ensure better results. Digital scales are now relatively inexpensive and widely available so I would recommend them to everyone!
- Measuring spoons*: for measuring smaller quantites such as tablespoons (tbsp) and teaspoons (tsp), I would recommend getting a set of dedicated measuring spoons. This is a far more accurate measurement than using your everyday eating spoons, which can vary greatly in size.
- Sieve*: to remove lumps from your dry ingredients, ensuring it all mixes together evenly.
- Stand mixer*/electric hand mixer*: I would highly recommend investing in a good electric mixer, whether stand mixer or hand held electric mixer, to help with your baking. This recipe can, of course, be done entirely by hand, but your bicep will get quite the workout for it! Having these tools makes it much easier, not to mention quicker, to do your baking.
- Jug*: to mix together the wet ingredients before combining with the dry.
- Spatula*: for mixing and smoothing the cupcake batter and buttercream, plus scraping down the bowls during mixing to ensure all ingredients are combined.
- Piping bag*: used for piping buttercream on the cupcakes.
- Piping nozzle*: I used a 2D nozzle here, which gives a lovely rosette look to my buttercream.
How to make coffee and walnut cupcakes
These cupcakes are actually relatively easy to bring together, there are just a few steps along the way. First, we need to make the cupcakes, then the buttercream and finally bring them together.
For the cupcakes:
Step 1: Line your cupcake tin with cupcake cases and set it aside. Preheat your oven to 180C/350F while you make your cupcake batter.
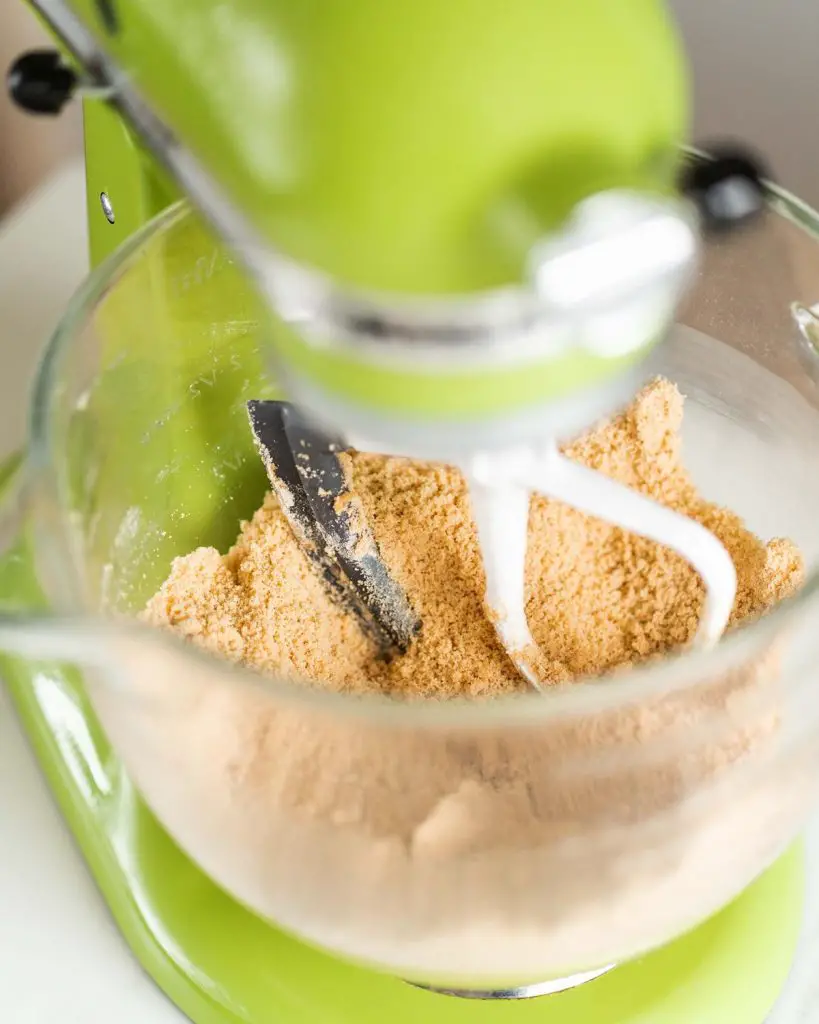
Step 2: In a large bowl or your stand mixer, beat your butter until softened. Now add in the sugar and beat together until completely combined and slightly paler. Sift your flour, baking powder, bicarbonate of soda and salt into the same bowl and beat it all together until your mixture resembles damp sand.
Step 3: In your jug, tip in the yogurt, eggs and coffee. Mix well until smooth and totally combined.
Step 4: Pour your wet ingredients into your flour mixture and mix on low to combine. Scrap the bowl down and mix again, then turn the speed up and beat on high for about 30 seconds to get some air into your batter. Finally, tip in your broken chunks of walnuts and fold into your cupcake batter.
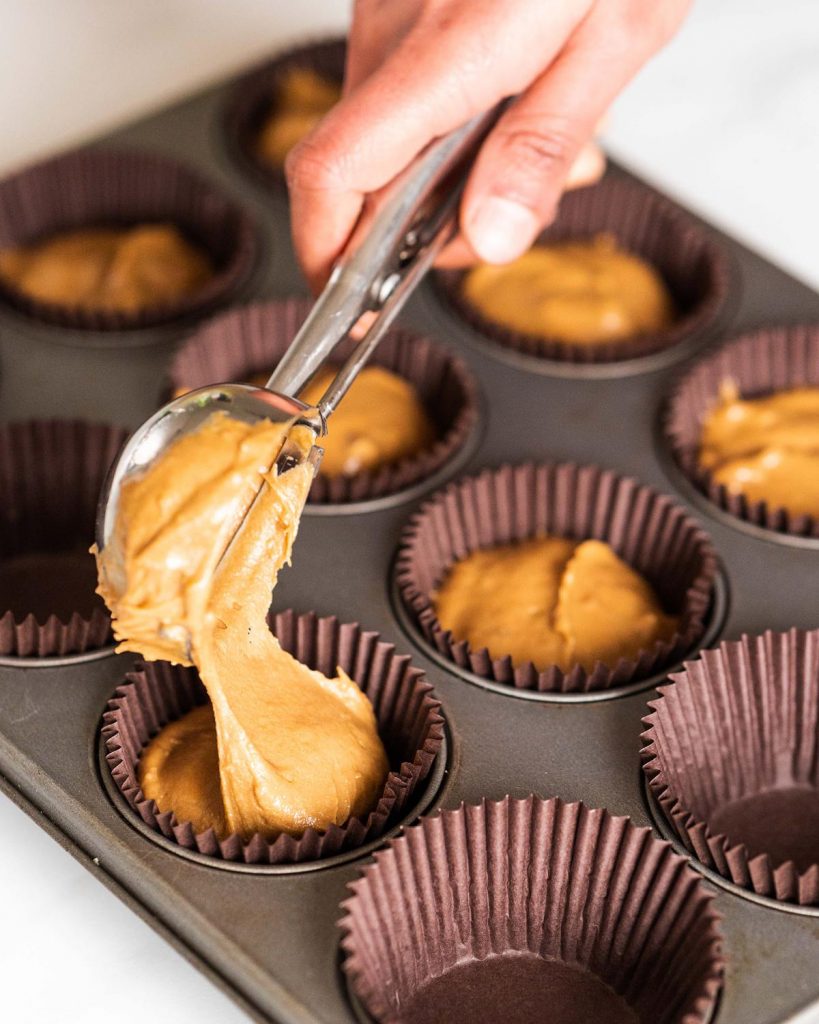
Step 5: Spoon or scoop your cupcake mixture evenly between your 12 cases, then bake in your preheated oven for 17-20 minutes until springy to touch and a skewer inserted into a cupcake comes out clean. Cool for a few minutes in the pan, then remove to a cooling rack and cool completely.
For the buttercream:
Step 1: To make your buttercream, first beat your butter for 4-5 minutes until really soft and spreadable and paler in colour. This is really important as it gives you a really light buttercream that is soft and fluffy. Don’t skip this step!
Step 2: Add in half your icing sugar and mix in until completely combined. Tip in your coffee mixture and vanilla along with 2 tbsp milk and mix to combine in smoothly, scraping down your bowl as needed. Now add in the remaining sugar and slowly mix it in. Scrape your bowl down again, then beat, on high, for about 30 seconds for the final fluffing of your buttercream.
Step 3: Using your spatula, mix and press your buttercream around your mixing bowl for about a minute or so. This smooths out your buttercream, pushing out air bubbles, so giving you a really silky buttercream to work with for your final step.
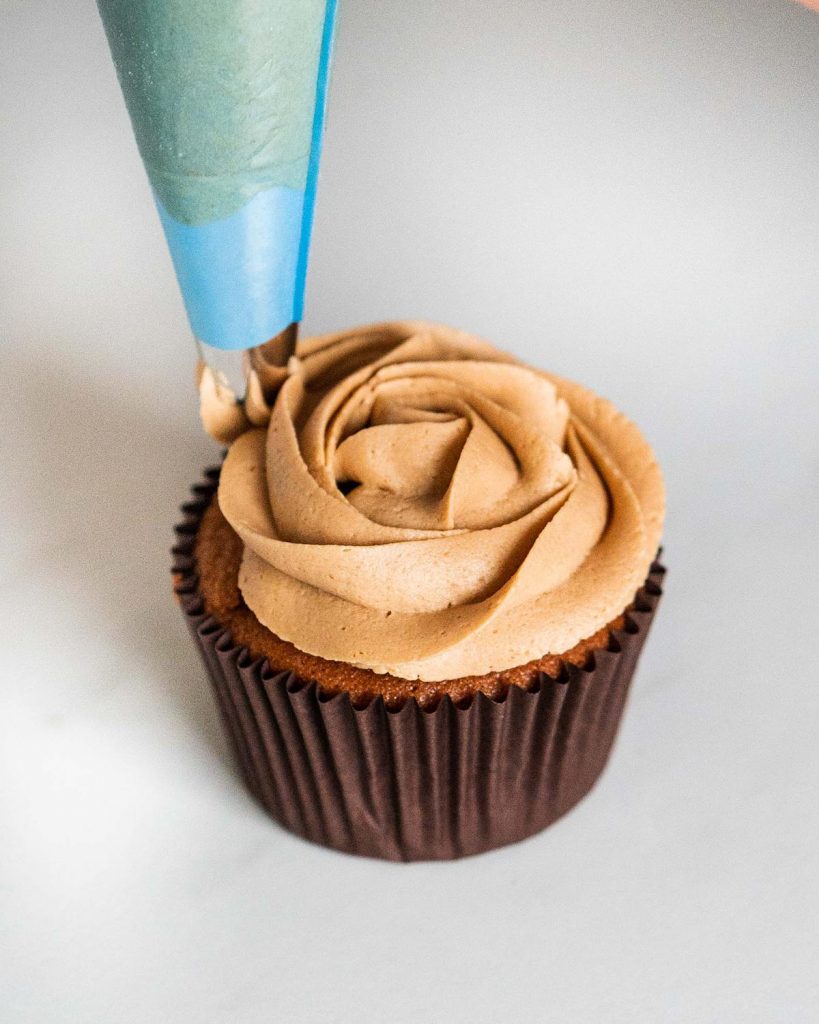
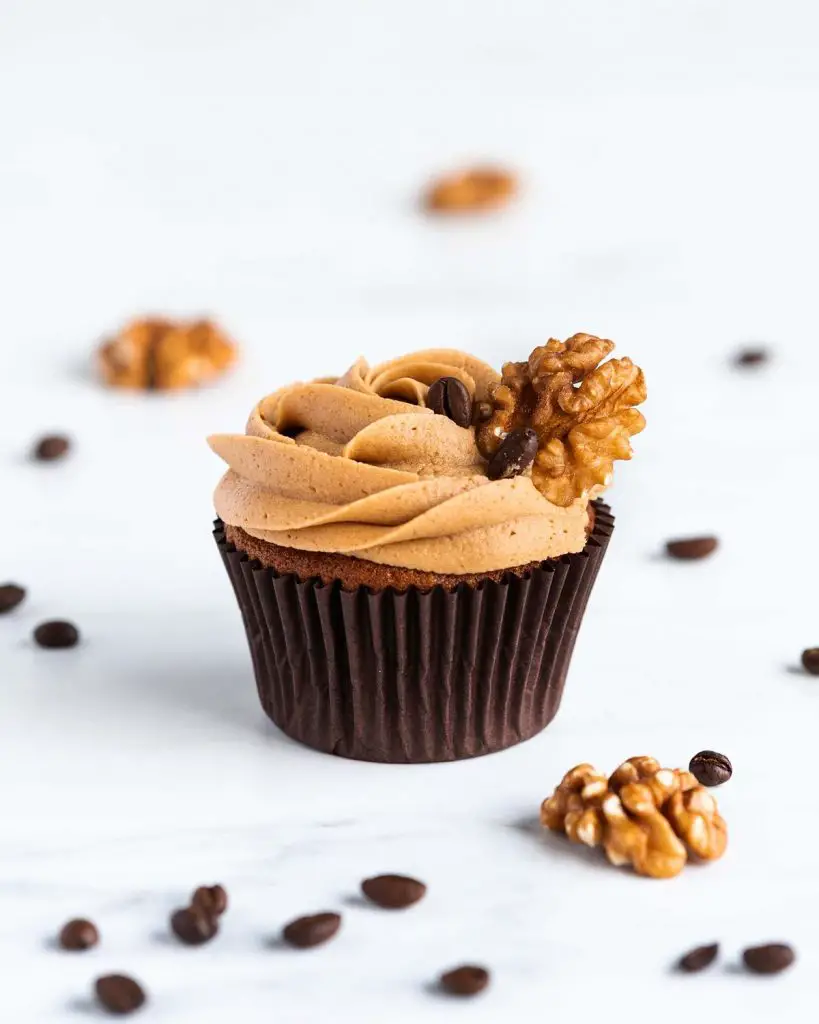
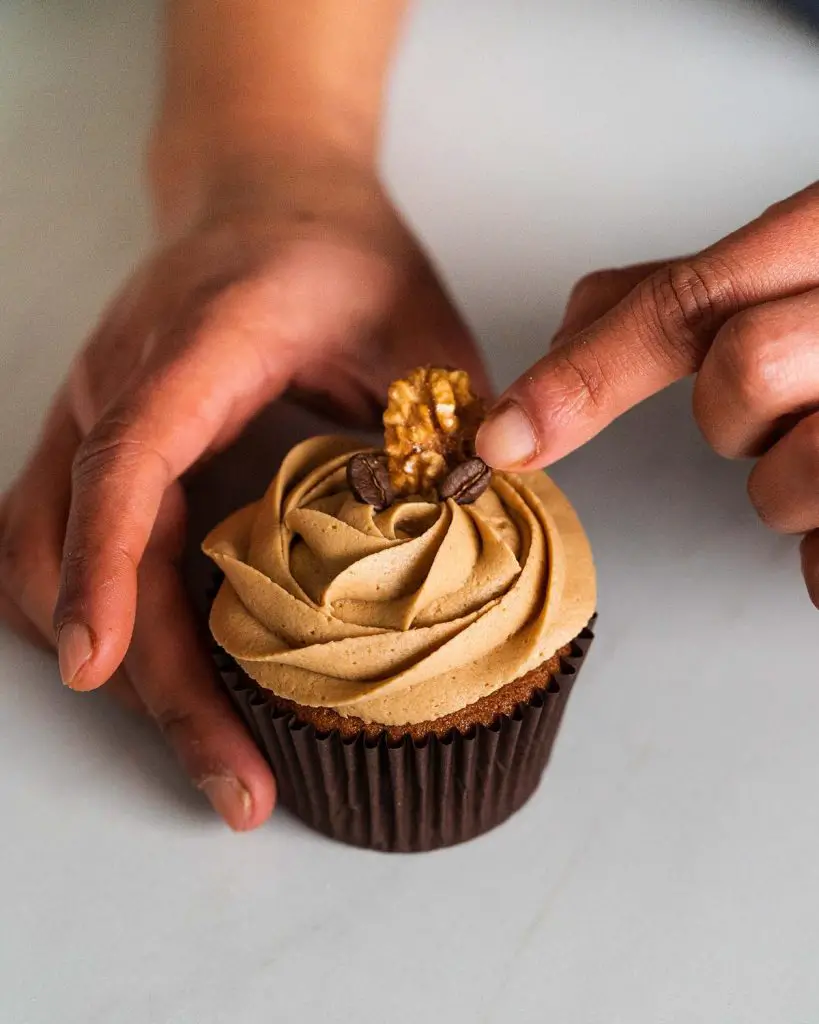
Step 4: Transfer your buttercream to your piping bag fitted with 2D piping nozzle. I find it easiest to place my piping bag into a glass to help me hold the bag open, so I can use both my hands to hold my mixing bowl and steady the piping bag as I fill it. Once you have filled your bag, twist the top of it to stop the buttercream from escaping out that way. Starting from the middle of each cupcake, pipe a swirl, keeping your pressure steady and your bag upright as you move it around the top of your cupcake. Top each buttercream rosette with a walnut half and a couple of coffee beans to decorate. Enjoy!
What can I do if I don’t have any cupcake cases?
If you’ve run out of cupcake cases, you can make your own! Simply find a glass that fits closely in your cupcake tin, then press a square of parchment paper around the base of your glass to shape it before placing your “cupcake case” in your cupcake pan and filling with batter before baking. The size of your parchment square will depend on how tall you want your cupcakes to be.
How do I know when my cupcakes are done?
You can tell your cupcakes are done because they will have risen and be firm on top, and springy when lightly pressed. You can also use a toothpick or wooden skewer, poked into the middle of the cupcake: you should have nothing come out sticking to this if your cupcake is baked.
How long do cupcakes last and how do I store them?
These cupcakes should be stored in an airtight container and will be fine kept at room temperature for 2-3 days.
Can you freeze cupcakes?
Absolutely! These cupcakes will freeze well for up to three months.
How to freeze your cupcakes
I would recommend freezing cupcakes before decorating them. This helps avoid your buttercream being squashed and damaged when frozen. To freeze your cupcakes, make sure they are completely cool first. Wrap each cupcake tightly in cling film and place in a sturdy airtight container before freezing. Using a container will help protect the cupcakes from knocks in the freezer.
How to thaw your cupcakes
Cupcakes thaw very quickly. Depending on the temperature of your room, they can normally be completely thawed in just a few hours. When thawing your cupcakes, remove them from the container and cling film and place each cupcake on a cooling rack, brushing off any ice crystals as you do. Then cover with a clean tea towel until you are ready to decorate them.
Can I make these cupcakes gluten free and dairy free?
Yes! You can substitute your plain/all purpose flour for a gluten free flour, but do add an additional ¼ tsp Xanthan gum if you can tolerate it. For dairy free options similarly use a plant based butter, yogurt and milk.
Additional tips for making this coffee and walnut cupcakes recipe
- Make sure you’ve prepared your tools and ingredients before you start mixing: line your cupcake pan with cupcake cases, preheat your oven and get your ingredients out ready to use. It’s easy to forget something once you start mixing!
- Take time to read through the recipe so you are familiar with what steps come next. Don’t skip details and instructions given as it could affect the results of your final bake.
- Remember to beat your butter plenty enough when making your buttercream. Trust me, this step is totally worth the extra few minutes you’ll spend!
- Ensure your cupcakes are completely cool before decorating with buttercream, otherwise you could end up with a melted liquid mess for buttercream and soggy cupcakes. No one wants that!
Troubleshooting
If you have any other questions about this recipe, please use the comments below to ask away and I’ll do my best to help! And if you made and enjoyed this, I’d love to hear from you too!
And don’t forget: if you make this recipe for coffee and walnut cupcakes, please do consider leaving a rating and review below, I would love to know how you enjoy making them and it really helps others looking for a recipe too! You could even post a picture on Instagram and tag me when you share it with the world, I’d love to see your creation!
More cupcake recipes for you to enjoy
Don’t forget too to check out these other yummy cupcake recipes on my blog:
Moist vanilla cupcakes: part of my Baking Basics series, these vanilla cupcakes are light and fluffy and beautifully moist, and topped with a delicious vanilla buttercream swirl. Add food colouring and sprinkles to suit your occasion for making them!
Black Forest cupcakes: rich and decadent, these are the lightest chocolate cupcakes, filled with beautiful boozy cherries, Kirsch and a light buttercream to top. And don’t forget the cherry on the cake!
Lemon curd cupcakes: bright, light and just delightful, these will satisfy even the most die hard lemon lover in your love! Filled with my delicious homemade lemon curd, these cupcakes are totally divine!
And there you have it! Coffee and walnut cupcakes are all yours to be enjoyed!
Happy baking my friends! x
Recommended equipment and ingredients I used *
| Cupcake tin | Cupcake cases |
| Digital kitchen scales | Measuring spoons |
| Stand mixer | Electric hand whisk |
| Sieve | Jug |
| Spatula | Ice cream scoop |
| Piping bags | Piping nozzle |
Coffee and Walnut Cupcakes
12
servings30
minutes20
minutes468
kcal1
hour30
minutesThe classic flavors of coffee and walnut in a sweet little cupcake!
Keep the screen of your device on
Ingredients
- For the cupcakes
110 g (½ cup) unsalted butter, at room temperature
200 g (1 cup) brown sugar
215 g (1¼ cups + 1 tbsp) plain (all purpose) flour
1 tsp baking powder
0.5 tsp bicarbonate of soda (baking soda)
0.5 tsp salt
2 large eggs
125 g (½ cup) yogurt (I use Greek yogurt)
1 tbsp espresso coffee granules
90 g (¾ cup) walnuts, broken into chunks
- For the buttercream
150 g (1 cup) unsalted butter, at room temperature
320 g (2 cups + 3 tbsp) icing (powdered) sugar
1.5 tbsp espresso granules dissolved in 1 tbsp boiling water
0.5 tsp vanilla
Directions
- For the cupcakes
- Line your cupcake tin with cupcake cases and set it aside. Preheat your oven to 180C/350F while you make your cupcake batter.
- In a large bowl or your stand mixer, beat your butter until softened. Now add in the sugar and beat together until completely combined and slightly paler. Sift your flour, baking powder, bicarbonate of soda and salt into the same bowl and beat it all together until your mixture resembles damp sand.
- In your jug, tip in the yogurt, eggs and coffee. Mix well until smooth and totally combined.
- Pour your wet ingredients into your flour mixture and mix on low to combine. Scrap the bowl down and mix again, then turn the speed up and beat on high for about 30 seconds to get some air into your batter. Finally, tip in your broken chunks of walnuts and fold into your cupcake batter.
- Spoon or scoop your cupcake mixture evenly between your 12 cases, then bake in your preheated oven for 17-20 minutes until springy to touch and a skewer inserted into a cupcake comes out clean. Cool for a few minutes in the pan, then remove to a cooling rack and cool completely.
- For the buttercream
- To make your buttercream, first beat your butter for 4-5 minutes until really soft and spreadable and paler in colour. This is really important as it gives you a really light buttercream that is soft and fluffy. Don’t skip this step!
- Add in half your icing sugar and mix in until completely combined. Tip in your coffee mixture and vanilla along with 2 tbsp milk and mix to combine in smoothly, scraping down your bowl as needed. Now add in the remaining sugar and slowly mix it in. Scrape your bowl down again, then beat, on high, for about 30 seconds for the final fluffing of your buttercream.
- Using your spatula, mix and press your buttercream around your mixing bowl for about a minute or so. This smooths out your buttercream, pushing out air bubbles, so giving you a really silky buttercream to work with for your final step.
- Transfer your buttercream to your piping bag fitted with your 2D piping nozzle. I find it easiest to place my piping bag into a glass to help me hold the bag open, so I can use both my hands to hold my mixing bowl and steady the piping bag as I fill it. Once you have filled your bag, twist the top of it to stop the buttercream from escaping out that way. Starting from the middle of each cupcake, pipe a swirl, keeping your pressure steady and your bag upright as you move it around the top of your cupcake. Top each buttercream rosette with a walnut half and a couple of coffee beans to decorate. Enjoy!
Recipe Video
Notes
- Make sure you’ve prepared your tools and ingredients before you start mixing: line your cupcake pan with cupcake cases, preheat your oven and get your ingredients out ready to use. It’s easy to forget something once you start mixing!
- Take time to read through the recipe so you are familiar with what steps come next. Don’t skip details and instructions given as it could affect the results of your final bake.
- Remember to beat your butter plenty enough when making your buttercream. Trust me, this step is totally worth the extra few minutes you’ll spend!
- Ensure your cupcakes are completely cool before decorating with buttercream, otherwise you could end up with a melted liquid mess for buttercream and soggy cupcakes. No one wants that!
I made these for Sunday tea time today – both my husband and I love them! The combination of coffee and walnuts tastes divine, and they even taste bit caramelly thanks to the brown sugar🤤
Thanks for the great recipe!🧁💜
Hi Bianca, I’m so happy to hear you enjoyed these cupcakes! Thank you for coming back to leave me a review! 💕
Omg the combination of coffee and walnuts sounds lovely!! Could I possibly turn this recipe into a loaf cake too?? Ps: love your blog :’)
Hi Daniella, firstly thank you for commenting, I’m so glad you’re here and you love my blog! 🥰 To answer your question, absolutely you can turn this into a loaf cake too! I would recommend a 2lb loaf tin, and baking for around 50-60 minutes, but do check around 40 minutes and cover loosely with foil if the top is browning before the cake is baked. Please do let me know how it turns out for you! 😊
In the ingredients you say espresso granules in the cupcake and espresso granules dissolved in the frosting. I’m wondering if you mean the actual coffee grounds or an instant espresso coffee, since the coffee grounds don’t dissolve?
Hi Mel! I use dissolvable instant espresso in this, rather than coffee grounds. If you don’t have instant espresso powder, a strong instant coffee powder will work well too. Hope that answers your question 🙂