
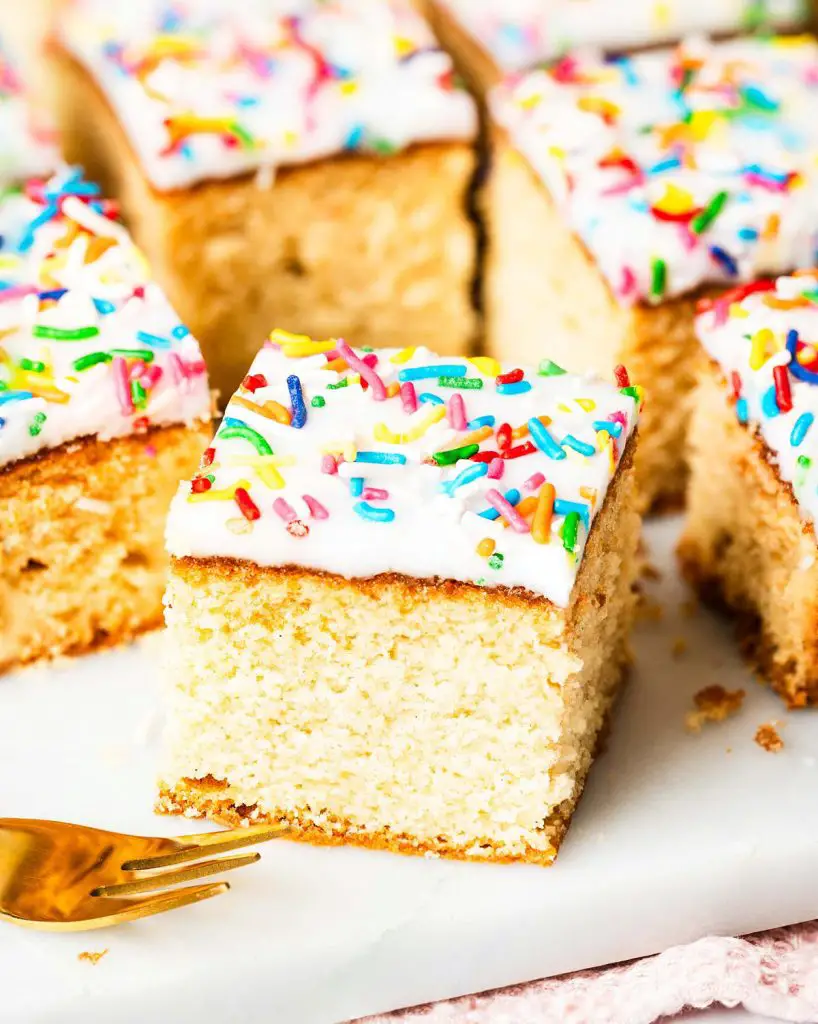
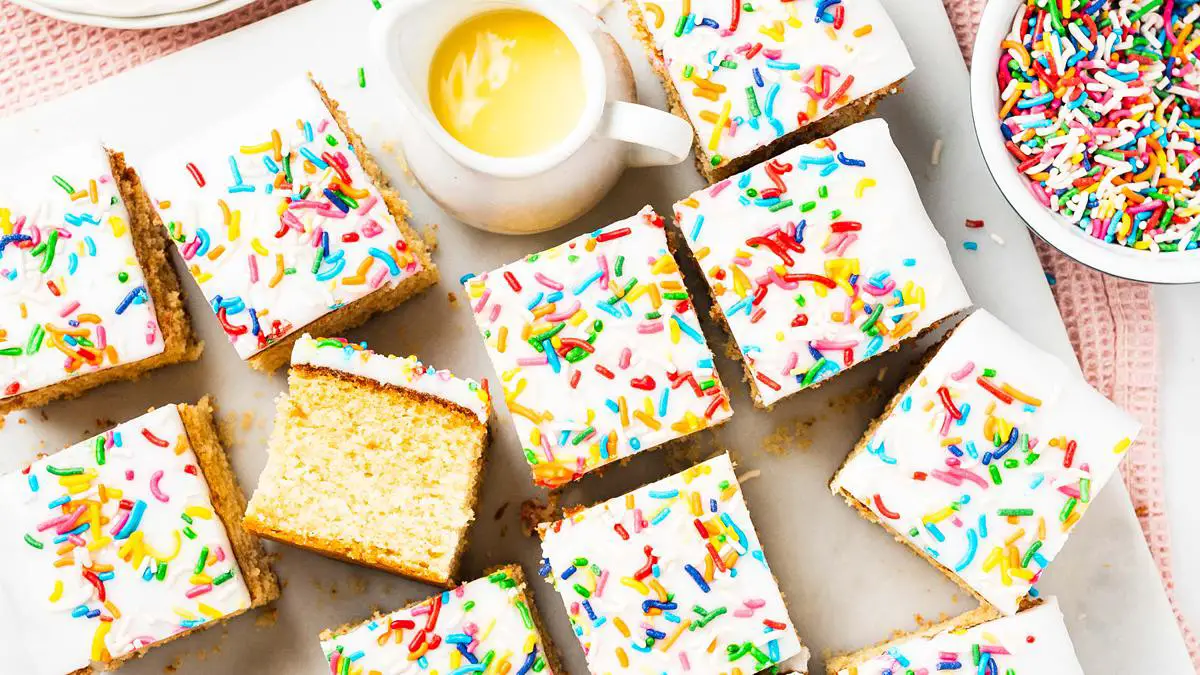
Anyone growing up in the UK will remember this classic school cake from their school dinners: a vanilla sponge cake topped with simple white icing and finished with lots of colourful sprinkles. Enjoy a square on its own, or in a pool of custard for the ultimate nostalgic dessert!

What is old school cake?
The old school sprinkle cake was one everyone got excited about at lunchtime! It is quite simply a single layer vanilla traybake, a thin layer of white icing and wonderfully colourful sprinkles to brighten up the bake. It was offered as a square of cake, but pretty much everyone I knew had to enjoy it with lashings of warm custard for the ultimate school dinner treat!
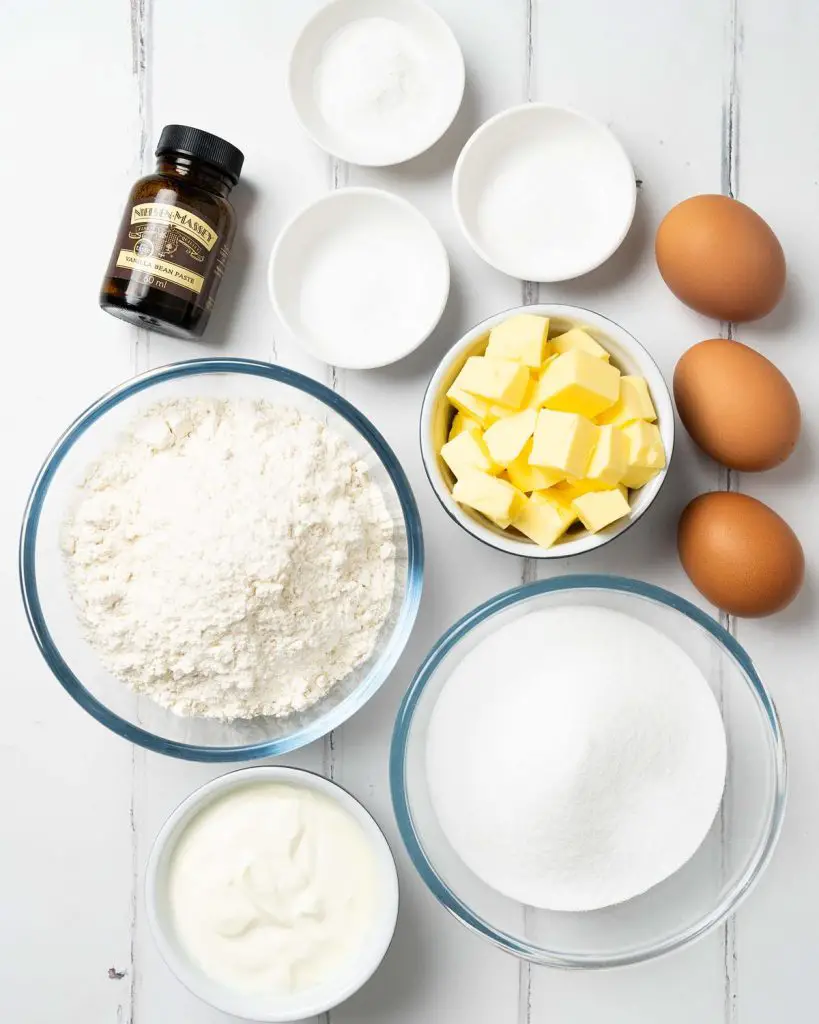
Ingredients for old school cake
- Butter: I use unsalted butter, so I can control the amount of salt in the cake tray bake.
- Caster sugar: dissolves better in the cake, and essential for delicious sweetness.
- Flour: I use plain/all purpose flour to make the cake. I prefer adding raising agents separately, as I do with salt, so I can control the rise of each bake.
- Baking powder/bicarbonate of soda: the raising agents used in this moist classic school cake.
- Salt: enhances the flavour of the bake, but it will not be so much that you taste it, I promise!
- Eggs: gives structure and stability to the cake as it bakes.
- Yogurt: part of the wet ingredients used for the cake. Keeps it light, moist and tender.
- Vanilla: for a light flavour, everyone loves vanilla cake!
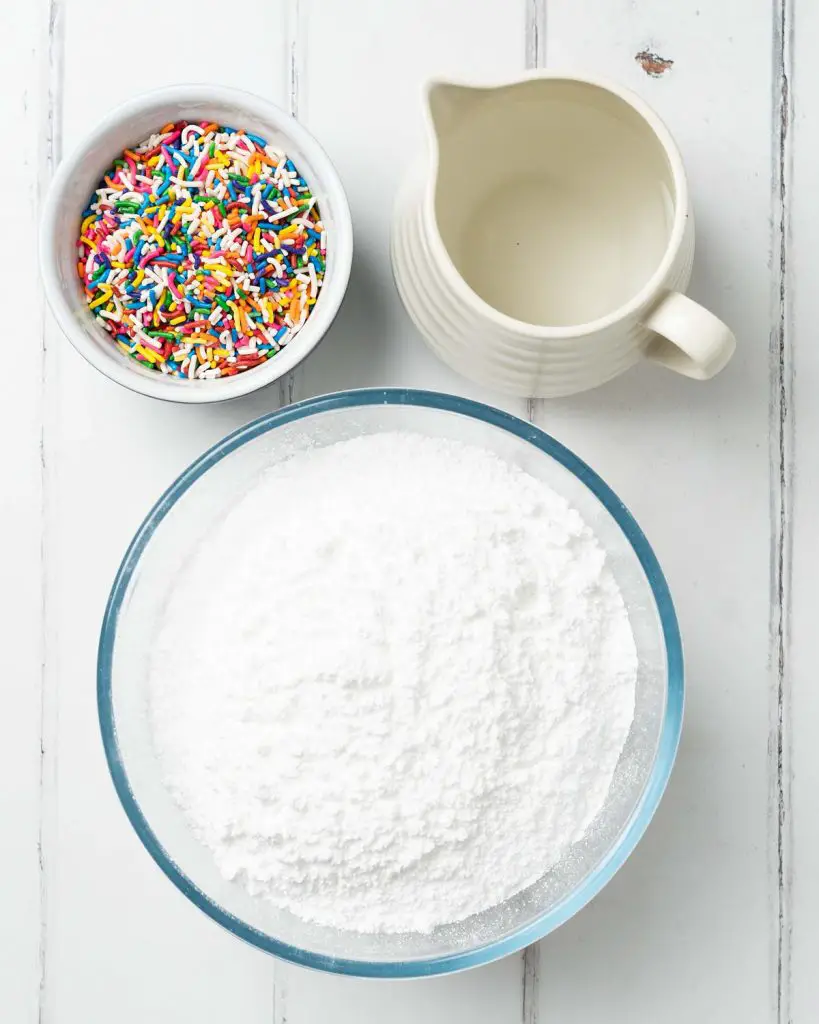
- Icing/powdered sugar: used to make the simple water icing that tops this vanilla traybake cake.
- Sprinkles: adds lots of colour and plenty of fun to this easy old school sprinkle cake recipe.
What equipment do I need to make a tray bake?
- Tray bake tin:* you can use a roasting tin too, but I like the sharper corners offered by a tray bake tin.
- Parchment paper: to line the tin.
- Digital kitchen scales*: I provide all my measurements in cups too, however I would encourage all bakers to weigh out ingredients using weighing scales when baking. A set of digital kitchen scales is so useful and totally an essential baking tool for me.
- Measuring spoons*: a set of measuring spoons is essential for any baker. This is because these are more accurate than using everyday teaspoons and tablespoons, which can vary greatly in size.
- Stand mixer*/electric hand mixer*: I would highly recommend investing in a good electric mixer, whether stand mixer or hand held electric mixer, to help with all baking. This recipe can, of course, be done entirely by hand, but your arm will get quite the workout for it! Having these tools makes it much easier, not to mention quicker, to do any baking.
- Jug*: to mix the wet ingredients in before adding to the dry in this easy tray bake.
- Sieve*: to remove any lumps from the dry ingredients.
- Spatula*: ensures you get every last bit of the old fashioned school cake mixture into the tin to bake! Plus useful to spoon out and spread the icing over the top of the cake once baked too.
How to make old school cake with white icing
This traybake cake is actually really quite easy to bring together, there are just a few steps along the way. First, we need to make the cake itself, then the simple water icing to top the cake and crown it generously with fun sprinkles to finish!
Making the cake
Step 1: Line the tin with parchment paper and set it aside. Preheat the oven to 180C/350F whilst making the cake batter.
Step 2: In a large bowl or a stand mixer, beat the butter until softened. Add in the sugar and beat until paler and fluffy. Sift in the flour, baking powder, bicarbonate of soda and salt and beat again until the mixture resembles damp sand.
Step 3: Separately, in a jug, tip in the yogurt, eggs and vanilla. Mix well until smooth and completely combined.
Step 4: Pour half the wet mixture into the flour mixture and mix on low to combine. Add in the remaining wet mixture, scrape the bowl down and mix again to completely combine. Scrap the bowl down once more and beat on medium-high for about 30 seconds until the batter is really light and silky.
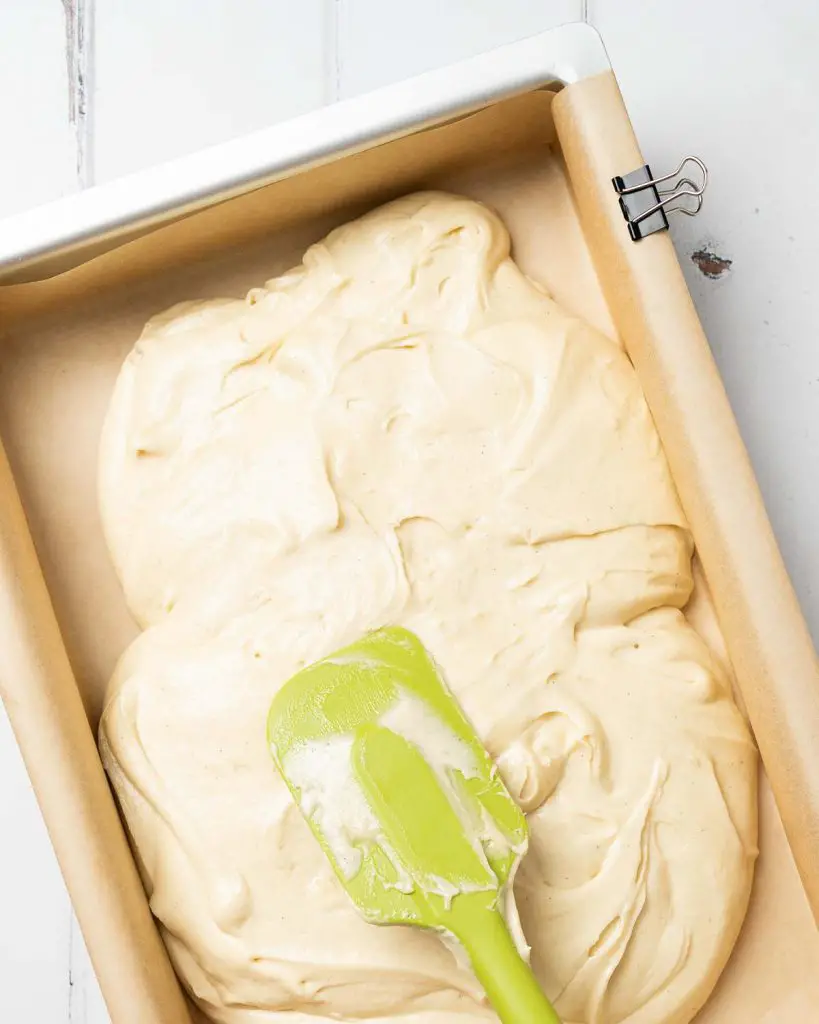
Step 5: Spoon the cake mixture into the prepared tin and level the top, then bake in the preheated oven for 30-35 minutes until springy to touch and a skewer inserted into the centre comes out clean. Cool for 10 minutes in the pan, then remove to a cooling rack and leave to cool completely.
For the icing and decoration
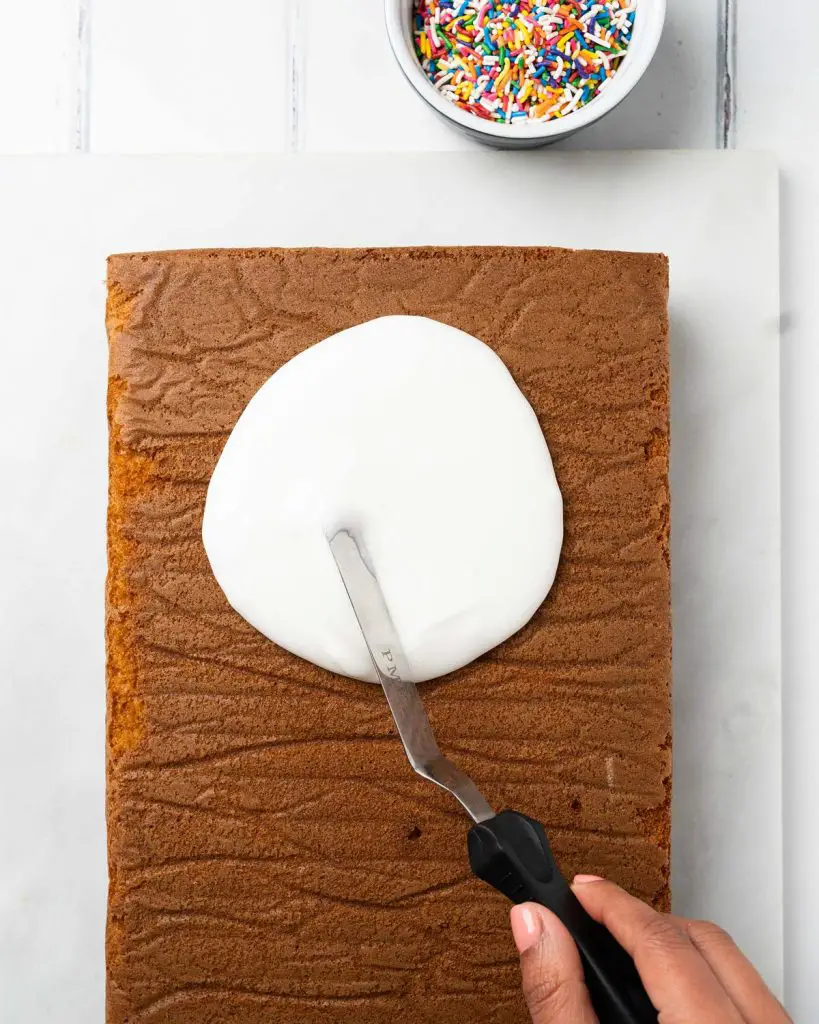
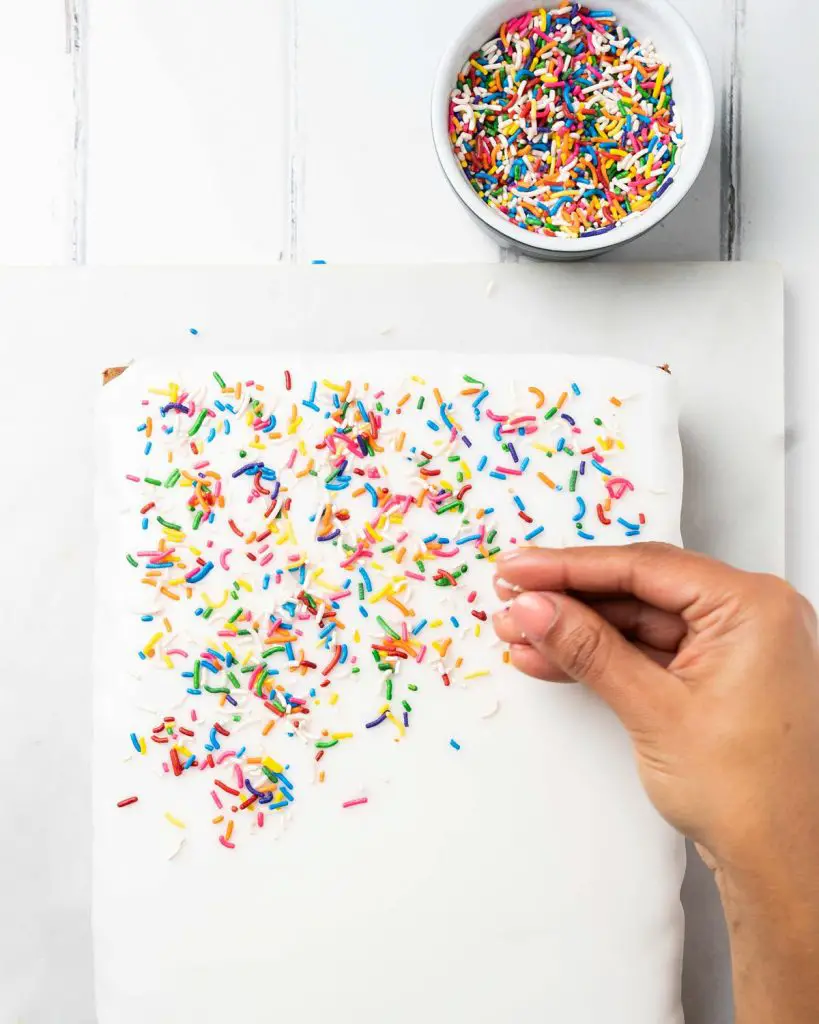
Step 1: Sift the icing sugar into a bowl, then add enough water to get the consistency of icing you want. Add in the water a little at a time: you want the icing thin enough to spread over the cake, but thick enough that it does not run off the sides of the cake.
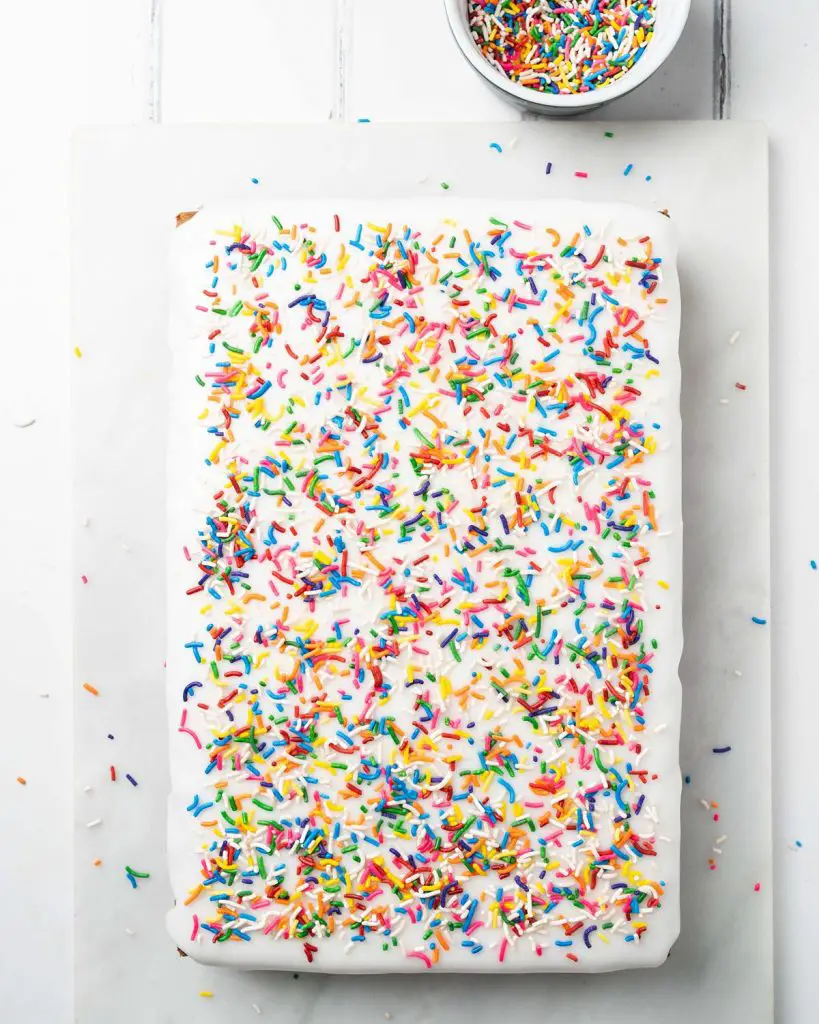
Step 2: Top with as many sprinkles as you would like to cover the top of the cake. Leave the icing to set for at least a half hour before cutting. Enjoy!
Frequently asked questions about baking old school cake
I have answered as many questions as I can, however if you have any that I have not answered, please leave me a comment below and I will get back to you!
How do I know when my school cake is baked?
You can tell when the traybake cake is baked as it will be well risen and slightly domed in the middle. You can also use a toothpick or wooden skewer, poked into the middle of the cake: you should have nothing come out sticking to this if the cake is baked.
How to decorate an old school cake
This cake is so easy to decorate and really forgiving too! Simply pour over the icing and spread it to the edges. Then top with as many sprinkles as you would like to make it as colourful and fun as you want!
How long will an old school sponge cake last?
This vanilla sheet cake should be stored in an airtight container and will be fine kept at room temperature for 2-3 days.
Where to store school cake
Store the vanilla traybake cake in an airtight container. It does not need to be kept in the refrigerator, just place the container in a cool spot away from direct sunlight to keep it at its best.

Can you freeze old fashioned school cake?
Absolutely! Most cakes will freeze well for up to three months.
How to freeze this sprinkle tray bake
I would recommend freezing this cake without the icing and decoration on top. Once baked, leave the cake to cool for 10 minutes in the tin before removing to a cooling rack to cool completely. Once it is cool, wrap it tightly with two layers of cling film (plastic wrap), leaving the parchment the cake was baked in around the cake. Then wrap snugly in a layer of foil and freeze.
How to thaw the cake
This cake will thaw fairly quickly. Depending on the temperature of the room, it can normally be completely thawed in a couple of hours at most. To thaw this old school cake, remove the foil and both layers of cling film and place on a cooling rack, brushing off any ice crystals as you do. Once the cake has thawed, remove the lining paper and decorate according to the rest of the recipe. Store in an airtight container as before.
Additional tips for making this school cake recipe
- Preparation is key! Get all ingredients and tools ready, including lining the tin and turning the oven on before you start mixing.
- Make sure all the ingredients are at room temperature. This small step helps ensure all the ingredients blend together much more smoothly, resulting in a better bake.
- Beat the butter well at the start of making the cake. You want it light and smooth and pale for the best vanilla traybake cake results.
- When beating the cake mixture before baking, make sure to beat at a medium speed. Mixing it too high will result in too much air going into the cakes, leading to it collapsing after rising during baking. You want to incorporate some volume, but not so much that is causes the cake to collapse.
- Ensure the cake is completely cool before decorating with the icing, otherwise you could end up with a melted liquid mess for icing and a soggy cake. No one wants that!
- Add the water a little at a time to the icing sugar when making the icing until it gets to the consistency you want. If you add too much water, simply add a little more icing sugar to achieve a thicker consistency. A little water goes a long way when making this icing!
Troubleshooting
If you have any questions about this school cake, please comment below and I will do my best to help. And do remember: if you enjoy this old school sponge cake recipe, please leave a rating and review below. You could even post a picture on Instagram and tag me when you share it with the world. You already know I would love to see!
More recipes from my blog for you to enjoy
Coffee and walnut traybake: This delicious traybake has a light and fluffy coffee cake with plenty of chopped walnuts throughout. It is topped in a delicious coffee buttercream and finished with more walnuts and coffee beans for decoration. A coffee cake lover’s true slice of heaven!
Victoria sponge cake: This British classic has to be a staple in every baker’s library! Two delicious vanilla flavoured sponge cakes are filled with softly whipped cream and jam and a simple dusting of icing sugar to finish. The Victoria sponge cake has to be one of the most simple but elegant cakes out there, making it a British classic loved the world over. Perfect for afternoon tea or any celebration!
Carrot cake tray bake: A delicious moist and light cake, packed with grated carrots, walnut chunks and my delicious spice mix, then spread generously with a tangy cream cheese icing and even more walnut pieces. Not only is this a super easy bake, but it’s always a crowd pleaser!
Thanks for joining me today, my friends. Hope you enjoy this beautiful school cake recipe as much as my family does, and happy baking! x
Recommended equipment I used *
| Tray bake tin | Digital kitchen scales |
| Measuring spoons | Stand mixer |
| Electric hand mixer | Jug |
| Sieve | Spatula |
Old School Sponge Cake
Ingredients
- 165 g (¾ cup) unsalted butter
- 300 g (1 ½ cups) caster sugar
- 325 g (2 ¼ cups + 1 tbsp) plain (all purpose) flour
- 1.5 tsp baking powder
- 0.75 tsp bicarbonate of soda (baking soda)
- 0.75 tsp salt
- 190 g (¾ cup + 1 tbsp) yogurt (I use Greek yogurt)
- 3 large eggs
- 2 tsp vanilla
- 500 g (3 ½ cups + 3 tbsp) icing (powdered) sugar
- 5-6 tbsp water
- sprinkles, to decorate
Instructions
For the cake
- Line the tin with parchment paper and set it aside. Preheat the oven to 180C/350F whilst making the cake batter.
- In a large bowl or a stand mixer, beat the butter until softened. Add in the sugar and beat until paler and fluffy. Sift in the flour, baking powder, bicarbonate of soda and salt and beat again until the mixture resembles damp sand.
- Separately, in a jug, tip in the yogurt, eggs and vanilla. Mix well until smooth and completely combined.
- Pour half the wet mixture into the flour mixture and mix on low to combine. Add in the remaining wet mixture, scrape the bowl down and mix again to completely combine. Scrap the bowl down once more and beat on medium-high for about 30 seconds until the batter is really light and silky.
- Step 5: Spoon the cake mixture into the prepared tin and level the top, then bake in the preheated oven for 30-35 minutes until springy to touch and a skewer inserted into the centre comes out clean. Cool for 10 minutes in the pan, then remove to a cooling rack and leave to cool completely.
For the icing and decoration
- Sift the icing sugar into a bowl, then add enough water to get the consistency of icing you want. Add in the water a little at a time: you want the icing thin enough to spread over the cake, but thick enough that it does not run off the sides of the cake.
- Top with as many sprinkles as you would like to cover the top of the cake. Leave the icing to set for at least a half hour before cutting. Enjoy!