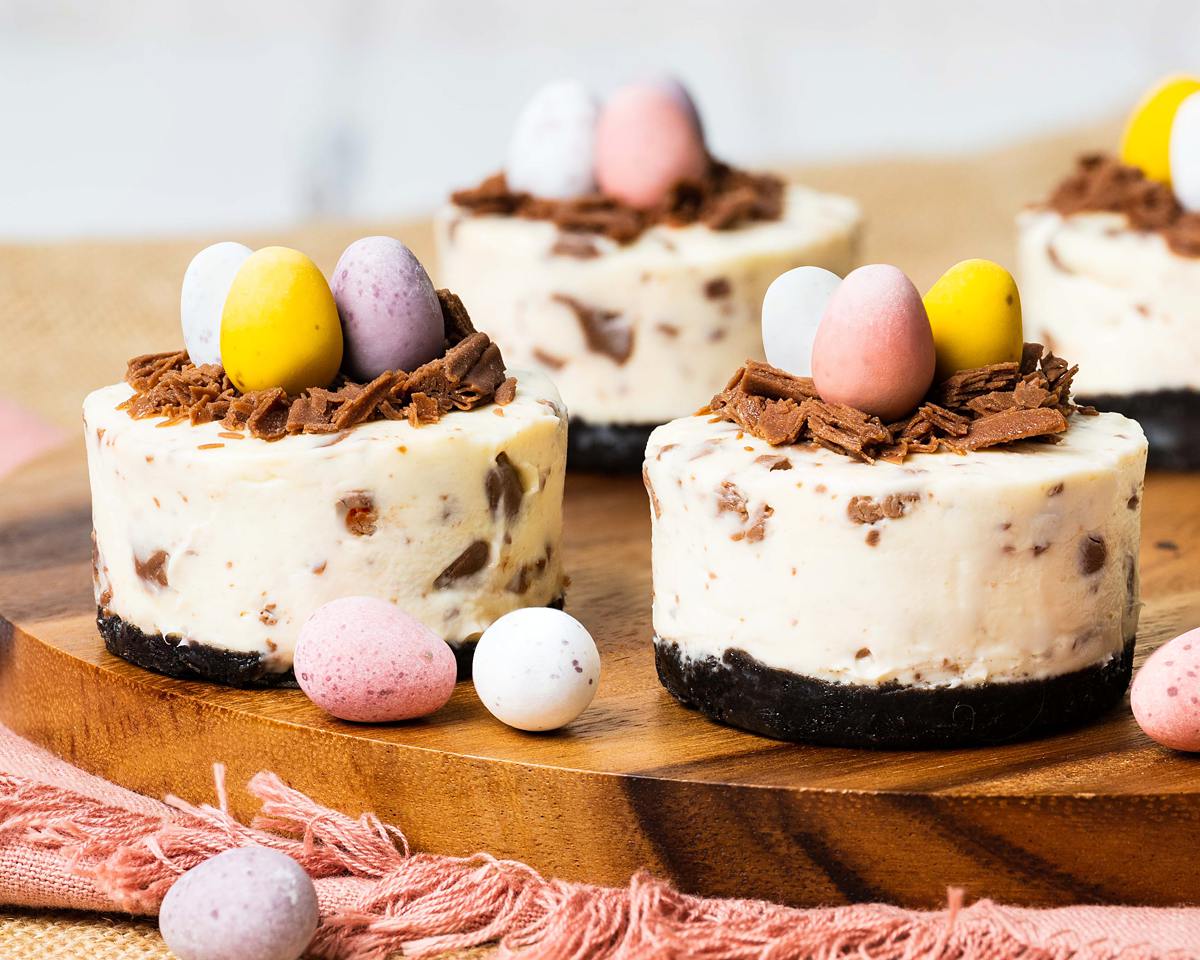
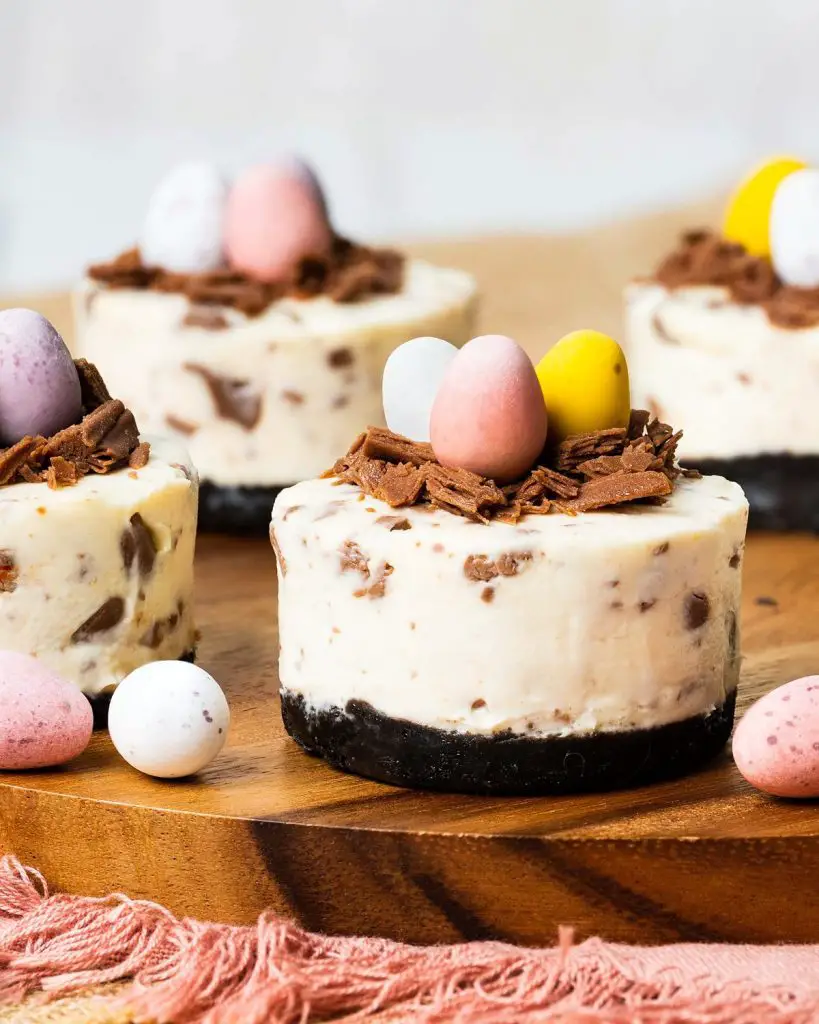
Entertaining and looking for Easter cheesecake ideas? My sweet individual mini egg cheesecakes make for excellent single serve desserts! They are so simple to make, perfect to make ahead for stress free entertaining and are just too cute to resist!
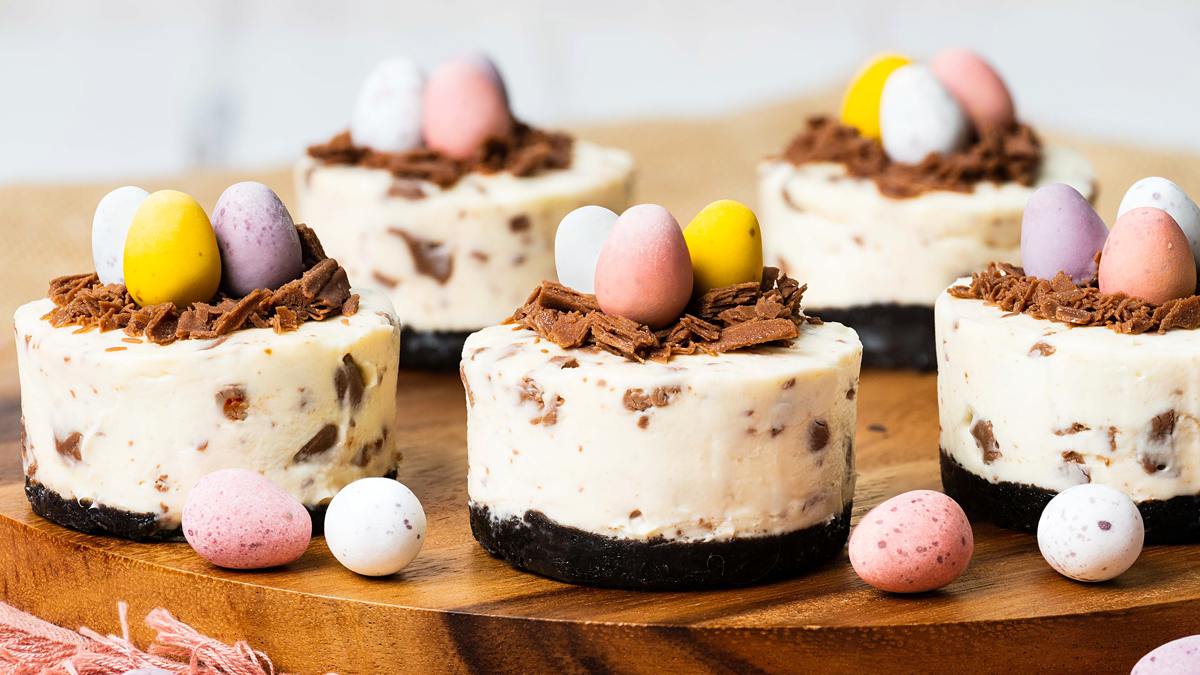
Mini Easter cheesecakes
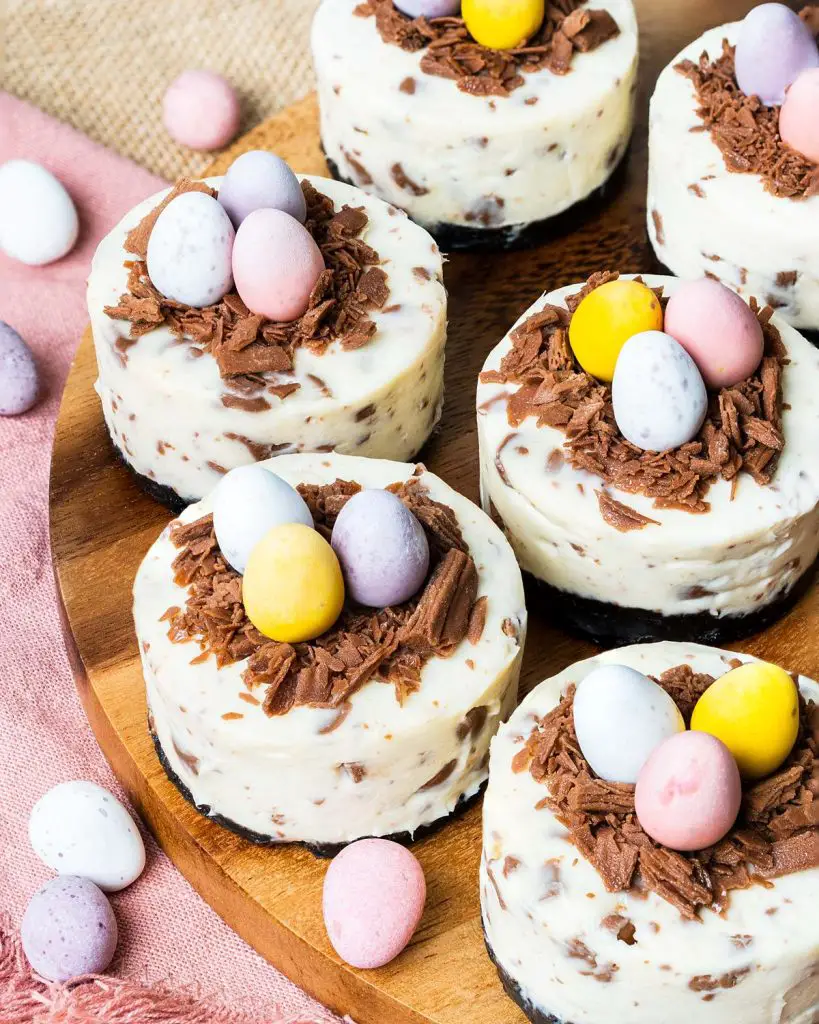
I am absolutely obsessed with mini desserts! They are perfectly portioned for individually plated desserts. It is so easy to serve them too as there is no mess of cutting or serving the dessert. And they always look so neat and tidy, each one perfectly identical to the rest. It rather makes me happy, having a selection of desserts quite so precisely matched to all the rest!
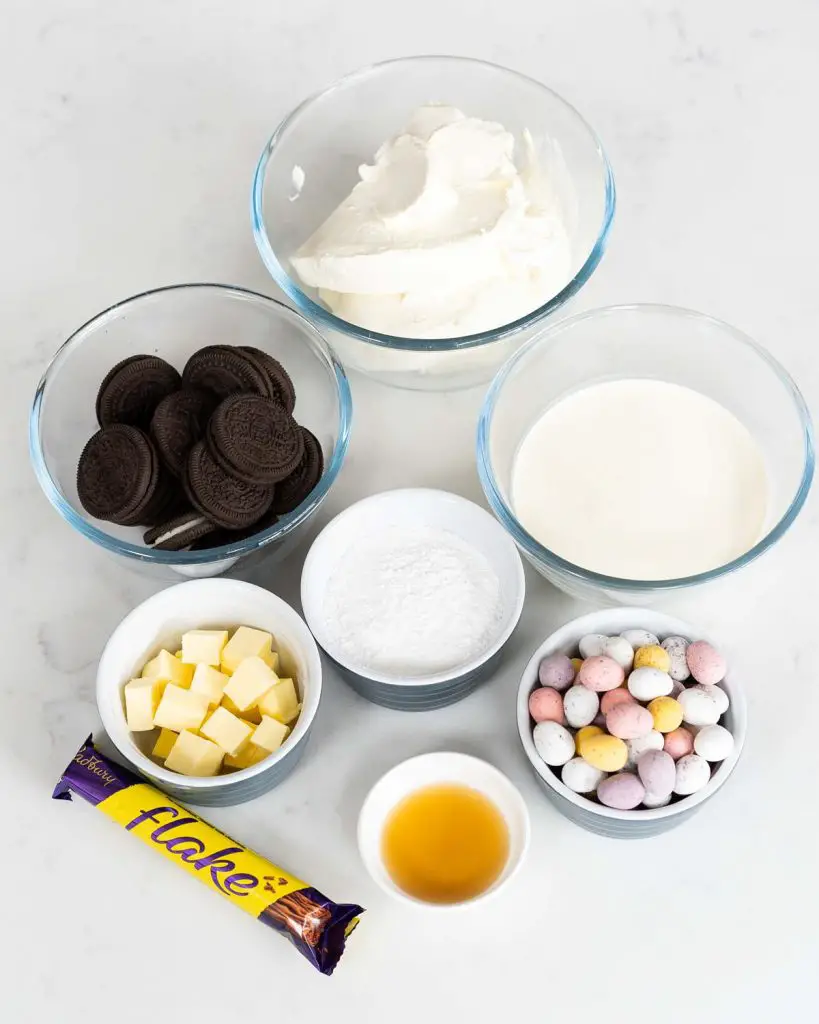
Mini egg cheesecakes ingredients
- Oreo biscuits: or any other cookies n cream biscuits, used to make the base of the cheesecake.
- Butter: I use melted unsalted butter in the base of the mini eggs cheesecakes. It gives a wonderful rich flavour and helps bind the biscuits together when making the base.
- Cream cheese: make sure to use a full fat cream cheese when making the filling for any no bake cheesecake recipe, as this is part of what helps the filling set firmly. Plus it gives the no bake mini egg cheesecakes a wonderfully rich and decadent texture!
- Icing sugar: for sweetness in the cheesecake filling.
- Vanilla: who can resist the timeless flavour of vanilla!
- Double/heavy cream: whipped up, this gives body, richness and stability to the Easter egg cheesecakes.
- Milk chocolate flake: used to create the “nest” for the mini eggs to sit in on top of the Easter egg cheesecakes.
- Mini eggs: an essential ingredient in this dessert, its even in the name!
Kitchen equipment you’ll need to make this Easter cheesecake
- Digital kitchen scales*: my recommended method of measuring ingredients is to weigh them out using grams rather than cups. I do, however, provide cup measures too, if you prefer working with this method.
- Measuring spoons*: for measuring smaller quantities such as tablespoons (tbsp) and teaspoons (tsp). A set of dedicated measuring spoons are far more accurate than using everyday eating spoons, so is a small investment well worth making.
- Food processor*: a quick way to crush the biscuits for the base. If you do not have a food processor, you can place the biscuits into a sealable freezer bag and bash with a rolling pin instead.
- Loose-bottomed mini cakes tin*: I love this tin! It means I can make mini cheesecakes, cakes and pies without needing to use cupcake tins and liners. So easy to release and gives lovely straight sides for this Easter cheesecake with mini eggs.
- Mixing bowl*: to mix together the ingredients for the cheesecake base and filling.
- Electric hand mixer*: whilst you can beat the filling by hand, this useful tool makes it all a whole lot easier.
- Spatula*: for scraping the bowl down as you make the no bake cheesecake base and filling.
- Offset spatula*: This tool makes the job of levelling the top of the mini Easter egg cheesecakes so much easier than a regular spatula or knife.
How to make mini egg cheesecakes
This mini egg mini cheesecake recipe is so simple to put together! Simply mix together the base ingredients and press individually into the tin, then mix together the cheesecake filling and spread over the top. Once chilled, remove from the tin, top each cheesecake with the a chocolate “nest” and some more mini eggs. And then serve and enjoy!
For the biscuit base
Step 1: Place the biscuits into a food processor and blitz until they are completely crumbled. If you do not have a food processor, pop the biscuits into a sealable bag and bash them with a rolling pin until well crushed. Both work fine, one is definitely more therapeutic (!), but I prefer using a food processor purely for speed.
Step 2: Add in the melted butter and mix through, scraping down the bowl to make sure everything is really well combined. Divide the biscuit mixture evenly between the 12 holes of the tin and press down evenly to give each a flat base. Pop the tin in the fridge to allow the bases to chill until needed.

How to make the cheesecake filling
Step 1: In a large mixing bowl, beat together the cream cheese, icing sugar and vanilla until smooth and creamy.
Step 2: Pour in the double cream and beat it all together until the double cream is well combined with the cheese and the mixture thickens. Set aside for a moment.
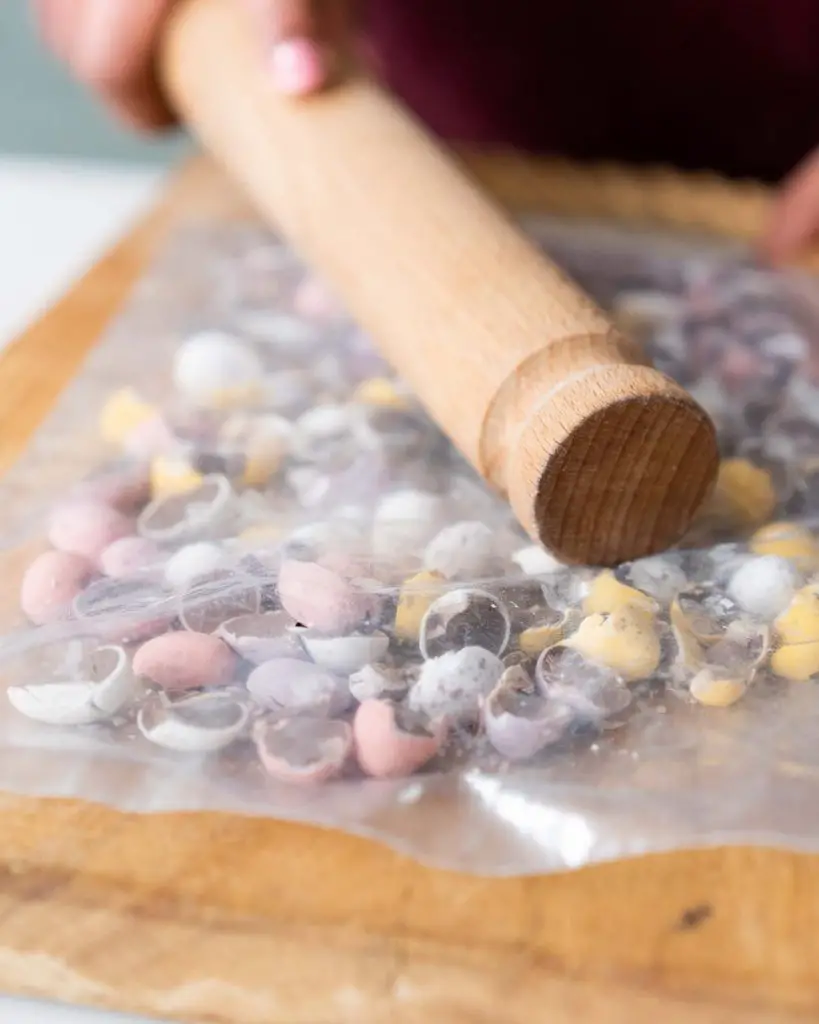
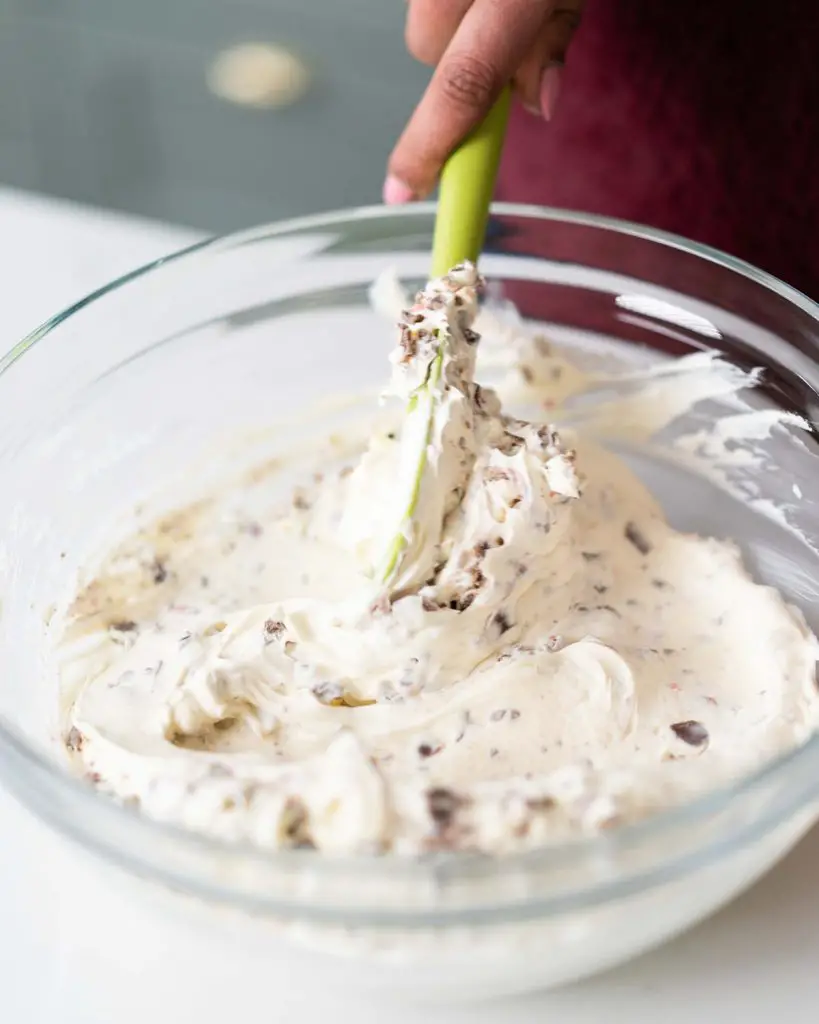
Step 3: Crush the mini eggs (and have fun bashing them!). Fold through the cheesecake filling to mix evenly.
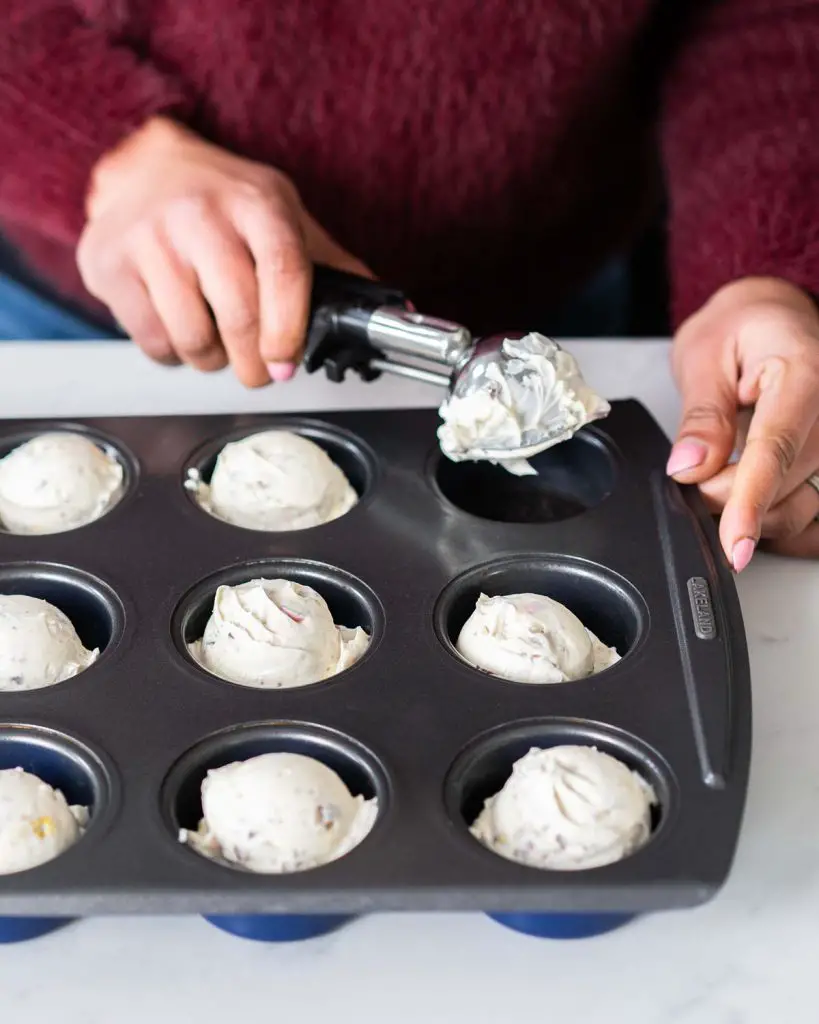
Step 4: Divide the cheesecake filling evenly over each chilled base and use an offset spatula to level the tops. Chill for at least 3-4 hours, preferably overnight.
For the topping and decoration
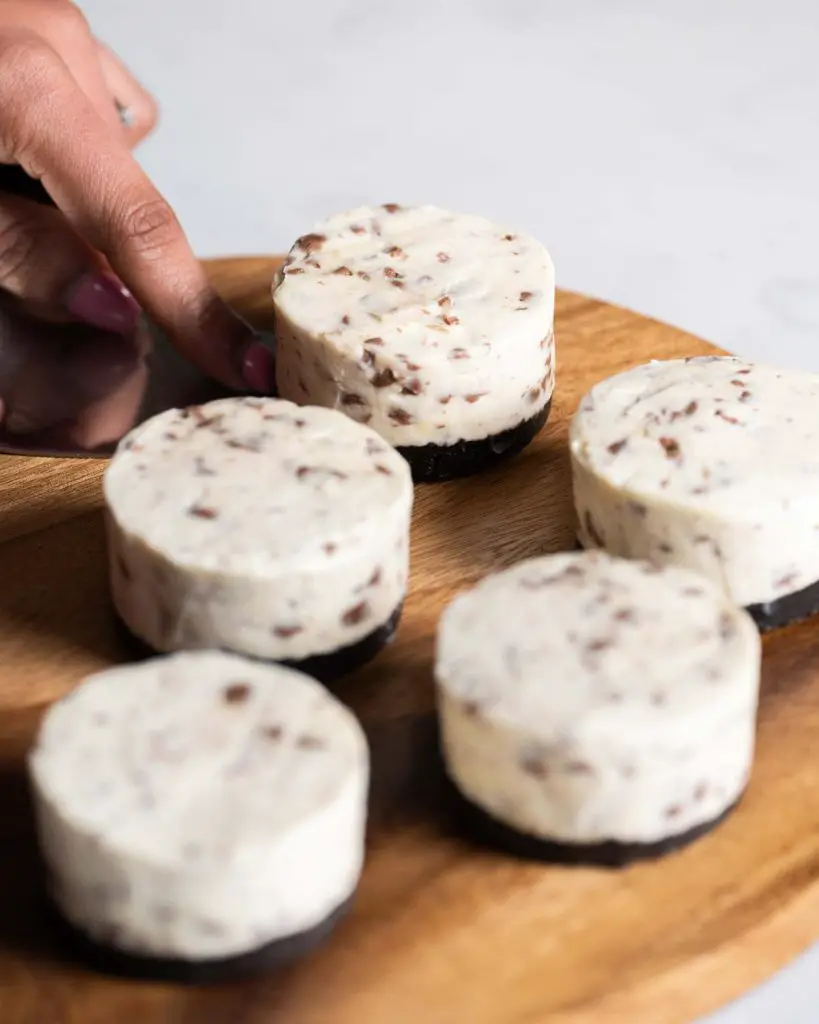
Step 1: Carefully remove each cheesecake from the tin. Smooth around the edges to give each one a nice smooth finish on the sides.
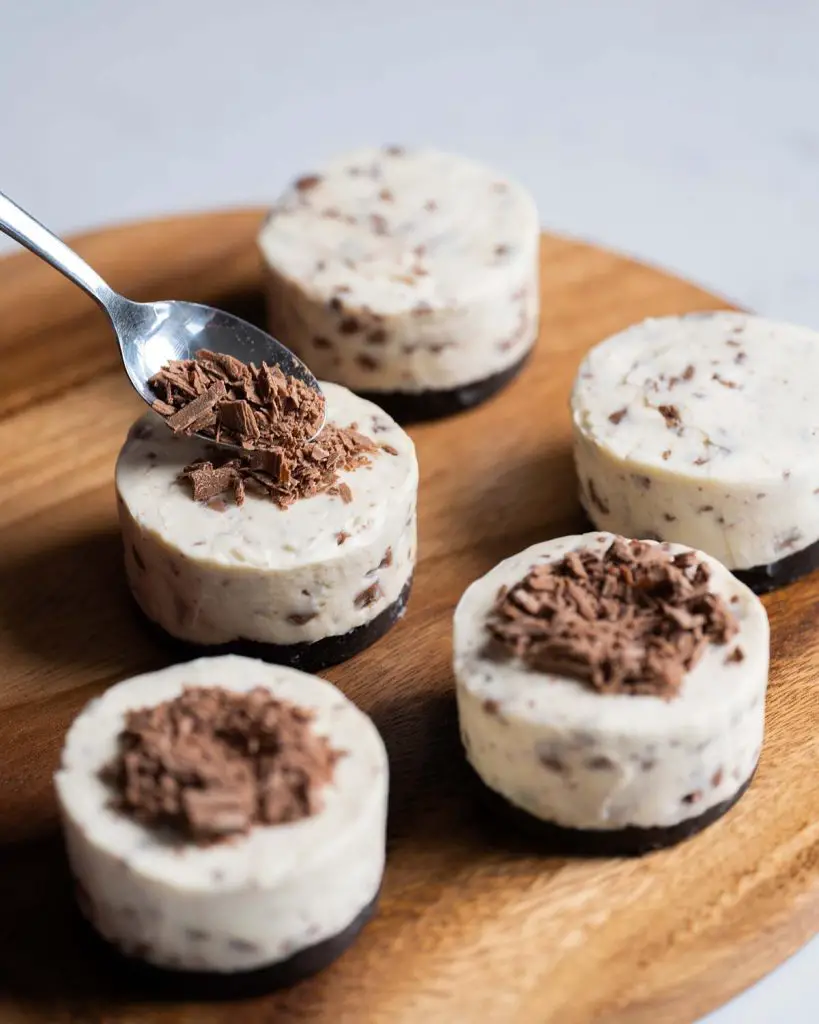
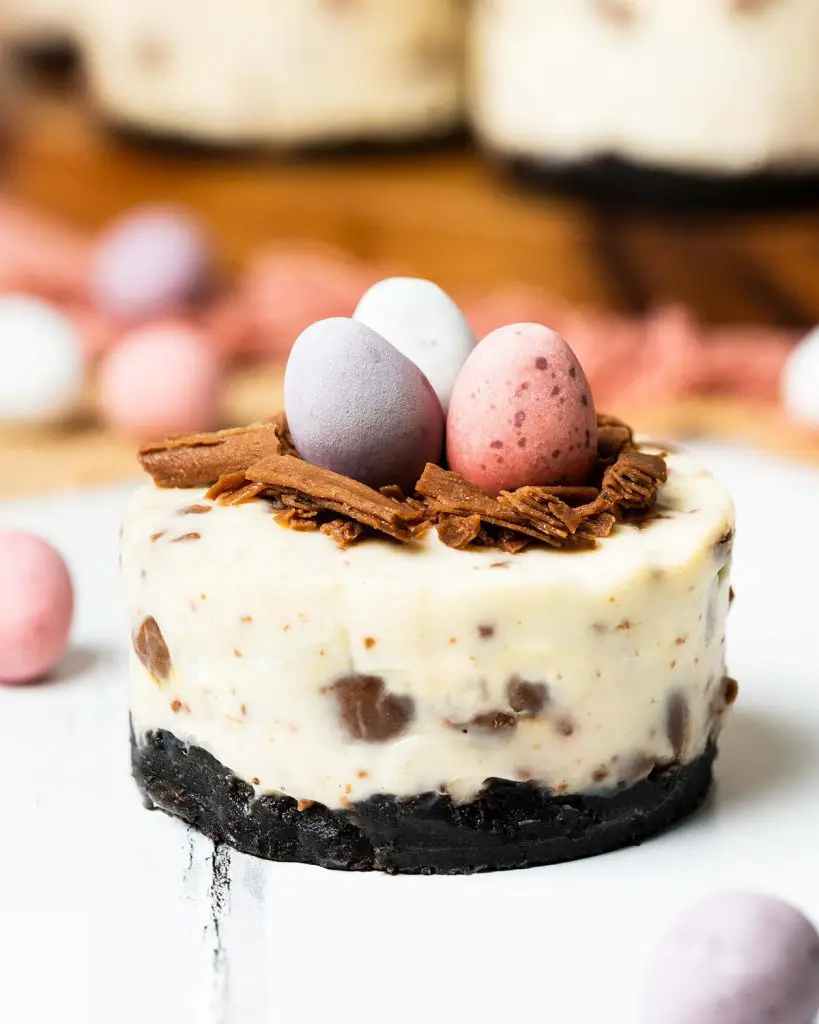
Step 2: Roughly break the chocolate flakes into chunks. If you are using normal chocolate, roughly chop it or grate with a peeler. Arrange a mound of chocolate over each cheesecake, making a little hollow in the middle so it looks like a nest.
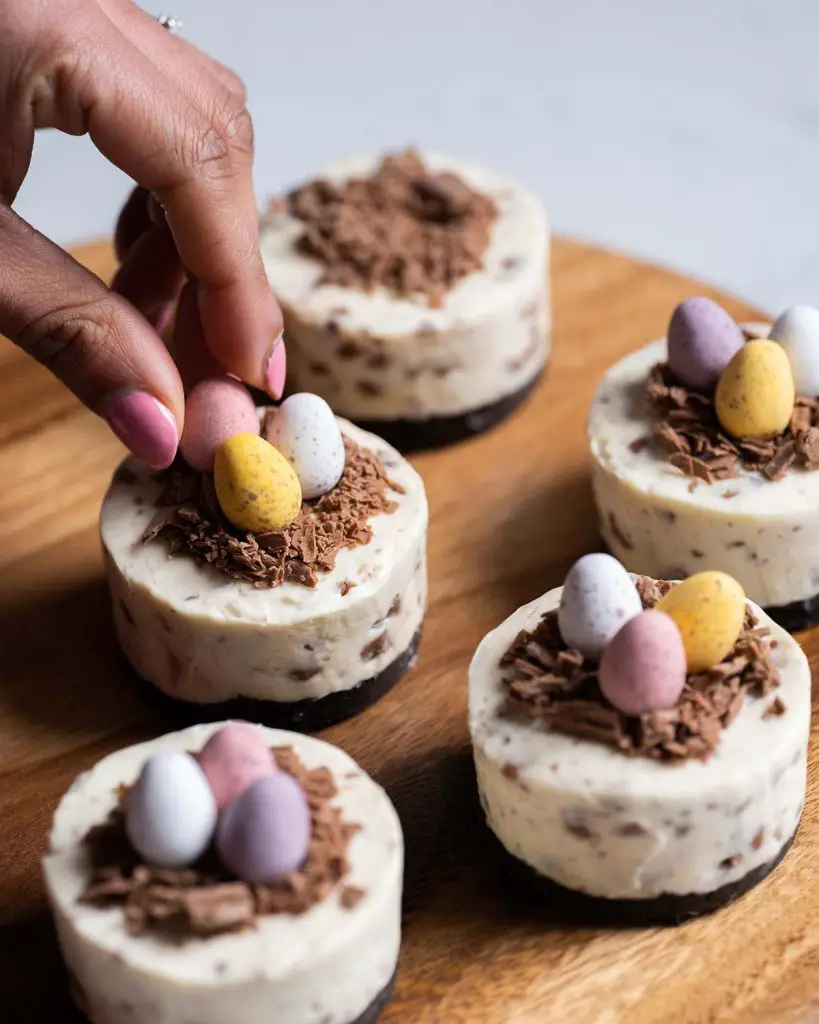
Step 3: Arrange three mini eggs into each chocolate nest, pressing down slightly to ensure they remain in place and not roll off! Place on individual plates and serve. Enjoy!
Mini egg cheesecakes FAQ
I’ve tried to answer as many questions as I could here, but if you have any others, do drop me a message below and I’ll do my best to help!
Do no bake cheesecakes use eggs?
There are no eggs in this easy mini egg cheesecake. A cheesecake recipe with eggs in the ingredients will need to be baked. This is to allow the eggs to cook and set the dessert.
Can I make this cheesecake without a special tin?
A tin with loose bases is really useful as it makes it so much easier to release the mini mini egg cheesecake from the tin. If you do not have a tin such as this, you can certainly use a muffin tin too.
How do you make mini cheesecakes in muffin pans?
To make these Cadbury mini eggs Easter cheesecakes in a muffin tin, simply use muffin cases in each hole before pressing the base in and adding the cheesecake filling. When serving, simply remove the cheesecake from the muffin tin, peel off the muffin liner and place on a plate before finishing the decorations.
How do I get a cheesecake out of a muffin tin without liners?
If you would prefer to use a muffin tin without liners, that can work too! Use two strips of baking parchment to form a cross at the bottom of each muffin hole, ensuring there is enough overhang of strips to pull the cheesecake out. Make and assemble the cheesecakes as per the recipe and chill. Once set, use the overhang of parchment paper to twist and wiggle and ease each of the Easter cheesecakes out of the tin.
Do you need to line a tin for a cheesecake?
No, there is no need to line the tin when making these mini cheesecakes, it should release without it. Simply run an off set spatula or a thin knife under the base to release it from each base before transferring it to the serving plates.
Having said this, I do sometimes like to line the base with a small circle of parchment as this does help make it a teensy bit easier to get the cheesecake off the base too!
How do I get a nice smooth top on my cheesecake?
Fill each cheesecake space generously with the filling, allowing it to be a little higher than the edge of the mould. Use an offset spatula to smooth the top of each cheesecake, using the frame of the tin to help level the tops. Chill to set, then use the offset spatula again to smooth around the side edges when the mini Easter cheesecakes have been removed from the tin.
How to store no bake Easter cheesecake
These Cadbury mini egg cheesecakes should be stored in the fridge. I keep my cheesecakes in the fridge, covered with a microwave lid, in order to avoid too much moisture remaining in with the cheesecakes.
Can I make this Easter cheesecake recipe ahead of time?
Absolutely! Make this cheesecake up to a day ahead of serving. I would recommend doing the decoration on top soon before serving as the colour of the mini eggs will be affected if left in the fridge.
How long does a cheesecake last in the fridge?
These no bake mini egg cheesecakes will keep well in the fridge for up to three days. I would recommend doing the decorations before serving the dessert just to ensure the eggs keep their pretty colours and patterns, as this can sometimes get lost after being in the fridge a few hours.
Mini egg cheesecake tips and tricks
- Press the biscuit base really firmly into the bottom of the pan to give a firm base for the filling. I use the end of my rolling pin to give me a flat surface to work with. A small glass, the back of a spoon or even clean fingers work just as well.
- You can bake the cheesecake base if you wish. Baking the crust makes it firmer and less crumbly, so it completely depends on the texture you prefer. Once pressed into the tin, bake the crust for about 5 minutes at 180C/350F. Please make sure the base and tin are fully cool before topping with the easter cheesecakes filling, or you will end up with a melted cheesecake puddle!
- The cream cheese should be at room temperature before mixing. Using it at room temperature will ensure the cheesecake filling is smooth and creamy.
- If you cannot get hold of some chocolate flakes, you can also use some chopped or even grated milk chocolate instead. Get creative with your chocolate!
Troubleshooting
If you have any questions about this mini egg cheesecakes, please comment below and I will do my best to help. And do remember: if you enjoy this Easter egg cheesecakes recipe, please leave a rating and review below. You could even post a picture on Instagram and tag me when you share it with the world. You already know I would love to see!
Easter recipes inspiration ideas
Easter donuts: A light and fluffy vanilla donut, topped with a speckled vanilla glaze, a chocolate nest and adorable mini eggs, these little beauties are sure to become your next seasonal obsession!
Hot cross bun cookies: These tempting hot cross bun cookies will be the ones you need this Easter. Packed with sultanas, orange and cinnamon, they have crisp edges, a chewy middle, and are just divine!
Mini egg cupcakes: These cupcakes are a perfect balance of rich and deeply chocolatey cupcakes, soft and light vanilla buttercream ruffle, and delicious mini eggs to finish it off. If you are looking for an Easter themed cupcake that everyone will enjoy, look no further: you have just found it!
Easter sugar cookies: These sweet little Easter sugar cookies are so simple to make and delicious to eat! Time to get creative with plenty of Easter cookies decorating ideas!
Recommended equipment I used *
| Digital kitchen scales | Measuring spoons |
| Food processor | Loose-bottomed mini cakes tin |
| Mixing bowl | Electric hand mixer |
| Spatula | Offset spatula |
Mini Egg Cheesecakes
Ingredients
For the biscuit base
- 155 g (1 ¼ cups + 3 tbsp) Oreo biscuits
- 60 g (¼ cup) unsalted butter, melted
For the cheesecake filling
- 600 g (2 ½ cups + 3 tbsp) full fat cream cheese
- 80 g (½ cup + 1 tbsp) icing (powdered) sugar
- 1 tsp vanilla
- 240 ml (1 cup) double (heavy) cream
- 240 g (1 cup + 3 tbsp) mini eggs, crushed
For the topping and decoration
- 2 chocolate flakes
- 36 mini eggs
Instructions
For the biscuit base
- Place the biscuits into a food processor and blitz until they are completely crumbled. If you do not have a food processor, pop the biscuits into a sealable bag and bash them with a rolling pin until well crushed. Both work fine, one is definitely more therapeutic (!), but I prefer using a food processor purely for speed.
- Add in the melted butter and mix through, scraping down the bowl to make sure everything is really well combined. Divide the biscuit mixture evenly between the 12 holes of the tin and press down evenly to give each a flat base. Pop the tin in the fridge to allow the bases to chill until needed.
How to make the cheesecake filling
- In a large mixing bowl, beat together the cream cheese, icing sugar and vanilla until smooth and creamy.
- Pour in the double cream and beat it all together until the double cream is well combined with the cheese and the mixture thickens. Set aside for a moment.
- Crush the mini eggs (and have fun bashing them!). Fold through the cheesecake filling to mix evenly.
- Divide the cheesecake filling evenly over each chilled base and use an offset spatula to level the tops. Chill for at least 3-4 hours, preferably overnight.
For the topping and decoration
- Carefully remove each cheesecake from the tin. Smooth around the edges to give each one a nice smooth finish on the sides.
- Roughly break the chocolate flakes into chunks. If you are using normal chocolate, roughly chop it or grate with a peeler. Arrange a mound of chocolate over each cheesecake, making a little hollow in the middle so it looks like a nest.
- Arrange three mini eggs into each chocolate nest, pressing down slightly to ensure they remain in place and not roll off! Place on individual plates and serve. Enjoy!
do you remove the icing from the middle of the Oreos so you’re only using the cookie? or leave the cream in the mixture when throwing them in the food processor? thank you
Hi Britt! No need to remove the middle of the Oreos, just fling em all in and whizz up! Enjoy!