
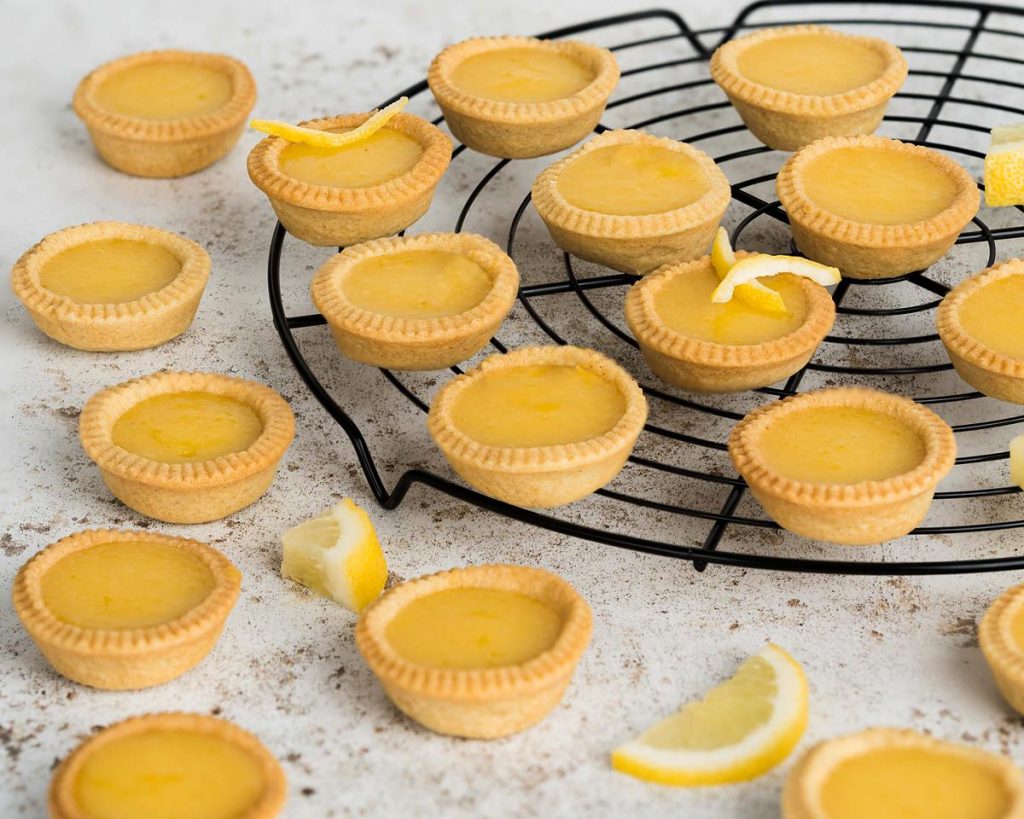
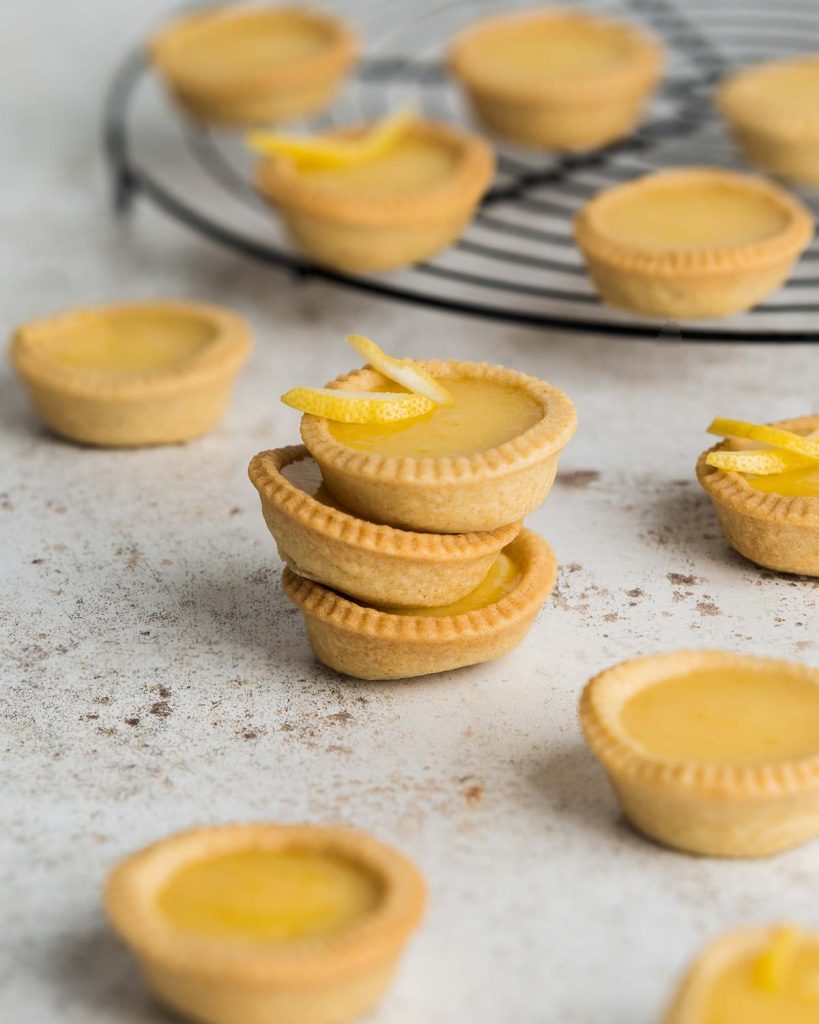
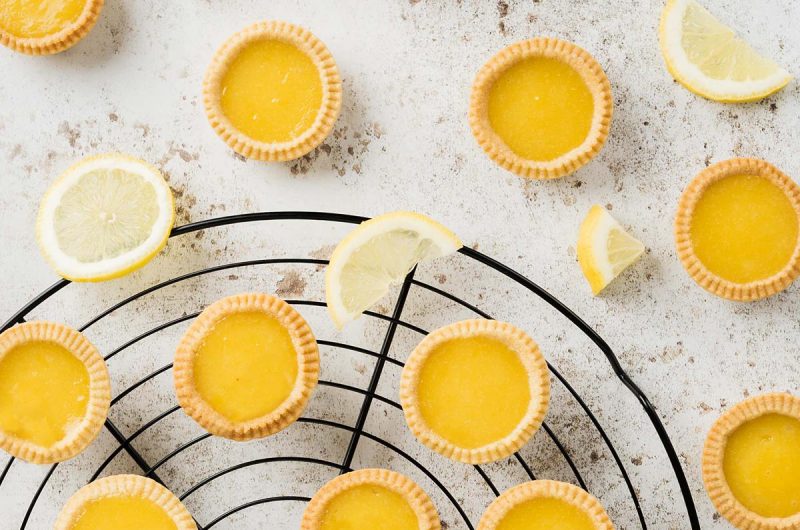
A delightfully joyful bake, these lemon curd tarts are sure to make you smile! A beautiful buttery mini shortcrust pastry shell filled to the brim with a bright and zingy lemon curd. The whole thing just melts in your mouth and is pure sunshine in a mouthful!
A little ray of sunshine
Lemons have always been, for me, like a little ray of sunshine in life. I love using them in all sorts of cooking and baking, both savoury and sweet. From salads and dressings, to a squeeze in curries and sauces to cakes and bakes, the tangy notes of lemon are always welcome in my kitchen!
Of course, using them in sweet foods comes with its own set of concerns. Some people like their lemon bakes to be really tart, I make mine a little more sweet. As such, if you are someone who prefers more lemony bakes, go ahead and increase how much you use! Tasting as you make your lemon curd is always a good idea to get the flavour you prefer.
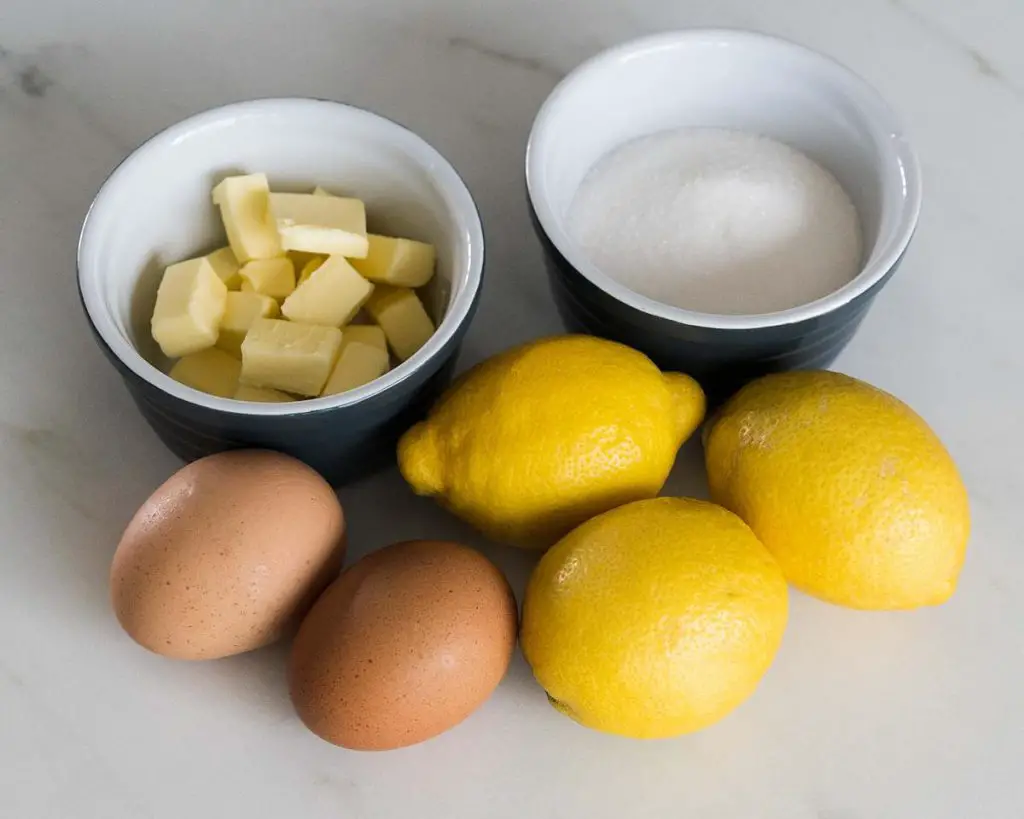
What ingredients do I need to make lemon curd tartlets?
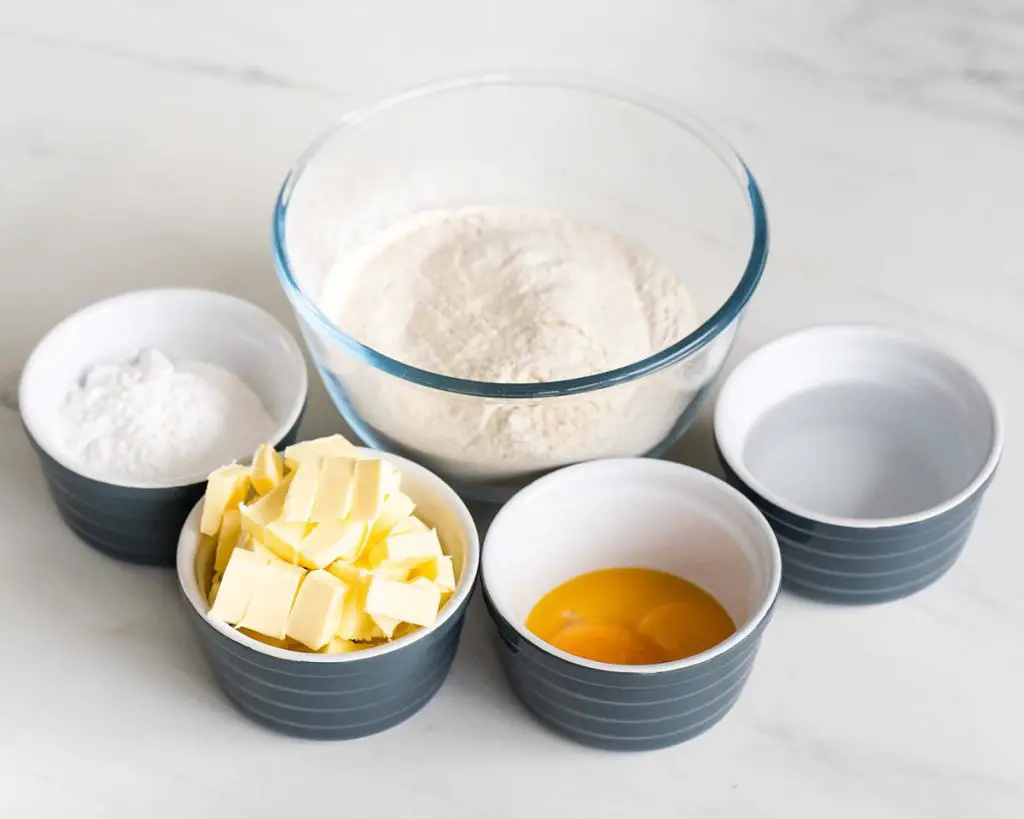
- Flour: I use plain flour for my pastry for this tart as it I do not want any rise in it.
- Icing/Powdered Sugar: for sweetening your shortcrust pastry.
- Butter: I use unsalted butter here in both the pastry and the curd. Make sure to use cold butter to make your pastry.
- Eggs: yolks in the pastry add richness and flavour. I also use whole eggs (the white and the yolk) in making the lemon curd.
- Ice cold water: make sure to use cold water when making your pastry. You want to keep it as cold as possible throughout the whole making process.
- Lemons: the star of this bake! I love using fresh lemons, but remember to zest them before you juice for a much easier and stress-free bake!
- Granulated sugar: for sweetness in the curd. Feel free to adjust the amount used to suit your tastes too.
What equipment do I need to make lemon curd tartlets?
- Food processor*: a brilliantly quick way to make the pastry, and my preferred way for speed and convenience.
- Digital kitchen scales*: weighing out ingredients when baking rather than measuring by cups is my preference. However, I do provide volume (cup) measurements too if this is your preference when baking.
- Measuring spoons*: for smaller quantities of measurement such as tablespoons (tbsp) or teaspoons (tsp). It is a small baking investment, but worth it for the consistency and accuracy of measuring ingredients out.
- Sieve*: useful to remove lumps from dry ingredients before blending everything together.
- Rolling pin*: for rolling out the pastry. If you do not have a rolling pin, you can get creative! A tall glass or even a wine bottle works well too!
- Pastry cutters*: to cut out the pastry for lining the tin. Use a cutter a couple of sizes bigger than the tin so that the pastry comes up the walls and does not just cover the base. If you do not have pastry cutters, again get creative and use an upturned mug or cup to help!
- Mini tart tin*: to make and bake the shells for the lemon tartlets.
- Mixing bowl*: I prefer using a large bowl to make my curd in, so I have plenty of room to whisk it when cooking.
- Zester*: to get all that beautiful, deliciously flavourful zest off the lemons!
- Lemon squeezer*: makes getting all the juice from the lemons a breeze!
- Small saucepan*: used to boil the water under the mixing bowl when making the lemon curd.
- Whisk*: for whisking the lemon curd as you heat it up over the saucepan of simmering water. I prefer using a whisk as it helps be get my curd beautifully smooth and without lumps.
- Spatula*: to scrape the bowl down and get every last bit of the yummy curd for your lemon tartlets!
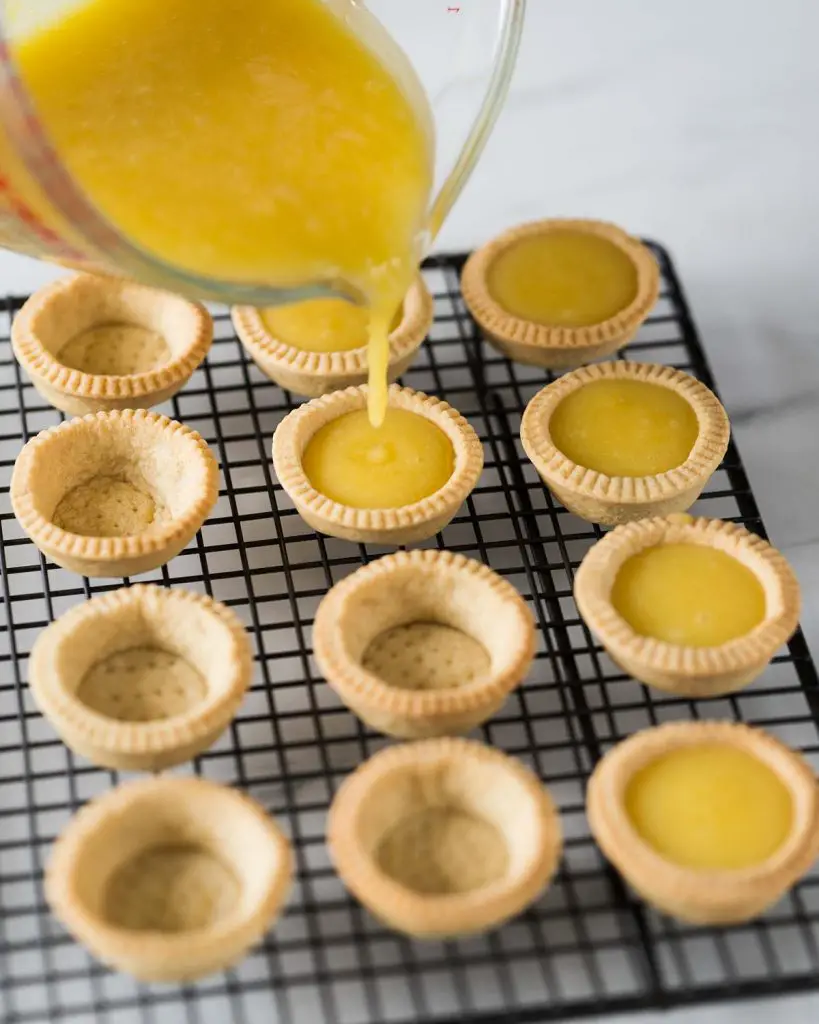
- Jug*: this one is optional, but I find it much easier to pour my curd into the pastry shells from a jug than from my mixing bowl, or even to spoon it out.
How to make lemon curd tarts
There are two parts to making these lemon tarts. The first step is the pastry, which is made and baked before being left to cool a little. Then is the lemon curd, which is filled into each pastry shell whilst still warm and left to set. So simple and so good!
For the pastry
Step 1: First make the pastry. In a food processor or a large mixing bowl, mix together the flour and sugar. Add in the cubes of cold butter and cut or blend in until the mixture resembles fine breadcrumbs. Ensure no large chunks of unblended butter remain or it will speckle the pastry when rolled out. Tip in the egg yolks and blend again until just combined. Add in the ice water a little at a time until the pastry dough comes together in clumps.
Step 2: Tip out the dough onto a clean work surface and gather it together. Squeeze it to bring together, try to avoid kneading and working it too much or the pastry will end up being tough. Divide the pastry dough into two equal parts and flatten into discs. Wrap each disc tightly in cling film and pop in the fridge to chill for at least 30 minutes. At this point, you can freeze the dough for another day, if desired.
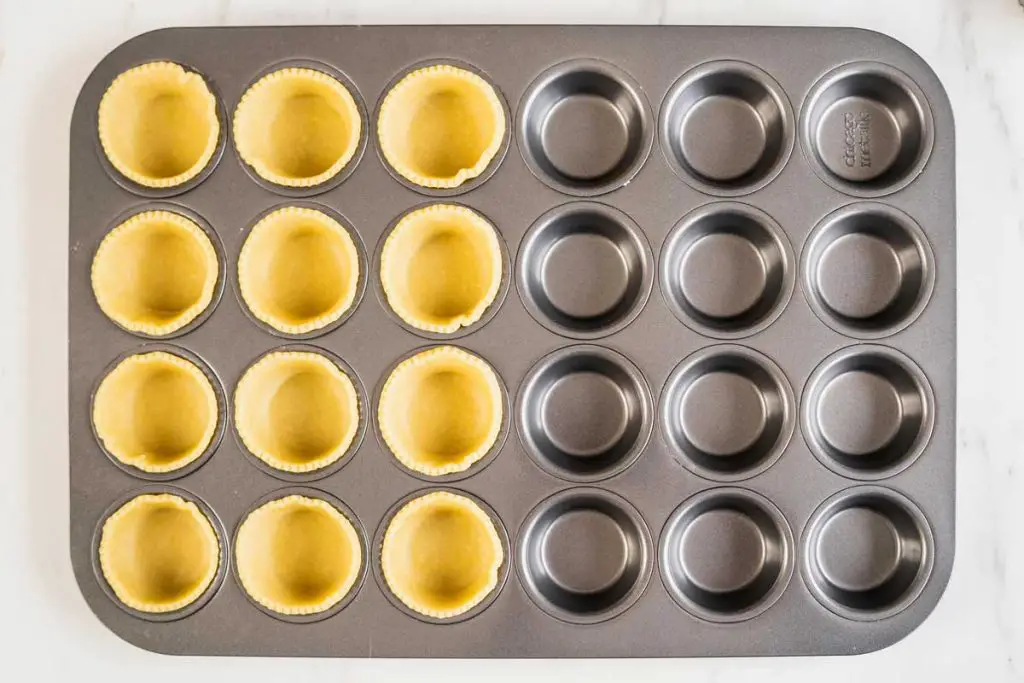
Step 3: Once the dough has chilled, it is time to get making the pastry shells! First, preheat your oven to 160C/320F whilst preparing the tarts for baking. Dust a work surface with a little flour and roll out one of the pastry discs until about 3mm thick. Stamp out rounds of dough a couple of sizes larger than the mini tart tin and ease them in. I use the end of my rolling pin to help push them in evenly, but fingers work well too. Once the tray has been filled, prick the bottom of each pastry shell a few times with a fork (this stops the bases puffing up and rising a lot when baking). Pop the tray into the freezer to chill and firm up for 15 minutes.
Step 4: When the pastry has chilled, bake them uncovered in the hot oven for 15 minutes until lightly golden and biscuity. Remove from the oven and leave in the tin to cool a little whilst making the lemon curd filling.
For the lemon curd
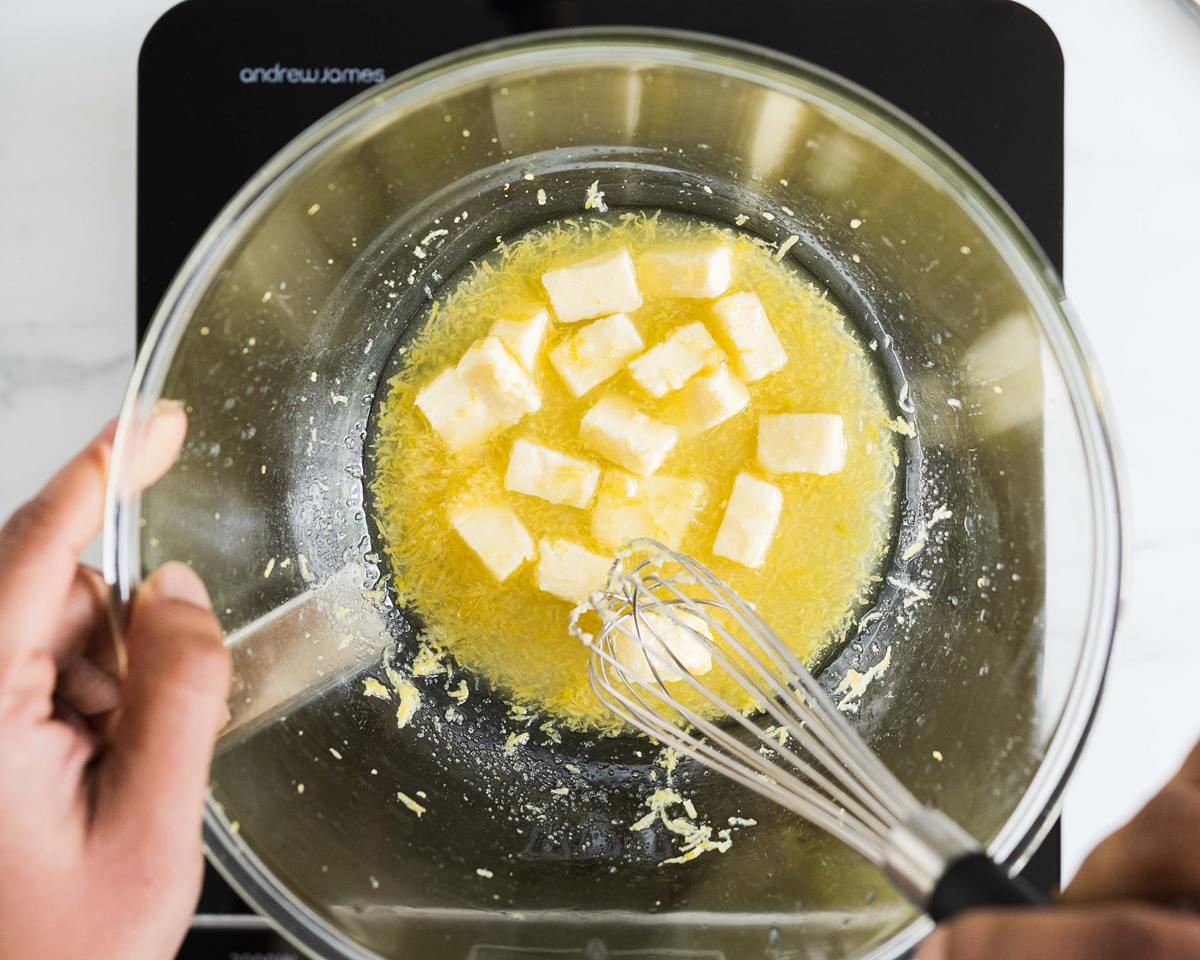
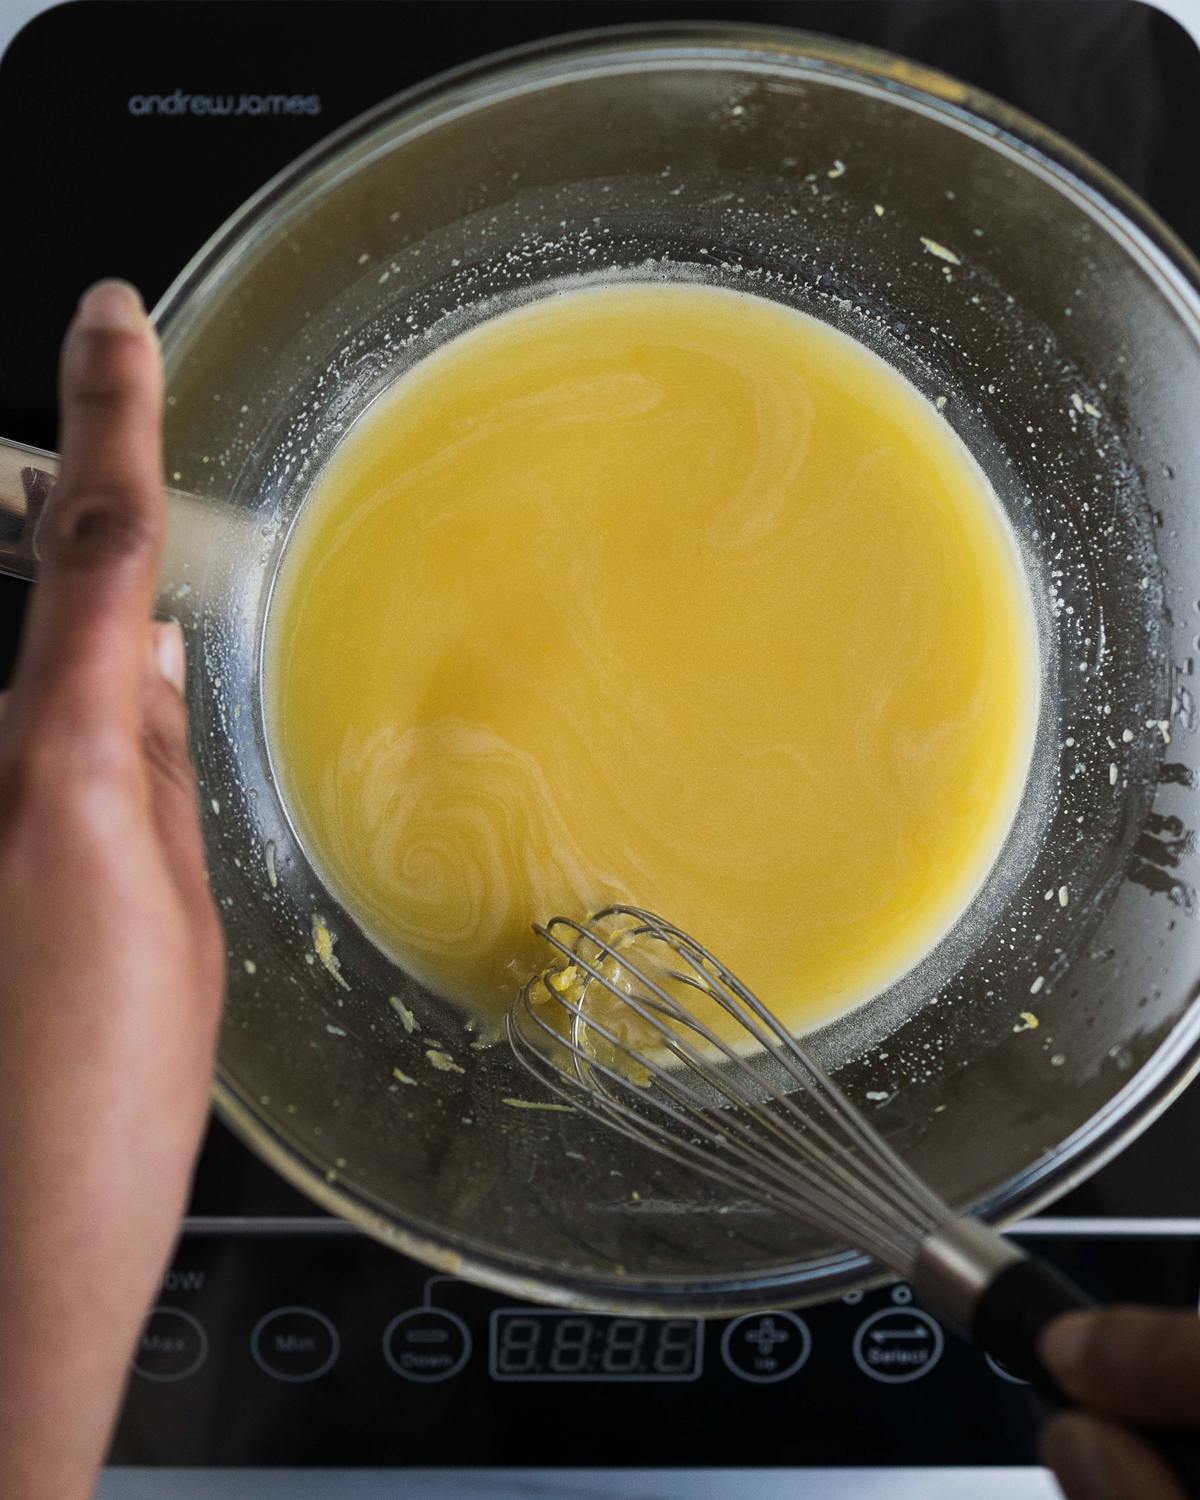
Step 1: Bring a small saucepan with about an inch of water in the bottom to boil, then lower to a simmer. Zest and juice the lemons into a large mixing bowl, then add in the sugar and butter too. Place the bowl over the saucepan, making sure the water does not touch the bottom of the bowl. Heat the lemon mixture, whisking, until the butter has melted and the sugar has fully dissolved. Remove from the heat and cool for five minutes.
Step 2: In a small separate bowl, beat the eggs together. Add the eggs to the mixing bowl with the lemon mixture and whisk together (make sure the lemon mixture is cool enough to not cook the eggs at this point!).
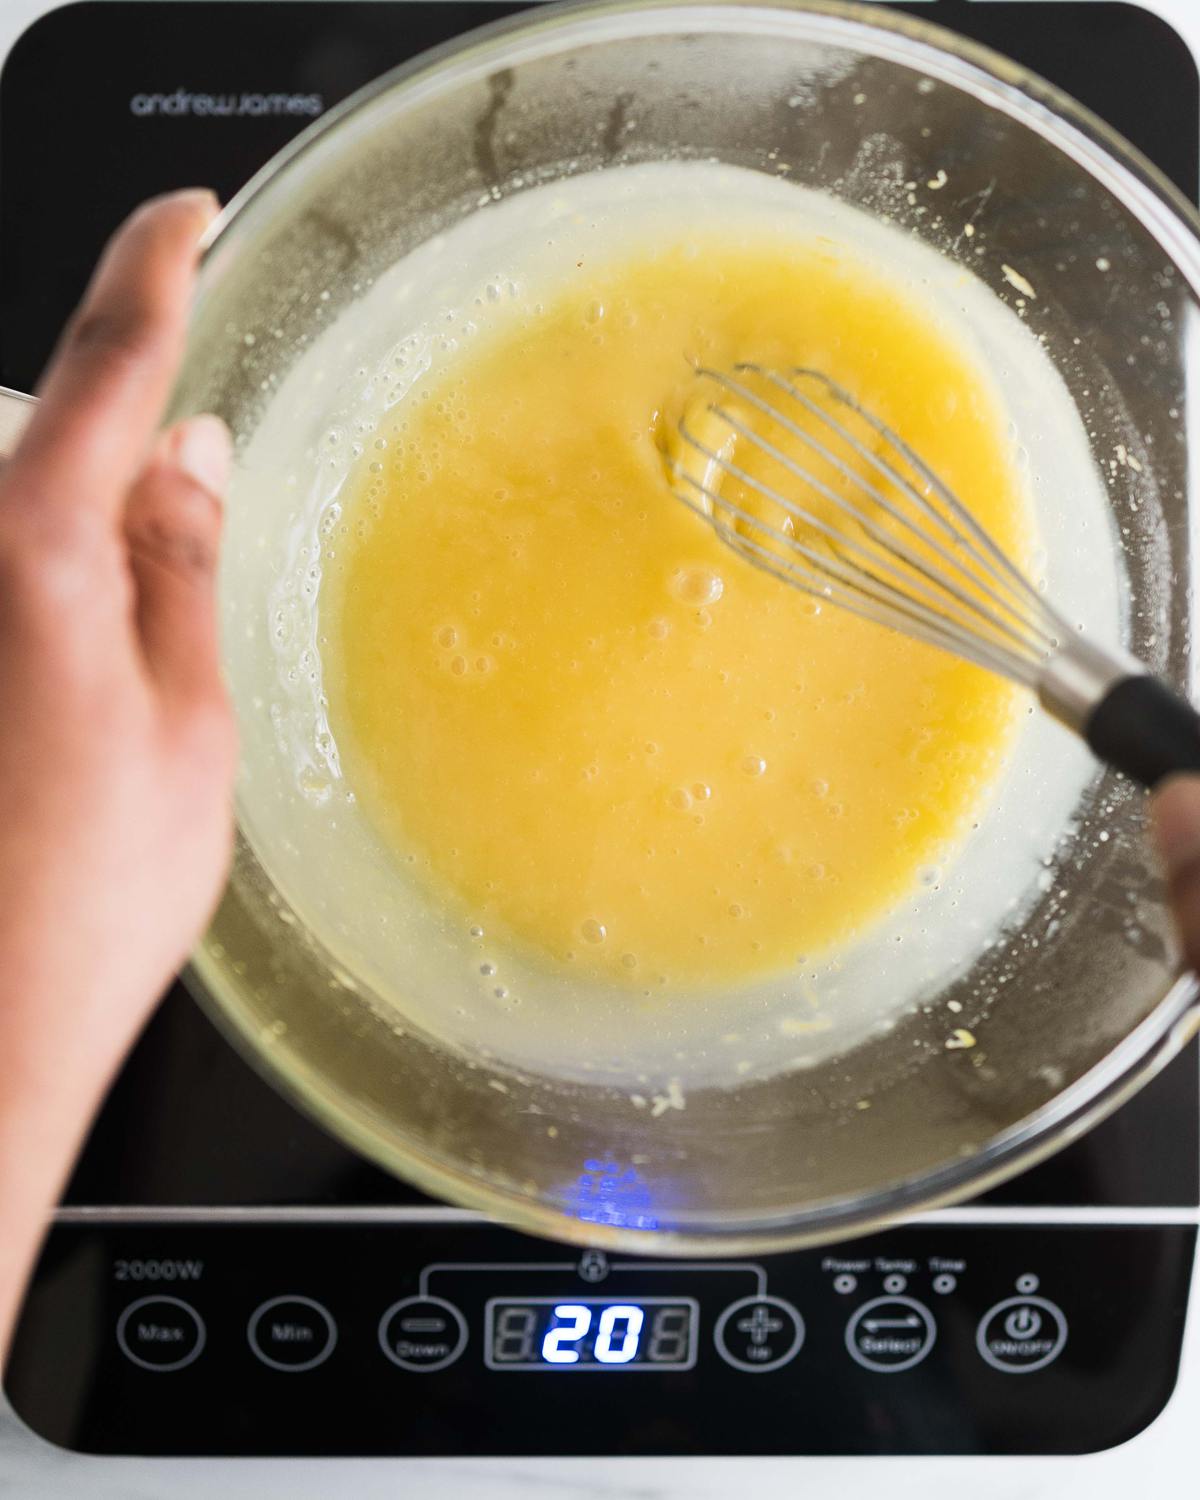
Step 3: Return the mixing bowl on top of the small saucepan, making the bain marie. Keep the heat low, and whisk the lemon mixture constantly using a whisk. The mixture will be runny at first, then will have a few white foamy streaks through it as it is whisked. Eventually the white streaks will disappear and the curd will thicken. This whole process, once returned to the heat, takes me about 10 minutes. I prefer heating my curd enough to a heavy cream consistency, so that it pours easily for the next step. This also results in a much softer set lemon curd in your tartlets.
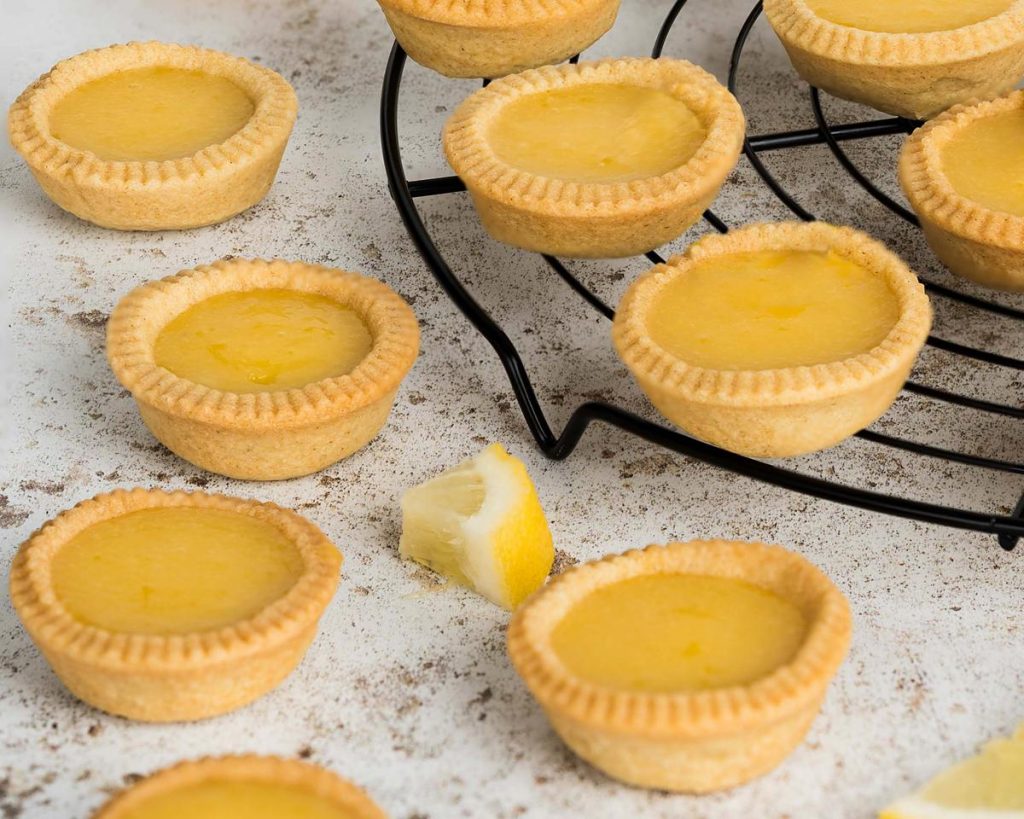
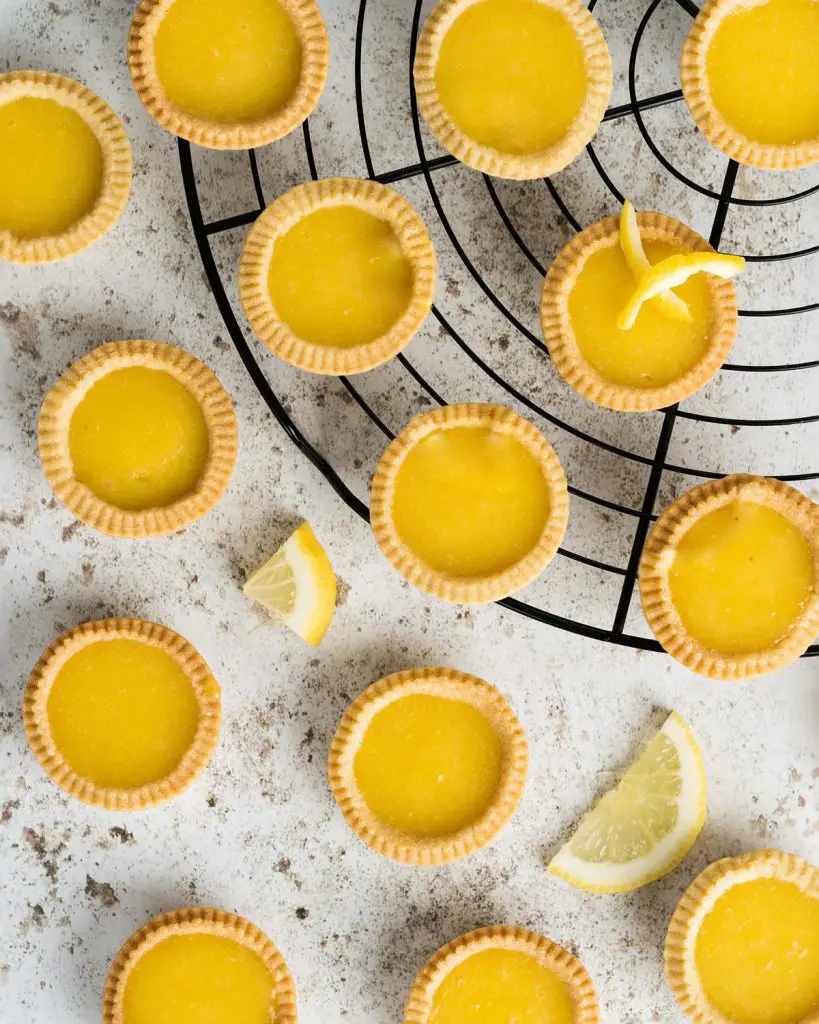
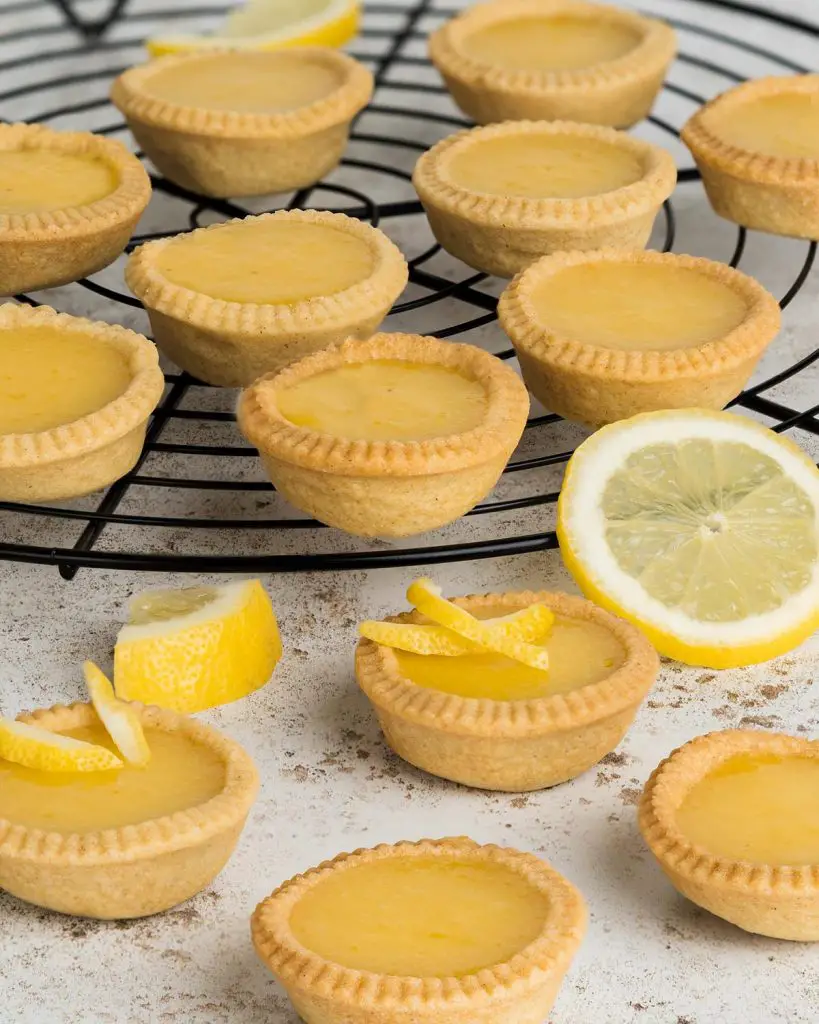
Step 4: Transfer the lemon curd into a jug and pour even amounts into the pastry shells still in the baking tin. Leave to set completely before removing from the tin. These lemon tarts are delicious at room temperature or chilled. Enjoy!
Can I use ready made pastry?
You can definitely use shop bought pastry shells. I would however recommend making your own pastry as you will get a much lovelier, buttery pastry and a better flavour for the whole bake.
Can I use shop bought lemon curd?
Absolutely, you can use shop bought lemon curd to make these lemon curd tartlets. I prefer making my own as I find the lemon curd can be adapted to my liking for lemony zing and sweetness.
Can these mini lemon tarts be made in advance?
Yes, of course. The pastry shells will keep well in an airtight container for 2 days at room temperature, and the curd must be stored in the fridge once cooled. When assembling the lemon tartlets, gently reheat the lemon curd to make it easier to fill the shells.
These easy lemon tarts with lemon curd are best assembled a few hours before they are served, so the curd has chance to set. They are delicious both at room temperature or chilled from the fridge.
How to store lemon curd tarts
Once they have been assembled, the mini lemon tarts should be stored in an airtight container in the fridge, and consumed within 2 days. If left longer than this, the pastry is likely to become soft and slightly soggy.
Can lemon curd tarts be frozen?
Lemon curd tarts cannot be frozen once fully assembled. Lemon curd will not freeze well, but the pastry will freeze beautifully.
How to freeze lemon curd tarts
These lemon tartlets cannot be frozen once put together. You can freeze the pastry either before or after baking. If freezing before, freeze at the stage of the first chill once tightly wrapped in cling film. Once baked, ensure the shells are completely cool, then freeze stored in an airtight container. Defrost on a cooling rack at room temperature for a couple of hours before using.
Can I make these mini lemon tarts gluten and dairy free?
You can substitute the flour in the pastry for a gluten free flour blend if you wish. Butter can be easily substituted for a dairy free block butter alternative too, both in the pastry and the curd.
Additional top tips for making this lemon tart recipe
- Make sure the tools and ingredients are prepared before you start mixing. This is important when making the pastry, as you ideally want to keep it as cold as possible.
- Take time to read through the recipe so you are familiar with each step of the process. Do not skip details and instructions given as it could affect the results, especially with the pastry.
- Make sure you use cold butter and ice water when making pastry. Remember it is important to keep the pastry as cold as possible throughout the process of bringing it together.
- Keeping your pastry as cold as possible helps stop it from misshaping and contracting when baking. Hence popping it in the freezer for a second chill before baking is really important.
- Remember to keep whisking the lemon curd when cooking it, as it will start to solidify at the bottom of the bowl before the top. If left, you may end up with lemony scrambled eggs at the bottom of the mixing bowl!
- I like to make my lemon curd a little less thick for these lemon tartlets as I find it continues to thicken slightly once poured into the shells. If you prefer the filling to be more like a firm custard, please do cook your homemade lemon curd a minute or two longer to thicken it up.
Troubleshooting
If you have any other questions about this recipe, please leave me a comment below, I would love to help. And if you do make this recipe for lemon tarts with homemade lemon curd, please do consider leaving a rating and review below. I would really appreciate your feedback to grow my website and it really helps others looking for a similar recipe too. Additionally, you could also post a picture on Instagram and tag me when you share it with the world. You already know I would love to see!
More recipes from my blog for you to enjoy
Do check out these other yummy recipes on my blog too:
Vegan lemon drizzle loaf cake: This cake is totally and utterly delightful! It is all the things you want in a good lemon cake: light, fluffy and packed with plenty of lemon flavour. Plus it is totally vegan. Heavenly!
Lemon blueberry donuts: These baked lemon blueberry donuts are absolutely delicious! A soft fluffy lemon donut with beautiful pops of blueberry topped with a stunning blueberry glaze. These taste every bit as good as they look, a real showstopper!
Lemon cupcakes with lemon curd: Love lemon curd? Then these cupcakes are for you! My deliciously moist lemon cupcakes are filled with a tangy homemade lemon curd and topped with a swirl of sweet lemon buttercream and more lemon curd drizzled on top. Totally scrumptious!
Happy baking, my friends! x
Recommended equipment I used to make this recipe *
| Food processor | Digital kitchen scales |
| Measuring spoons | Sieve |
| Rolling pin | Pastry cutters |
| Mini tart tin | Mixing bowl |
| Zester | Lemon squeezer |
| Small saucepan | Whisk |
| Spatula | Jug |
Lemon Curd Tarts
24
servings30
minutes15
minutes123
kcal1
hour30
minutes2
hours15
minutesButtery pastry filled with smooth and zingy lemon curd. Lemon curd tart heaven!
Keep the screen of your device on
Ingredients
- For the pastry
250 g (1½ cups + 1 tbsp) plain (all purpose) flour
60 g (¼ cup + 3 tbsp) icing (powdered) sugar
125 g (½ cup + 1 tbsp) unsalted butter, cold and cubed
2 large eggs, yolks only
2-4 tbsp ice (ie very very cold!) water
- For the lemon curd
2-3 lemons, zest and juice
50 g (3 tbsp + 2 tsp) unsalted butter
80 g (¼ cup + 2 tbsp) granulated sugar
2 large eggs
Directions
- For the pastry
- First make the pastry. In a food processor or a large mixing bowl, mix together the flour and sugar. Add in the cubes of cold butter and cut or blend in until the mixture resembles fine breadcrumbs. Ensure no large chunks of unblended butter remain or it will speckle the pastry when rolled out. Tip in the egg yolks and blend again until just combined. Add in the ice water a little at a time until the pastry dough comes together in clumps.
- Tip out the dough onto a clean work surface and gather it together. Squeeze it to bring together, try to avoid kneading and working it too much or the pastry will end up being tough. Divide the pastry dough into two equal parts and flatten into discs. Wrap each disc tightly in cling film and pop in the fridge to chill for at least 30 minutes. At this point, you can freeze the dough for another day, if desired.
- Once the dough has chilled, it is time to get making the pastry shells! First, preheat your oven to 160C/320F whilst preparing the tarts for baking. Dust a work surface with a little flour and roll out one of the pastry discs until about 3mm thick. Stamp out rounds of dough a couple of sizes larger than the mini tart tin and ease them in. I use the end of my rolling pin to help push them in evenly, but fingers work well too. Once the tray has been filled, prick the bottom of each pastry shell a few times with a fork (this stops the bases puffing up and rising a lot when baking). Pop the tray into the freezer to chill and firm up for 15 minutes.
- When the pastry has chilled, bake them uncovered in the hot oven for 15 minutes until lightly golden and biscuity. Remove from the oven and leave in the tin to cool a little whilst making the lemon curd filling.
- For the lemon curd
- Bring a small saucepan with about an inch of water in the bottom to boil, then lower to a simmer. Zest and juice the lemons into a large mixing bowl, then add in the sugar and butter too. Place the bowl over the saucepan, making sure the water does not touch the bottom of the bowl. Heat the lemon mixture, whisking, until the butter has melted and the sugar has fully dissolved. Remove from the heat and cool for five minutes.
- In a small separate bowl, beat the eggs together. Add the eggs to the mixing bowl with the lemon mixture and whisk together (make sure the lemon mixture is cool enough to not cook the eggs at this point!).
- Return the mixing bowl on top of the small saucepan, making the bain marie. Keep the heat low, and whisk the lemon mixture constantly using a whisk. The mixture will be runny at first, then will have a few white foamy streaks through it as it is whisked. Eventually the white streaks will disappear and the curd will thicken. This whole process, once returned to the heat, takes me about 10 minutes. I prefer heating my curd enough to a heavy cream consistency, so that it pours easily for the next step. This also results in a much softer set lemon curd in your tartlets.
- Transfer the lemon curd into a jug and pour even amounts into the pastry shells still in the baking tin. Leave to set completely before removing from the tin. These lemon tarts are delicious at room temperature or chilled. Enjoy!