

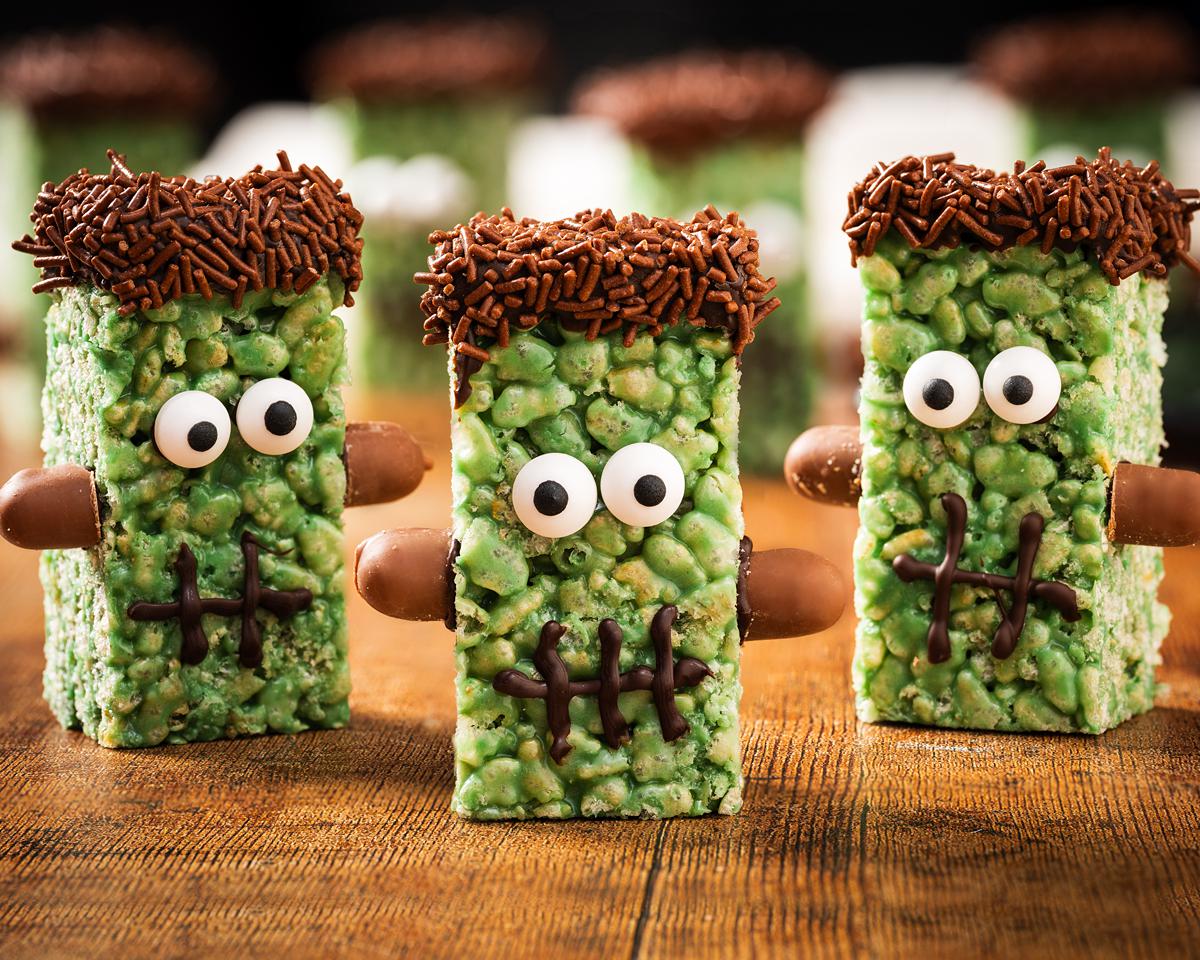
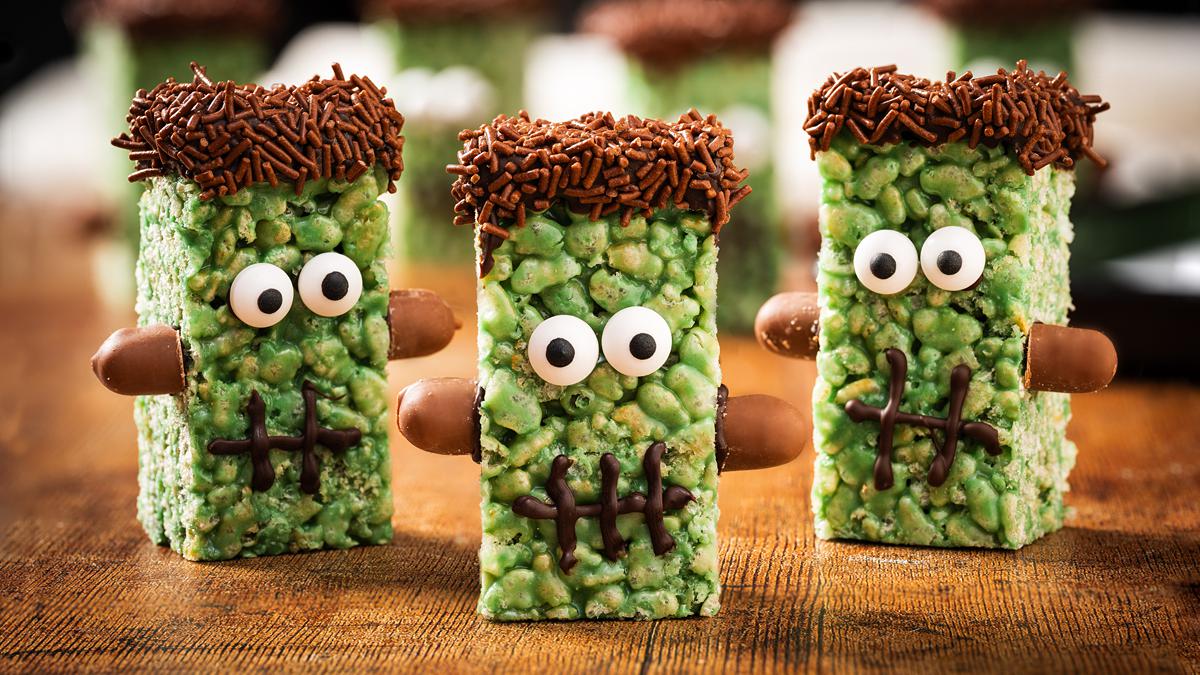
Right friends, it’s time to get spooky! My Frankenstein rice krispie treats are everything you love about the classic rice krispie squares. Simply dress them up with a spooky green colour, adorable candy eyes, irresistible chocolate hair and munchable chocolate bolts. They come together in super quick time, and because there’s no oven needed, they’re a brilliant sweet treat for little hands to get involved with too. So much to love in one simple little Halloween treat!

What are monster rice krispies squares?
Think of your classic rice krispie treats, but with a delicious Halloween makeover! Crunchy sweet and slightly sticky marshmallow covered rice krispies decorated to make them perfectly seasonal. And the best part? They’re so much easier than they look! No baking, no fancy skills and absolutely no special equipment.
Why you’ll love this easy Frankenstein rice krispie treats recipe
- A handful of simple ingredients. Using easy to come by ingredients makes this a no fuss recipe perfect for Halloween!
- No oven needed. Just a pan, a mixing bowl and spoon and a little marshmallow magic make these beauties absolutely irresistible!
- Kid-friendly fun. Get little hands involved in the kitchen, from stirring to pressing and decorating their own monster rice krispies, there are plenty of opportunities for creativity and fun to be had! Besides, who can resist wonky eyes and wild chocolate hair on a delicious edible Frankie?
- Gooey AND crunchy. Bringing all the nostalgic joy of a childhood favourite to your home in these Frankenstein rice krispie treat.
- Great for sharing. One batch yeilds 18 Frankenstein rice krispie treats, making this a perfect sweet treat for parties, school bake sales and Halloween get-togethers.
What ingredients do I need to make rice krispies Frankenstein?
- Butter: I use unsalted butter to make these rice krispie Frankenstein cuties.
- Condensed milk: helps keep the mixture softer, chewier and slightly creamier. A must add in for me when making any rice krispy treats!
- Marshmallows: absolutely essential in making the most irresistible Frankenstein rice krispie treats! It acts as a sweet sticky edible glue to help the cereal perfectly hold into these irresistible bars.
- Food colouring: to achieve that signature green colour of our favourite mash up monster.
- Rice cereal: puffed rice cereal is the traditional choice when making any rice krispy bars. You can use cornflakes too, if you wish, though this will affect the texture and look of the finished dessert.
- Sugar eyes: for adorable almost cartoon-like sweetness to finish up your Frankenstein rice krispie.
- Dark chocolate: melted and used to dunk one end of each bar to create the ‘hair’ for each rice krispie Frankenstein monster.
- Chocolate sprinkles: I like the texture of using sprinkles gives these sweet lil guys, but you can totally omit this ingredient if you wish.
- Chocolate fingers: for the rice krispie treat Frankenstein bolts! Break or cut into smaller nubbins (and enjoy nibbling on the offcuts! Perks of the chef n all!)
What equipment do I need for rice krispie bars?
- Baking tin*: I used an 8” square pan for these Frankenstein rice krispie treats. One with a loose bottom makes it much easier to lift the krispie block out of the tin after it has set.
- Digital kitchen scales*: whilst I provide all my measurements in cups too, I would encourage all bakers to weigh out ingredients when baking. A set of digital kitchen scales is so useful and totally an essential kitchen tool for me.
- Saucepan*: to melt the marshmallow mixture in before combining with the cereal to make this Frankenstein rice krispie treat recipe. Use a saucepan large enough to allow you to mix the cereal in too for less washing up.
- Spatula*: used to mix everything together when melting and combining ingredients, but also to press the final mixture into the tin before leaving to set.
How to make Frankenstein rice krispies
This recipe really couldn’t be easier! Simply melt together the marshmallows, butter and condensed milk, adding green food colour to achieve your desired hue, then mix with the rice cereal before pressing in the tin. Once set, cut and decorate. Hey presto, you’re done!
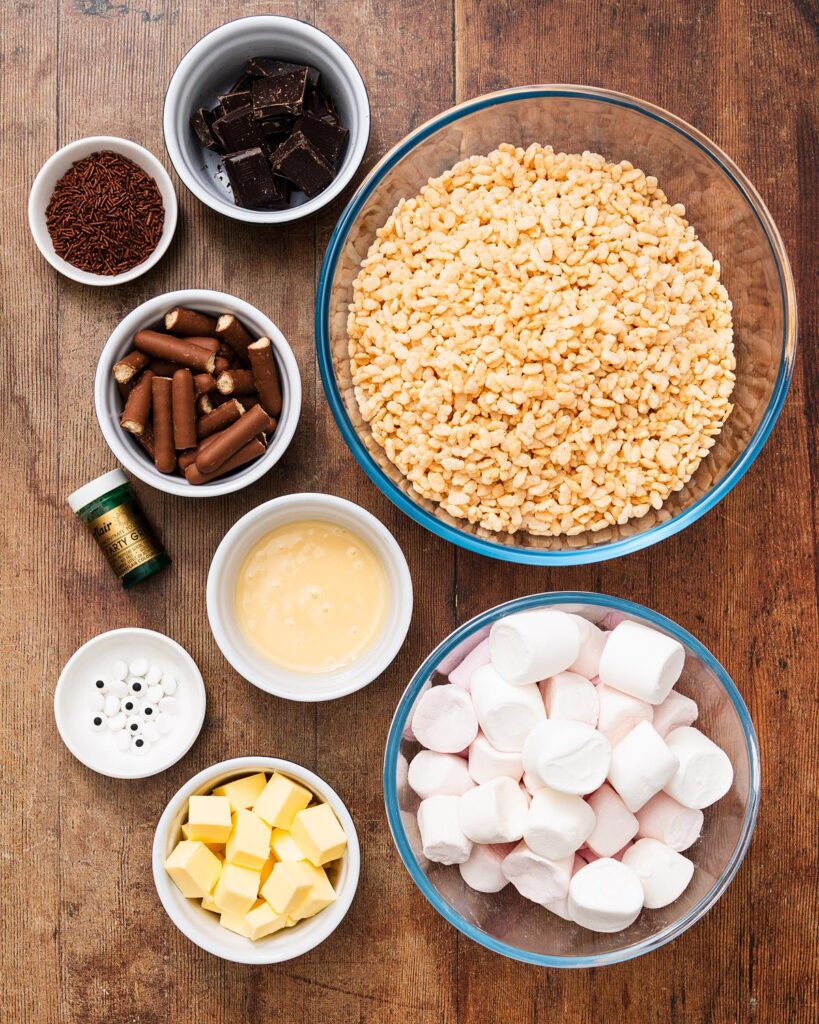
Step 1: Line the baking tin with parchment paper and set aside. In a large mixing bowl, measure out the rice cereal, then set aside.
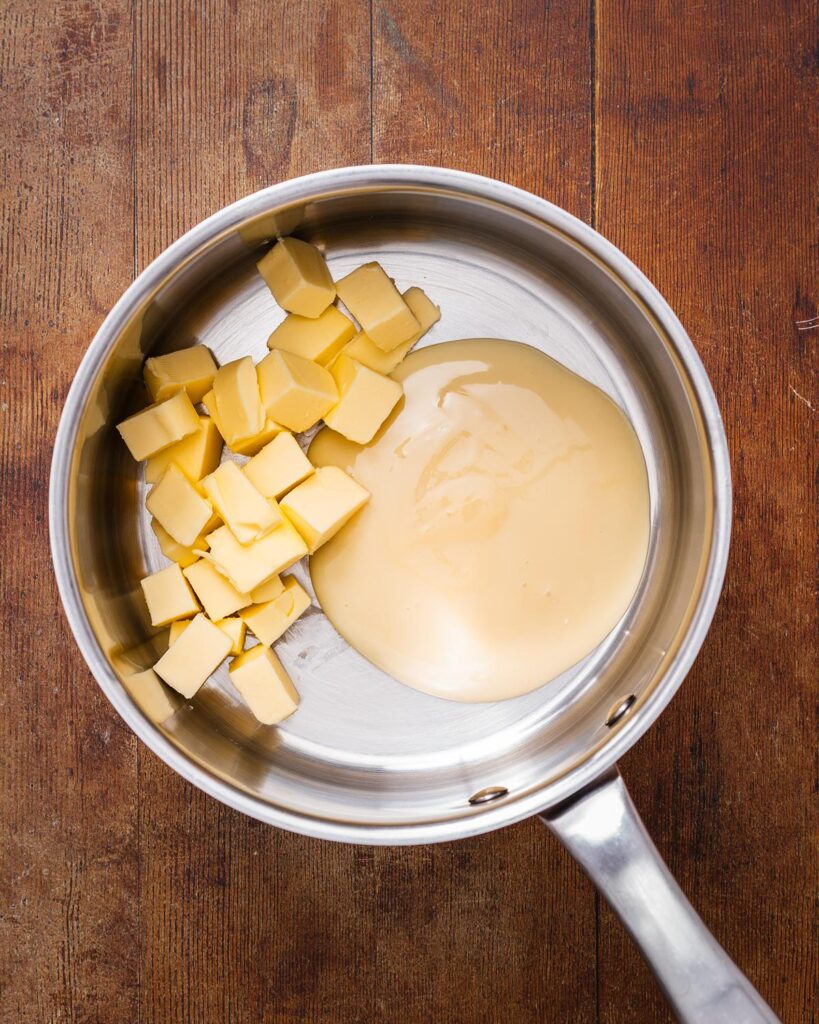
Step 2: In a large saucepan, place the butter and condensed milk, melting gently until smooth and combined. Tip in the marshmallows and continue to cook over a low heat until completely melted. Add in enough food colour to achieve a strong green as the colour will be less intense once combined with the rice cereal.

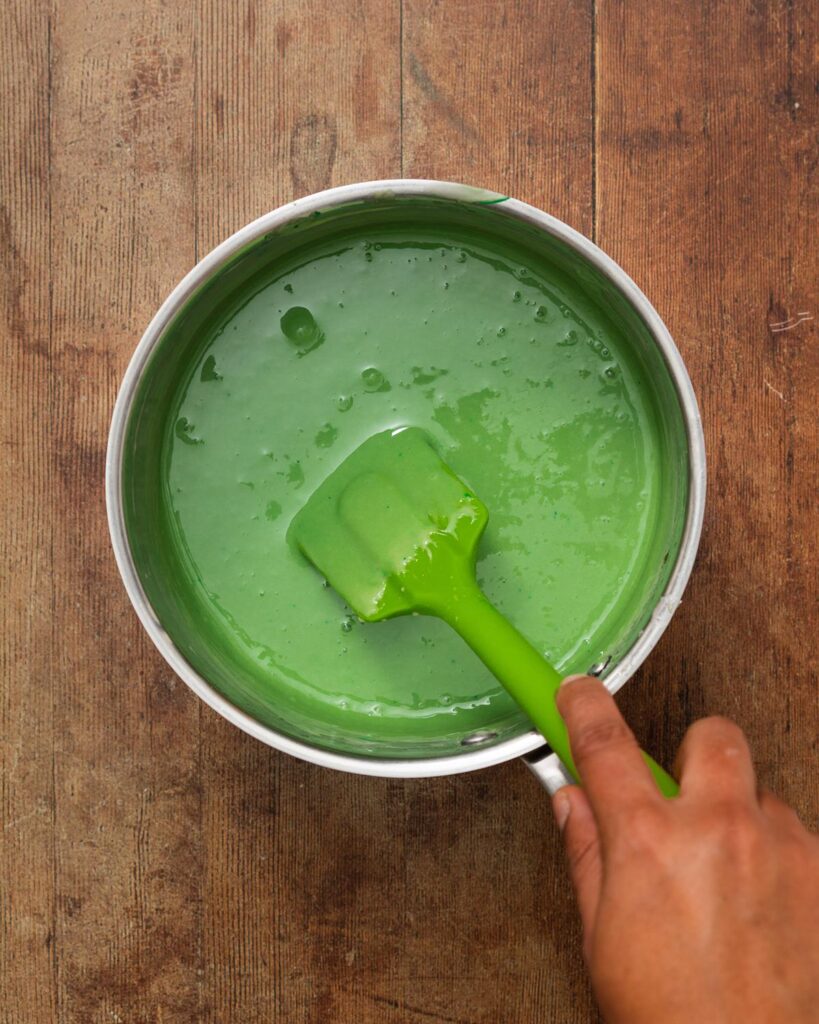
Step 3: Tip the green marshmallow mixture into the bowl with the rice cereal. Working quickly, stir everything together until evenly combined, then tip the mixture into the prepared tin, smoothing into the corners and levelling the top. Leave to cool and set.
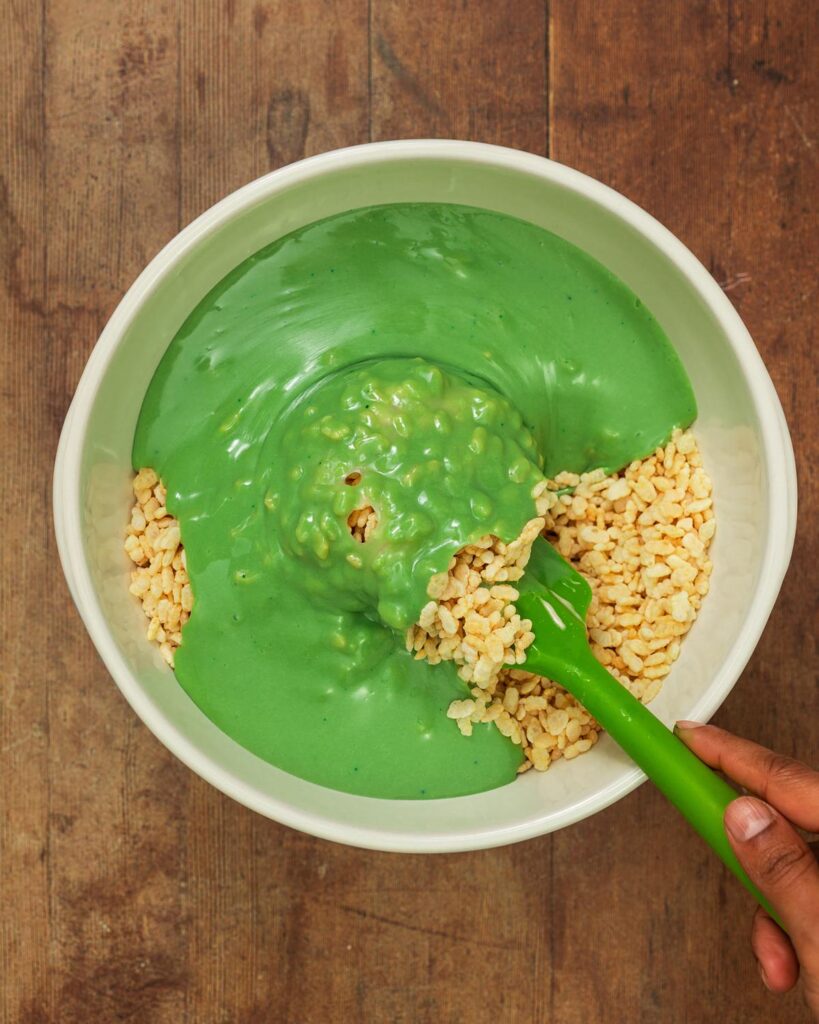

Step 4: Once the rice krispy treats have set, remove from the tin and cut into 18 bars (3 rows of 6 rectangles) or however you wish to cut them.
Step 5: Melt the dark chocolate, then dip the smaller top end of each bar into the melted chocolate. Shake off any excess, then dip the same side into the chocolate sprinkles whilst the chocolate is still melted so the vermicelli sticks to it.
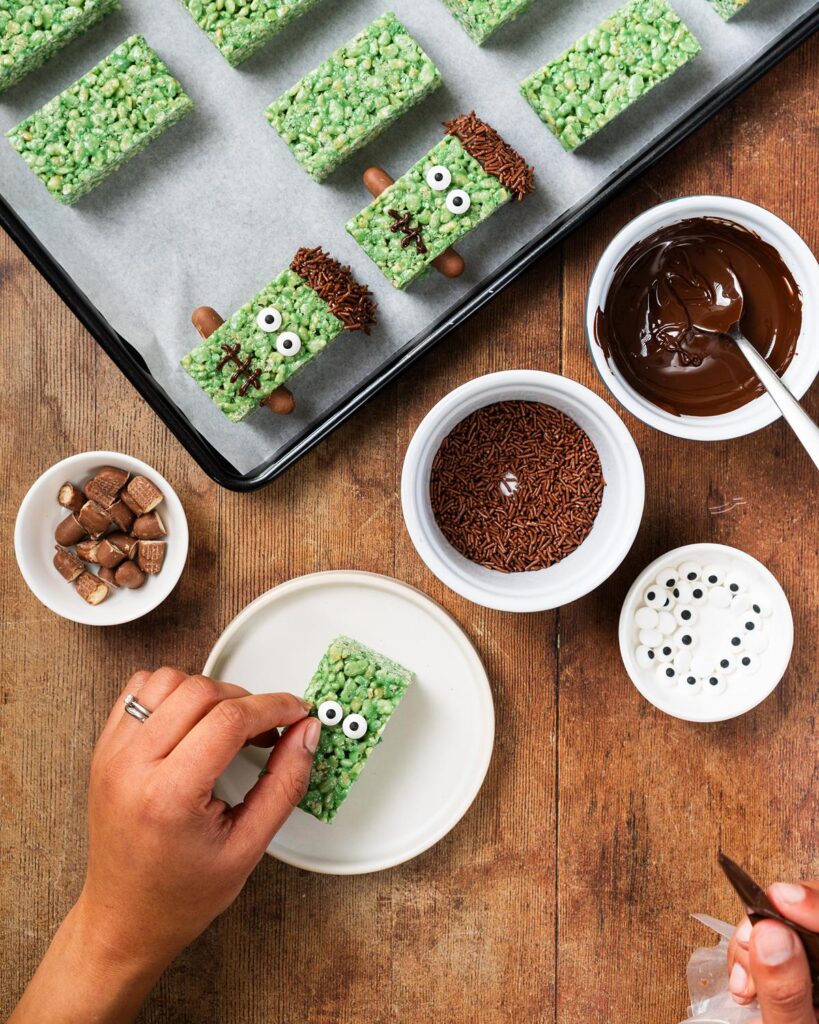


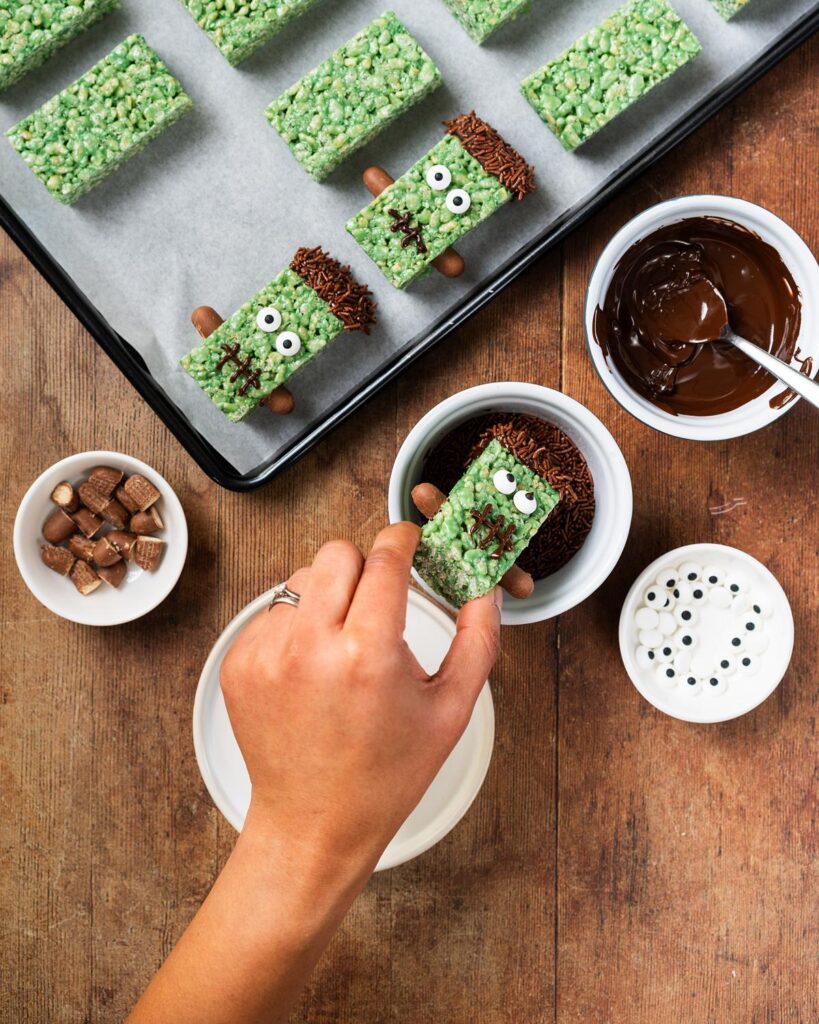
Step 6: Transfer the remaining melted chocolate to a piping bag and snip the end off. Use the melted chocolate to help stick two eyes and two bolts onto each Frankenstein rice krispy treat, then use the remaining chocolate to pipe on a mouth for each Frankie. Leave to set (or pop in the fridge for a few minutes to speed up the setting!) then dig in. Enjoy!

Monster rice krispies squares FAQs
Below are some of the more commonly asked questions about making halloween rice krispie treats. If you have any other questions that are unanswered, please do leave me a comment below and I’ll come back to you as soon as I can!
Can I swap the butter?
You can use margarine or a similar spread, but the taste and texture may change a little. For the best flavour, I would stick with real butter when making these Frankenstein rice krispie bars. And definitely don’t be tempted to cut down the amount used either!
Can I use other cereals to make these treats?
My Frankenstein rice krispie treats recipe uses Kellogg’s Rice Krispies as the base ingredient, however any puffed rice cereal will work just as well. You can even try making it with Corn Flakes, though this will change the texture of the finished bars somewhat.
Why aren’t my rice krispie treats sticking together?
The likelihood is that the marshmallow mixture had cooled down a little too much ahead of mixing with the rice cereal. Always work quickly whilst the marshmallows are still warm and gooey and always ensure you use fresh cereal when making Frankenstein rice krispies. Stale cereal is a sneaky troublemaker!
Why are my rice krispie treats hard?
If your Halloween rice krispie treats are hard, it is likely because the marshmallows were overheated. This causes the mixture, once cooled, to be more brittle, losing the signature stretch of the marshmallows and leading to hard krispie treats.
How long will these Frankenstein rice krispie keep?
Store these Frankenstein rice krispie squares in an airtight container away from direct sunlight. They are best enjoyed for up to a week stored this way.
How do I cut the Halloween bars neatly?
To ensure you can cut these rice krispie Frankenstein treats neatly, make sure to lin the tin with parchment paper (leaving an overhang on the sides) so you can easily lift the set krispie block out. Once set, lift the whole slab out before using a sharp knife for clean cuts.
Can I freeze rice krispie treats?
I wouldn’t recommend freezing these treats. However, they are so simple to make, you can throw them together in no time anytime the craving hits!

Top tips for Halloween rice krispies squares
- Preparation is key! Once the marshmallow mixture is melted, you need to work quickly to combine with the cereal and push the whole mixture into the tin. So before you start melting anything, measure out the rice cereal and line the tin in preparation.
- Use fresh cereal for the ultimate crunch! Stale cereal goes softer, so you won’t get the same texture in the finished Frankenstein rice krispie treat.
- Go low and slow when melting the marshmallows. Overheated marshmallows are the number one cause of hard treats, and we definitely want to keep them chewy and soft!
- Add in more green colour than you think. Once the marshmallow mixture is stirred through the cereal, the colour is diluted, so make the initial mixture a stronger colour to achieve a better finished result.
- Let the treats set fully before cutting into bars. I leave mine for a couple of hours, just to be sure.
- Dip the top edge of each bar into the dark melted chocolate, shake off the excess, then dip immediately into the chocolate vermicelli so the sprinkles stick before the melted chocolate sets.
- Use a little melted chocolate in a piping bag to stick both the eyes and the bolts to the bars. Use the same melted chocolate in piping bag to draw on the mouth of our very own Frankies!
- My advice would be to attach the bolts on as the last step to decorating, as these can be fiddly and easy to knock if there are other bits of decoration to go on.

Share the social love!
Did you make this Frankenstein rice krispie treats recipe? I would love to see it! Tag me on Instagram @movers_bakers or leave a comment and star rating below pretty please! It genuinely makes my day to see your bakes using my recipes! Happy baking friends!
More Halloween recipes from my blog for you to enjoy

Pumpkin spice brigadeiros. Usher in autumn with my pumpkin spice brigadeiros: creamy, spiced truffles. An easy, no-bake dessert perfect for cosy seasonal gatherings.

Halloween Witches’ Cauldron Cookie Cups: My witches’ cauldron cookie cups are chewy chocolate cookies filled with a delicious pistachio cream “potion” and sprinkles. A fun Halloween for everyone!

Halloween decorated pumpkin spice cookies: My Halloween pumpkin spice cookies with a gorgeous cream cheese frosting is exactly what you NEED in your life this spooky season!
Recommended equipment I used *
| Baking tin | Digital kitchen scales |
| Saucepan | Spatula |
Frankenstein Rice Krispie Treats
Ingredients
- 100 g (¼ cup + 3 tbsp) unsalted butter
- 100 g (¼ cup + 1 tbsp) condensed milk
- 275 g (5 cups) marshmallows
- green food colouring
- 200 g (5 cups) rice krispies
- 75 g (½ cup + 1 tbsp) dark chocolate
- chocolate vermicelli
- sugar eyes
- chocolate fingers
Equipment
- 1 8" square baking tin
- 1 Parchment paper
- 1 Digital kitchen scales
- 1 Saucepan
- 1 Spatula
Instructions
- Line the baking tin with parchment paper and set aside. In a large mixing bowl, measure out the rice cereal, then set aside.200 g (5 cups) rice krispies
- In a large saucepan, place the butter and condensed milk, melting gently until smooth and combined. Tip in the marshmallows and continue to cook over a low heat until completely melted. Add in enough food colour to achieve a strong green as the colour will be less intense once combined with the rice cereal.100 g (¼ cup + 3 tbsp) unsalted butter, 100 g (¼ cup + 1 tbsp) condensed milk, 275 g (5 cups) marshmallows, green food colouring
- Tip the green marshmallow mixture into the bowl with the rice cereal. Working quickly, stir everything together until evenly combined, then tip the mixture into the prepared tin, smoothing into the corners and levelling the top. Leave to cool and set.
- Once the rice krispy treats have set, remove from the tin and cut into 18 bars (3 rows of 6 rectangles) or however you wish to cut them.
- Melt the dark chocolate, then dip the smaller top end of each bar into the melted chocolate. Shake off any excess, then dip the same side into the chocolate sprinkles whilst the chocolate is still melted so the vermicelli sticks to it.75 g (½ cup + 1 tbsp) dark chocolate, chocolate vermicelli
- Transfer the remaining melted chocolate to a piping bag and snip the end off. Use the melted chocolate to help stick two eyes and two bolts onto each Frankenstein rice krispy treat, then use the remaining chocolate to pipe on a mouth for each Frankie. Leave to set (or pop in the fridge for a few minutes to speed up the setting!) then dig in. Enjoy!sugar eyes, chocolate fingers
Notes
- Preparation is key! Once the marshmallow mixture is melted, you need to work quickly to combine with the cereal and push the whole mixture into the tin. So before you start melting anything, measure out the rice cereal and line the tin in preparation.
- Use fresh cereal for the ultimate crunch! Stale cereal goes softer, so you won’t get the same texture in the finished Frankenstein rice krispie treat.
- Go low and slow when melting the marshmallows. Overheated marshmallows are the number one cause of hard treats, and we definitely want to keep them chewy and soft!
- Add in more green colour than you think. Once the marshmallow mixture is stirred through the cereal, the colour is diluted, so make the initial mixture a stronger colour to achieve a better finished result.
- Let the treats set fully before cutting into bars. I leave mine for a couple of hours, just to be sure.
- Dip the top edge of each bar into the dark melted chocolate, shake off the excess, then dip immediately into the chocolate vermicelli so the sprinkles stick before the melted chocolate sets.
- Use a little melted chocolate in a piping bag to stick both the eyes and the bolts to the bars. Use the same melted chocolate in piping bag to draw on the mouth of our very own Frankies!
- My advice would be to attach the bolts on as the last step to decorating, as these can be fiddly and easy to knock if there are other bits of decoration to go on.