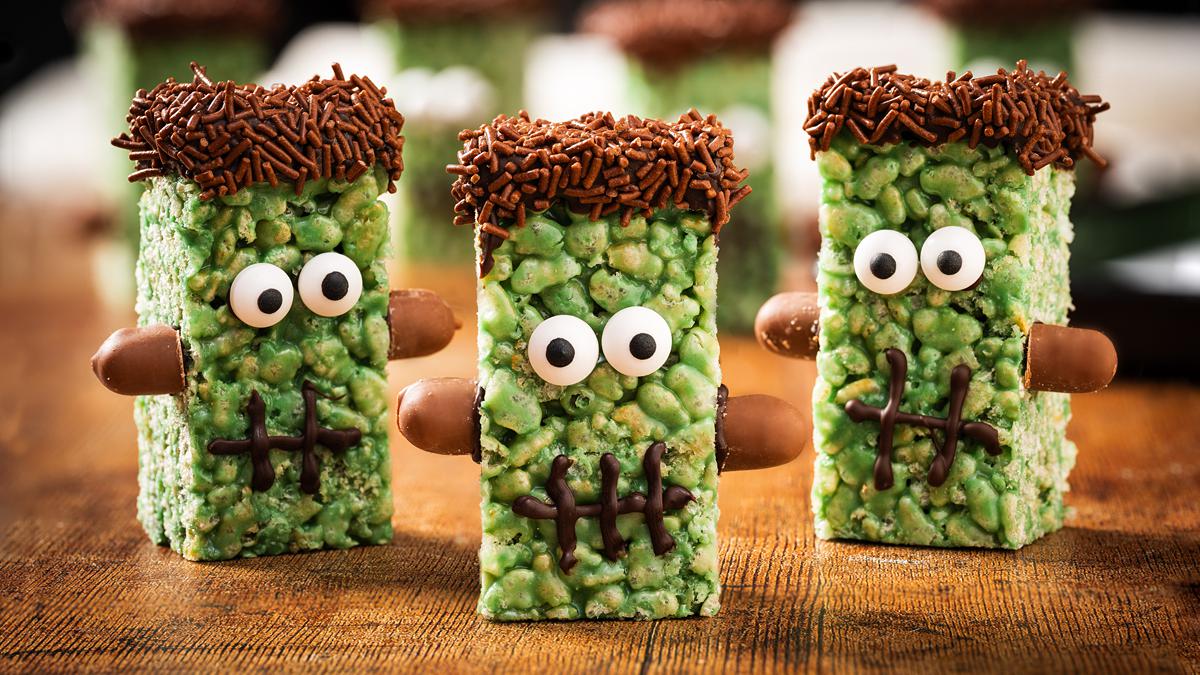
Frankenstein Rice Krispie Treats
My no-bake Frankenstein rice krispie treats are perfect for some Halloween fun with the kids! Spooky, cute and super easy, these are sure to be a hit with everyone!
Equipment
- 1 8" square baking tin
- 1 Parchment paper
- 1 Digital kitchen scales
- 1 Saucepan
- 1 Spatula
Ingredients
- 100 g (¼ cup + 3 tbsp) unsalted butter
- 100 g (¼ cup + 1 tbsp) condensed milk
- 275 g (5 cups) marshmallows
- green food colouring
- 200 g (5 cups) rice krispies
- 75 g (½ cup + 1 tbsp) dark chocolate
- chocolate vermicelli
- sugar eyes
- chocolate fingers
Instructions
- Line the baking tin with parchment paper and set aside. In a large mixing bowl, measure out the rice cereal, then set aside.200 g (5 cups) rice krispies
- In a large saucepan, place the butter and condensed milk, melting gently until smooth and combined. Tip in the marshmallows and continue to cook over a low heat until completely melted. Add in enough food colour to achieve a strong green as the colour will be less intense once combined with the rice cereal.100 g (¼ cup + 3 tbsp) unsalted butter, 100 g (¼ cup + 1 tbsp) condensed milk, 275 g (5 cups) marshmallows, green food colouring
- Tip the green marshmallow mixture into the bowl with the rice cereal. Working quickly, stir everything together until evenly combined, then tip the mixture into the prepared tin, smoothing into the corners and levelling the top. Leave to cool and set.
- Once the rice krispy treats have set, remove from the tin and cut into 18 bars (3 rows of 6 rectangles) or however you wish to cut them.
- Melt the dark chocolate, then dip the smaller top end of each bar into the melted chocolate. Shake off any excess, then dip the same side into the chocolate sprinkles whilst the chocolate is still melted so the vermicelli sticks to it.75 g (½ cup + 1 tbsp) dark chocolate, chocolate vermicelli
- Transfer the remaining melted chocolate to a piping bag and snip the end off. Use the melted chocolate to help stick two eyes and two bolts onto each Frankenstein rice krispy treat, then use the remaining chocolate to pipe on a mouth for each Frankie. Leave to set (or pop in the fridge for a few minutes to speed up the setting!) then dig in. Enjoy!sugar eyes, chocolate fingers
Notes
- Preparation is key! Once the marshmallow mixture is melted, you need to work quickly to combine with the cereal and push the whole mixture into the tin. So before you start melting anything, measure out the rice cereal and line the tin in preparation.
- Use fresh cereal for the ultimate crunch! Stale cereal goes softer, so you won't get the same texture in the finished Frankenstein rice krispie treat.
- Go low and slow when melting the marshmallows. Overheated marshmallows are the number one cause of hard treats, and we definitely want to keep them chewy and soft!
- Add in more green colour than you think. Once the marshmallow mixture is stirred through the cereal, the colour is diluted, so make the initial mixture a stronger colour to achieve a better finished result.
- Let the treats set fully before cutting into bars. I leave mine for a couple of hours, just to be sure.
- Dip the top edge of each bar into the dark melted chocolate, shake off the excess, then dip immediately into the chocolate vermicelli so the sprinkles stick before the melted chocolate sets.
- Use a little melted chocolate in a piping bag to stick both the eyes and the bolts to the bars. Use the same melted chocolate in piping bag to draw on the mouth of our very own Frankies!
- My advice would be to attach the bolts on as the last step to decorating, as these can be fiddly and easy to knock if there are other bits of decoration to go on.