

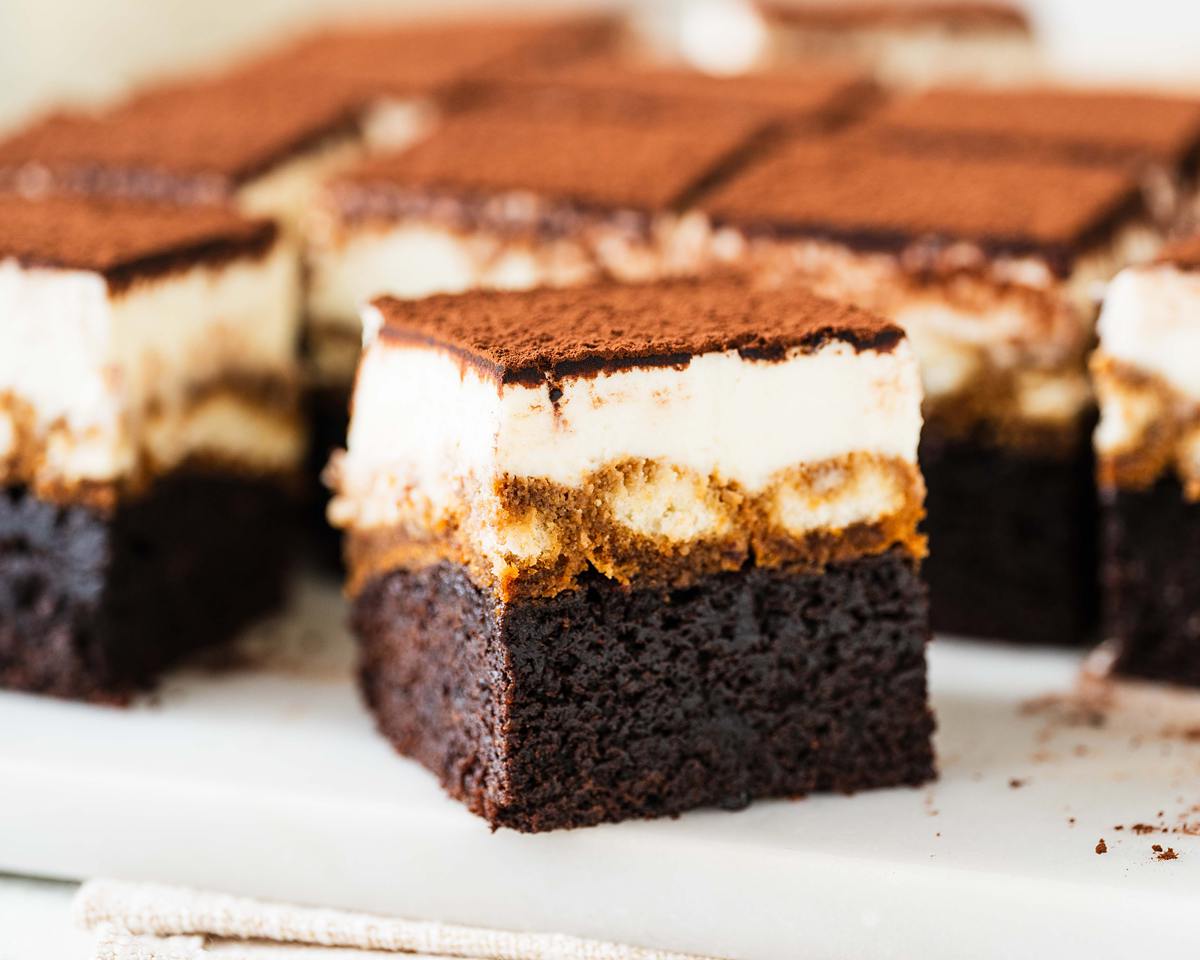
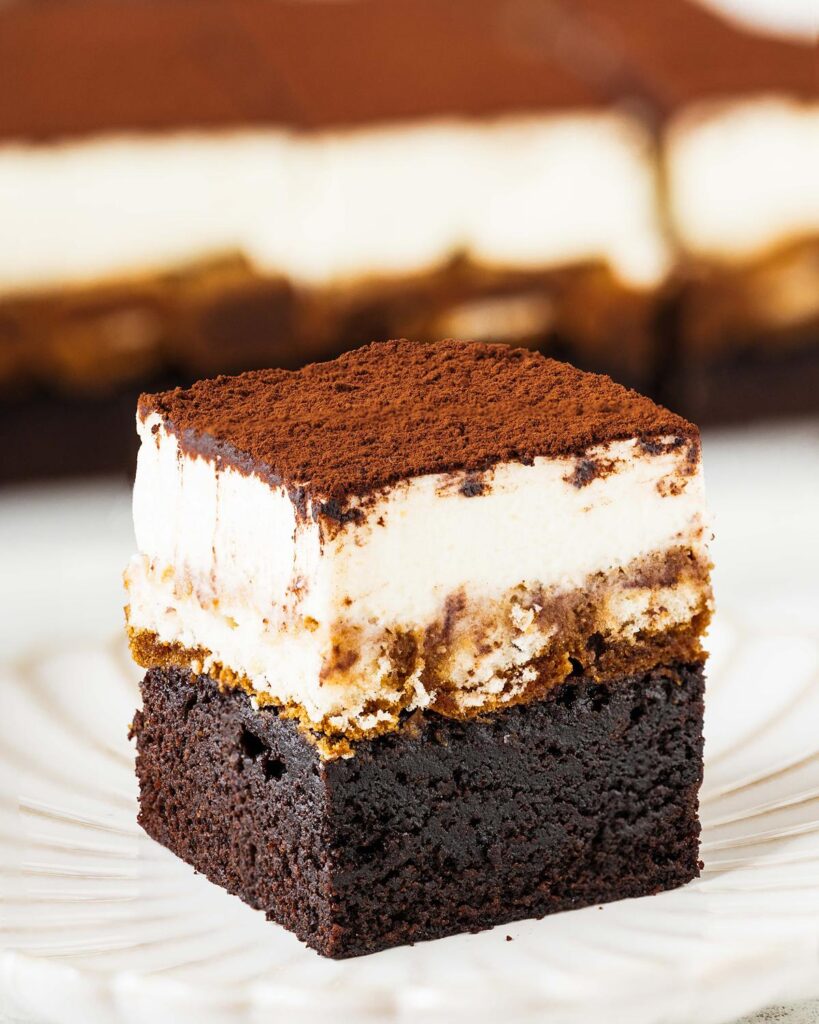
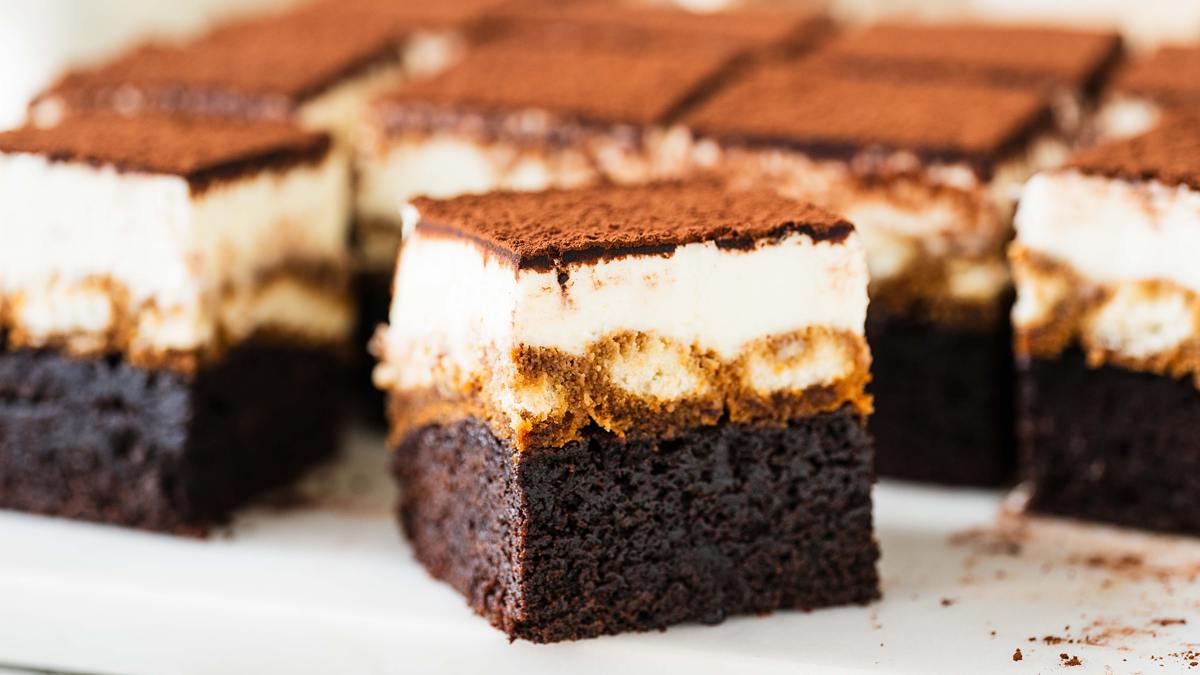
My tiramisu brownies are for when you can’t decide between a rich, fudgy brownie or a classic tiramisu! These brownies bring together the best of both worlds: deep chocolatey brownie infused with espresso, topped with coffee soaked sponge fingers and a silky mascarpone cream. Finish with a generous dusting of cocoa powder for the ultimate decadent dessert mash-up!

A delicious twist on two classic desserts
If you know me, you’ll know I am obsessed with all things chocolate, in particular brownies. However, you will also know tiramisu is my true kryptonite, my weakness. Naturally, given the choice, I will always struggle to choose between the two desserts.
Then one day, a friend and I were out for dinner, and we ordered a brownie and tiramisu between us to share. Putting them together was just the magic of that meal for us both, so naturally I just had to recreate this incredible dessert mashup myself at home! And so my tiramisu brownies recipe came into being!
Why you’ll love these tiramisu brownies
- Two desserts in one. Fudgy chocolate brownies meets coffee infused sponge fingers and creamy mascarpone. A truly magical combination of flavours and textures!
- Perfect balance of flavours. Coffee and chocolate always go well together, but they are dark and deep. The creamy mascarpone cuts through these intense flavours, resulting in a wonderfully rich and decadent creation.
- A crowd pleasing dessert. Loved by children and adults alike, this dessert is enjoyable as a weekend treat, but also impressive enough for dinner parties and entertaining.
- Make ahead for convenience. Since the mascarpone topping needs to be chilled after assembling, this dessert is brilliant to be made ahead of serving. In fact, I would highly recommend making it the day before and chilling for it to be served at its best.

Components of the tiramisu brownies
- Unsalted butter: I like to use unsalted butter so I can control how much salt is in the bake.
- Cocoa: essential in the fudgy brownie for all that beautiful chocolatey loveliness! Also used to sprinkle over the top of the finished dessert.
- Espresso powder: I added this to the brownies too for extra coffee flavour, but you could only use it for dunking the sponge fingers in. Espresso powder gives a much stronger coffee flavour, perfect to cut through the chocolate brownies and mascarpone cream.
- Vanilla: for delicious flavour in these simply delicious beauties.
- Caster sugar: for sweetness in the brownie part of these delicious chocolate brownies.
- Eggs: helps with the structure and texture of the bake.
- Flour: I use plain/all purpose flour to make these fudgy brownies from scratch. There is no raising agent used in making this bake.
- Salt: enhances the flavours every time. You will not taste it, I promise!
- Coffee liqueur: an optional add in, for a subtly boozy flavour in the dessert. I love this addition, but no need to use it if you’d prefer to leave out.
- Sponge fingers: also known as ‘lady fingers’, these soak up the coffee syrup to make the middle layer of the brownies tiramisu.
- Double (heavy) cream: whipped up and folded with the other ingredients, this gives structure and stability to the mascarpone topping of these tiramisu brownies.
- Mascarpone cheese: this unique soft cheese is a key ingredient in tiramisu, and gives a wonderful creamy finish to the brownies topping tiramisu.
- Condensed milk: my version of the mascarpone filling is made without eggs, but uses sweetened condensed milk for richness and flavour. Plus it is so easy and fuss free!
Recommended tools to make brownies
- Digital kitchen scales*: I always recommend using digital kitchen scales to weigh ingredients out over using a volume based measuring system, as cups. Weighing out the ingredients is much more accurate than measuring by volume, and will ensure better results in the cookies, so I would definitely take the plunge if you have not already.
- Measuring spoons*: for measuring smaller quantities such as tablespoons (tbsp) and teaspoons (tsp), a set of dedicated measuring spoons is a must! These are far more accurate than everyday eating spoons, and are really easy to get hold of too.
- Baking tin*: you will need an 8”x 8” pan to make this easy brownie tiramisu. One with a loose bottom is my preference, for ease of removal after baking and assembly.
- Mixing bowl*/small mixing bowl* any material of bowl will do for the larger one: plastic, glass, the choice is yours! The smaller bowl is for the chocolate mixture when melting the butter, so I would recommend a microwave safe one here.
- Whisk*: used to mix together the brownie tiramisu.
- Spatula*: to use to mix ingredients together towards the end of the brownie making and to get all that delicious mixture in the pan to bake!
- Handheld electric mixer*: a useful tool to make life easier in the kitchen! You can, of course, whisk up the cream by hand. It will just take a little longer, so be patient if this is your method.
- Sieve*: to sift the cocoa powder over the mascarpone topping as the finishing touch to the irresistible brownies with mascarpone.
How to make tiramisu brownies
There are three stages of making these delicious tiramisu brownies. First is the brownie layer, then once baked and cooled, the coffee-dipped sponge fingers, and finally the creamy dreamy mascarpone layer topped generously with cocoa powder. Chill to firm up and set before cutting into squares and watch them get devoured!

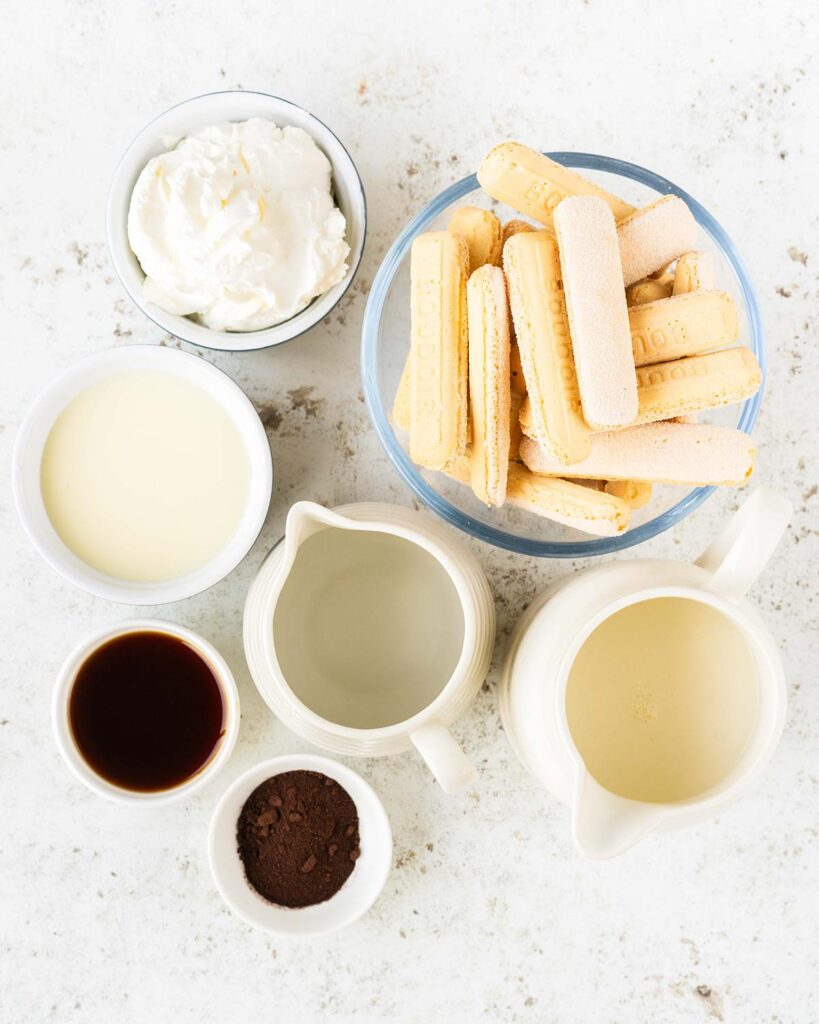
For the chocolate brownie
Step 1: Line an 8”x 8” baking tin with parchment paper and set it aside. Preheat the oven to 180C/350F while you make the brownies
Step 2: Melt the butter in a small bowl. I do this in the microwave in short burst of 10-20 seconds, swirling or stirring in between. Add in the cocoa powder, vanilla and espresso (if using), and whisk together until silky smooth.


Step 3: In a separate larger bowl, whisk together the eggs and sugars until evenly combined. Slowly drizzle in the chocolate mixture, beating as you go so it is all evenly mixed together.
Step 4: Into the same mixing bowl, tip in the flour and salt. Fold this into the chocolatey mixture until everything is completely mixed through.
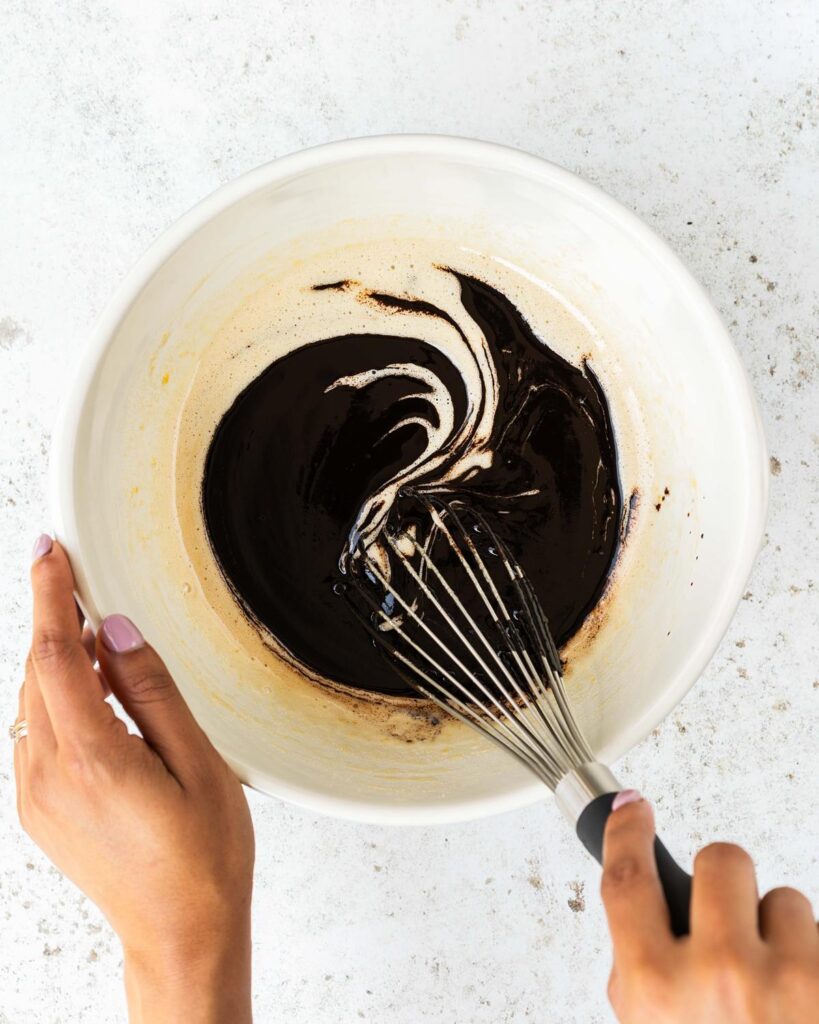

Step 5: Pour the brownie batter into the prepared baking tin and ease it into the corners, levelling the top. Bake in the preheated oven for 22-27 minutes the edges feel firm to touch and the middle has the tiniest wobble. It will take more or less time, depending on your oven, but you want them to appear slightly underbaked. For me, my brownies are done around 24 minutes. Leave to cool completely in the tin before the next steps.
For the tiramisu topping
Step 1: Make the coffee dip. In a flat bowl, mix together the water, espresso powder and coffee liqueur (if using) until combined.
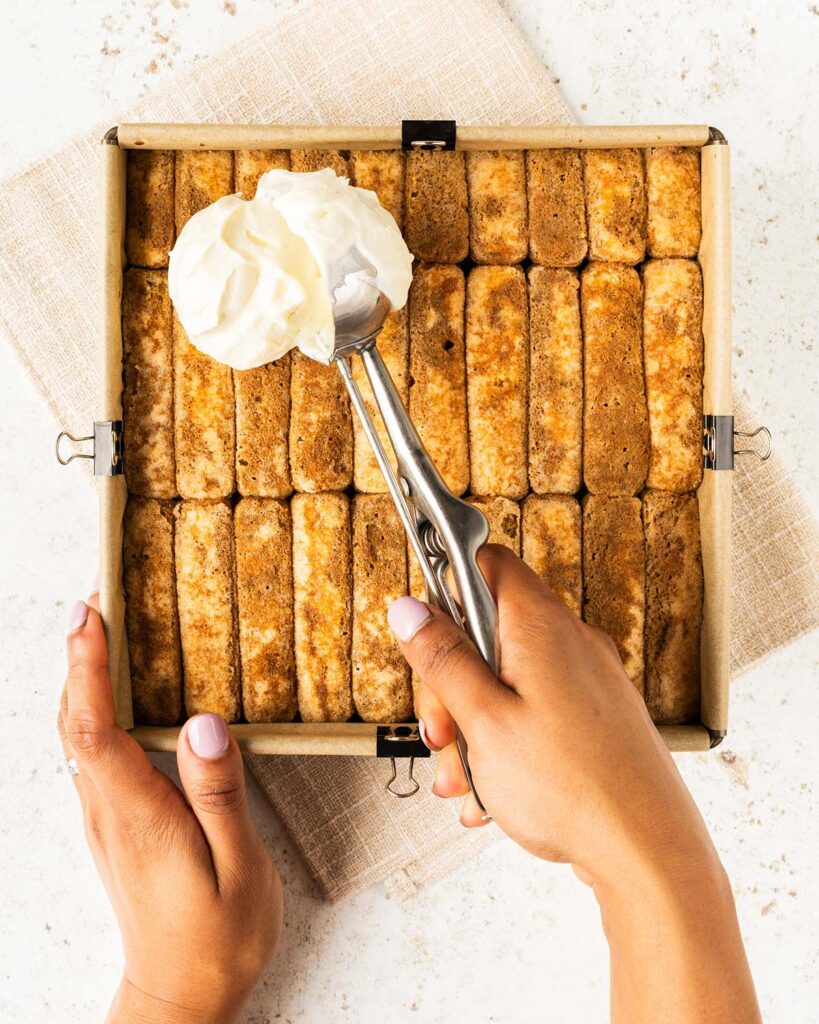
Step 2: Dip one sponge finger at a time in the coffee solution, turning to coat all sides, then place on top of the cool brownie. Arrange the dipped fingers over the top of the brownie in a single layer, making sure they are snugly pressed together. Set aside once done.


Step 3: In a large mixing bowl, whisk the double (heavy) cream until it just reaches stiff peaks. Set aside.
Step 4: Using a separate bowl, tip in the mascarpone and smoosh it to soften and loosen. Add in the condensed milk, then mix the two ingredients together until smooth and combined.
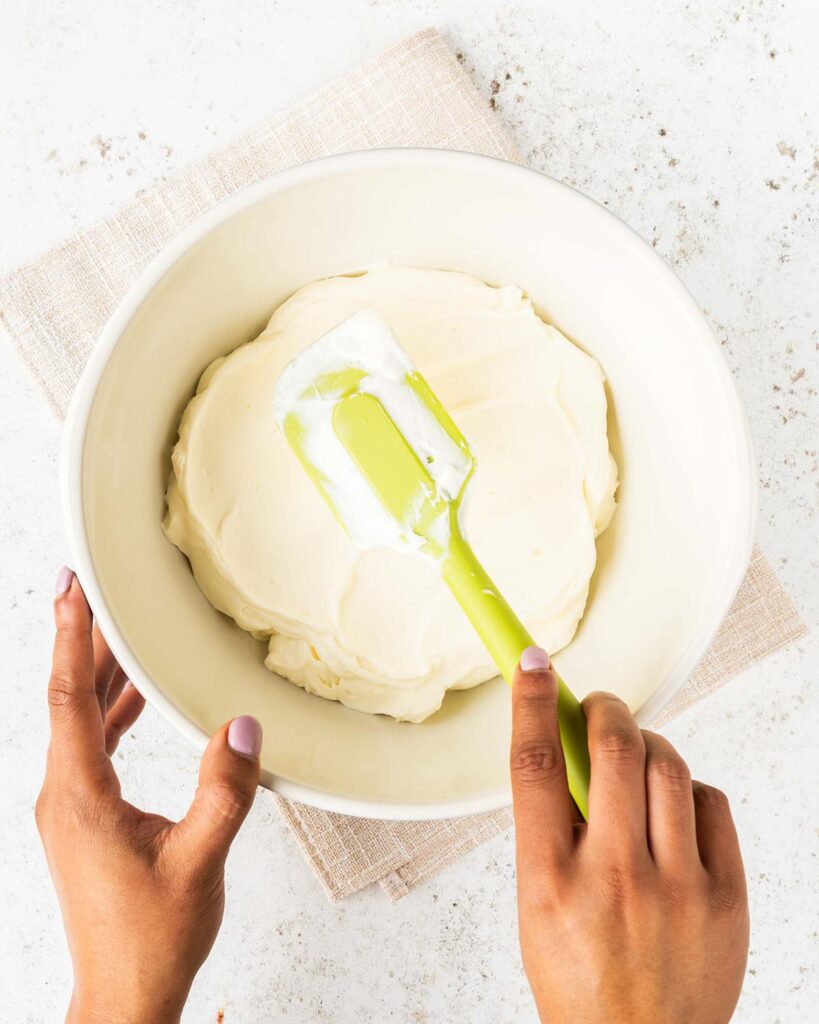
Step 5: Pour the mascarpone mixture into the whipped cream, then fold everything together gently to keep the firmness and structure of the cream. Make sure everything is well combined, scraping down the bowl thoroughly.
Step 6: Spoon the mascarpone filling over the top of the sponge fingers, spreading into an even layer. Smooth out the top, or create a texture if you wish.


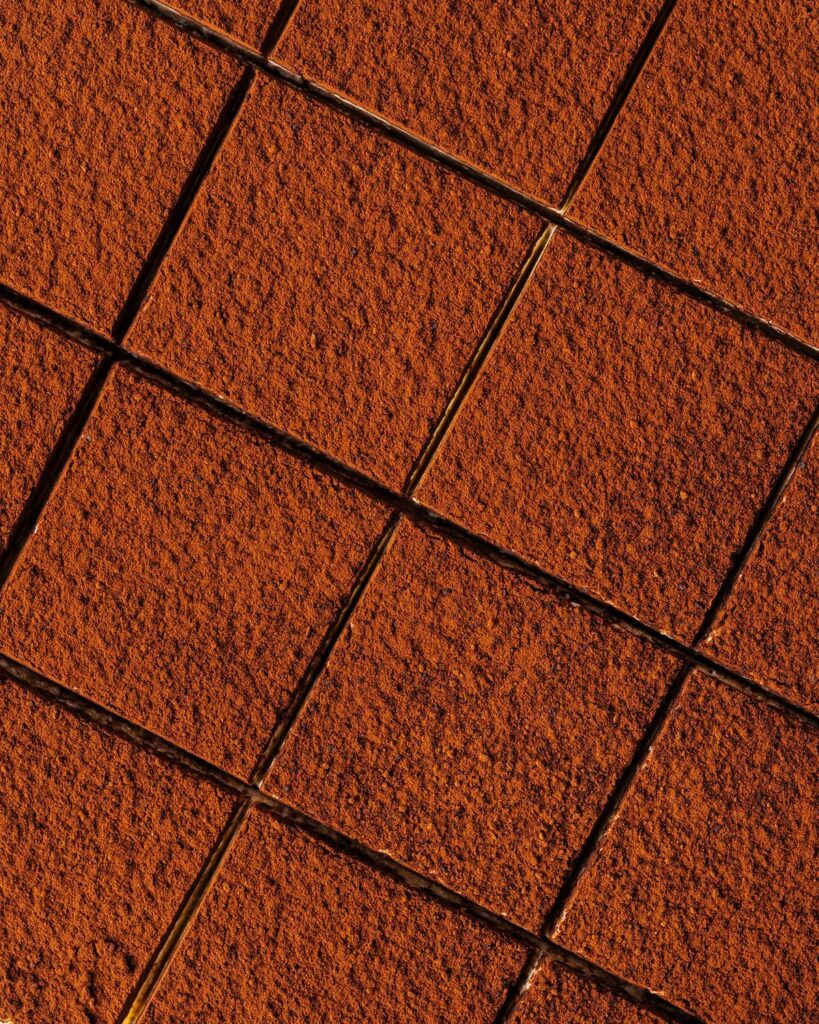
Step 7: Sprinkle the top of the mascarpone filling generously with cocoa powder, covering it entirely. Place the tin in the fridge for at least 3-4 hours to chill and set. Cut into squares before serving. Enjoy!
Tiramisu brownie FAQs
Below you can find some of the more commonly asked questions about these brownies. If you have any that I’ve missed, please do leave me a comment below, I’d love to help!
What baking tin do you need for chocolate brownies?
Metal tins are best for making this brownies recipe fudgy at home. This is because they distribute heat evenly and ensure an even bake. I would recommend avoiding glass, silicone, or ceramic dishes to make brownies in. Glass dishes absorb heat, leading to burnt or over baked edges on the brownies. Silicone does not conduct heat at all, which means it will take longer to bake the brownies. And ceramic dishes are very similar to glass: they conduct heat well, but can result in over baked brownies.
How do I line a square baking tin?
There are many ways to line a square baking tin. The simplest way is to cut two strips of baking parchment marginally smaller than one side of the tin first. Lightly brush the tin all over with melted butter. Then lay the strips of parchment paper in the tin in a cross shape. Press and smooth onto the tin, ensuring the edges and corners are folded to give nice neat edges.
When is the brownie done baking?
When do you pull the chewy fudgy brownies out of the oven? Personally, I prefer my brownies just past the gooey side anyway, so I prefer taking them out earlier rather than later. For this tiramisu brownies recipe, you will need to bake until a toothpick comes out only slightly smeared with the brownie mixture, as it will continue to bake and firm up as it cools.

Do tiramisu brownies need to be refrigerated?
Yes, these tiramisu brownies will need to be refrigerated due to the mascarpone topping on them.
How to serve tiramisu brownies
Serve this dessert cold straight from the fridge or allow to warm up a little (for about 10 minutes at room temperature) before serving.
Can you freeze tiramisu brownies?
These brownies will keep for up to 5 days stored in an airtight container in the fridge. If you wish to freeze them, freeze individual pieces for up to three months wrapped in tightly and placed in an airtight container. Thaw in the refrigerator overnight or for a few hours at room temperature before serving.
Tips for decorating and slicing tiramisu brownies
- This brownie mixture, if the butter cools a lot, is really quite a thick one. No need to be alarmed by this, the brownies will turn out wonderful once baked!
- Espresso in the brownies is totally optional. Personally, I love the additional coffee hit, but if you prefer to tone it down, feel free to only use it to soak the sponge fingers.
- Leave the brownies to cool completely before adding the tiramisu topping layers to the dessert. Adding them too soon, especially the mascarpone topping, will result in it melting and spoiling your beautiful creation!
- When dipping the sponge fingers in the coffee mixture, don’t leave them to sit in it. Just place in, turn once and then lift out and place on the brownies.
- Always whisk the cream separately to stiff peaks before folding together with the mascarpone mixture. If you try to whisk everything together at once, it will not firm up quite the same.
- You can swirl or mark a pattern on top of the mascarpone mixture if you wish, rather than making it entirely smooth as I did.
- Dust the top with as much or little cocoa as you wish. I love the contrast between the cream and dark cocoa, but if you prefer less cocoa, simply make it a light dusting instead.
- When cutting, use a sharp knife to cut the brownies, and wipe the knife clean in between cuts for a really neat finish.
Troubleshooting
If you have any questions about this tiramisu brownies recipes, please comment below and I will do my best to help. And do remember: if you enjoy this recipe for tiramisu brownies, please leave a rating and review below. You could even post a picture on Instagram and tag me when you share it with the world. You already know I would love to see!
What are some good desserts to make with brownies?
I’m so glad you asked! Please check out my other brownie recipe offerings, I hope you’ll love them!
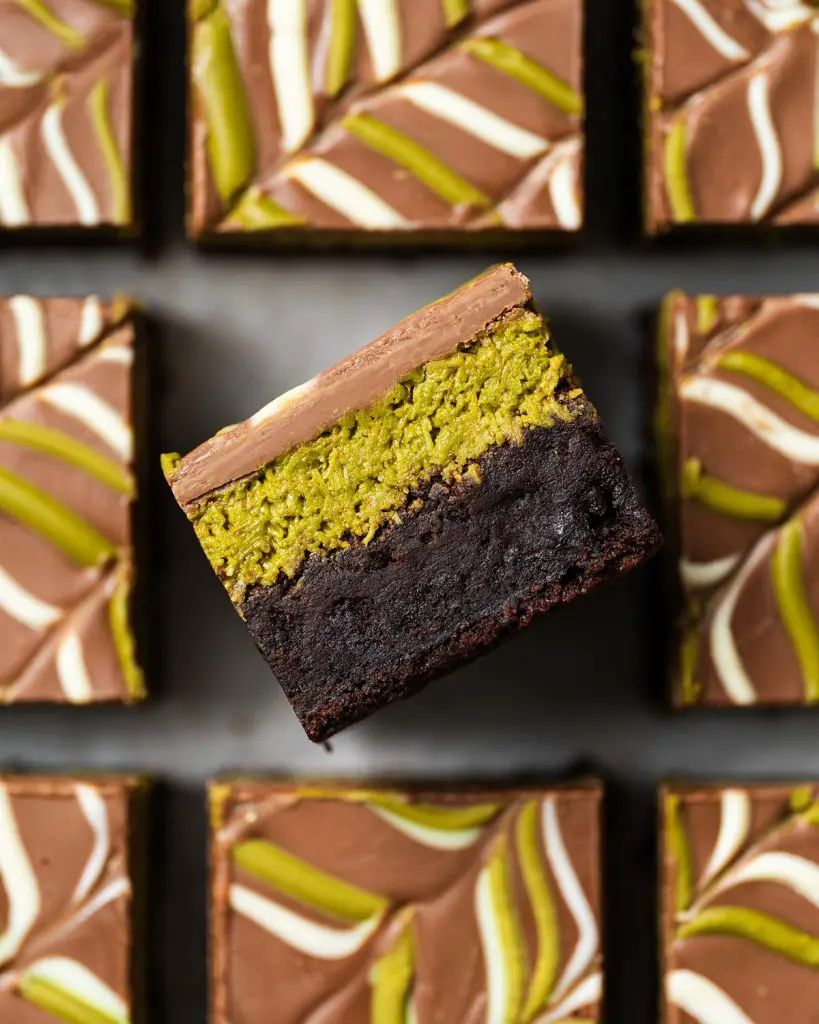
Pistachio chocolate brownies: Hot off the heels of the viral Dubai chocolate bar I just had to share a brownie version of the dessert! Pistachio cream, Kataifi pastry and chocolate is truly a match made in heaven, and I am OBSESSED!
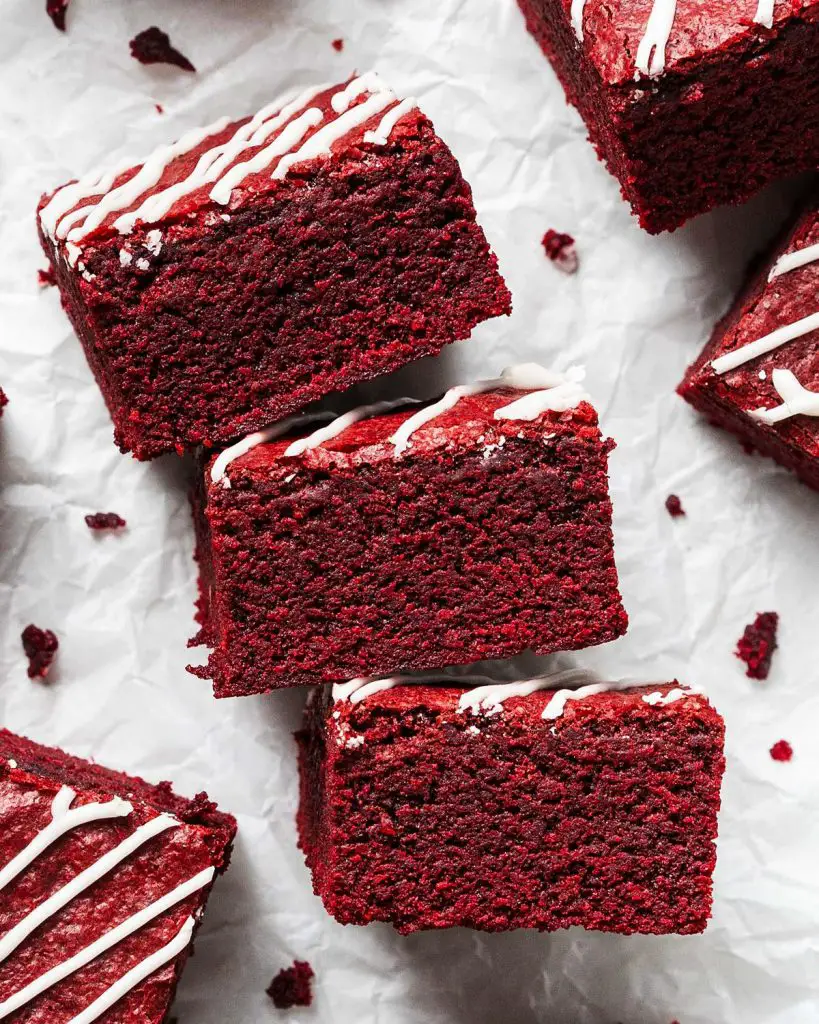
Red velvet brownies: If red velvet cake and brownies had a baby together, what would the resulting bake be? Let me introduce you to the irresistible result that is red velvet brownies! These vibrant brownies are chewy, fudgy, and oh so delicious!
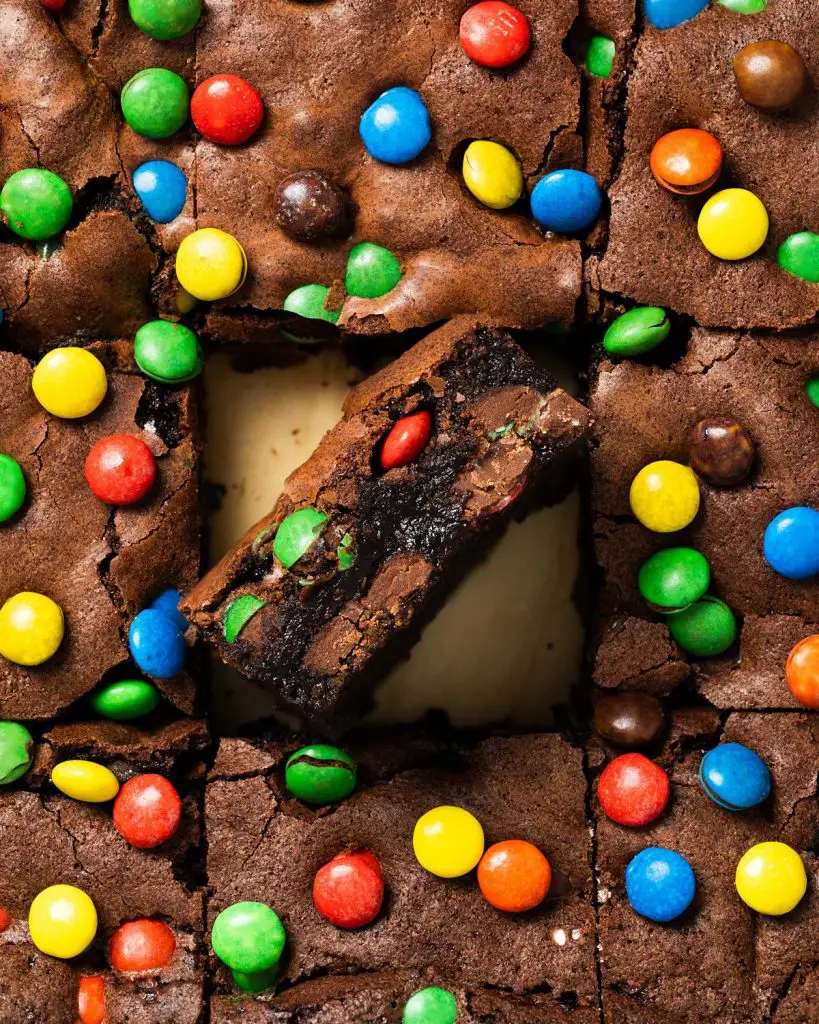
Chewy M&M brownies: My fudgy chocolate M&M brownies are absolutely to die for! Chunky and chewy, with a rich deep chocolate flavour, a fudgy texture and packed with yummy M&Ms. Perfect enjoyed either warm or cold, this is the ONLY recipe for the most delicious MMs brownies you will ever need!
And that’s all from me for today! Hope you enjoy making this delectable brownie tiramisu recipe as much as I enjoy sharing with you. Happy baking friends! x
Recommended equipment I used *
| Digital kitchen scales | Measuring spoons |
| Baking tin | Mixing bowl/small mixing bowl |
| Whisk | Spatula |
| Handheld electric mixer | Sieve |
Fudgy Tiramisu Brownies
Ingredients
For the chocolate brownie
- 165 g (¾ cup) unsalted butter
- 75 g (½ cup + 3 tbsp) cocoa
- 1 tsp vanilla
- 2 tsp espresso powder (optional)
- 3 large eggs
- 220 g (1 cup + 2 tbsp) caster sugar
- 110 g (½ cup + 1 tbsp) brown sugar
- 110 g (¾ cup + 1 tbsp) plain (all purpose) flour
- 0.5 tsp salt
For the tiramisu topping
- 120 ml (½ cup) hot water
- 1 tbsp espresso powder
- 1.5 tbsp coffee liqueur (optional)
- 25 sponge fingers
- 230 g (1 cup) mascarpone cheese
- 200 g (½ cup + 2 tbsp) sweetened condensed milk
- 260 ml (1 cup + 1 tbsp) double (heavy) cream
- 2 tsp cocoa powder, for dusting
Instructions
For the chocolate brownie
- Line an 8”x 8” baking tin with parchment paper and set it aside. Preheat the oven to 180C/350F while you make the brownies
- Melt the butter in a small bowl. I do this in the microwave in short burst of 10-20 seconds, swirling or stirring in between. Add in the cocoa powder, vanilla and espresso (if using), and whisk together until silky smooth.
- In a separate larger bowl, whisk together the eggs and sugars until evenly combined. Slowly drizzle in the chocolate mixture, beating as you go so it is all evenly mixed together.
- Into the same mixing bowl, tip in the flour and salt. Fold this into the chocolatey mixture until everything is completely mixed through.
- Pour the brownie batter into the prepared baking tin and ease it into the corners, levelling the top. Bake in the preheated oven for 22-27 minutes the edges feel firm to touch and the middle has the tiniest wobble. It will take more or less time, depending on your oven, but you want them to appear slightly underbaked. For me, my brownies are done around 24 minutes. Leave to cool completely in the tin before the next steps.
For the tiramisu topping
- Make the coffee dip. In a flat bowl, mix together the water, espresso powder and coffee liqueur (if using) until combined.
- Dip one sponge finger at a time in the coffee solution, turning to coat all sides, then place on top of the cool brownie. Arrange the dipped fingers over the top of the brownie in a single layer, making sure they are snugly pressed together. Set aside once done.
- In a large mixing bowl, whisk the double (heavy) cream until it just reaches stiff peaks. Set aside.
- Using a separate bowl, tip in the mascarpone and smoosh it to soften and loosen. Add in the condensed milk, then mix the two ingredients together until smooth and combined.
- Pour the mascarpone mixture into the whipped cream, then fold everything together gently to keep the firmness and structure of the cream. Make sure everything is well combined, scraping down the bowl thoroughly.
- Spoon the mascarpone filling over the top of the sponge fingers, spreading into an even layer. Smooth out the top, or create a texture if you wish.
- Sprinkle the top of the mascarpone filling generously with cocoa powder, covering it entirely. Place the tin in the fridge for at least 3-4 hours to chill and set. Cut into squares before serving. Enjoy!