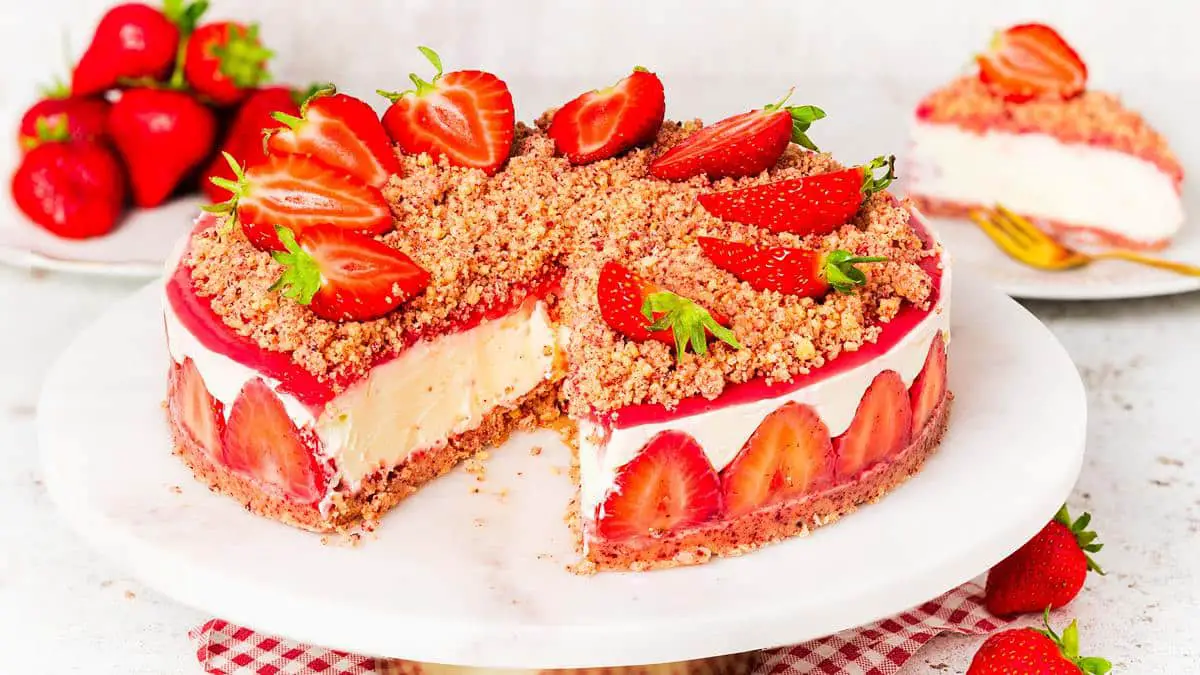
Strawberry Cheesecake Crunch (No Bake)
Elevate your summer baking with this No-Bake Strawberry Cheesecake Crunch. Featuring a Golden Oreo and freeze-dried strawberry crust, a creamy vanilla filling, and a vibrant homemade strawberry sauce, this dessert is a true summer showstopper.
Ingredients
For the biscuit base
- 350 g (3 cups + 3 tbsp) golden oreos
- 15 g (½ cup) freeze dried strawberries
- 85 g (¼ cup + 2 tbsp) unsalted butter, melted
For the cheesecake
- 10-12 fresh strawberries
- 600 g (2 ½ cups + 3 tbsp) full fat cream cheese
- 80 g (½ cup + 1 tbsp) icing (powdered) sugar
- 1 tsp vanilla
- 250 ml (1 cup + 1 tbsp) double (heavy) cream
For the strawberry sauce
- 250 g (1 ¼ cups) strawberries
- 2 tbsp caster sugar
- 1 tsp lemon juice
- 1 tbsp cornflour
Instructions
For the biscuit base
- Place the biscuits and freeze dried strawberries into a food processor and blitz until the biscuits are completely crumbled. If you do not have a food processor, pop the biscuits into a sealable bag and bash them with a rolling pin until well crushed. Both work fine, one is definitely more therapeutic (!), but I prefer using a food processor purely for speed.
- Add in the melted butter and mix through, scraping down the bowl to make sure everything is really well combined. Tip about ⅔ of the biscuit mixture into an 8" springform tin and press it down evenly to make a flat base. Pop the tin in the fridge to allow the base to chill until needed.
How to make the cheesecake filling
- In a large mixing bowl, beat together the cream cheese, vanilla and icing sugar until smooth and creamy.
- Pour in the double cream and beat it all together until the double cream is well combined with the cheese and the mixture thickens. Set aside until required. The cheesecake filling is done!
Assembling the cheesecake
- Choose strawberries that are roughly the same height and width. Half each strawberry, then cut a flat edge to remove the leaves and stem. Place on some kitchen towel to absorb some of the juices.
- Pull the tin with the base out of the fridge, and place a strawberry half against the side of the tin. Make sure the flat tops are at on the base, point facing up, and the cut edges are against the side of the tin. Use as many strawberry halves as required to create a strawberry border around the tin.
- Spoon the cheesecake filling onto the base, spreading it out and making sure to fill the space in between the strawberries around the edge. Once all the cheesecake filling has been added to the tin, smooth and level the top using an offset spatula. Chill for at least 3-4 hours, preferably overnight.
Making homemade strawberry sauce
- Remove the green leaves and stem from the strawberries and chop them into small pieces. Place them in a saucepan with the lemon juice and sugar.
- Heat the strawberry mixture to melt the sugar, stirring to make sure the fruit is evenly coated with the lemon and sugar. Once the sugar has melted, cook the mixture until the strawberries break down. Add in the cornflour and cook until the mixture starts to thicken.
- Remove the strawberry mixture from the heat and blitz or mash until smooth. Push the strawberry goo through a sieve to remove any seeds and leave to cool before using on the cheesecake.
Finishing the cheesecake
- Once the cheesecake has chilled and the strawberry sauce has cooled, its time to finish assembling the cheesecake! Remove the cheesecake from the tin and place on a serving dish.
- Spread the strawberry sauce over the top of the cheesecake in an even layer, leaving a little gap around the outer edge.
- Do this part just before serving to keep the crunch of the topping. Sprinkle the reserved biscuit base over the strawberry sauce in an even layer, leaving little gaps to allow the sauce to peak through for some pretty colour.
- Top the cheesecake with some halved strawberries for decoration. Enjoy!
Notes
Nutrition
Calories: 449kcal