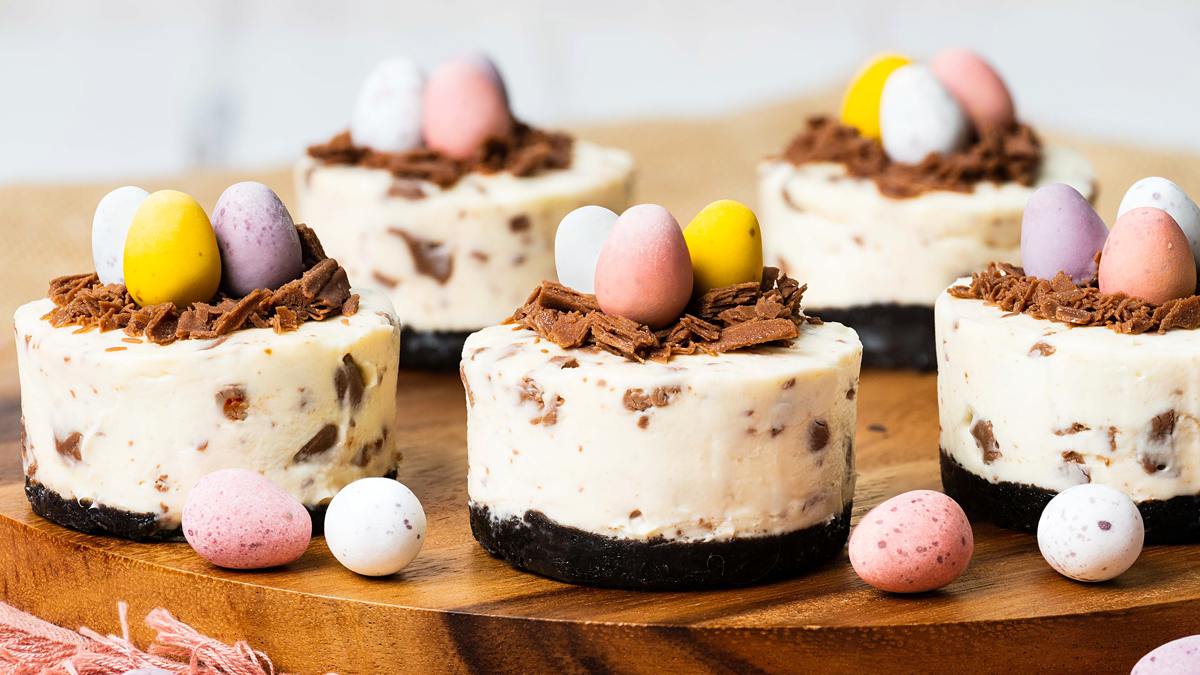
Mini Egg Cheesecakes
Make your Easter table extra special with these adorable Mini Egg Cheesecakes! These individual no-bake desserts feature a crunchy Oreo biscuit base and a rich, creamy vanilla filling packed with crushed mini eggs. Finished with a chocolate flake nest and even more mini eggs, this easy Easter recipe is simple to make and just too cute to resist!
Ingredients
For the biscuit base
- 155 g (1 ¼ cups + 3 tbsp) Oreo biscuits
- 60 g (¼ cup) unsalted butter, melted
For the cheesecake filling
- 600 g (2 ½ cups + 3 tbsp) full fat cream cheese
- 80 g (½ cup + 1 tbsp) icing (powdered) sugar
- 1 tsp vanilla
- 240 ml (1 cup) double (heavy) cream
- 240 g (1 cup + 3 tbsp) mini eggs, crushed
For the topping and decoration
- 2 chocolate flakes
- 36 mini eggs
Instructions
For the biscuit base
- Place the biscuits into a food processor and blitz until they are completely crumbled. If you do not have a food processor, pop the biscuits into a sealable bag and bash them with a rolling pin until well crushed. Both work fine, one is definitely more therapeutic (!), but I prefer using a food processor purely for speed.
- Add in the melted butter and mix through, scraping down the bowl to make sure everything is really well combined. Divide the biscuit mixture evenly between the 12 holes of the tin and press down evenly to give each a flat base. Pop the tin in the fridge to allow the bases to chill until needed.
How to make the cheesecake filling
- In a large mixing bowl, beat together the cream cheese, icing sugar and vanilla until smooth and creamy.
- Pour in the double cream and beat it all together until the double cream is well combined with the cheese and the mixture thickens. Set aside for a moment.
- Crush the mini eggs (and have fun bashing them!). Fold through the cheesecake filling to mix evenly.
- Divide the cheesecake filling evenly over each chilled base and use an offset spatula to level the tops. Chill for at least 3-4 hours, preferably overnight.
For the topping and decoration
- Carefully remove each cheesecake from the tin. Smooth around the edges to give each one a nice smooth finish on the sides.
- Roughly break the chocolate flakes into chunks. If you are using normal chocolate, roughly chop it or grate with a peeler. Arrange a mound of chocolate over each cheesecake, making a little hollow in the middle so it looks like a nest.
- Arrange three mini eggs into each chocolate nest, pressing down slightly to ensure they remain in place and not roll off! Place on individual plates and serve. Enjoy!
Video
Notes
Nutrition
Calories: 415kcal