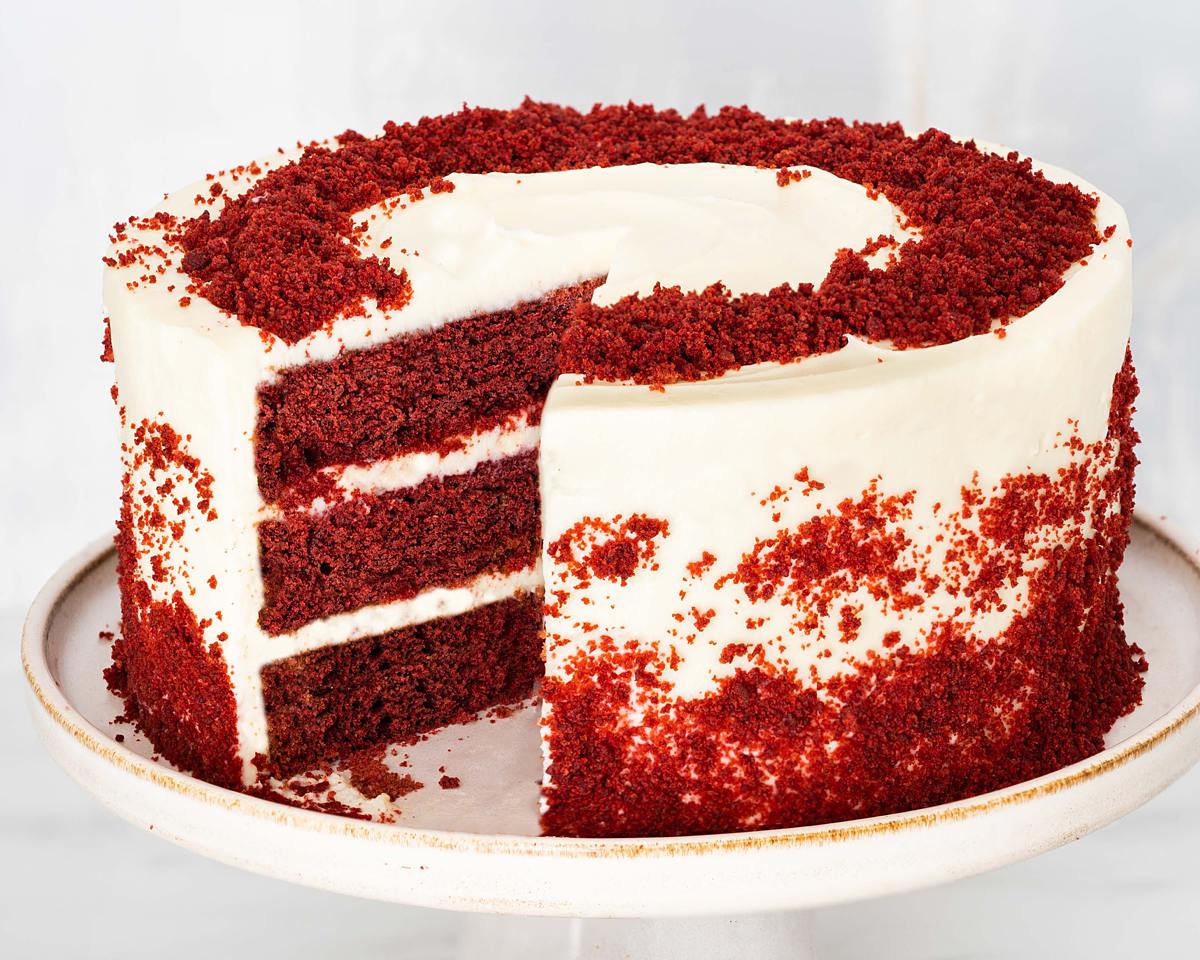
Eggless Red Velvet Cake
This easy eggless red velvet cake delivers a soft, velvety crumb and a rich cocoa flavour, all paired with a silky tangy cream cheese icing. Made without eggs using a simple vinegar and buttermilk reaction, this striking egg-free red velvet cake is the ultimate showstopping dessert for birthdays, anniversaries, and Valentine's Day.
Ingredients
For the cake
- 180 g (¾ cup + 1 tbsp) unsalted butter
- 300 g (1 ½ cups) caster sugar
- 470 g (2 ¾ cups + 3 tbsp) plain (all purpose) flour
- 3 tbsp cornflour (cornstarch)
- 3 tsp baking powder
- 1.5 tsp bicarbonate of soda (baking soda)
- 0.5 tsp salt
- 25 g (3 tbsp + 2 tsp) cocoa powder
- 230 ml (¾ cup + 3 tbsp) milk (I used whole milk)
- 170 g (¾ cup) yogurt
- 50 ml (3 tbsp + 1 tsp) water
- 2 tsp vanilla
- 1.5 tbsp white vinegar
- 1-2 tsp red food colour
For the cream cheese icing and decoration
- 300 g (1 ¼ cups + 2 tbsp) unsalted butter
- 300 g (2 cups + 1 tbsp) icing (powdered) sugar
- 645 g (2 ¾ cups + 1 tbsp) cream cheese
- 2 tsp vanilla
Instructions
For the cake
- Brush three 8" circle cake tins with some melted butter, then line the base with parchment paper and brush with a little butter again to make sure it sticks down well. Set your tins aside. Preheat your oven to 180C/350F while you make your cake batter.
- In the bowl of your stand mixer, cream together your butter and sugar until pale and fluffy. Sift in the flour, cornflour (cornstarch), baking powder, bicarbonate of soda (baking soda), salt and cocoa powder. Beat it all together until your mixture resembles damp chocolatey sand.
- In a separate bowl or large jug, mix together the milk and yogurt to make your buttermilk. To the jug, add in the water, vanilla and food colouring then mix. Add more colour if you wish to have a more vibrant shade of red. The colour deepens as the cake bakes, so your red will not be quite as vibrant once baked as your cake mixture is.
- With your mixer running, slowly pour in your wet ingredients into the dry, scraping the bowl down if needed to incorporate all the ingredients well. Once everything is well combined, add in the vinegar and beat again to mix through. Turn the speed up to high and beat for 30 seconds.
- Divide your cake mixture evenly between your three prepared pans. Bake in your preheated oven for 20-25 minutes. Your cakes will be firm and springy to the touch and a toothpick inserted into the cakes will come out clean. Cool in the tins for 5 minutes, then transfer to a cooling rack to cool completely.
For the cream cheese icing and decoration
- Once your cakes are cool, we can crack on with decorating them! To make your cream cheese icing, first beat your butter until really soft and paler. Add in the icing sugar and vanilla, mixing to combine and fluff up again. Give your cream cheese a little smash to soften it, then tip into your butter mixture and beat well to fully combine.
- Before you assemble your cake, level the tops of your individual cake layers. If they do not need levelling, that is fine, but I like to regardless as I use the crumbs for my decoration. Once level, put a little dollop of cream cheese icing on your serving plate. Place your bottom layer of cake on the icing, pressing down gently to secure the cake to the icing. Spread or pipe a layer of icing on top of your first cake, smoothing to level if needed, then place your second cake layer on top. Repeat the icing and cake layer steps once more for your third and final layer of cake. Cover the top and sides of your assembled cake with the remaining cream cheese icing, then smooth it out with a scraper or offset spatula.
- Crumble up the off cuts of cake from when you levelled your layers earlier. If you want to decorate your cake as I did, here is how I did it. First create swirls in your icing on top of your cake using your offset spatula, a rounded knife or even a spoon. Using your cake crumbs, carefully sprinkle a ring of crumbs on top of your cake leaving a little rim of icing around the edge. Carefully push cake crumbs around the bottom of your cake. Gently ease a few more crumbs a little higher up along the side of your cake to create a tapered crumbs effect. Enjoy!
Nutrition
Calories: 635kcal