
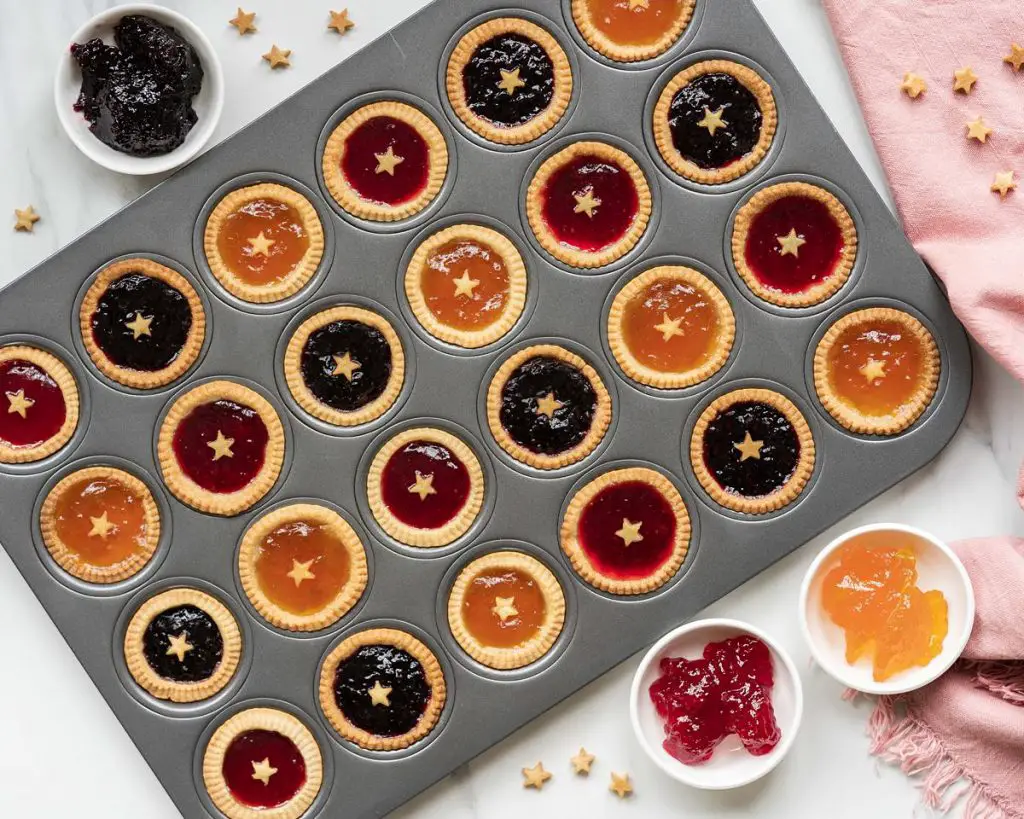
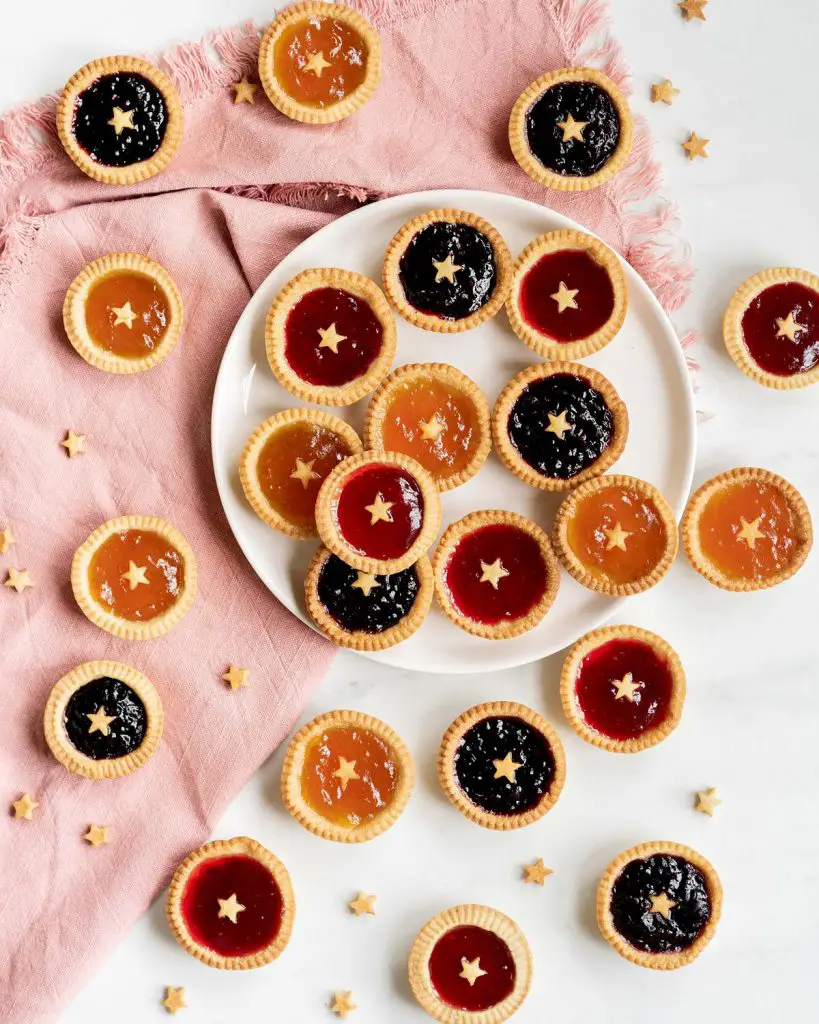
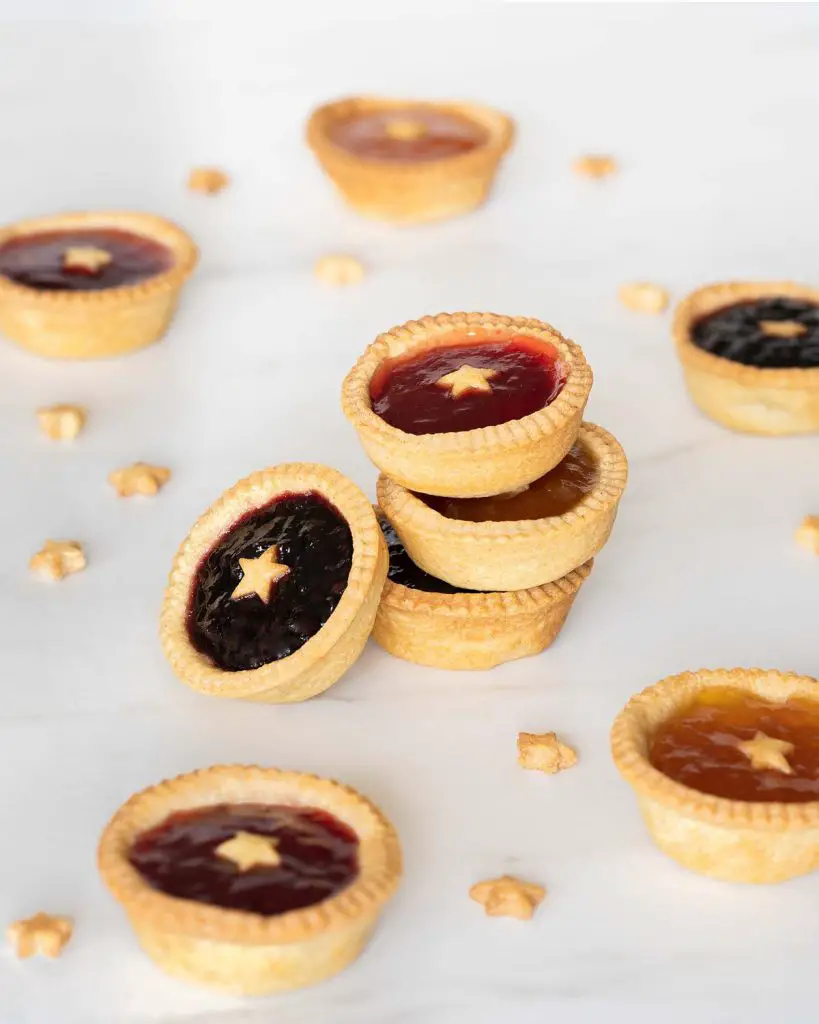
These adorable little jam tarts are too cute to resist! Beautiful buttery shortcrust pastry filled with your favourite jam, or even a selection of different jams. Perfect little mouthfuls of joy!
What are jam tarts?
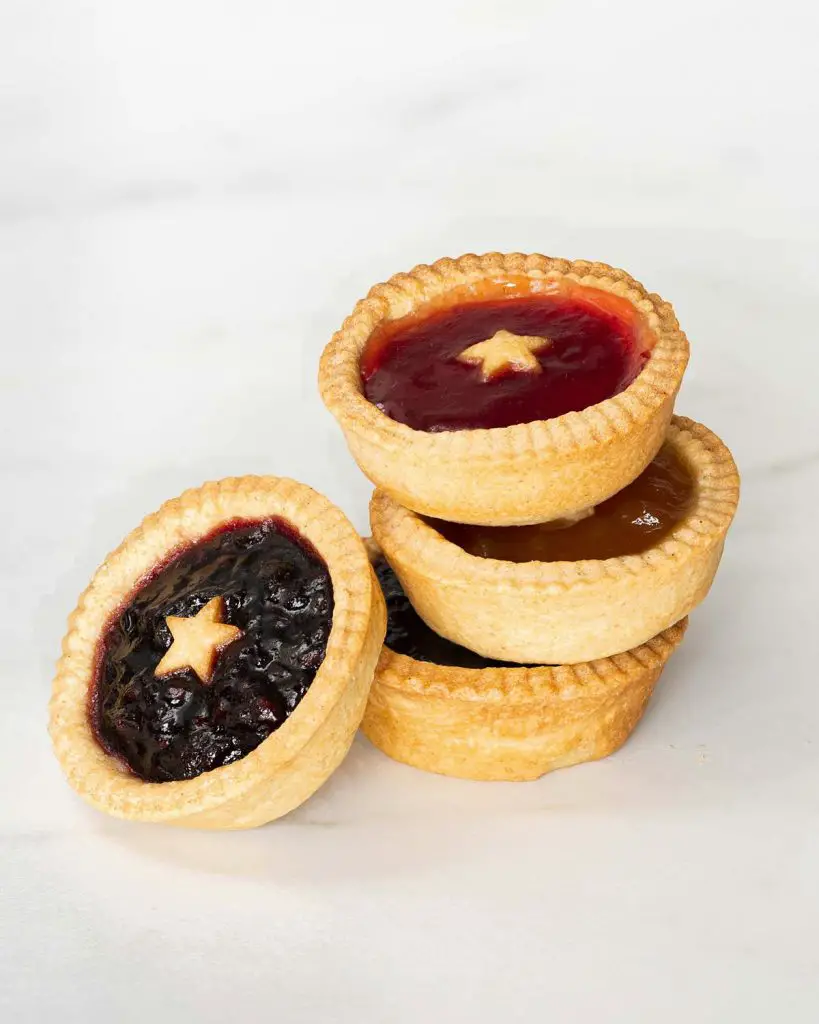
Jam tarts, jam tartlets, mini jam tarts. Regardless of what you wish to call them, they are quite simply shortcrust pastry shells filled with beautiful jam. When properly made, you will have a beautiful buttery pastry that melts in your mouth, filled with a smooth sweet jam.
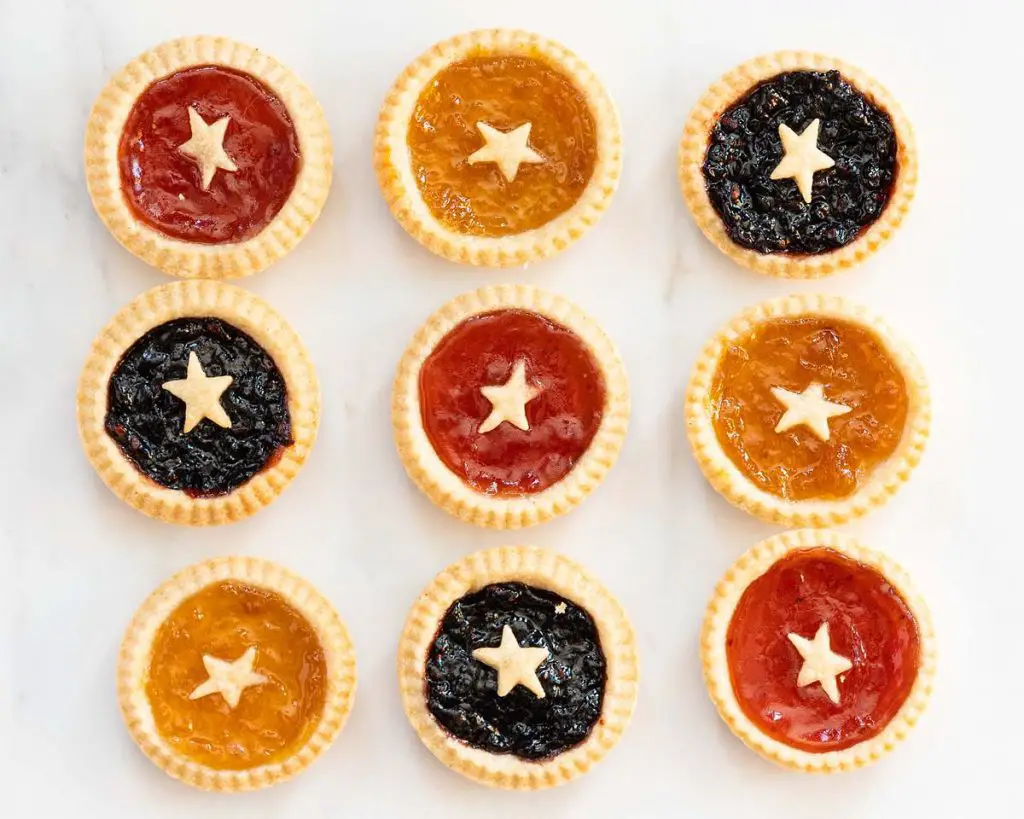
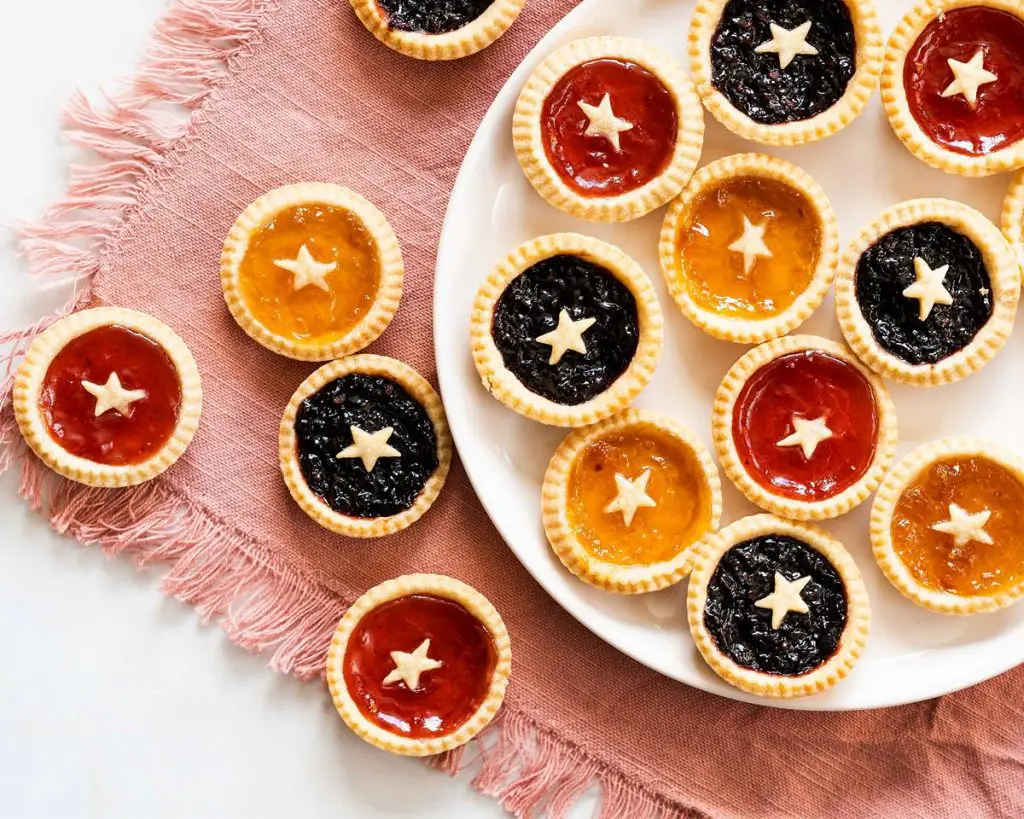
The brilliant thing about jam tarts is that they are so adaptable! Changing up the jam you use can take these tarts easily through the seasons. I like to make them with marmalade for Easter and strawberry or blackberry jam in the summertime. They even work beautifully with some festive jam, like orange and cranberry, in time for Christmas too. Truly, your imagination is the limit with these beauties!
Are jam tarts made with shortcrust pastry?
Yes, I use shortcrust pastry when making my jam tartlets. It helps to keep the pastry case light and melt in your mouth gorgeous.
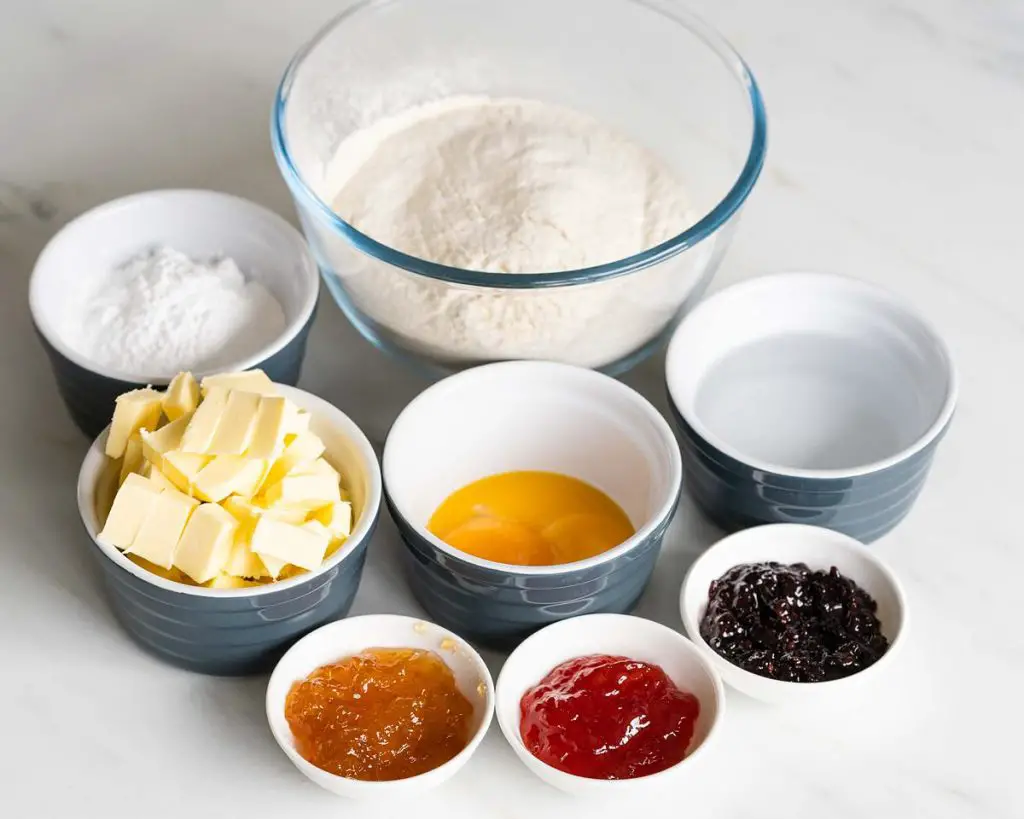
What ingredients do I need to make mini jam tarts?
- Flour: I use plain flour for my pastry for this tart as it I do not want any rise in it.
- Icing/Powdered Sugar: for sweetening your shortcrust pastry.
- Butter: I use unsalted butter here. Make sure to use cold butter to make your pastry.
- Eggs: yolks in the pastry add richness and flavour.
- Ice cold water: make sure to use cold water when making your pastry. You want to keep it as cold as possible throughout the whole making process.
- Jam: your filling for the tarts. Use your favourite jam, any is good! I would recommend using a smooth jam if you want a smooth finish to the tops of your jam tarts.
What tools do I need to make mini jam tarts?
- Food processor*: a brilliantly quick way to make your pastry. If you do not have a food processor, you can use your fingers to rub your ingredients together too. Or alternatively, even the pastry blender detailed below is perfect too.
- Pastry blender*: an alternative to using a food processor or your fingers. Using a tool such as a food processor or pastry blender helps you keep your pastry cooler than using your fingers would.
- Digital kitchen scales*: weighing out ingredients when baking rather than measuring by cups is preferable for me. However, I do provide volume (cup) measurements too if this is your preference when baking.
- Measuring spoons*: for smaller quantities of measurement such as tablespoons (tbsp) or teaspoons (tsp). It is a small investment, but worth it for the consistency and accuracy of measuring ingredients when baking.
- Sieve*: useful to remove lumps from your flour and icing sugar before blending together.
- Rolling pin*: for rolling out your pastry. If you do not have a rolling pin, get creative! A tall glass or even a wine bottle works well!
- Pastry cutters*: to cut out your pastry before lining your tin. Use a cutter a couple of sizes bigger than your tin so that the pastry comes up the walls and does not just cover the base.
- Mini tart tin*: to make and bake your mini jam tartlets in.
- Star press*: for your pastry decoration.
How to make jam tarts
Pastry making can be a scary undertaking for many people. I promise you, however, that making pastry is not something to fear. In fact, once you get the hang of it, you will absolutely love working with pastry!
Step 1: First make your pastry. In your food processor or a large mixing bowl, mix together the flour and sugar. Add in the cubes of cold butter and cut or blend in until your mixture resembles fine breadcrumbs. Ensure no large chunks of unblended butter remain or it will speckle your pastry when you roll it out. Tip in the egg yolks and blend again until just combined. Add in your ice water a little at a time until your pastry comes together in clumps.
Step 2: Tip out your pastry onto a clean work surface and gather your dough together. Squeeze it to bring together, try to avoid kneading and working it too much or your pastry will be tough. Divide your pastry dough into two equal parts and flatten into discs. Wrap each disc tightly in cling film then pop in the fridge to chill for at least 30 minutes. At this point, you can freeze your dough for another day, if you wish.
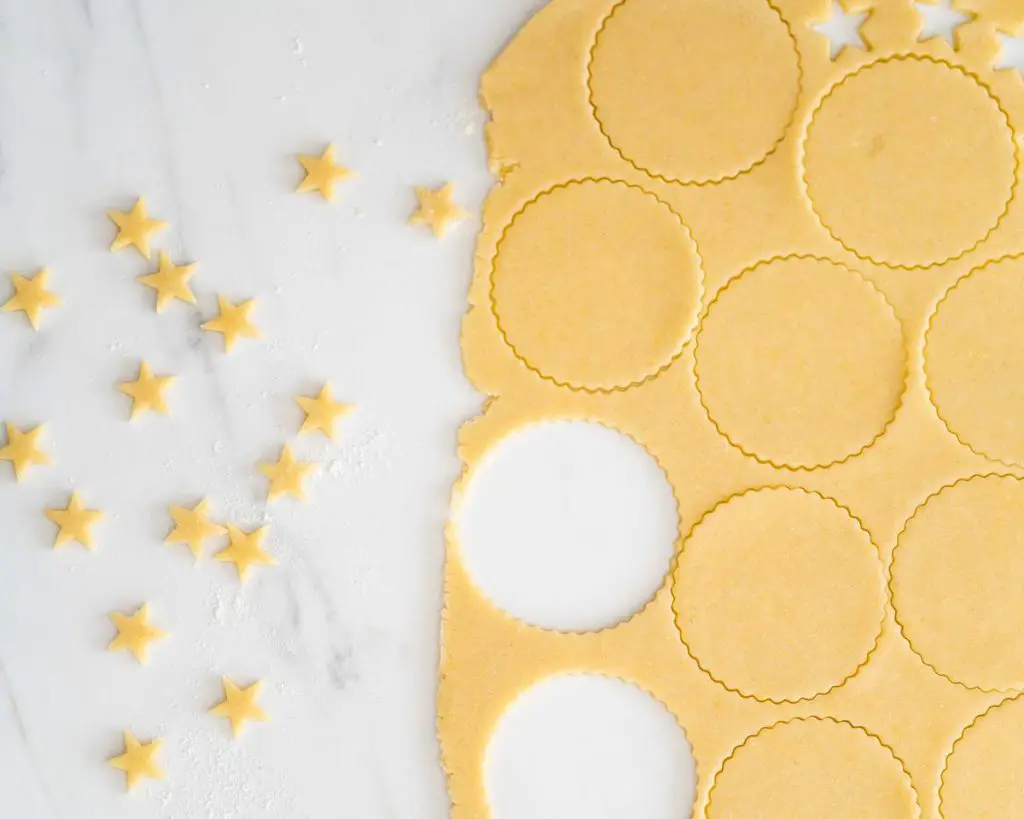
Step 3: Once your dough has chilled, it is time to have some fun! First, preheat your oven to 160C/320F whilst you prepare your tarts for baking. Dust your work surface with a little flour and roll out one of your pastry discs until about 3mm thick. Stamp out rounds of dough a couple of sizes larger than your mini tart tin and ease them in. I use the end of my rolling pin to help push them in evenly, but fingers work well too. Once you have filled your tray, pop it into the fridge to chill again for a few minutes whilst you prepare the jam fillings.
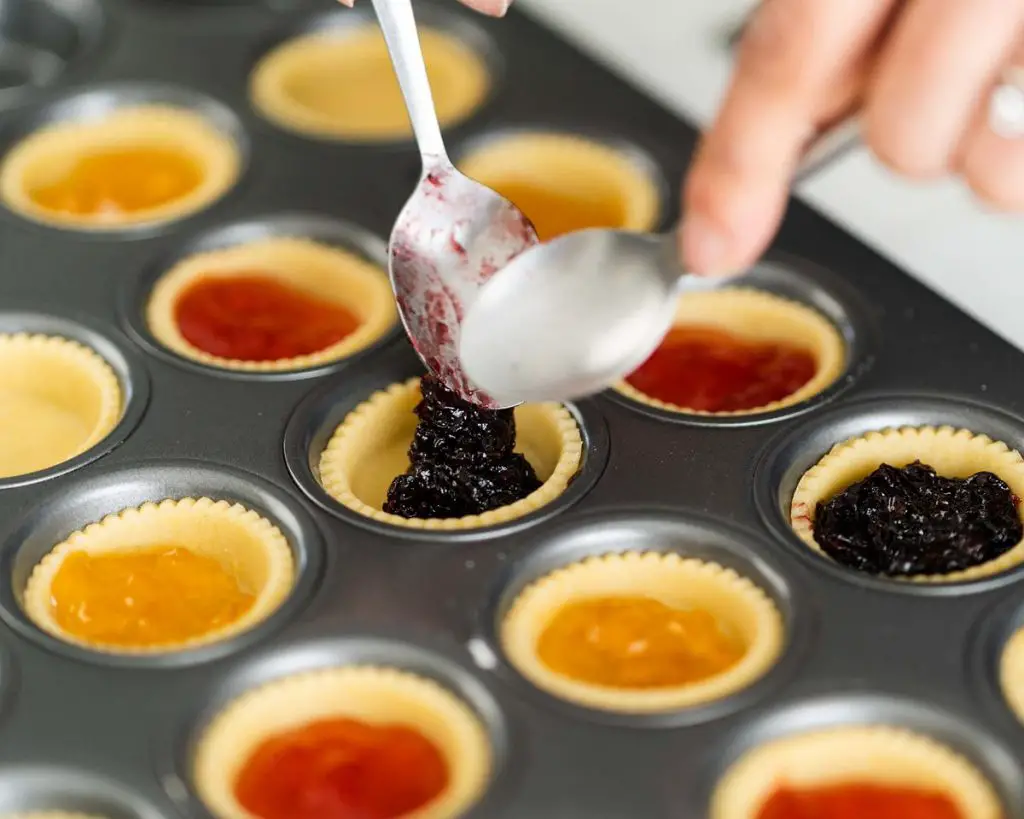
Step 4: Place a few spoonfuls of your chosen jam into a microwave safe bowl. Add a few drops of water and mix it all together. Microwave your jam for a few seconds, just to warm it up and loosen it a little. This will make it easier to spread into your pastry cases, so you get lots of jam and less mess!
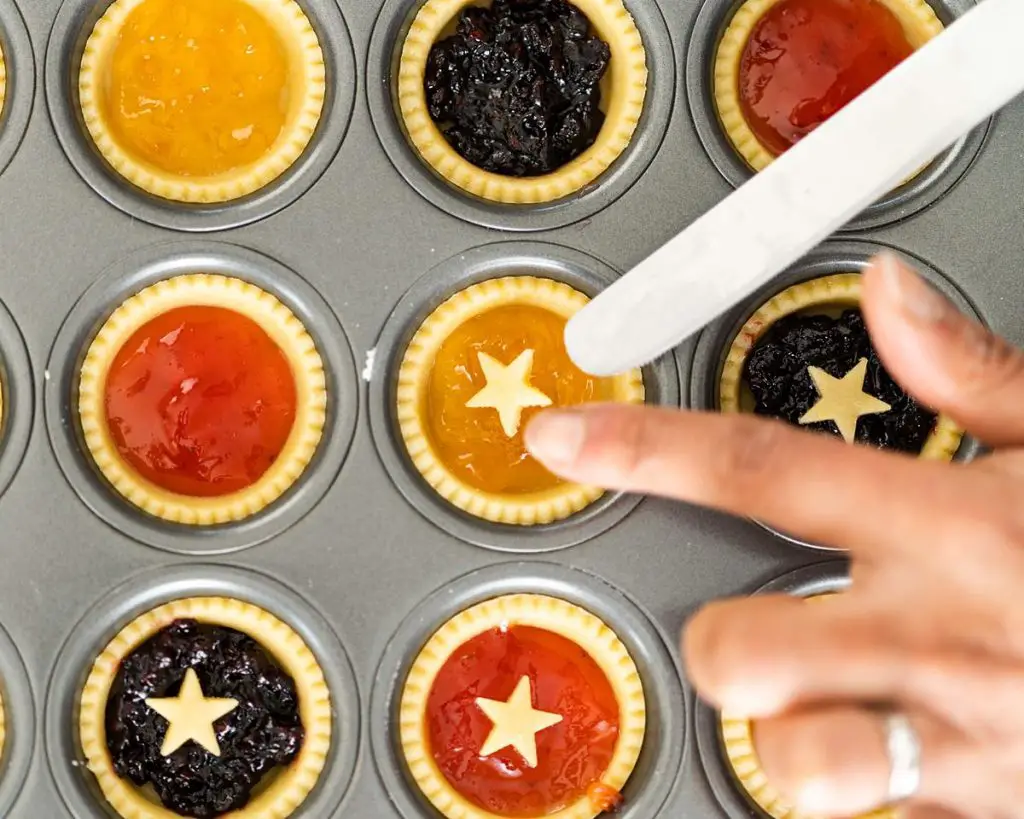
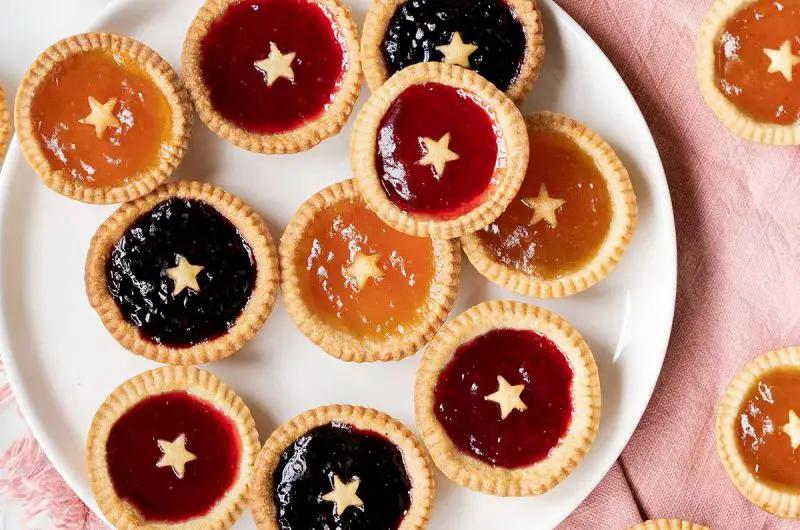
Step 5: Bring your tin out of the fridge and fill your pastry cases no more than half full with your slightly warm and looser jam. Using some leftover pastry, stamp out some stars or any other shape you wish and gently place them over the top of your jam. This last bit is optional, but makes for pretty tarts! If you do not have a star cutter, you can leave them without or get creative with other small cutouts you have in your kitchen!
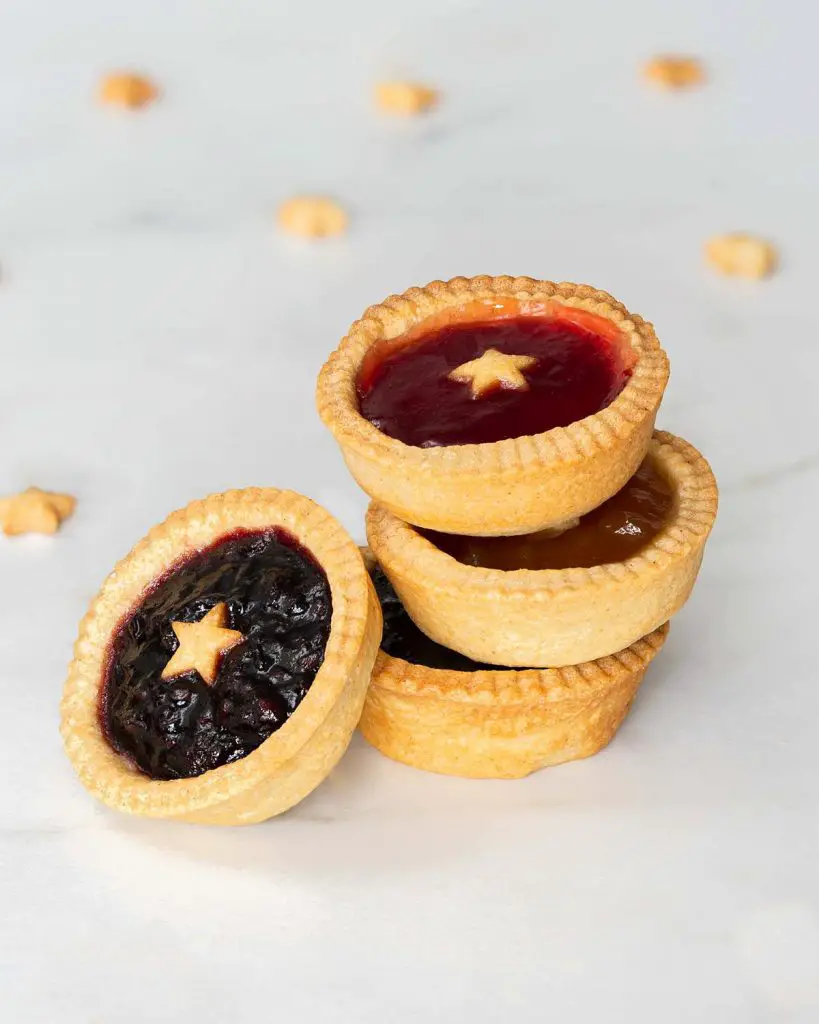
Step 6: Bake your mini jam tarts in your hot oven for 10-12 minutes. Your pastry will be golden on the edges and your jam bubbly. Leave in the tin to cool for a few minutes (to avoid getting burned by hot jam!), then transfer to a wire rack to cool completely. Enjoy!
Pastry FAQ
There are a few things that could go wrong with pastry, so I have tried to answer as many commonly asked questions as I can below. Please do use the comments below if you have any questions I have not answered for you here.
Why is my shortcrust pastry fragile and crumbly when I try to roll it?
This is probably because your dough was too dry and needed a little more liquid in it. Simply break it up into crumbs again using your hands or food processor. Blitz through enough liquid until your shortcrust dough naturally forms clumps. Then bring it back together, chill and roll as before.
Why is my shortcrust pastry tough after baking?
If your pastry is tough it is likely that too much gluten has developed in the dough. The most likely cause of this is overworking (over mixing or over kneading) your dough when making and rolling your pastry shells.
Why is my shortcrust pastry sticking to my work surface/rolling pin?
The moisture in your dough makes it stick to surfaces. The solution here is simple. Just lightly dust your work surface and rolling pin with a little extra flour (not too much, you do not want to dry out your pastry!) and try rolling it out again. As you roll, keep moving your pastry, turning it through 90º, so it does not stick to your surface. If you find it is not rolling out too easily, gently lift the pastry over your rolling pin and lightly dust the surface under it with flour before rolling again. This should allow you to get a beautiful thin pastry.
How do I know what size cutter to use?
If you are unsure what size cutter for jam tarts is best, I would recommend choosing one that is about ½” wider all around than the base of each individual mould. This will allow additional pastry for up the sides of your tart shell, so you can fill it with yummy jam.
Do I need to blind bake my pastry shells?
In this recipe for jam tarts, you do not need to blind bake your pastry. Instead, you only bake your pastry once you have filled it with jam.
How do I know when my pastry is baked?
Your pastry is baked when it is pale golden in colour and looks dry. If it looks a little doughy or wet, leave it to bake for a few minutes longer.
How to stop jam tarts bubbling over
The answer here is simple: only fill them half way up the shortcrust pastry shells. If you wish to have more jam in your tartlets once they are baked, you can easily spoon some more on to top them up too. Should you decide to do this, bake the tartlets without the decorative star in the middle. Bake the stars separately on a baking tray, then gently add them onto your topped up jam filling whilst it is still warm.
Are jam tarts vegetarian?
These mini jam tarts are suitable for vegetarians. They do however contain egg yolks in the pastry, so would not be suitable for those avoiding eggs as part of a vegetarian diet.
How long will jam tarts keep? How should I store these mini tarts?
These delicious tarts should be stored in an airtight container and will be fine kept at room temperature for 2-3 days.
Can jam tarts be frozen?
You can freeze your pastry at the end of step one if you wish, before rolling, filling and baking. Just defrost overnight in the fridge when you want to use it again.
If you wish to freeze already baked jam tarts, keep reading for how you can do this too.
How can you freeze jam tarts?
To freeze your jam tarts, first leave them to cool completely. Do not be tempted to fling them all in a freezer bag or container and throw into your freezer. They will break and fall apart or stick together. Once they are cool, lay the mini jam tartlets in one layer on a flat baking tray and pop in your freezer until fully frozen. This firms the pastry and helps make it sturdy so it does not break so easily. Wrap each jam tart individually in cling film tightly, then place your mini jam tarts in a lidded container in the freezer.
To thaw, simply remove the number of tarts you wish to defrost. Unwrap each one and lay them on a cooling rack to come to room temperature. Enjoy!
Can I make these mini jam tarts gluten and dairy free?
You can substitute the flour in the pastry for a gluten free flour, but please add an additional tsp of xanthan gum to your pastry. Butter can be easily substituted for a dairy free block butter alternative too.
Additional top tips for making this jam tarts recipe
- Make sure you have prepared your tools and ingredients before you start mixing. This is especially important when making your pastry, as you want to keep it as cold as possible.
- Take time to read through this recipe so you are familiar with each step of the process. Do not skip details and instructions given as it could affect the results, especially with the pastry.
- Make sure you use cold butter and ice water when making your pastry. Remember it is important to keep your pastry as cold as possible throughout the process of bringing it together.
- Keeping your pastry as cold as possible helps stop it from misshaping and contracting when baking. Hence popping it back in your fridge for a second chill whilst preparing the jam is really important.
- When preparing your jam for your filling, add a few drops of water and mix it together. This loosens the jam a little so it spreads more easily, both when you put it in the pastry shell and when baking. This will help you get a lovely flat top jam layer for your tartlets.
Troubleshooting
If you have any other questions about this easy jam tarts recipe, please use the comments below to ask away and I will do my best to help. And if you do make this recipe for jam tartlets, please take a moment to leave a rating and review below. I would love to know how you enjoy making it and following along, plus it really helps others looking for a tartlet recipe too. You could even post a picture on Instagram and tag me when you share it with the world, you know I love seeing your bakes!
More delicious British recipes for you to enjoy
Please do check out these other very British recipes on my blog too:
Cherry bakewell tarts: a classic British bake in a mini version! Buttery pastry, rich cherry jam, beautiful almond frangipane, a layer of icing, and of course, the obligatory cherry on top!
Jammie dodger blondies: love jammie dodgers? Cannot get enough blondies in your life? Then this bake is for you! Beautiful fudgy white chocolate blondies packed with jammie dodger biscuits and swirls of raspberry jam. These jammie dodger blondies really are absolutely incredible!
Mini victoria sandwiches: this one is a total winner every time! Light and fluffy vanilla sponge cakes sandwiched with beautiful strawberry jam and delicious vanilla buttercream. So simple but always enjoyed by everyone!
Easy Sticky Toffee Pudding: my sticky toffee pudding cake is light and delicious, with lashings of smooth toffee sauce and so good served with vanilla ice cream. This classic British bake is the ultimate comfort food, you wouldn’t believe how easy it is to make!
And that’s all from me for today! Hope you enjoy making these beautiful jam tarts as much as I enjoy sharing them with you. Happy baking, my friends! x
Recommended tools I used for this bake *
| Food processor/Pastry blender | Digital kitchen scales |
| Measuring spoons | Sieve |
| Rolling pin | Pastry cutters |
| Mini tart tin | Star press |
Mini Jam Tarts
Course: PastriesCuisine: BritishDifficulty: Moderate24
servings30
minutes10
minutes136
kcal1
hour1
hour30
minutesAdorable and delicious, these bite sized jam tartlets are always a hit!
Keep the screen of your device on
Ingredients
250 g (1 ½ cups + 1 tbsp) plain (all-purpose) flour
60 g (¼ cup + 3 tbsp) icing (powdered) sugar
125 g (½ cup + 1 tbsp) unsalted butter, cold and cubed
2 large eggs, yolks only
2-4 tbsp ice (ie very very cold!) water
your choice of jam, for the filling
Directions
- First make your pastry. In your food processor or a large mixing bowl, mix together the flour and sugar. Add in the cubes of cold butter and cut or blend in until your mixture resembles fine breadcrumbs. Ensure no large chunks of unblended butter remain or it will speckle your pastry when you roll it out. Tip in the egg yolks and blend again until just combined. Add in your ice water a little at a time until your pastry comes together in clumps.
- Tip out your pastry onto a clean work surface and gather your dough together. Squeeze it to bring together, try to avoid kneading and working it too much or your pastry will be tough. Divide your pastry dough into two equal parts and flatten into discs. Wrap each disc tightly in cling film then pop in the fridge to chill for at least 30 minutes. At this point, you can freeze your dough for another day, if you wish.
- Once your dough has chilled, it is time to have some fun! First, preheat your oven to 160C/320F whilst you prepare your tarts for baking. Dust your work surface with a little flour and roll out one of your pastry discs until about 3mm thick. Stamp out rounds of dough a couple of sizes larger than your mini tart tin and ease them in. I use the end of my rolling pin to help push them in evenly, but fingers work well too. Once you have filled your tray, pop it into the fridge to chill again for a few minutes whilst you prepare the jam fillings.
- Place a few spoonfuls of your chosen jam into a microwave safe bowl. Add a few drops of water and mix it all together. Microwave your jam for a few seconds, just to warm it up and loosen it a little. This will make it easier to spread into your pastry cases, so you get lots of jam and less mess!
- Bring your tin out of the fridge and fill your pastry cases no more than half full with your slightly warm and looser jam. Using some leftover pastry, stamp out some stars or any other shape you wish and gently place them over the top of your jam. This last bit is optional, but makes for pretty tarts! If you do not have a star cutter, you can leave them without or get creative with other small cutouts you have in your kitchen!
- Bake your mini jam tarts in your hot oven for 10-12 minutes. Your pastry will be golden on the edges and your jam bubbly. Leave in the tin to cool for a few minutes (to avoid getting burned by hot jam!), then transfer to a wire rack to cool completely. Enjoy!