
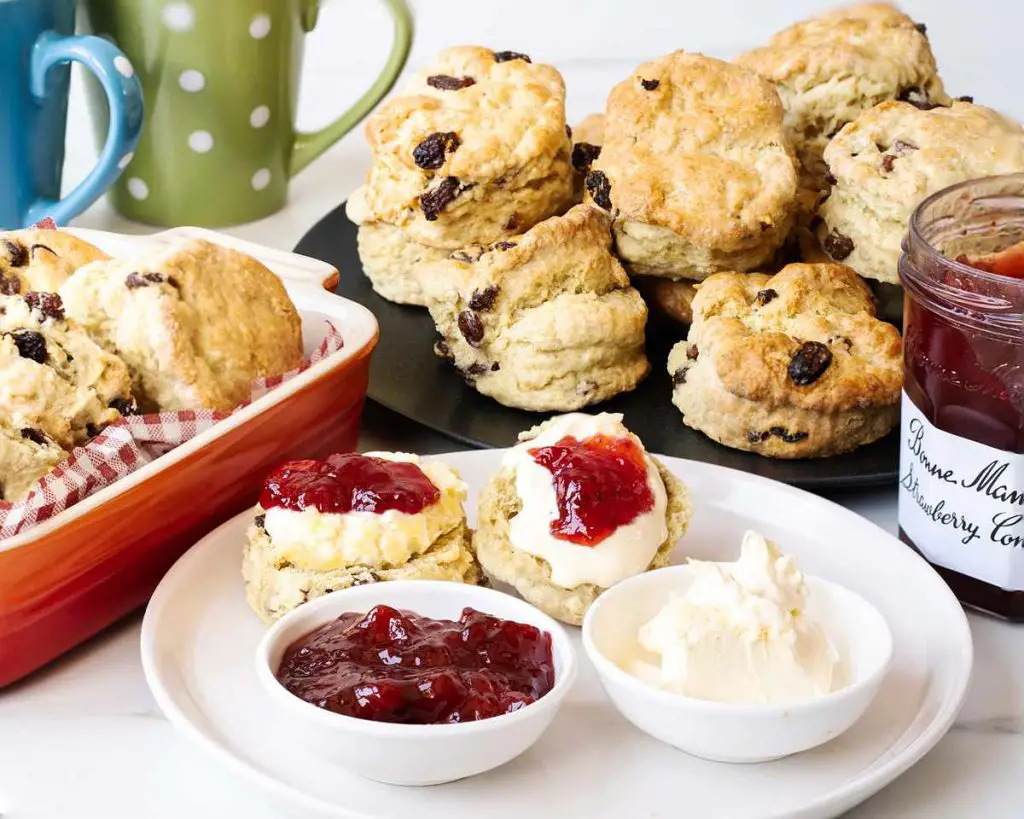
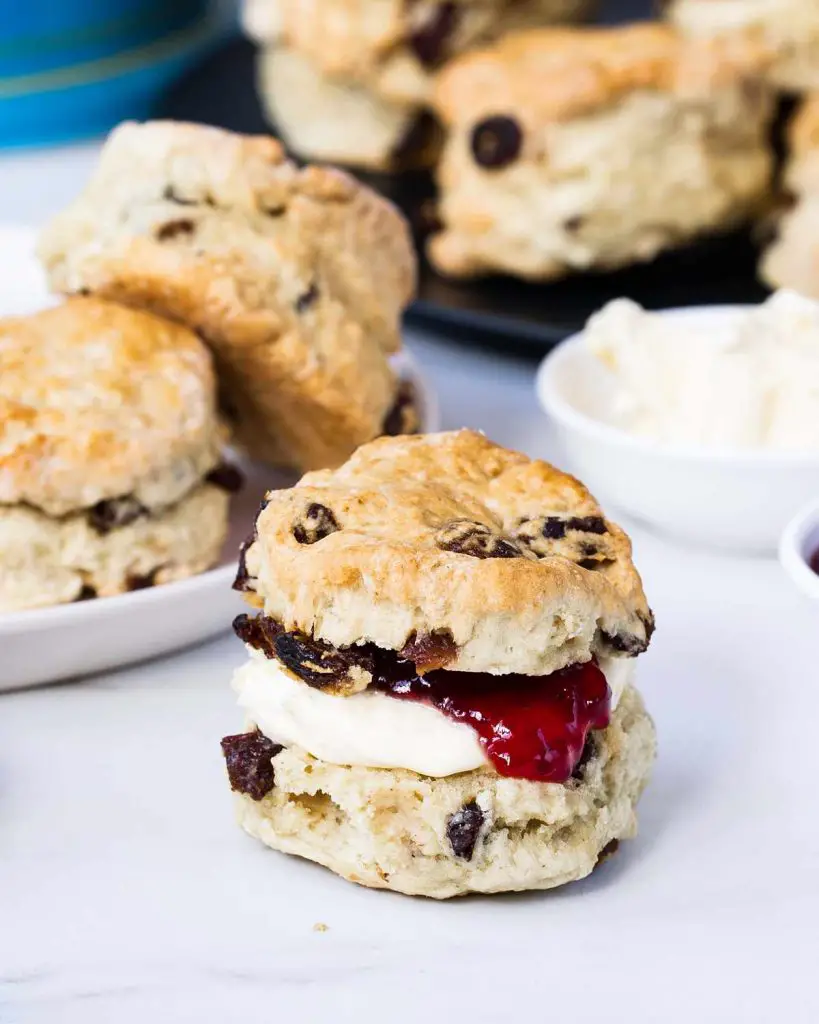
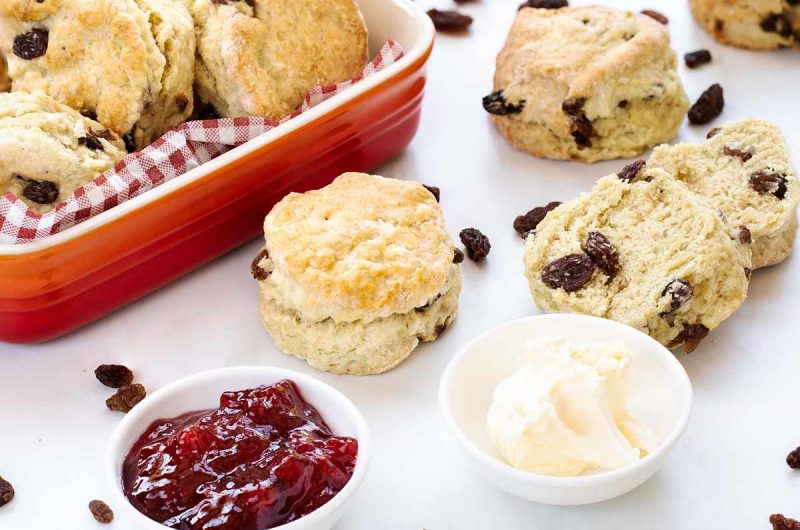
My easy buttermilk fruit scones are the only fool-proof recipe you will ever need for the most beautiful scones! Perfect fresh out of the oven and still warm or cool and split topped with clotted cream and jam. Or any other way you fancy!
A bit about scones for you: scones are actually a type of bread known as a quick bread. Here in the UK, they are often slightly sweetened and traditionally served as an afternoon tea-time sweet treat with clotted cream and jam. I had not experienced the joy of this little beauty until my 20s, and have been totally obsessed with it ever since!
My scone story
For many years, I bought scones in the shop. Why? Every time I tried to make them, they would turn out wrong: like rocks, dense and tough. Or too much like a cake. Or my dough would be too wet and it would just end up being a delicious but weirdly shaped mound of… something! There came a point I gave up on ever making scones myself at home.
But then when I got back into baking in full gusto once I became a mum. Like so many new mums I was adamant my children would only eat homemade foods. That didn’t last too long!! However, it did bring me back to trying my hand at scones again.
So I researched and tweaked recipes, and I’ve finally settled with my version and the one I’m sharing with you today. I find these so easy to make now, just remember to follow my top tips shared below, or watch my video to see how I do it for you 😊
The perfect scone
Guys, this is the ultimate scones recipe. You won’t need another, I guarantee it! 😊
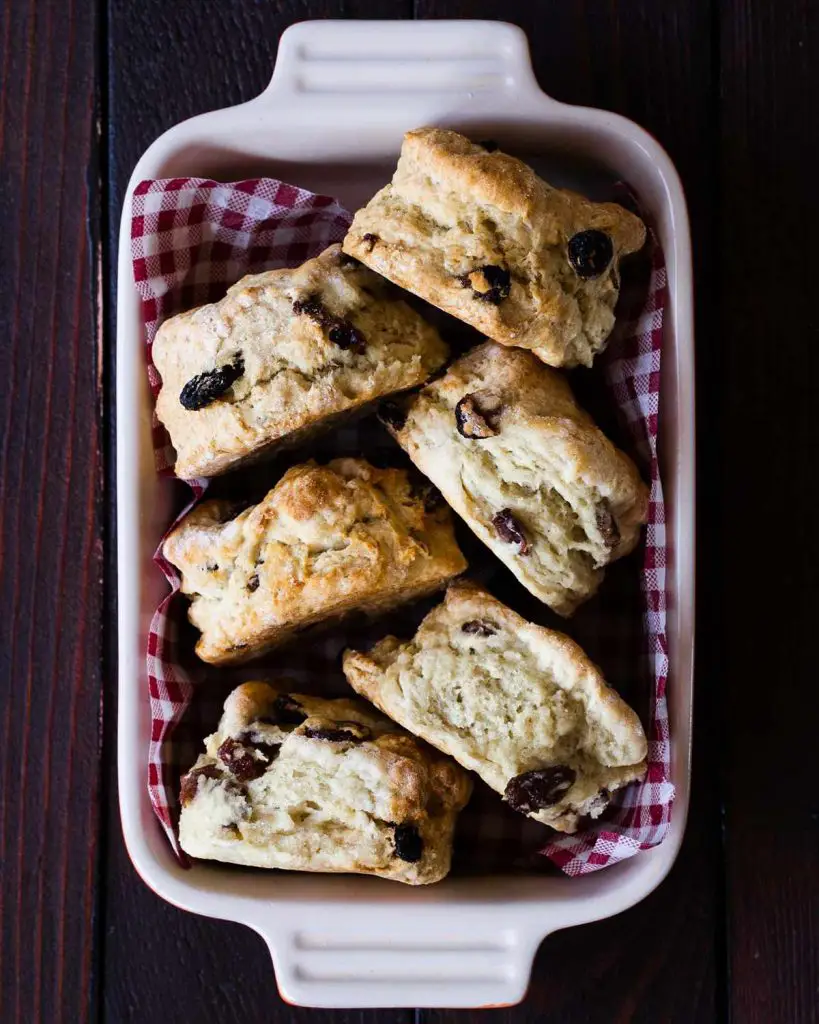
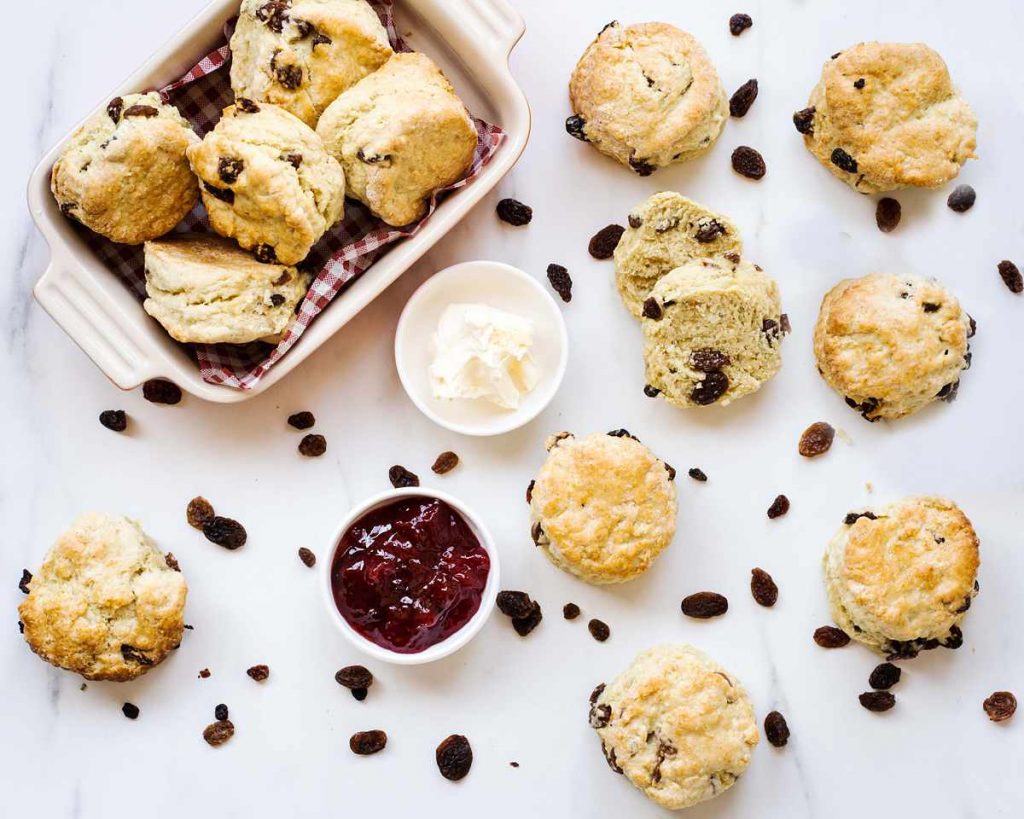
Beautiful, firm and lightly golden on the outside but still soft and light on the inside, these fruit scones with buttermilk will become your go-to recipe when you want scones.
And even better than that, they are just so damn easy! I prefer to make these in my trusty Kitchenaid stand mixer, purely for ease and speed. But you can absolutely make them with a pastry cutter or even the good ol’ fashioned way and get properly stuck in!
A lot of recipes will use good ol’ milk to make scones. I found I prefer to use buttermilk, as it makes for a much more tender scone, and so my fruit scones with buttermilk were born!
Topping it off
Of course, scones for me are a real luxurious treat and so have to be served generously topped with clotted cream and strawberry jam! My all-time favourite is Bonne Maman’s Strawberry Conserve. It is rich and packed full of beautiful strawberry flavour without being overly sweet. Perfection!
If, like me, you love all of Bonne Maman’s products too, you will adore my cherry bakewell blondies in which I use Bonne Maman’s utterly scrumptious cherry compote. This is the real deal, folks! 🤤
Now it’s over to you!
So now you have my recipe, it’s over to you to make them! I’m including all my tips I’ve discovered as I’ve made these and fallen in love with scones all over again. Follow all my top tips and I guarantee you will have the most perfect scones every time!
Happy baking, friends! Enjoy! x
Recommended equipment and ingredients I used *
| Stand mixer | Sieve |
| Cutters | Strawberry conserve |
Easy Buttermilk Fruit Scones
9-10
servings10
minutes17
minutes30
minutesThe ULTIMATE fruit scones with buttermilk, perfect with clotted cream and jam!
Keep the screen of your device on
Ingredients
250 g (1½ cups + 1 tbsp) plain (all-purpose) flour
1 tsp baking powder
0.5 tsp bicarbonate of soda (baking soda)
0.25 tsp salt
1 tbsp (generous) caster sugar
55 g (¼ cup) COLD unsalted butter, cubed
75 g (½ cup) sultanas, or any other dried fruit
150 ml (½ cup + 2 tbsp) buttermilk
milk, for brushing your scones before baking
Directions
- Preheat your oven to 190C/375F. Line a baking tray with parchment paper and set aside.
- In a large bowl, sift together your flour, baking powder, bicarb, salt and caster sugar. Add in the cold cubed butter and rub/blend in until your mixture resembles breadcrumbs. Mix the dried fruit through, then pour in the buttermilk and mix until your dough just comes together (see note below).
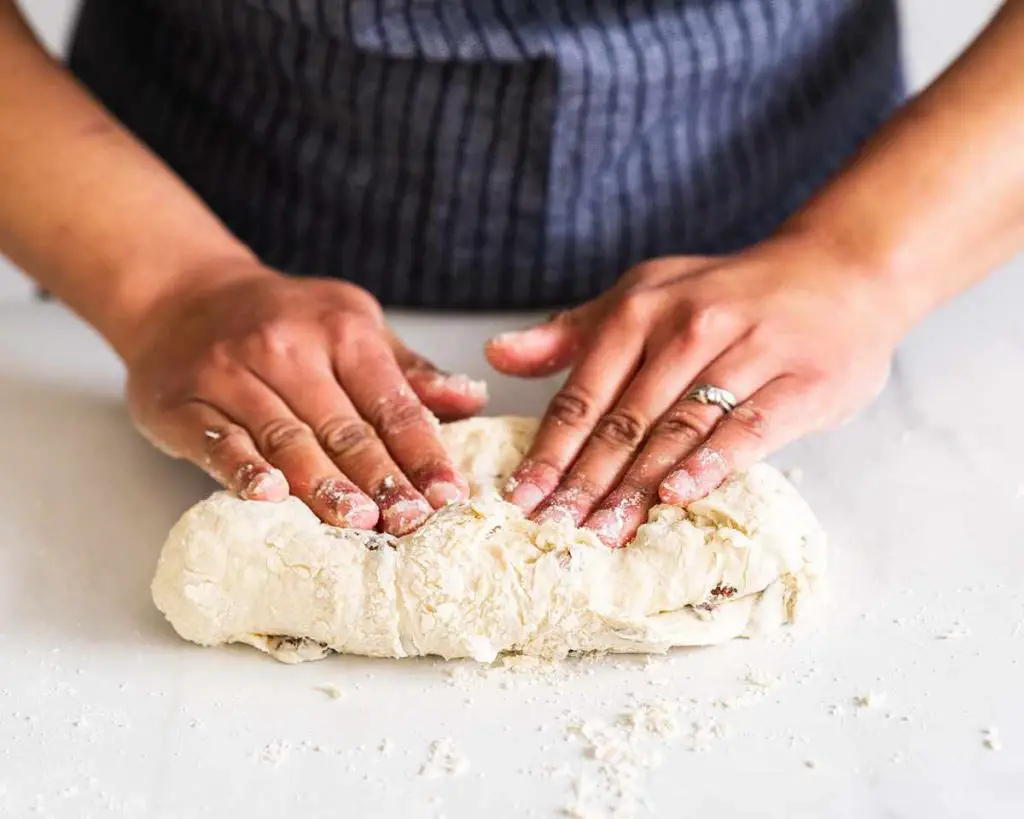
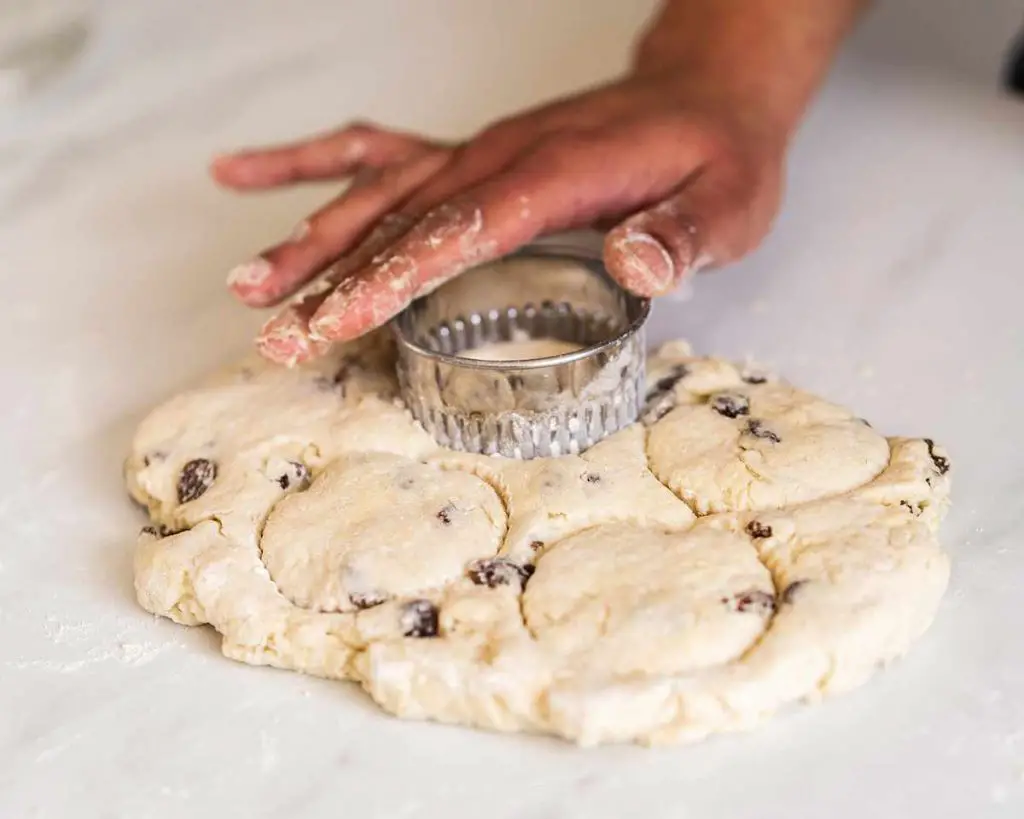
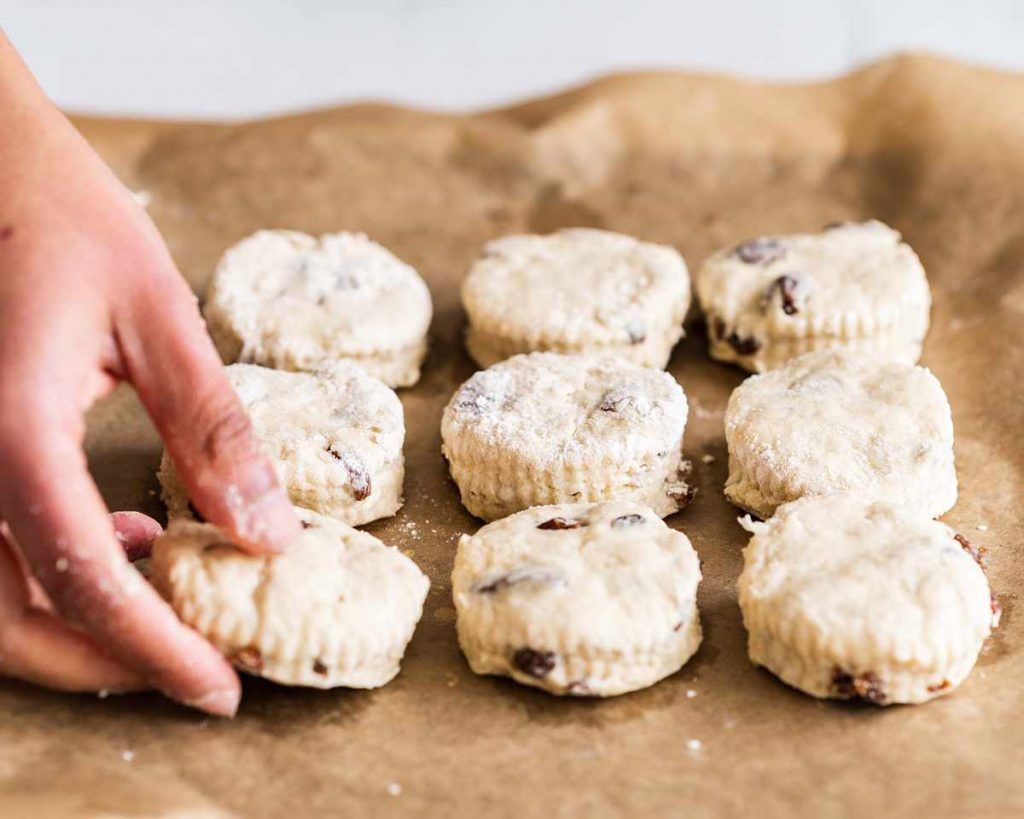
- Tip your dough out onto a lightly floured surface. DO NOT KNEAD!! Instead, just push your dough together into one large shape, then flatten with your hands until about 1″ thick. Using a floured cutter tool, press it into the dough (see note below), stamping out as many as you can before you smoosh the dough back together and flatten again to repeat and use the rest of your dough up.
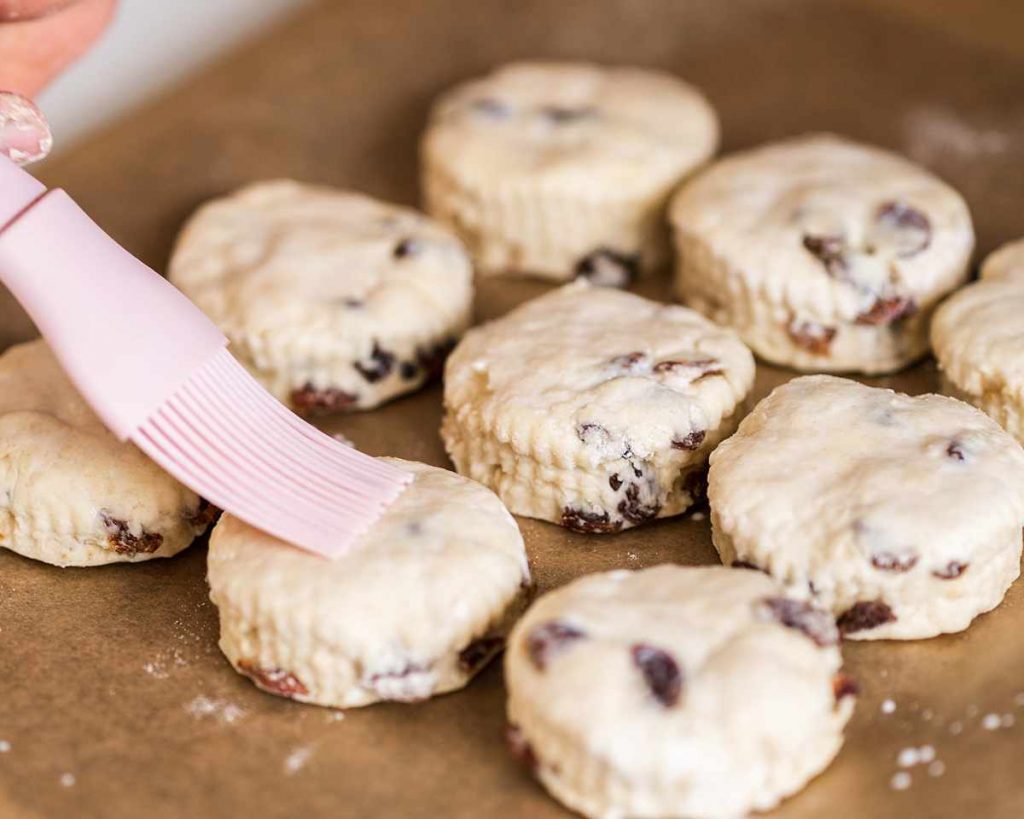
- Place your cut out scones onto your prepared baking tray, pushing any fruit sticking out back into the scone so it doesn’t burn. I place mine fairly close together, but you can space them out too if you wish (see note). Carefully brush the top only (see note) of each scone with a little milk and bake for 17-20 minutes, turning to brown evenly for the last couple of minutes if needed. Cool for a minute on the tray, then transfer to a wire rack to cool completely. Enjoy!
Recipe Video
Notes
- When mixing your dough together, you want it to be soft and slightly sticky but not soggy. If you need a bit more liquid than the buttermilk offers, add a splash of milk to help bring your dough together. It should not be completely mixed when you tip it out, so you do the last bit by hand 😊
- It is really important you don’t twist your cutter when you stamp out your scone shapes. Twisting the cutter seals the sides of your scone, hindering the rise and beautiful shape you can achieve. Straight down and back up again is perfect, making sure to flour your cutter in between each cut.
- Put your cut out scones close together to bake and achieve softer scones. Spacing them further apart will result in more browned and crisper scones, so go with what you prefer!
- Another important step is brushing only the tops of your scones with milk. If you use too much milk and it drips down the sides, it can hinder the rise of your scones, so you’ll end up with lopsided rising on your scones!

Well, these are awesome! Perfect for Saturday brunch. Everyone loved them! I will most definitely be making these again in the near future!
So glad they were well received and enjoyed by everyone! Thanks loads for coming back to comment and rate my recipe!
It’s only three stars because I can’t for the life of me find where in the recipe you add the fruit???
Hi Bert, that was my oversight, thank you for pointing out to me. I have amended the recipe to include when I add in the dried fruit. Thanks again!
Hi, Is the cooking temperature for a fan oven? Thank you
Yes, it is! Enjoy 🙂
Ready to try these and sure I won’t be disappointed but can I use self rising flour instead? Thanks.
Hi Linda, I would recommend using plain/all purpose flour instead of self raising flour, as this is likely to give the scones more rise and make them more cakey, not dense as this recipe is intended.
Hello
I was going to make these today as they sound great but you mentioned in the last comment that these will be ‘dense’ scones? Could you confirm this before I make them as I was hoping for lighter, fluffy centered scone!!!
Kind regards
Hi Hayley, thanks for your comment. What I meant with the comment is that self raising flour would give more rise and result in more of a cakey texture, rather than the less squidgy one associated with scones. This recipe makes really light scones, don’t worry! 😊